Uprated Heater Mk2 Installation
#1
Posted 13 September 2012 - 06:29 PM
Tools required
- Allen key set (2.5, 3, 4 mm)
- 7, 10 and 13 mm hex sockets
- 8-10 cm (ish) extension bar
- Ratchet
- 10 mm spanner
- Philips head screwdriver
- Small flathead screwdriver
- Stereo removal tool
- Jug to collect coolant
- Hacksaw
Supplied parts
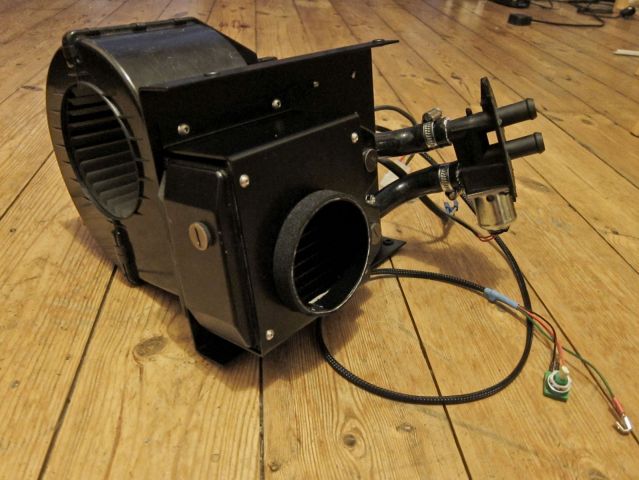
- Pre-assembled heater unit
- 0.5 m neoprene air duct
- Bag containing four M6 bolts
The heater is supplied fully assembled but is modular and will require partial disassembly before installation. Use the following steps to disassemble.
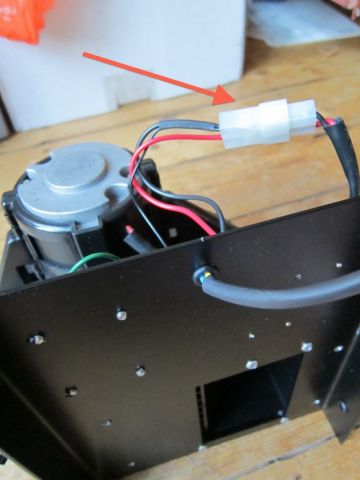
1. Detach fan connector (pull apart)
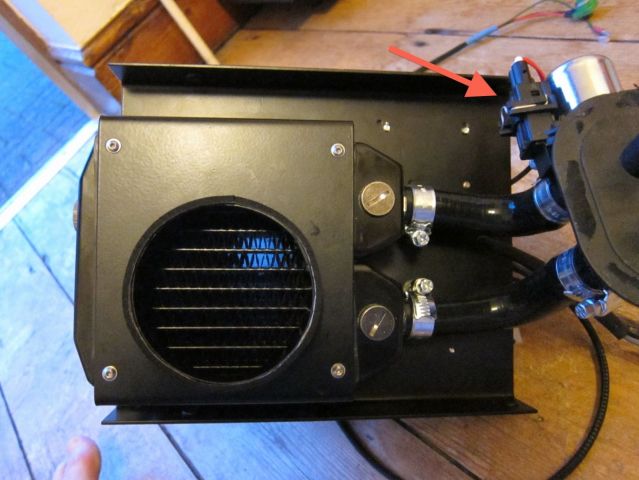
2. Detach bypass valve connector (push in metal spring clip)
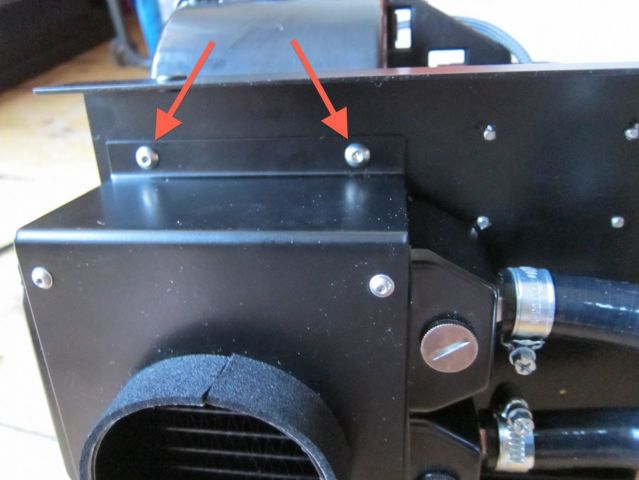
3. Unbolt radiator assembly (four M5 bolts) use 3 mm allen key
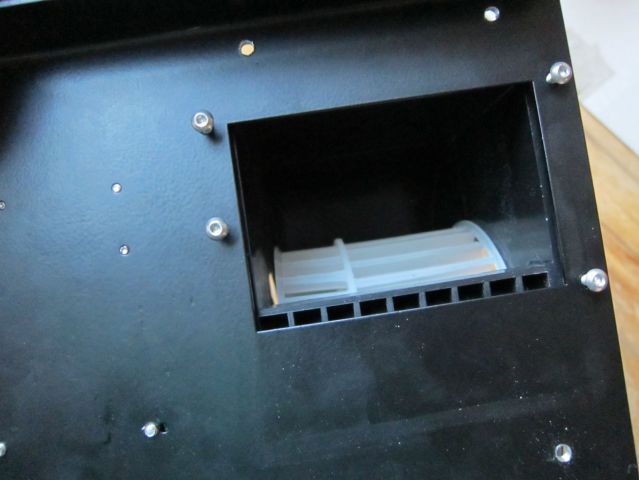
4. Unbolt blower (four M4 bolts) use 2.5 mm allen key
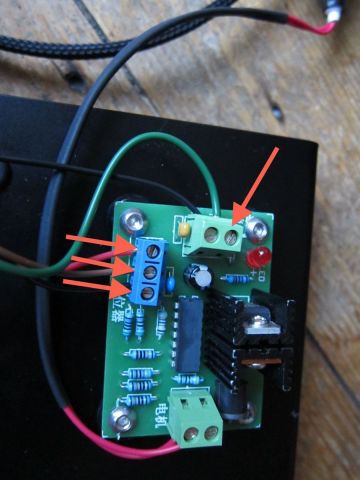
5. Detach four wires to the temperature control unit use small flathead screwdriver
#2
Posted 13 September 2012 - 06:41 PM
Dash removal.
1. Remove stereo and stereo cage use stereo key
2. Remove small dash plate around headlight switches (held on with double sided tape, a butter knife can be used to cut the tape).
3. Pull out headlight switches (depress four tabs using a flathead screwdriver or fingernail)
4. Remove large dash plate around stereo and heater controls (held on with fir tree clips, pull plate towards floor to separate)
5. Undo dashboard retaining screws, they are angled 45 degrees into the dashboard. Depending on the age of the car there will be between 3 and 5 screws (from left to right while sat in the car)
- behind the VX220 badge (later cars only)
- behind the stereo
- to the left of the steering column
- on the left hand side of the headlight switch cutout (later cars only)
- on the right hand side of the headlight switch cutout
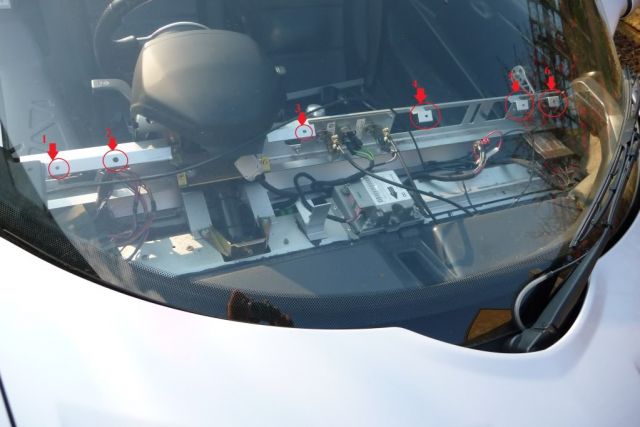
6. Pull instrument binnacle towards the steering wheel and lift dashboard up
7. Reach under the dash and detach starter button cable
8. Remove dashboard completely
Heater control removal
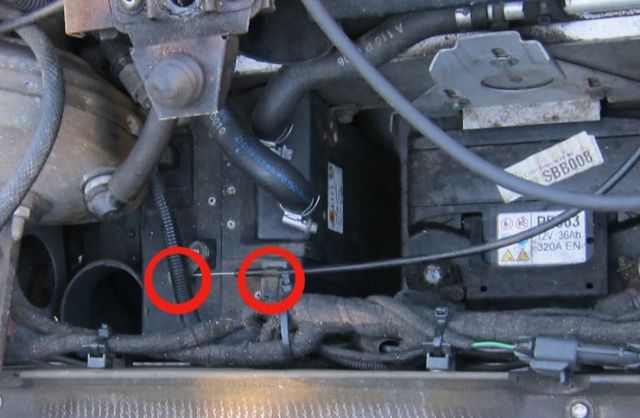
1. Open bonnet, detach metal cable running to heater (prise off metal retaining clip with flathead screwdriver)
2. Remove temperature control dial (pull away from panel)
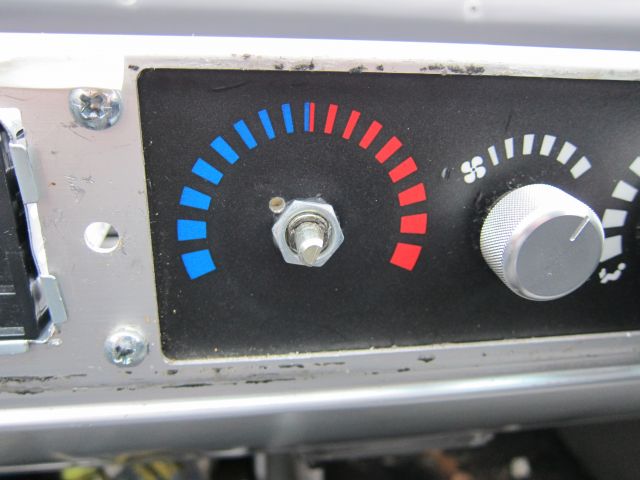
3. Undo nut holding the temperature control dial in place.
4. Pull temperature control cable through the grommet into the cabin
5. Remove temperature control
Heater control installation
1. Bolt new temperature control in place
2. Pull off the all green wire on the top of the fan speed selector (middle dial), attach the green piggyback connector and reconnect.
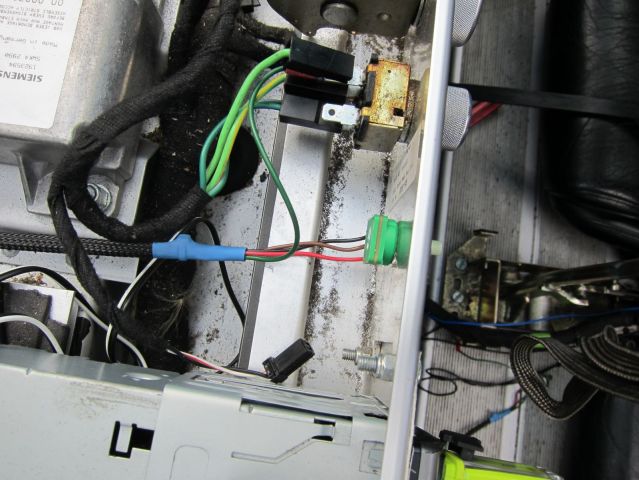
3. Push exposed cable end of the temperature control through the grommet from the cabin to under the bonnet.
4. Reach under the wiper motor to find the end of the cable, pull the rest through.
#3
Posted 04 October 2012 - 07:31 PM
#4
Posted 05 October 2012 - 08:31 AM
#5
Posted 05 October 2012 - 08:31 AM
#6
Posted 07 October 2012 - 08:47 AM
The following is intended to be a guide on fitting the uprated heater I am providing. The first section may also be used to remove the OEM heater for the various modifications that already exist.
OEM heater removal.
DO NOT ATTEMPT THIS WHILE THE CAR IS STILL HOT; THE COOLANT CAN CAUSE BURNS
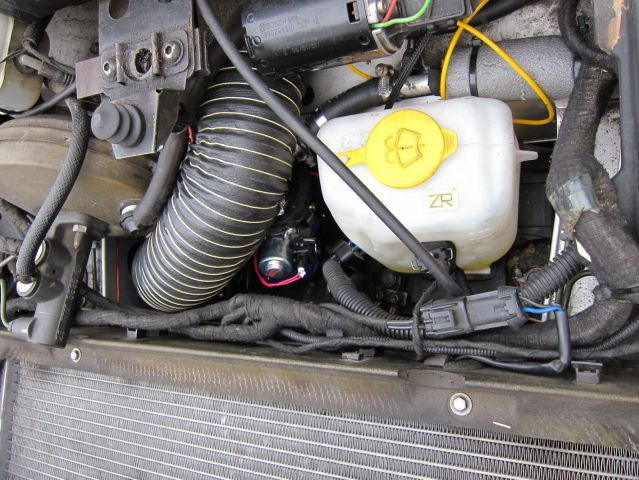
1. Remove the aluminium ducting running from the heater box to the cabin inlet
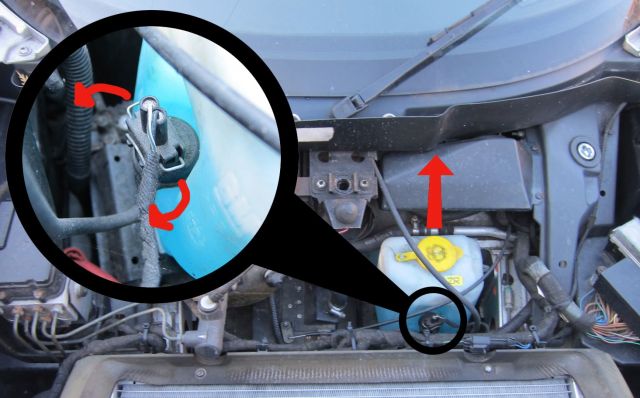
2. Remove the washer bottle by pulling it upwards, there is a small black hose and wired connection connected to the black pump. Remove the hose by pulling it and the wired connection by removing the metal retaining clip and then pulling.
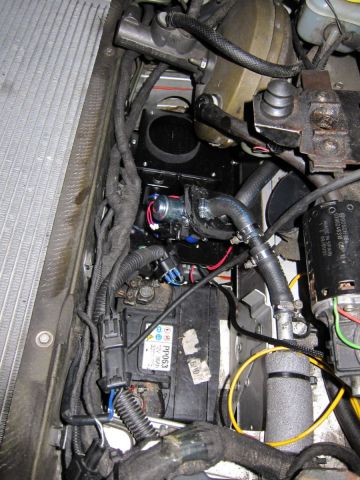
3. The washer bottle sat above the battery, unplug the battery by first undoing the negative (black) using a 10 mm spanner and lifting off, then repeating for the positive (red).
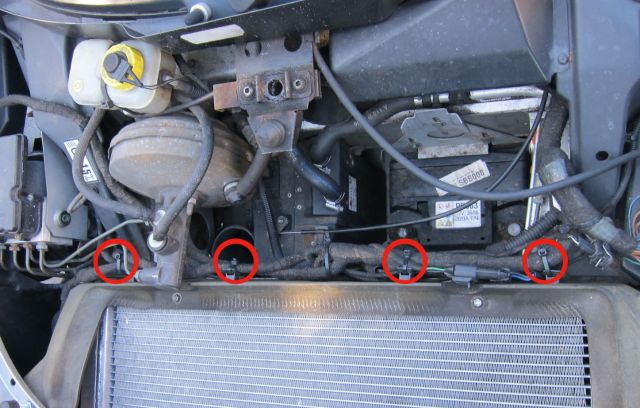
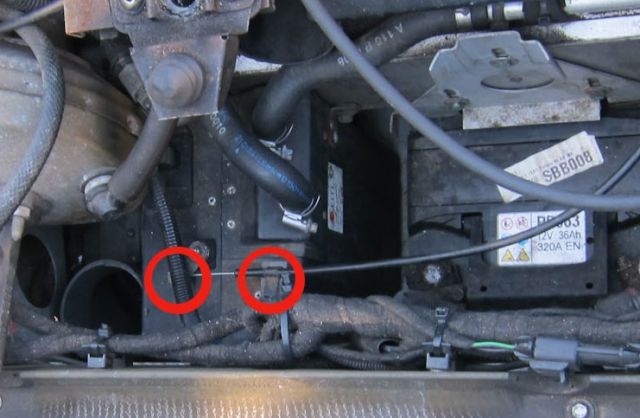
4. Cut the four cable ties holding the wiring loom to the back of the radiator surround and move the wiring so it sits on top of the surround. The connector to the heater will need to be disconnected.
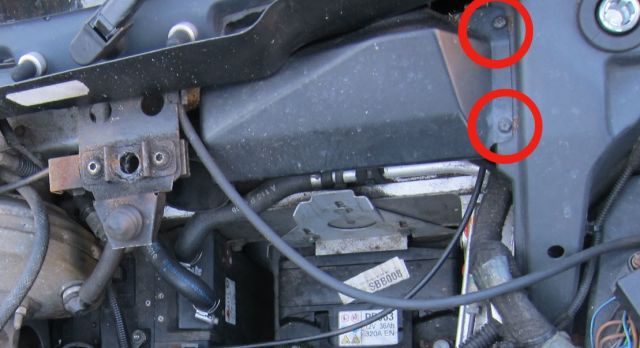
5. Undo the two philips head screws holding the cover over the wiper motor and remove.
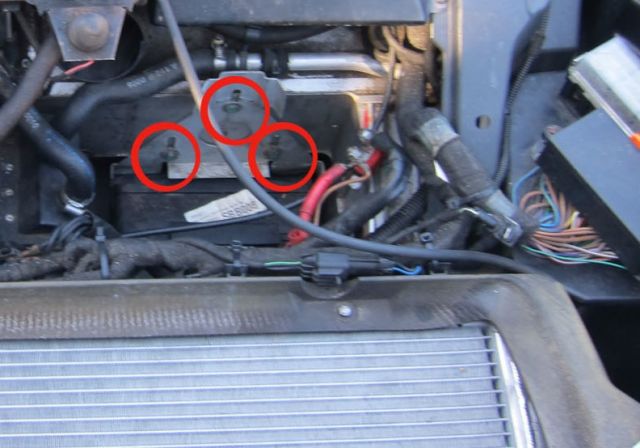
6. Using a 10 mm socket, remove the three bolts on the battery holder and remove.
7. Remove the cable operating the heater flap by placing a flat head screwdriver between the clamp and prising off. The cable should then come off when wiggled (technical term).
8. Lift the battery out.
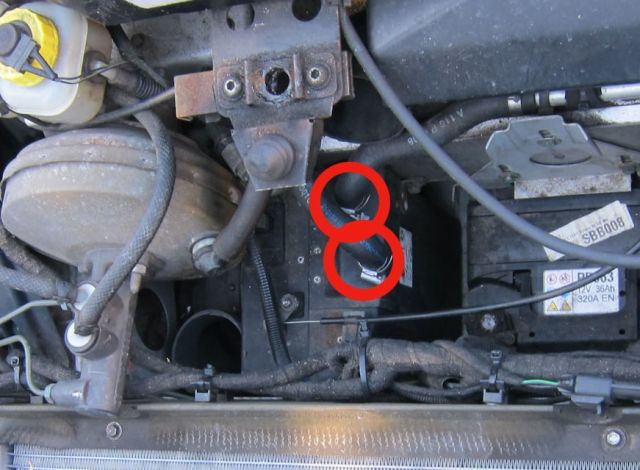
9. Undo the hose clips using a flat head screwdriver or a 7 mm socket on the heater piping and pull tubing off, using a jug to collect coolant.
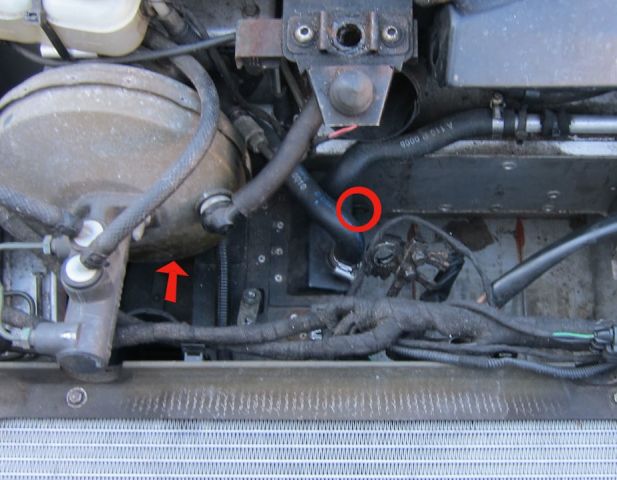
10. There are two 10 mm headed bolts attaching the heater to the bulkhead. One is visible on the right hand side of the heater when looking down. The second is under the brake servo and can be reached with a 10 mm socket on a 50 mm (approx.) extension bar connected to a small ratchet.
11. Move the heater to the right and lift out. The clips which were holding the wiring loom in place over the battery may foul the heater when it's lifted up and you will need to use a large flathead screwdriver to leaver the heater over the clips.
#7
Posted 07 October 2012 - 09:05 AM
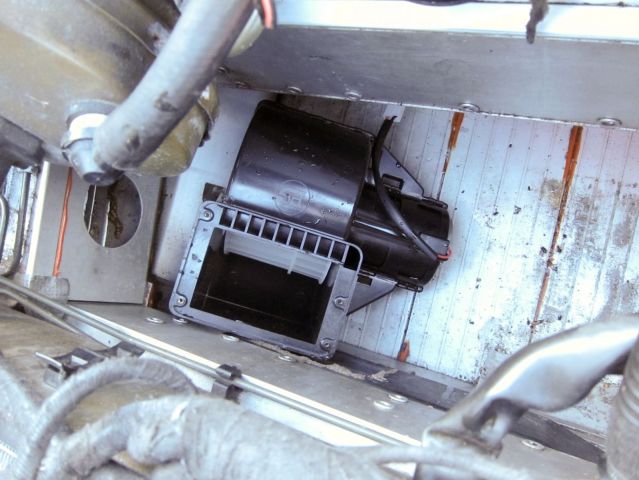
1. Place blower in void
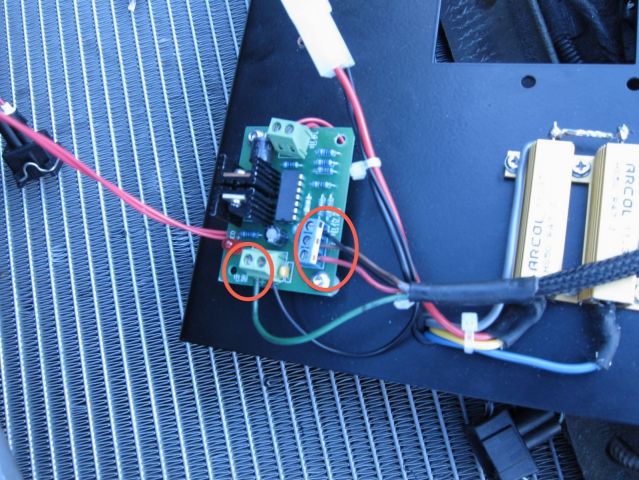
2. Connect wires from temperature controller under dash to the circuit on the underside of the heater bracket (colour coded - red to red, black to black...)
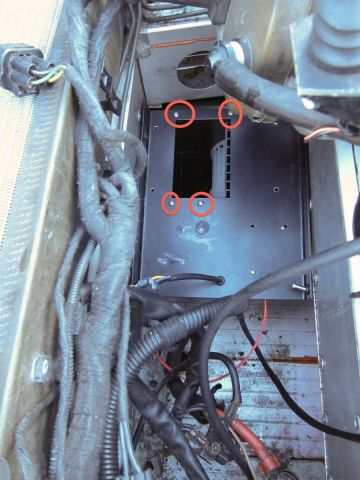
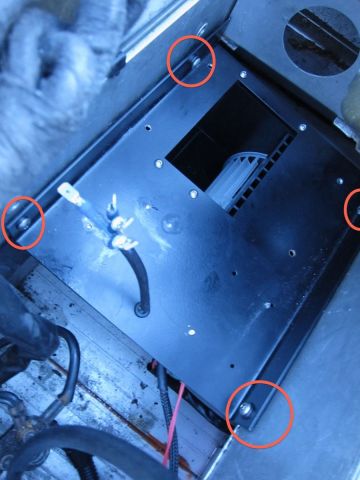
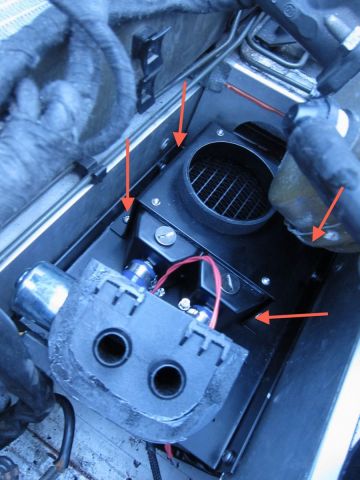
3. Place bracket on top of blower, bolt bracket to blower
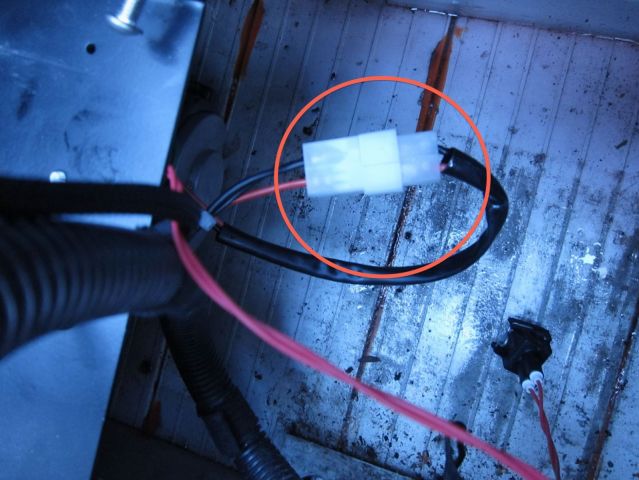
4. Connect blower
5. Bolt bracket to chassis
6. Bolt radiator to bracket
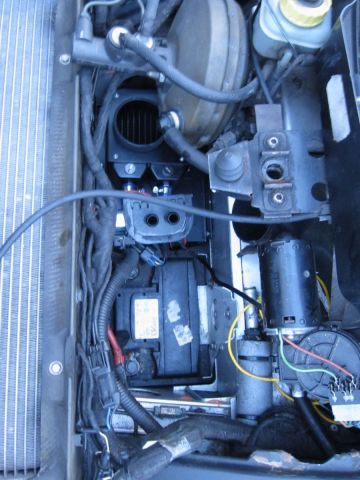
7. Replace battery, reconnect, replace battery bracket
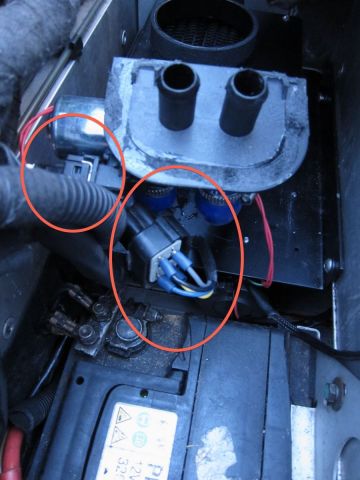
8. Connect diverter valve, connect four spade connectors to wiring loom (black to black, green/grey to grey, green/blue to blue, green/yellow to yellow)
9. Connect hoses to heater
10. Connect duct, use hose clamp on heater end
Done!
#8
Posted 02 November 2012 - 11:22 AM
#9
Posted 02 November 2012 - 12:33 PM
#10
Posted 02 November 2012 - 12:59 PM
Went out last night (about 5 C outside) and only did short drive, so water temp only got up to 75/6, but I could tell a massive difference in heat and blow. It never going to be as good as a modern insulated car, but this is how it should have been from the factory.
With the heater pipe I found it easy to cut out a couple of the metal rings off to make it more flexible, then put my hand inside the pipe it to push it over the heater outlet. I also topped up the heater with water before connecting to reduce the air in the system.
PS be careful not to crossthread the plastic green heater control
Edited by T VXT, 02 November 2012 - 01:00 PM.
#11
Posted 03 November 2012 - 07:36 AM
#12
Posted 19 November 2012 - 04:06 PM
1) Be careful when removing the dash, It's quite tight against the binnacle and has a pointless metal bracket which can scratch the binnacle. Mine could do with a bit of a touch up now.
2) When pulling the old heater control cable through the grommet in the dash, attach a piece of wire to the other end. This wire can then be attached to the wire of the new heater control unit and pulled back through the grommet.
3) Make sure you fit the heater ducting to the radiator and secure with Jubilee clip before installing the radiator. I bolted it up and found that I couldn't get the hose on due to the brake servo. The radiator had to come off again which is quite a fiddly job.
4) A 2.5 Allen key socket, a universal joint, 18 inches of extensions and a ratchet will make installation of the radiator much easier. I wouldn't have been able to do it with a simple Allen key as there is very little room especially with the heater ducting fitted. With the tools I've mentioned you can gain access to the rear corner next to the brake fluid bottle and can reach the others without too much trouble. I found that magic fingers (think that's their name) were really handy when putting the radiator bolts in.
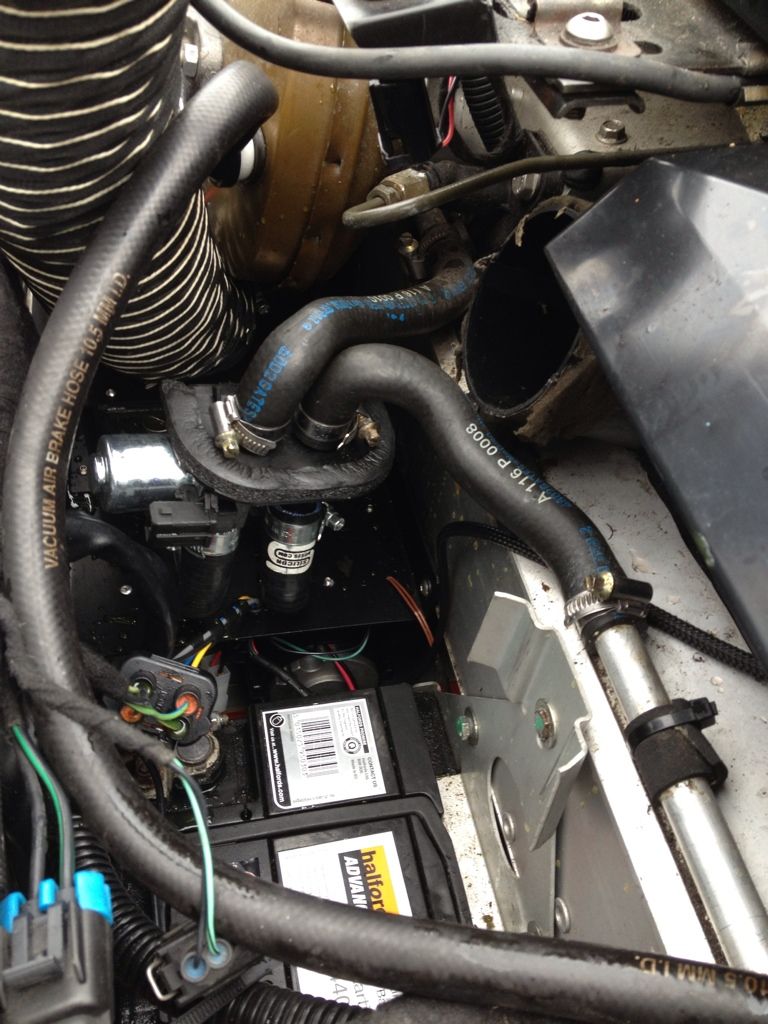
5) This picture is wrong.
Installing the feed and return hoses this way round will kink the hoses and prevent flow. Place the hoses on the same way they were removed from the old heater.
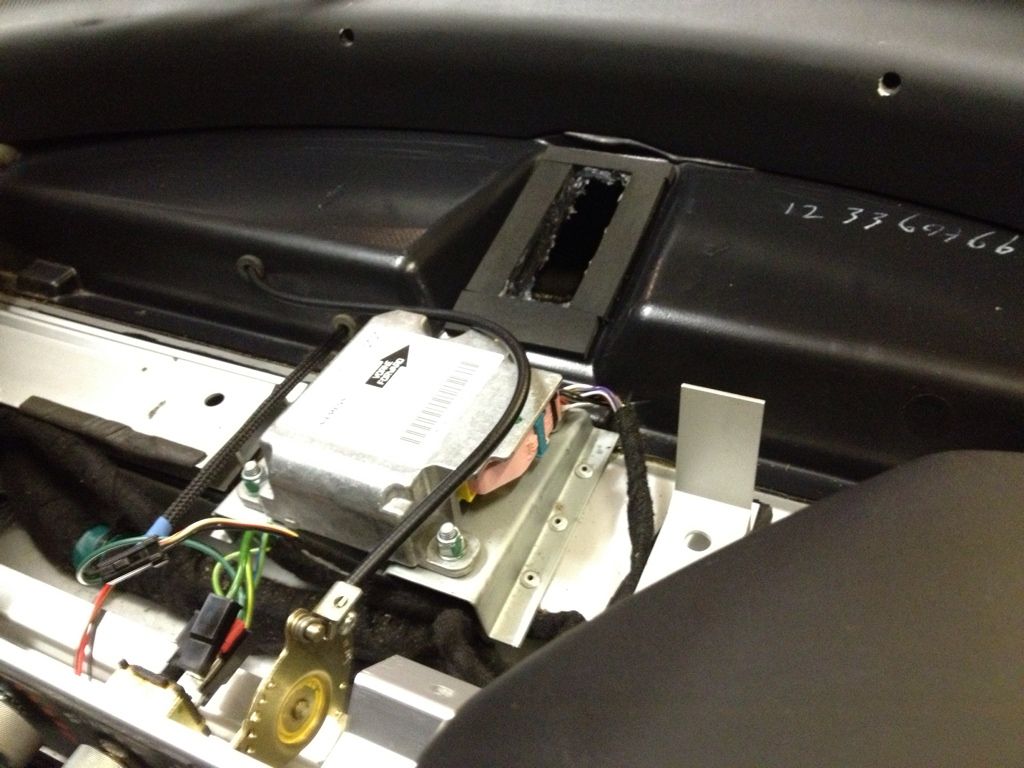
6) While you've got your dash off, it's worth sealing around the rectangular hole where the plenum comes into the cabin. When I looked under the bonnet, I had a 3mm gap all the way round which means the system is losing pressure and heating your bonnet. Use some silicone to seal it. I also replaced the foam with some sticky back sound proofing foam to get a decent seal when I put the dash back on as pictured.
It's a great mod and you'll be glad you did it. I managed it in a day and I've never had the dash off before. Good luck.
Ben
#13
Posted 19 November 2012 - 04:41 PM
#14
Posted 19 November 2012 - 05:51 PM
Tom, does is matter for flow which was round they are?
No not at all - I mentioned this to Ben on the phone yesterday, as you can see from my picture my hoses are bodged, so this direction worked best for me.
#15
Posted 19 November 2012 - 08:22 PM
#16
Posted 19 November 2012 - 10:09 PM
And you can see the black plastic circle sticker next to the dash clocks on the above picture, it's easier to run the wire loom through there rather than the original heater cable position
Was looking for this sticker but couldn't see it. Where is it on the picture?
Can't really see what difference the flow through the radiator would make. What's the benefit of having them as shown in the picture? Seemed to put unnecessary stress on the pipes but I hadn't loosened the jubilee from the metal return pipe.
Thanks again for your help on the phone yesterday Tom.
#17
Posted 19 November 2012 - 10:42 PM
Was looking for this sticker but couldn't see it. Where is it on the picture?
Directly behind the binnacle. An exact mirror of where the existing control cable hole is.
#18
Posted 20 November 2012 - 04:09 AM
#19
Posted 20 November 2012 - 10:35 AM
#20
Posted 20 November 2012 - 10:55 AM
1 user(s) are reading this topic
0 members, 1 guests, 0 anonymous users