Jump to content


Photo

Honda K24 Powered Speedster


  • Please log in to reply
984 replies to this topic

#461 OneYet

OneYet

    Billy No Mates

  • PipPipPipPipPip
  • 1,354 posts
  • Gender:Male
  • Location:Huskvarna, Sweden

Posted 08 March 2015 - 09:22 PM


Hi Per!

You edit your posts by clicking on the "Edit" button in the down right corner of the post. 

No, I cannot see any pictures in your post but there are some clickable links to photobucket and through them I can see your tires. 

I have 235:s and they are a very tight fit. 255 must be even tighter. Maybe manageble. Try to search both here and on the German forum I would say. 


Are you a paying member? I cannt see any edit post button.


BR, Per


I think you can edit posts for a while. But once you left the page or log in again the option is gone. 


#462 The Batman

The Batman

    Super Moderator

  • 30,267 posts
  • Gender:Male
  • Location:FLD mum's bed

Posted 08 March 2015 - 09:25 PM

  The K24 is not a high reving Engine because of the 99mm stroke. K20 have around 85mm stroke. It´s also a question of durablity and how you are going to use the Engine. For street use and revihigh from time to time I Believe you can have the rev limiter above 8500. If you have a good built Engine and goingto use it for track use I shuld stay below 8500. Myself is currenly running OEM valve springs from the K24 head and there for going to stay at 8000rpm. I will  for now use a RBC intake manifold. I have thought about SC but am also considiering to rebuild the Engine for a good NA and around 350 bhp without pushing to hard would be possible. for a K24   BR, Per    

Very nice! What will the spec and parts needed for a 350hp Na engine? Cheers!

#463 Tonie Pettersson

Tonie Pettersson

    Super Member

  • PipPip
  • 423 posts
  • Gender:Male
  • Location:Katrineholm, Sweden

Posted 09 March 2015 - 07:49 AM

Anyone knows where to buy Touch up paint for a Silver VX220? And what is the paint code for it?


Br, Per


Check this page and then order from Opel.


#464 Nev

Nev

    Nipper's Minion

  • PipPipPipPipPipPipPipPip
  • 11,587 posts
  • Gender:Male
  • Location:Bristol
  • Interests:Rock climbing, skiing, kayaking, surfing, mountaineering, budgies, chess, practical mechanics.

Posted 09 March 2015 - 12:45 PM

Anyone knows where to buy Touch up paint for a Silver VX220? And what is the paint code for it?


Br, Per


Just buy some primer paint (it's the same thing) ;)


#465 Aerodynamic

Aerodynamic

    Billy No Mates

  • PipPipPipPipPip
  • 1,455 posts

Posted 09 March 2015 - 09:18 PM

To get up to 350 bhp you need a compression ratio over 13:0 and this means you should use E85 or race fuel.

You need a fully ported head with oversize intake valves and a good pair of cams, RM cams for example.

RRC is about the best OEM intake manifold you can get and you need something better then this for example Skunk 2 Ultra series manifold with  bigger TB. And a great exhaust manifold  like the SSR I have, don´tknow how much my bend kills it though. Good rods are Cunningham, a cheaper option is Brian Crower who olso have a light weight version.

Something like this and fully balanced with RPM limit of 8500 or there about.


BR, Per


  The K24 is not a high reving Engine because of the 99mm stroke. K20 have around 85mm stroke. It´s also a question of durablity and how you are going to use the Engine. For street use and revihigh from time to time I Believe you can have the rev limiter above 8500. If you have a good built Engine and goingto use it for track use I shuld stay below 8500. Myself is currenly running OEM valve springs from the K24 head and there for going to stay at 8000rpm. I will  for now use a RBC intake manifold. I have thought about SC but am also considiering to rebuild the Engine for a good NA and around 350 bhp without pushing to hard would be possible. for a K24   BR, Per    

Very nice! What will the spec and parts needed for a 350hp Na engine? Cheers!


#466 Aerodynamic

Aerodynamic

    Billy No Mates

  • PipPipPipPipPip
  • 1,455 posts

Posted 10 March 2015 - 06:36 PM

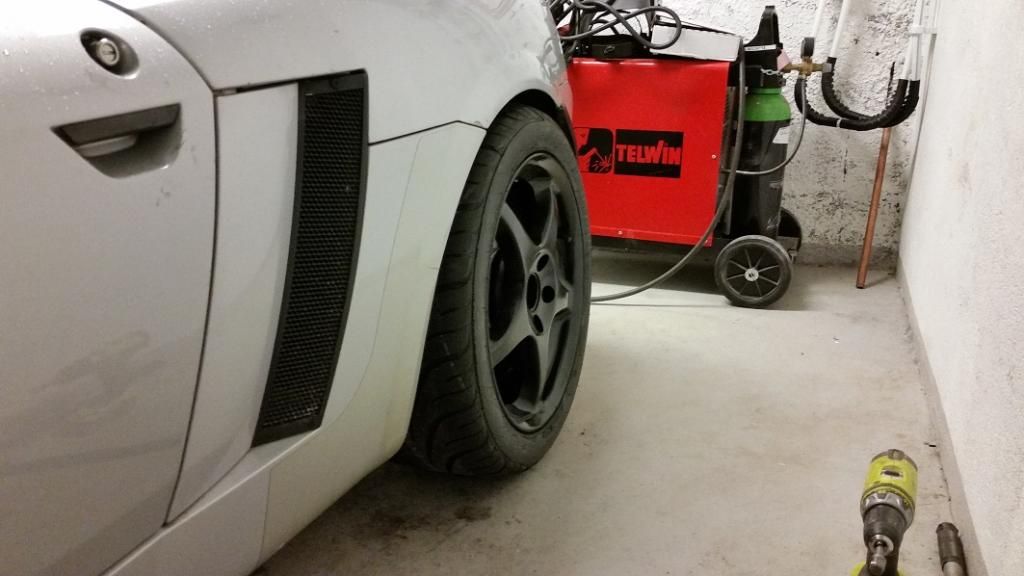
Anyone having an idea how to remove this OEM paint shield in smoothest way.


See in front of the rear wheels.

Posted Image


Thanks, Per


#467 fezzasus

fezzasus

    Whipping Boy

  • PipPipPipPipPipPipPip
  • 7,689 posts
  • Gender:Male
  • Location:Oxford

Posted 10 March 2015 - 07:28 PM

Heat gun.


#468 Aerodynamic

Aerodynamic

    Billy No Mates

  • PipPipPipPipPip
  • 1,455 posts

Posted 10 March 2015 - 08:28 PM

Is a hair dryer enough?

#469 oakmere

oakmere

    Scary Internerd

  • PipPipPipPipPipPip
  • 2,143 posts

Posted 10 March 2015 - 10:16 PM

If the paint is original it will probably come off fine. If it been repaired at some point things might be different. I got a bit of heat (hair dryer fine) on mine and took it slowly starting at the top and pulling straight down.

#470 Aerodynamic

Aerodynamic

    Billy No Mates

  • PipPipPipPipPip
  • 1,455 posts

Posted 12 March 2015 - 08:37 PM

Thanks guys, anyone know where to get a template for this paint protector, thinking about making new in fake carbon fiber. Like OEM Opel or Lotur part number or any ebay stuff or anything?


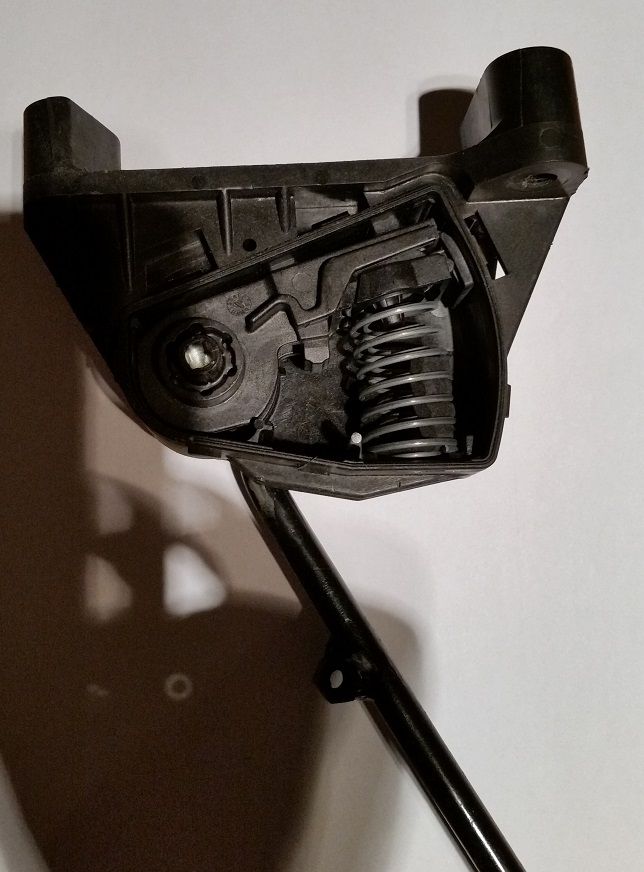
I have a problem with to hard throttlepedal due to springs in both pedal and throttle body, so I loosend the pedal assy and disassembled it.

Found these 2 springs much easier then I could think  about. Now I need to decide if I should take 1 or both springs out.

Posted Image


I  also need 1 more of this. Anyone having one for sale or know where I  can get it.

Posted Image


Br, Per


#471 vocky

vocky

    Moderator

  • 11,969 posts
  • Gender:Male
  • Location:Earth

Posted 12 March 2015 - 08:57 PM

M6 ball joint - http://www.ebay.co.u...&_dmd=1&_ipg=50


#472 Nev

Nev

    Nipper's Minion

  • PipPipPipPipPipPipPipPip
  • 11,587 posts
  • Gender:Male
  • Location:Bristol
  • Interests:Rock climbing, skiing, kayaking, surfing, mountaineering, budgies, chess, practical mechanics.

Posted 13 March 2015 - 05:11 PM


How can you tell the size of it without a sense of scale from the pic? :wacko: Must be divine powers !  


#473 Aerodynamic

Aerodynamic

    Billy No Mates

  • PipPipPipPipPip
  • 1,455 posts

Posted 13 March 2015 - 05:39 PM

Well it´s a std parton our cars, so it make sence.

Don´t Think I know anything else looking the same on our car.


I´d like this OEM part. I bought something similar here in sweden and it was sh*t.

But a uniball would work too.


Br, Per


#474 The Batman

The Batman

    Super Moderator

  • 30,267 posts
  • Gender:Male
  • Location:FLD mum's bed

Posted 13 March 2015 - 05:42 PM

I may have a throttle pedal if that's what you need?

#475 Aerodynamic

Aerodynamic

    Billy No Mates

  • PipPipPipPipPip
  • 1,455 posts

Posted 13 March 2015 - 07:13 PM

I may have a throttle pedal if that's what you need?

I was talking about the ball joint. The throttle pedal will be fine when removing 1 or both springs. Proably 1.

#476 Aerodynamic

Aerodynamic

    Billy No Mates

  • PipPipPipPipPip
  • 1,455 posts

Posted 16 March 2015 - 06:23 PM

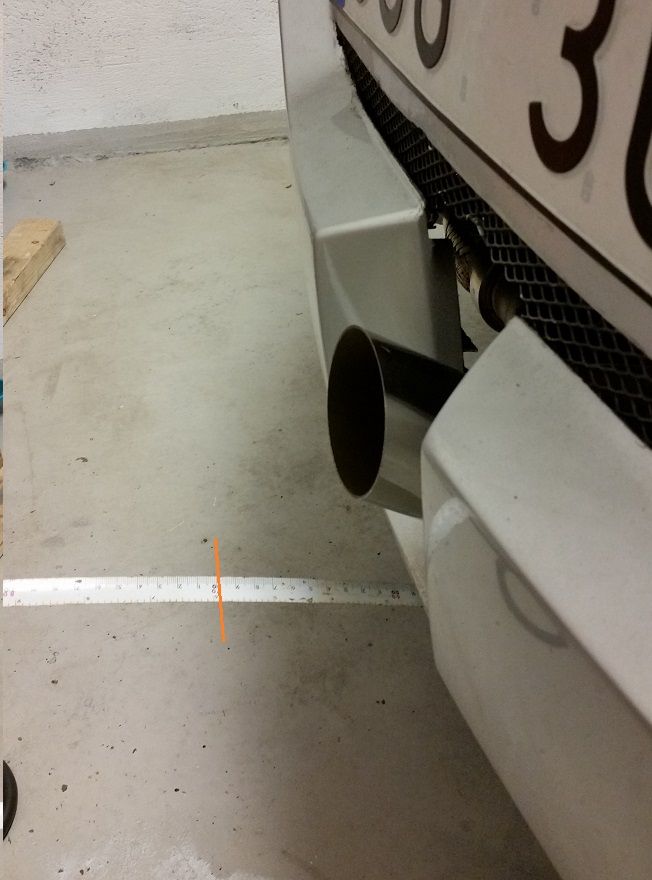
Hi, I need some help /advice so preferable an answer today would be nice. Tomorrow a friend is going to cut some pieces for me and he  needs to do this on tuesdays and I don´t have time to wait untill next week.  :-)  worst case I will have to.


So I was down in the garage doing some measuring.  So I want a long diffuser but it is also going to be a streetcar so I don´t want it to be dangerous (when driving in reverse for example). In the picture below there is an orange line, this is 10 cm from the lower edge of the rear clam. I was thinking about another 2-3cm futher back in total of 13cm from lower part of the clam. And then what is the std width on the diffusers sold out there? It´s a bit hard to measure the std one since the edges are so round and it´s a bit angled, But I was thinking about a width of 110cm. The std one is total of 113 but is maybe around 107cm in the middle of the corners.


So I´d like to have some widths of aftermarket diffusers for a comparision would be nice and how they are length wise compared to the clam.


Posted Image


Thanks in advance, Per    rallly


#477 Aerodynamic

Aerodynamic

    Billy No Mates

  • PipPipPipPipPip
  • 1,455 posts

Posted 18 March 2015 - 08:29 PM

Diffuser is now precut. it will be extenden about 10cm, will collect the material next week.


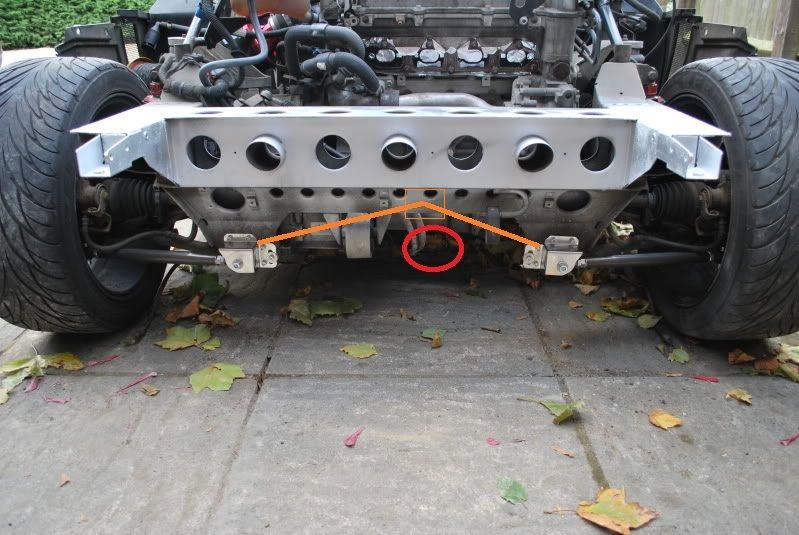
Next thing a bracebar, I´ve understood this is a necessary part doing circuit driving on our cars?!


The thing is my exhaust manifold is right in the way for any std bracebar I´ve seen. See red circle in the picture below.

And the bar its self must go arund the manifold. I was thinking of a stainless steel bar Ø20*2.


I stole the picture from someone here, I hope this is ok.

Posted Image


One thing, can the heat from the manifold spread in the bar and out to the joints?


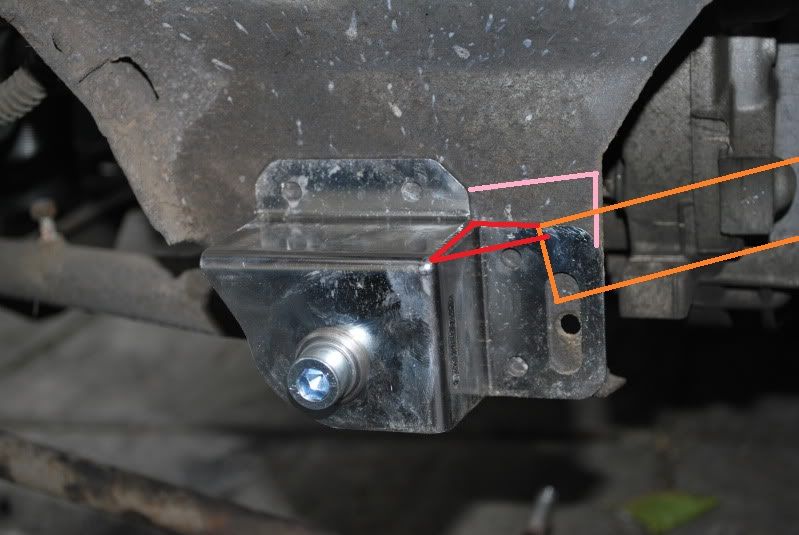
Next thing is how I should connect the bar into the  "joint" I have the same joint brackets as in the picture

and thought about connecting as it shows. 


Pink and red is an extra piece I will weld in and orange is the bar.

Posted Image


Anyone having any idea about this? A better solution or experience that could help?


Br, Per


#478 speedster

speedster

    Future of Speed

  • PipPipPipPipPipPip
  • 3,600 posts
  • Gender:Male
  • Location:Space
  • Interests:Music Engines Birds Whiskey and Cosmology

Posted 19 March 2015 - 03:22 PM

One thing, can the heat from the manifold spread in the bar and out to the joints?    

The standard setup has heat shielding along the manifold and exhaust path to minimise the heat transfer to the chassis so you probably should apply the same to your setup. Stainless steel is a great heat conductor, ask any cook :)

#479 fezzasus

fezzasus

    Whipping Boy

  • PipPipPipPipPipPipPip
  • 7,689 posts
  • Gender:Male
  • Location:Oxford

Posted 19 March 2015 - 03:50 PM

I'm not sure I agree with the use of a brace bar, this subject has been explored in a great level of detail here and on lotus forums and no real conclusion has been drawn.


The use of the brace bar does reduce flex and therefore fatigue of the subframe, but damage from fatigue is very unlikely. This is more minimising the impact of the subframe flex on geometry of the car.


To counter the use of them, a brace bar will prevent shearing of the toe links in a collision, transmitting the force to the subframe and likely causing more damage. 


I certainly would not say it is essential for track use.


#480 Rosssco

Rosssco

    Scary Internerd

  • 4,181 posts
  • Gender:Male
  • Location:Aberdeen

Posted 19 March 2015 - 04:09 PM


To counter the use of them, a brace bar will prevent shearing of the toe links in a collision, transmitting the force to the subframe and likely causing more damage. 


Interestingly, the subframe took virtually all the impact load in my fairly recent rear quarter impact, causing deformation to the drivers side subframe 'leg'.. The toelinks and wishbones were all (visually at least) untouched..


In theory, I think brace between the toe link connection points would have changed this (although of course, it would just have manifested itself somewhere else, probably in lower wishbone / wishbone mounting deformation if the toe link didn't fail)


1 user(s) are reading this topic

0 members, 1 guests, 0 anonymous users