Honda K24 Powered Speedster
#621

Posted 28 April 2016 - 03:34 PM
#622

Posted 18 June 2016 - 04:24 PM
Goal for the winter have been to fix some problems from last year and hopefully don´t create any new once.
Since I cut the OEM tube to close to the plastic parts the diameter got to big and I tried to solve this with some heat tube.
It started to melt but didnt leak but I wanted to fix this with some bycykle tube.
I was a bit suprised when I saw this, far worse then I thought. I never had any temp issues when driving
but when I was in the pit and was on idle then engin temp rised.
The manifold is very close to the trunk so I wanted to get some more safety margine. I got 2 cans of exhast cating really cheap
so I painted the manifold with my paint bruch.
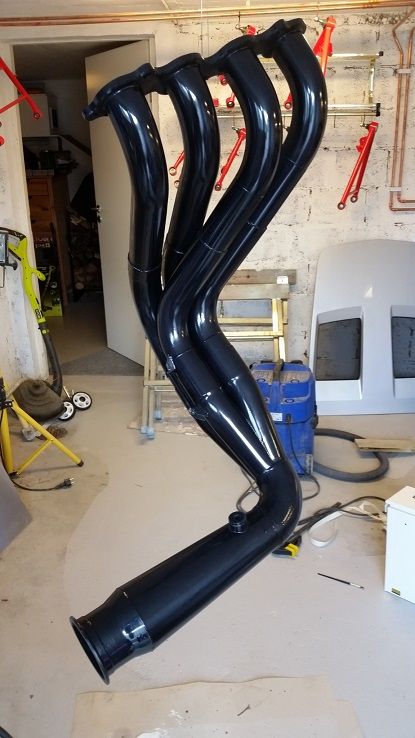
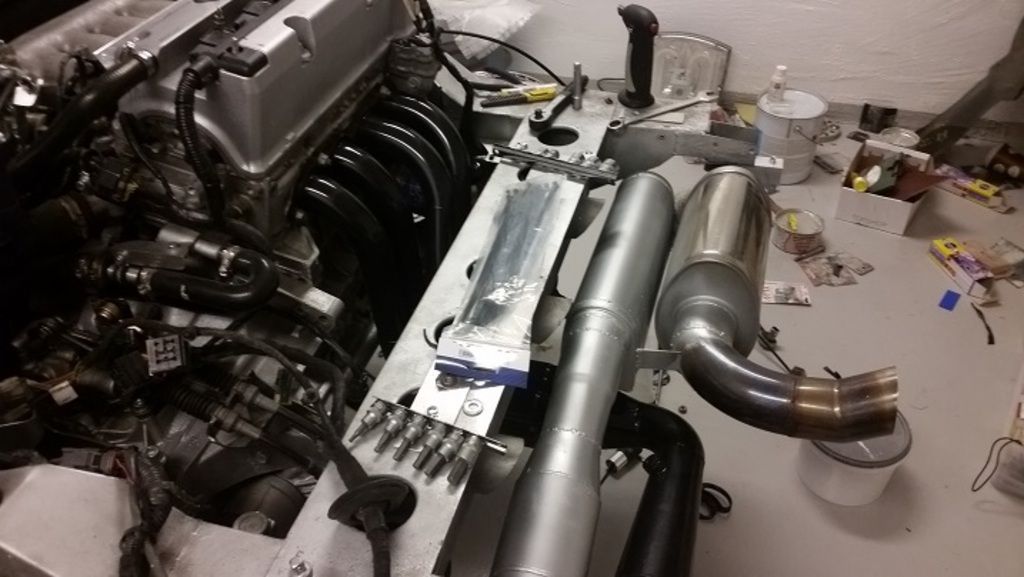
A picture of my complete stainless exhaust after 1 season.
you clearly see the difference between the quality parts and the "chineese" parts.
a few layers of zinc spray and heat paint was sprayed on it.

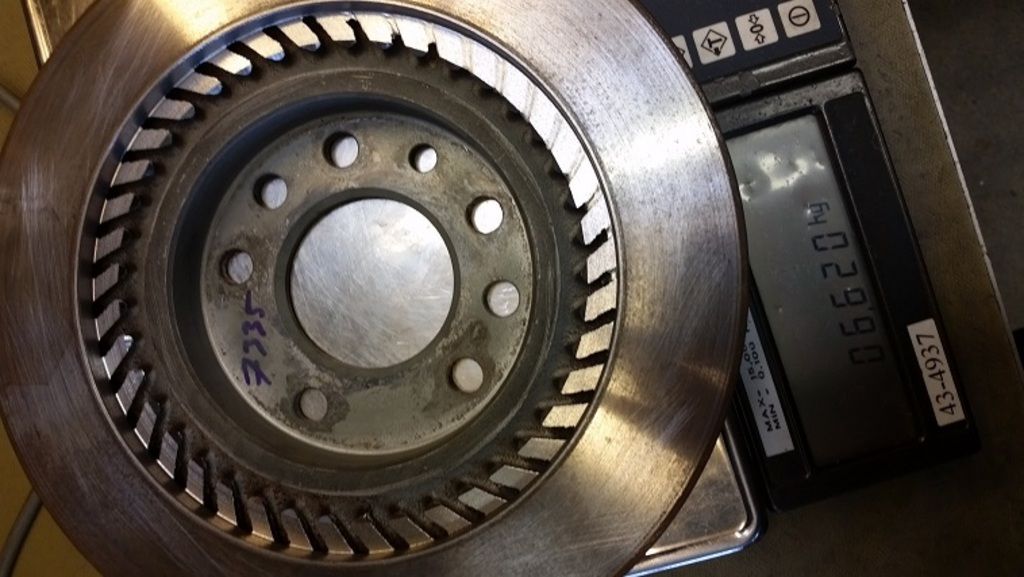
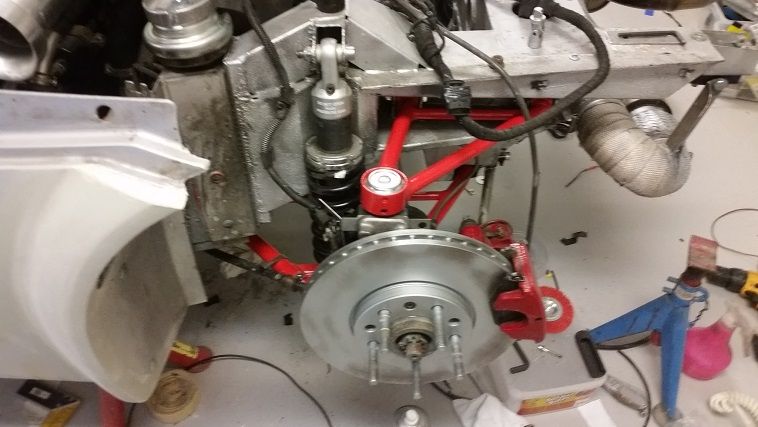
I want to increase my rear end grip so I thought I give it a try and save some weight out of my rear brake discs.
13mm thicker then last years to match my wider arc and improve rear end grip. =ET23

Ive been on paternity leave for almost 1 month now so not much is happening with my car.
But ebay is very fun, some parts are on the way.
Best regards, Per
#623

Posted 18 June 2016 - 10:08 PM
Whats the story with the rear discs? -700 each sounds good to me.
#624

Posted 19 June 2016 - 06:28 AM
#625

Posted 19 June 2016 - 06:44 AM
#626

Posted 20 June 2016 - 09:51 AM
Exhaust system is ready and mounted back on, it looks a lot better.
Hope it will cool down the engine bay and doesnt rust.
1st A arm out of 8 finished with new bushings and ball joint.

my wider arcs are finally ready after a few 100 hours, damn it took much longer then I thought,
It became really well, the painting didn´t tho,
So either I repaint the rear clam this winter or a repaint the whole car and change the color in the same time,
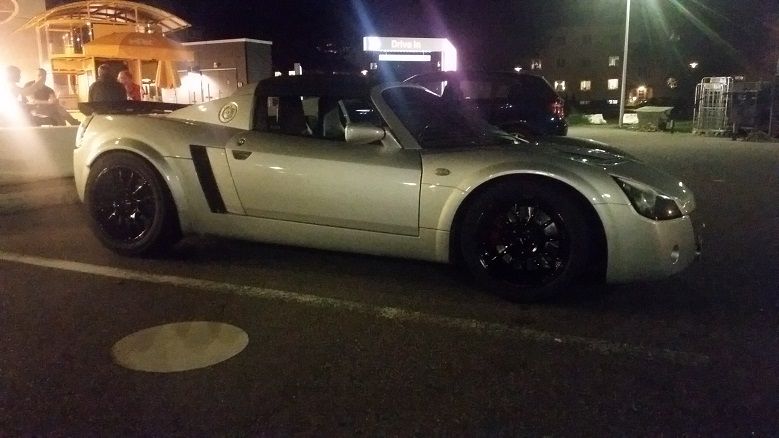
I´m not a big fan of silver, even though the car looks better then I rememberd it.
For you brittish ppl who like naught stuff.
New wheels. Front 225/45/16*7 ET 17 och rear 255/40/17*9 ET 23 saving around 4 kg per wheel with theese compared to my other wheels
tgether with my lighter rear discs.
Kumho V7 (v700) K61 medium. Newtires in the rear och used in front.
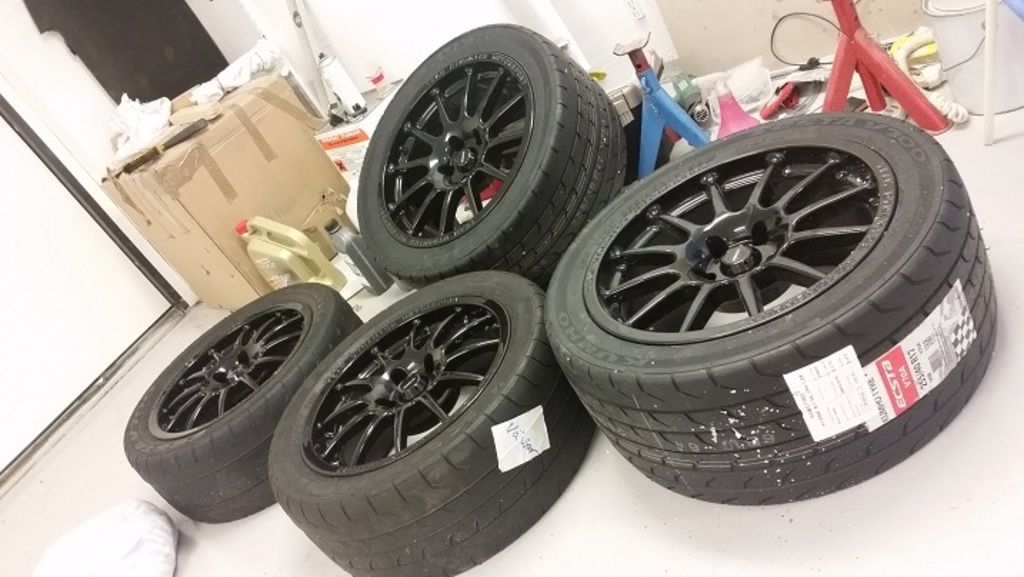
Finally the car is out and rolling but I had 2 error codes, one for oxygen sensor, which disapered when delteting it and didn´t come back.
The other was TPS high voltage, so I have cut ttwo wires when trying to take power from the TPS wires but this didnd´t seem to be the reason
and new TPS sensors are on the way home.
So I need to get out and rewire my new oil temp sensor.
Br, Per
#627

Posted 20 September 2016 - 03:49 PM
Now it was a while since last time and a lot has happened.
A car summer full of bad luck.
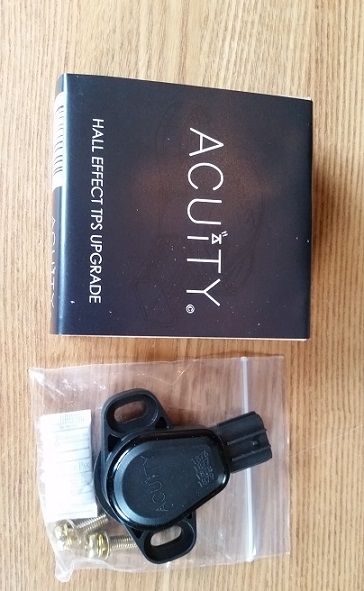
After I got the car together and started the car up I got two error codes, one turned out to be the TPS sensor and second lambda sensor. Lambda sensor I didn care to order a new one, it should be a quality part so I was thinking more that it either blackened back or bad contact in the connector, I also noticed that the motor went bad but figured it depends on the sensor were bad. A new Acuity TPS sensor was ordered.
3 weeks later this showed up in the mailbox.
I got home my new TD Pro Race wheels 1.2 and mounted first the rear rim to see
if it fitted which it did. When tested the front rim it didnt fit and when I measured the center hole it turned out that center bore was 64.7 to 65.1 as it should be. I contacted Demon Tweaks and they paid for the work to machine up the hole that was made by fälgfixarn in Gothenburg and after this they fitted nicely.
I felt that the rear wheel did not fill out my new wheel arches, as expected, and a 5mm was spacer ordered.
Instead of a pair of 5mm spacers dies up a pair 10mm spacers with 56mm center hole. Luckily, I got a new pair without fuss. And got to keep the old ones.
The new TPS was assembled and I called Hamed for help to street tune my engine. We started the car
and I noticed nothing directly while Hamed immediately noticed that something wasnt right, he thought it sounded like it went on 3 cylinders and we picked a injector connector one after the other and measured and it turned out that 2nd cylinder injector gave full voltage directly at idle, while the others were about 0.5volt.
After we tried my ECU in another car with the same error code, the conclusion was my ECU was bad.
I saw dollar signs in my eyes and how the entire car summer was destroyed, had already losing time and money with my TPS sensor.
I was approached by Asse who had seen my problem on Facebook and had an ECU lying that he did not know the condition of, but we had an agreement and he sent it and a contact I have in France helped me move my KPro from the old to the new ECU. A few weeks later I got back my fixed ECU
And now it was the beginning of August. I installed the ECU and turned the ignition key, it sounded like it went on all 4a and lambda value turned right and no error codes.
I got hold of a MOT time and the car inspected without remarks.
A big difference from last year is that the idle stable, it may be due to the qualityTPS compared to
cheap ebuy TPS I had last year?
During the wait for my ECU to come home, I tried to put together the wing that I wanted for a long time.
Reinforcements had to be fitted in the boot before wing mounts was installed.
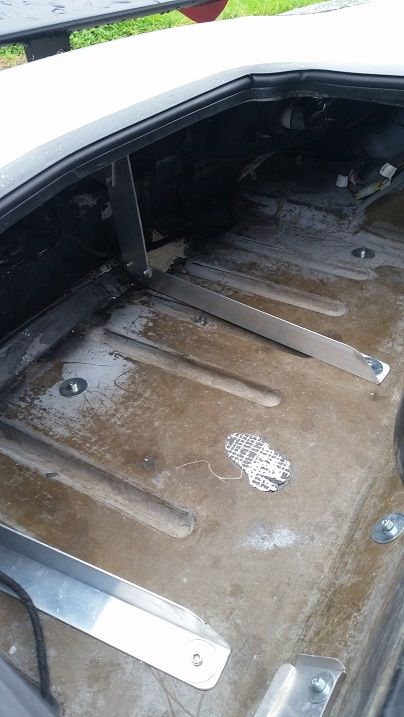
An image with the wing of the VAG race and Shine hit.
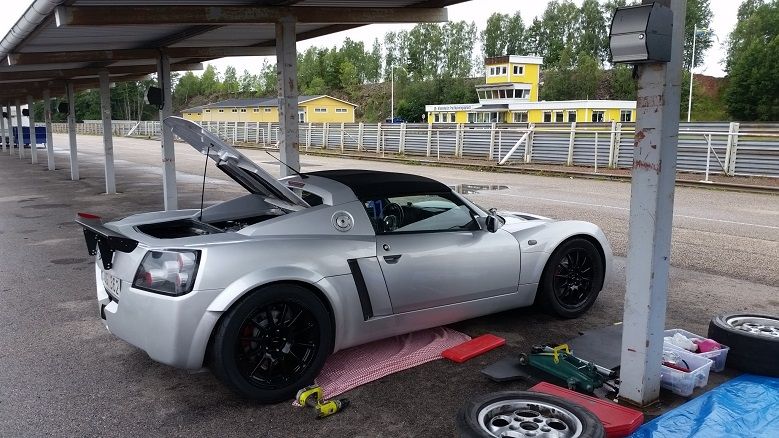
A friend and I went up to run on VAG race and shine and the car went like a dream.
Just honk and run all day. However, I was not completely happy with the car handeling when I got to set down the grip in front to balance the car.
You knew that the wing even though the wing is so small does little good, maybe not by giving so much downforce that it will increase car grip lots directly but more to stabilize the car, especially under the bridge on Kinnekulle ring and in braking, you feel a little difference. when the car eager to wag the butt when downshifting.
Yours sincerely, Per
Edited by Aerodynamic, 20 September 2016 - 03:55 PM.
#628

Posted 20 September 2016 - 04:58 PM
On the VAG track day I felt my driving was hampered by that I wasnt sitting still in my seat and the steering wheel is to far away.
And the next track day was with the Opel club 16-09-11
The day before this meet i got some time in the garage I thought I do some setup changes, my MBR ARB was set to hardest setting,
In front lowered the car 1 turn on my gaz monos and soften them 1 click. In the rear I lowered the car 2 turns and soften the damper 1 click.
I also took time to lower my driver seat with the tips I got from here, I moved the joggle from front to rear, see the red circle.
Wow, the car really felt fantastic on Kinnekulle ring, perfect balanced between front and rear and when I trailed brake and the rear steped out it comfortably got the grip back nice and smoothly without suprises.
Best time for the day was 1.00.55, and new personal best with about 2 seonds.
The brakes tho doesnt give me confidence, I remembered I was happy with them last year, maybe I wasn´t pushing as hard then but now they were sometimes so I didn´t feel the bite in them and in the next brake the pedal was hard.
Mike recommended me to change my Mintex 1155 to Pagid RS14.
A picture fron the day after the trackday.
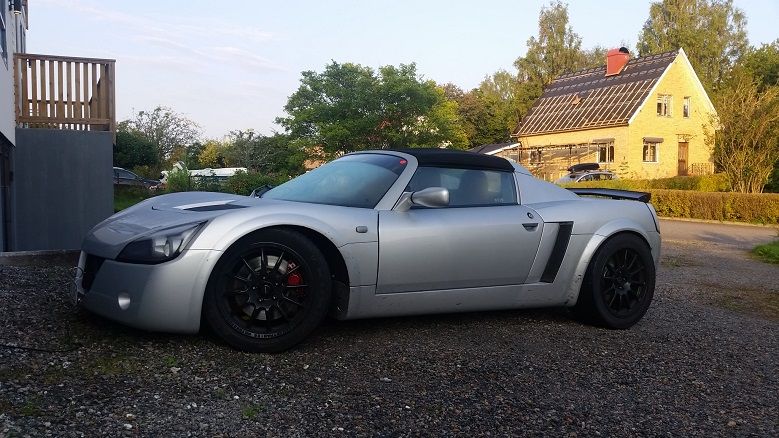
Last thursday we had a small car meet at the local hamburger restaurant.
On the meet there was a Supra, 997 turbo, 944 race edition, Corvette C6, Subaru Impreza GT and mine,

One small cone track driving next monday before cars going back into the garage for modifying.
Med vänlig hälsning, Per
#629

Posted 02 January 2017 - 05:47 PM
I thought it was about time for a new update, finally I have gathered some strength to go down in the garage after a autumn when both me and my sons have had a lot of Colds flues and stomachflu after they both started new kindergarden / school.
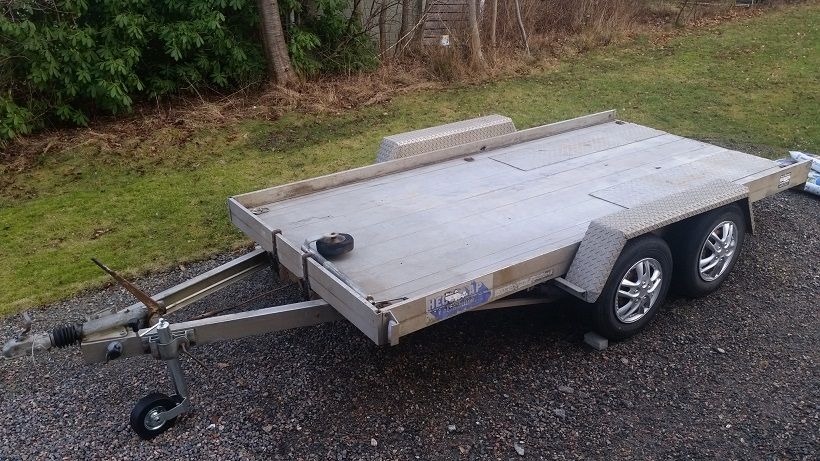
In october I bought this,
It´s a bit narrow (180cm) so I tested my oem front Wheels to have as
transport Wheels untill I bought a bigger one or modified it.
As a birthday gift I got a race suit from my wife, parents and mother in law.
At the same time I bought a pair of race glowes and shoes.
P1 race suit 3 layer Nomex and FIA approved.
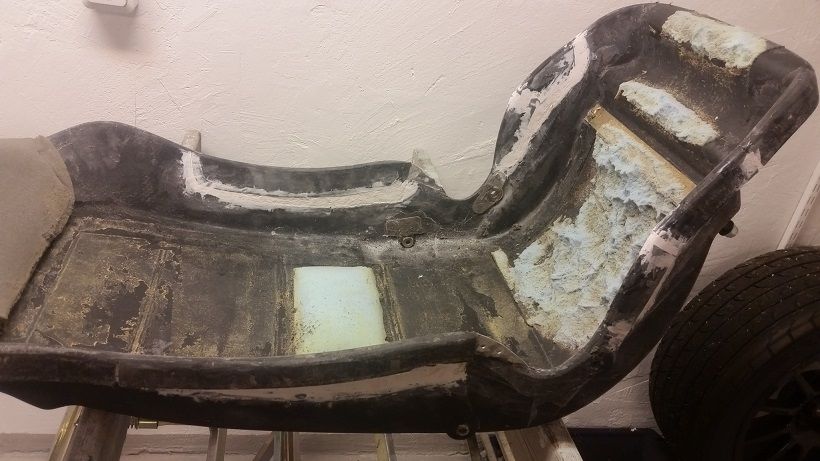
I also try to get a bit better seating posistion a lowering the seat rail.
But what is this?
So now I will get my seat a whole 1cm lower, yay.
And to make myself even more comfortable while driving I bought these from Hangar 111
Together with this modified seat.
I hope I will sit still.
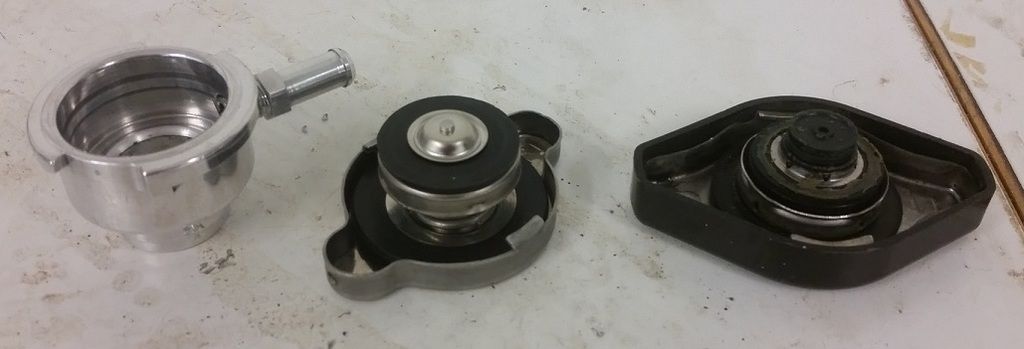
I also got this filler neck from e-bay.
I thought it would be using the same cap as Honda
but it doesn´t, sadly. So I´m thinking of modifying the filler neck so the Honda cap fits.
It feels safer for the future so I can get a new OEM quality honda cap or a increased pressure Mugen cap.
And I don´t know the quality of the cap I got with the neck.
What do you guys Think about this?
Br, Per
#631

Posted 02 January 2017 - 11:20 PM
I also got this filler neck from e-bay.I thought it would be using the same cap as Honda
but it doesn´t, sadly. So I´m thinking of modifying the filler neck so the Honda cap fits.
It feels safer for the future so I can get a new OEM quality honda cap or a increased pressure Mugen cap.
And I don´t know the quality of the cap I got with the neck.
What do you guys Think about this?
Br, Per
Why do you want to change the coolant cap?
Edited by The Batman, 02 January 2017 - 11:21 PM.
#632

Posted 02 January 2017 - 11:26 PM
just seen you have done this:
So Another day in the garage, as Always you don´t get as much done as expected. but I got a few things done.
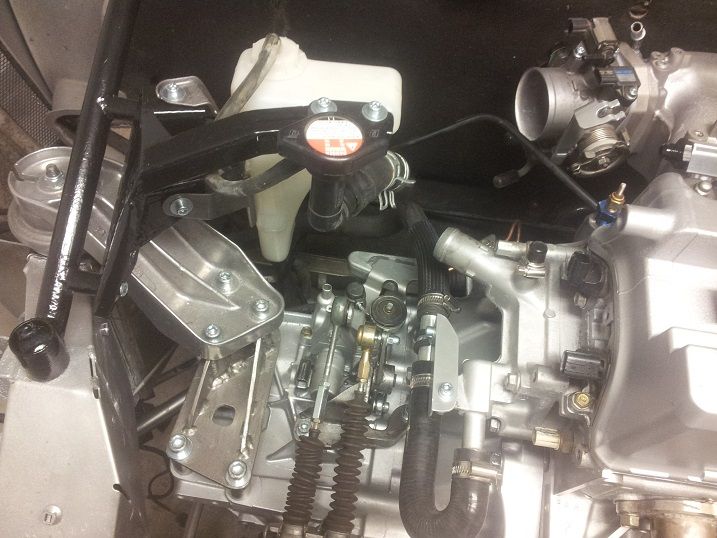
I made a mount for the Honda filler neck with honda cooling pressure valve and expansion tank.
Also shift linkage version 1.0 with a rocker arm since the Honda linkage was going in the wrong way at one of
the wires is ready any mounted, alomst 100% finish need some lock sprints.
I also made a mount for the Cable for the clutch.
Thank you, Per
why dont you just fit a normal headtank?
I use the VX 2.2 one in mine
#633

Posted 03 January 2017 - 06:46 AM
I thought this would be nice and still look OEM.
But the seat mod by FLD is beautiful.
Br, Per
What did you all do to this seat? I see some poly filler in places where you raised the side supports, right?
(ps; did you see the seat mod FLD is doing to create more space for harness holes?)
#634

Posted 04 January 2017 - 06:56 PM
Then I bought some more stuff.
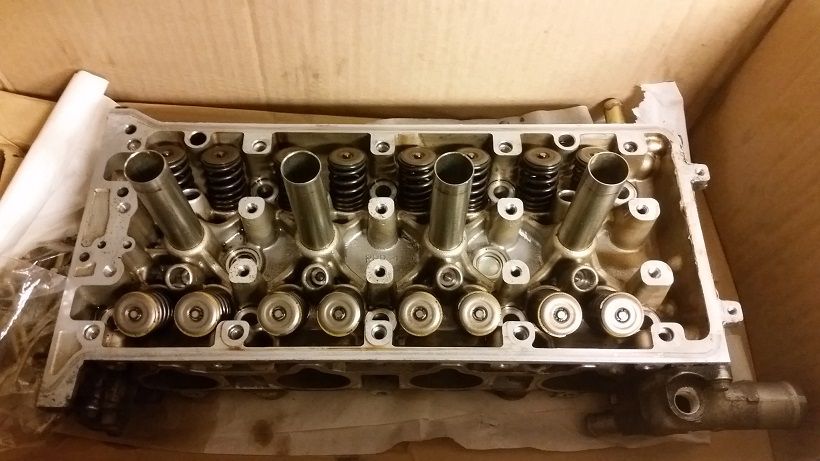
A new head, K20a2 same as type R, will match port head and intake and port the intake channels slightly,
This will gibe me some more compression from 9.8 to 10.2 and better flow... and separate water channel directly to the head instead of through the intake manifold as it is today.
By cooling today is working just fine but I want it a bit more robust and ditch the bike tire hooses i use as spacing today.
And thought about moving the rad cap directly onth this water neck you see in the bottom right.
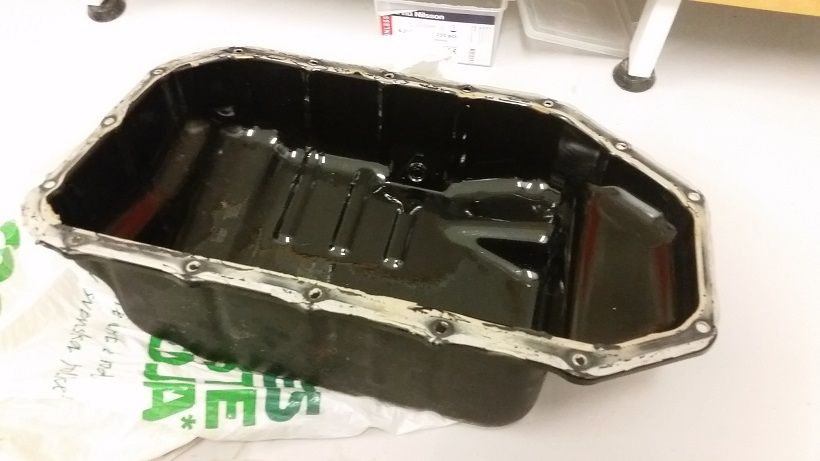
And a oilpan, could be useful in the future. :-)
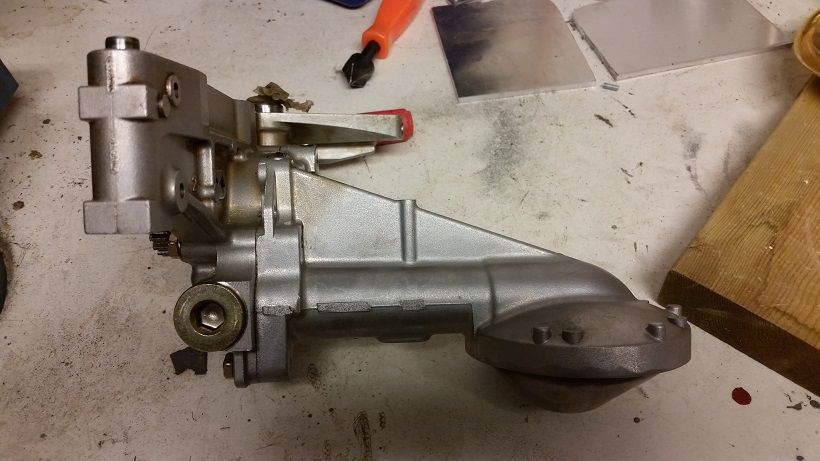
Also a oil pump...?
I think thats all for now.
Now I need to sort this out with all the parts.
Br, Per
#635

Posted 05 January 2017 - 12:13 PM
If you fit the K20 oil pump you should also be able to fit the K20 aluminium oil sump and drop in a ClockWiseMotion (info@clockwisemotion.co.uk, +44-7792-179485) baffle setup like this:

Bye, Arno.
#636

Posted 05 January 2017 - 05:39 PM
HI Arno, I already have a K20a2 oilpump in the car, but this oilpump is just a junk pump that will be modified so I can make the Oilpan around 17mm lower then today. Only the pickup part of the oilpump will be modified and mounted back on to the oilpump that is sitting in my car today.
I will the modify the oilpan so it will be around 17mm more shallower then my current oilpan, which is already modified in this regards.
I´m also thinking about a baffle design for the new oilpan that will be welded in and I will not use any movable parts.
I will then later also Place my pan closer to the underpanel so I will lower the Engine in total around 23mm I Think.
I will probaly lower it a little less in the back of the gearbox mounting but a Little more in the front Engine mount.
Br, Per
If you fit the K20 oil pump you should also be able to fit the K20 aluminium oil sump and drop in a ClockWiseMotion (info@clockwisemotion.co.uk, +44-7792-179485) baffle setup like this:
Bye, Arno.
#637

Posted 06 January 2017 - 06:50 PM
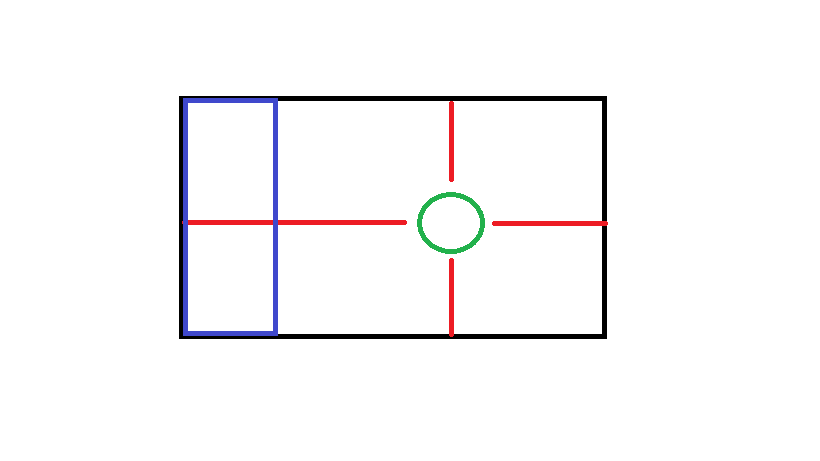
I thought about how to make a good bafflle design on this new oilpan I´m going to use.
The red are metal sheets standing up, green is the oil pickup and blu is a horizontal plate.
The idea with this + design is if the oil moves it must Always pass the oilpickup and I dont like to have moving parts
inside of my oilpan.
Any thoughts about this?
ideas are welcome.
Br, Per
Edited by Aerodynamic, 06 January 2017 - 06:52 PM.
#638

Posted 07 January 2017 - 11:06 AM
Phew, that seat re-work looks time consuming, but good on you for doing it. ![]()
#639

Posted 07 January 2017 - 07:20 PM
Well, thank you. I actually Think it have been going quite well I Think so far not more then 8 hours.
WHen It´s ready maybe it will be 10-12 hours in total.
Widening my rear fenders was far more time consuming but also a much more visible thing.
Phew, that seat re-work looks time consuming, but good on you for doing it.
#640

Posted 15 January 2017 - 12:20 PM
Seat is ready and my handed away to the trimmer guy.
Now I´m going to focus a bit more on my roll bar and find out where to weld in my harness bar.'
Anyone who can guide me here, I´d like to keep my speaker panel since my car is bloody noisy as it is.
Is there anyone who can come up with some feeback / ideas about my proposed baffle system on my oilpan.
Br, Per
7 user(s) are reading this topic
0 members, 6 guests, 0 anonymous users
-
Bing (1)


