Little bit of an update,
Fitted my oil catch tank ive modified it to fit larger inlets and also put an additional inlet so that I can either take a feed from other side of the rocker cover or ive been thinking recently about trying to take a inlet from the dip stick to help let the crank case breathe as I saw it on another build on here.
High quality engineering!


I also wanted to start removing any mild steel and also im not a fan of the long nuts I used but at the time it was the only thing i could think of, so i made a start and removed them and used carbon tube, ive kept the adjuster as I still dont know the perfect angle of the diffuser until we go tuff testing.

Then i have been wanting go get rid of the factory header tank, theres nothing wrong with it, but having something plastic so close to my downpipe didnt fill me with confidence if im going to creating an awful lot of heat on track, plus it being held on partially by a cable tie wasnt the best solution.
So I replaced it with an ali one,

im just waiting for the cap to arrive, while im not driving it this week ill pull the manifold off so i can wrap it aswell

Elise Track Car Build Thread - Have You Lot See This One?
#281

Posted 18 June 2014 - 06:48 PM
#282

Posted 19 June 2014 - 11:28 AM
Oil catch can looks to small according the the blue book.
- Plus Neil got pulled up on it in scrut at Knockhill.
2 litres mate!
#283

Posted 19 June 2014 - 11:33 AM
Is TA covered by the BB?
#284

Posted 19 June 2014 - 06:06 PM
#285

Posted 19 June 2014 - 07:31 PM
#286

Posted 19 June 2014 - 07:35 PM
#287

Posted 21 June 2014 - 10:37 AM
Oil catch can looks to small according the the blue book.
- Plus Neil got pulled up on it in scrut at Knockhill.
2 litres mate!
Yep, when i bought the catch can they didnt have it in the list of requirements as they only had last years rules.
I saw the 2ltr rule about a month ago so i gave a 2 litre one sat here ready, im just trying to decide which is the best place to put it.
Decided while the weather was nice it was time to wrap my manifold.
Been meaning to do this for a while as it will help keep my engine bay temps down and also make sure more of that heat energy gets to my turbine wheel.
The turbo and manfiold come off together as its easier to get at the manifold bolts into the head then the ones between the turbo and the manifold.
Its had a new nice heat cycles and has a lovely shade of blue, shame I wont see it again!

After having a good think about how to cover everything, not run out of wrap and also do the wrap in one piece to have having to metal cable tie each end I came up with this.


Lying on the garage floor for an hour pulling heat wrap through it tons of times wasnt fun especially in shorts and a t shirt, every part of me is itchy now!
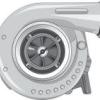
Also turbo seems to holding up well, no smoke, no play at all in the shaft, no marks on any of the blades, been a good little turbo even when I have had it glowing red.

All bolted back in with the engine running giving it a nice bake, left it for 10mins running it let it smoke.

#288

Posted 21 June 2014 - 10:43 AM
#289

Posted 21 June 2014 - 01:03 PM
If you dampen the wrap it makes it a little less itchy. I say a little.
hindsight is a wonderful thing! All night it felt like I resting my arms on a family of hedgehogs!
#290

Posted 22 June 2014 - 10:37 PM
Since ive removed the wheel arch liners front and rear to help release any high pressure air my sills were starting to take a battering from stones and muck, so to stop that i have covered them in kevlar.
Finished the rear tonight, should get the front finished tomorrow


#291

Posted 22 June 2014 - 10:41 PM
Also when applied wet, it shrinks into a tighter fit once dried outIf you dampen the wrap it makes it a little less itchy. I say a little.
#292

Posted 23 June 2014 - 07:40 AM
#293

Posted 23 June 2014 - 09:23 AM
What about protecting the rest of the bits? That oil cooler for example.
You could do with some sort of wheel arch liner, but with some slots cut into it ![]()
#294

Posted 23 June 2014 - 11:32 PM
ill make a panel that sits between the oil cooler and the tyre to protect it when i get chance
finished off my front kevlar protection this afternoon, so thats ticked off the list

Also decided to make some stone protectors while I at it, looks pretty funky.
Made a cardboard template from looking at pictures online of other exiges


#295

Posted 24 June 2014 - 06:56 AM
#296

Posted 24 June 2014 - 12:09 PM
#297

Posted 24 June 2014 - 12:11 PM
If the lower section of the door matched then it may look better.
#298

Posted 24 June 2014 - 05:54 PM
If the lower section of the door matched then it may look better.
I will probably wrap the sills when i come across some black vinyl in the future so it looks more complete, for not the kevlar was just to stock the stone chips and since its free I may aswell use it.
#299

Posted 28 June 2014 - 05:11 PM
While I wait for my new rear uprights I knew I needed to sort out the safety aspect of my rear toe links, I had installed an S2 phoenix motorsport toe link kit with brace bar, thats great but the major issue with it was its designed for steel uprights, with the aluminum uprights being weaker they will twist at the toe link end, so you need a brace to put the toe link bolt in double shear and take some of the pressure off the upright.
So I managed to get a pair of used brackets cheap, rubbed them down to remove any surface corrosion and gave them a link of paint


Took a bit of tinking to get them on, got some 12.9 cap head bolts on order so used some normal hex head so I could get it back in the garage


Next i have been thinking about making some diffusers for my front splitter, these wont be seen from the outside and basically are in between the front clam and the wheel, they will help create a lower pressure area under the car.
Because I hadnt made these before I decided to make one out of paper first so I could work out what bends and angles to put into the aluminum , once they are made ill cut out the splitter, paint and bond them in

The shaded area is the horizontal section that gets bonded to the splitter
#300

Posted 01 July 2014 - 10:27 PM
Just thought I would share this with everyone. They left alot of tech info out of it which I thought was a shame, but still its nice to have a bit of footage of it moving from the outside
1 user(s) are reading this topic
0 members, 1 guests, 0 anonymous users


