Jump to content


Photo

Project 'cash In The Attic' - Sc Conversion

stage2 supercharger

  • Please log in to reply
468 replies to this topic

#261 Captain Vimes

Captain Vimes

    Scary Internerd

  • PipPipPipPipPipPip
  • 2,755 posts
  • Gender:Male
  • Location:South East
  • Interests:Motorbikes, VX220, Procrastination

Posted 19 October 2014 - 04:42 PM

As above. Poor choice of words from me... Naca ducts to get cool air in, which helps cool the engine bay. I doubled the number of naca ducts and also vent holes in the clam.

#262 Captain Vimes

Captain Vimes

    Scary Internerd

  • PipPipPipPipPipPip
  • 2,755 posts
  • Gender:Male
  • Location:South East
  • Interests:Motorbikes, VX220, Procrastination

Posted 04 April 2015 - 09:26 AM

Time for another project update.


So, this years list of jobs are:


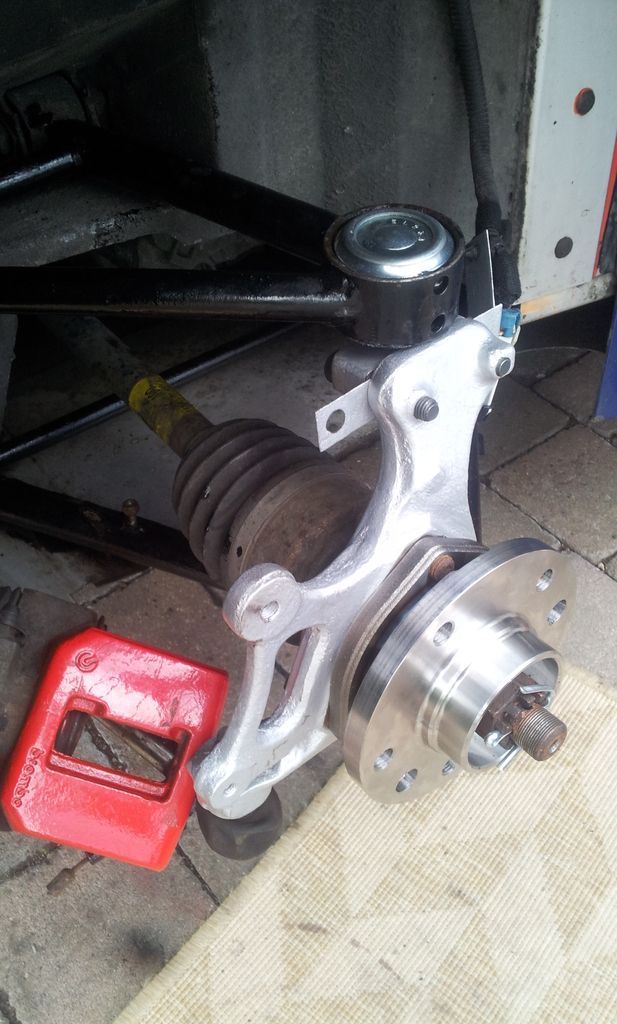
- Mini suspension refresh (tidy up rusty bits, replace ball joints, new HCB's, GEO)

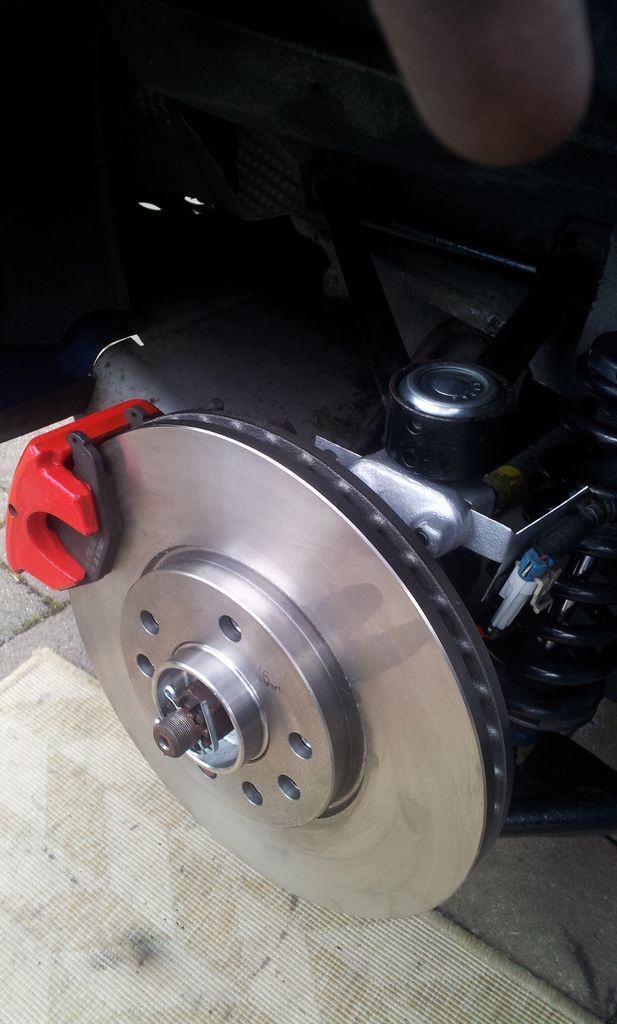
- Brake refresh (New RS14 pads, New discs, Paint callipers, fresh fluid)

- New Front Tyres - Federal's again but dropping to 45 profile from 50's

- Swap Regal exhaust for Tubby box (for sale thread to follow in a few weeks...)

- Cosmetics.... TBD. Lots I want to do 


Post SC conversion bits to sort:

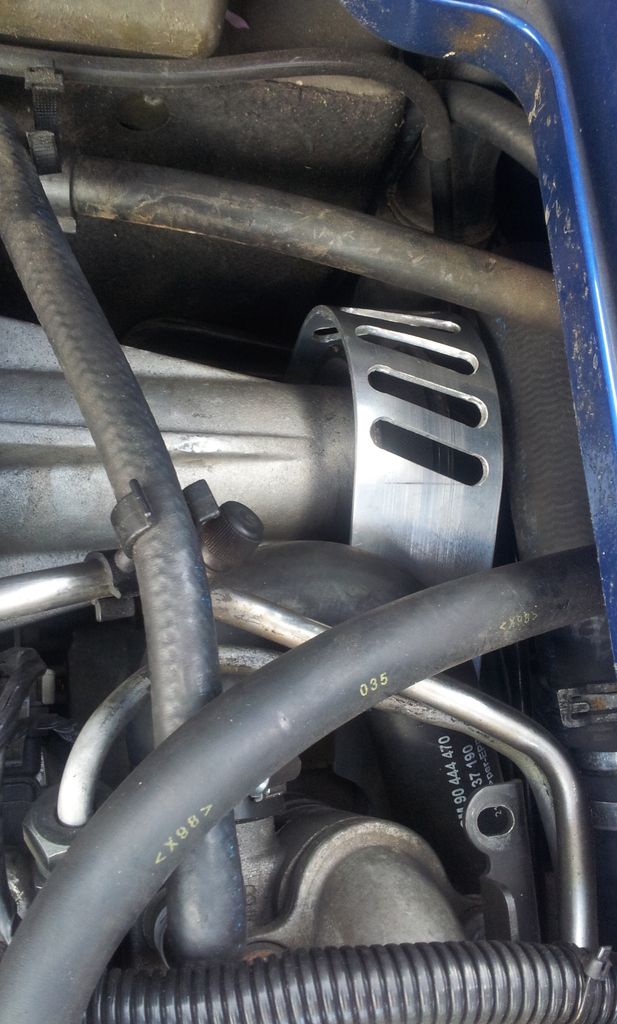
- Fit SC belt guard

- Space charge cooler away from rad & fill in gaps to ensure all air is forced through the rads and not round the edges

- Change the oil breather setup (currently using a catch tank, plan is to keep the tank but move the breather to the very back of the car)


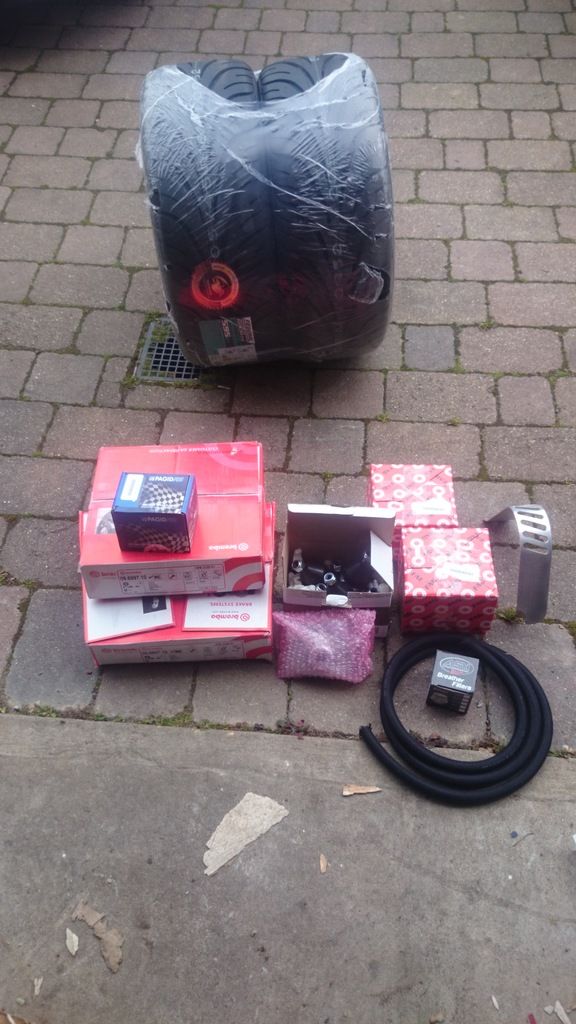
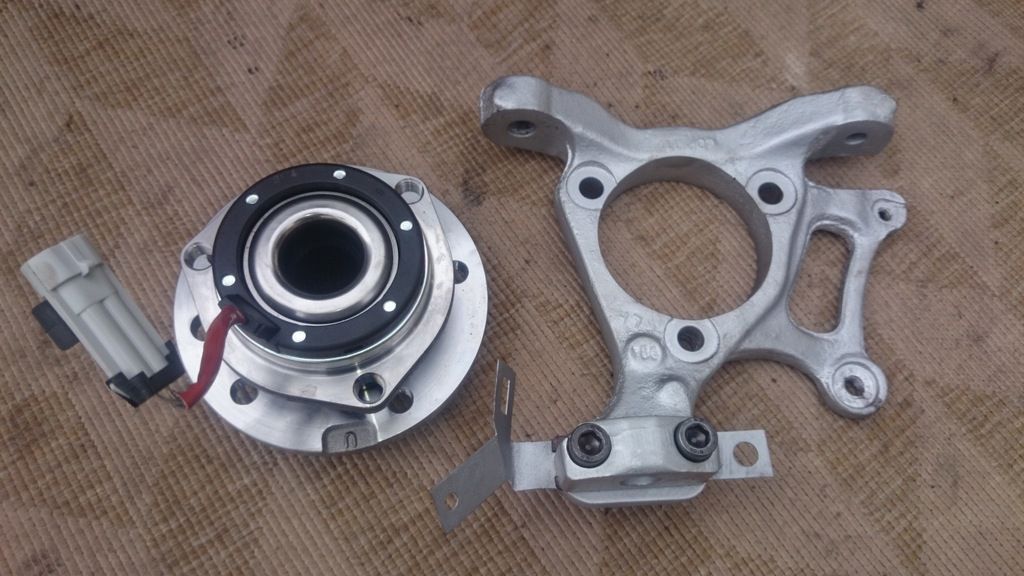
So I have this pile of bits to start with:


Posted Image


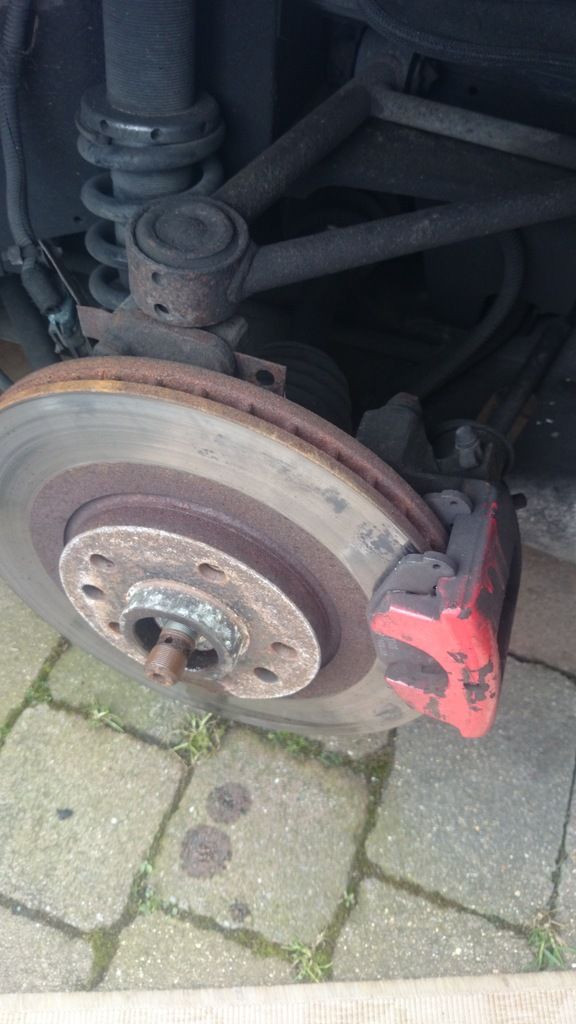
Started on the rear, nearside corner:


Posted Image


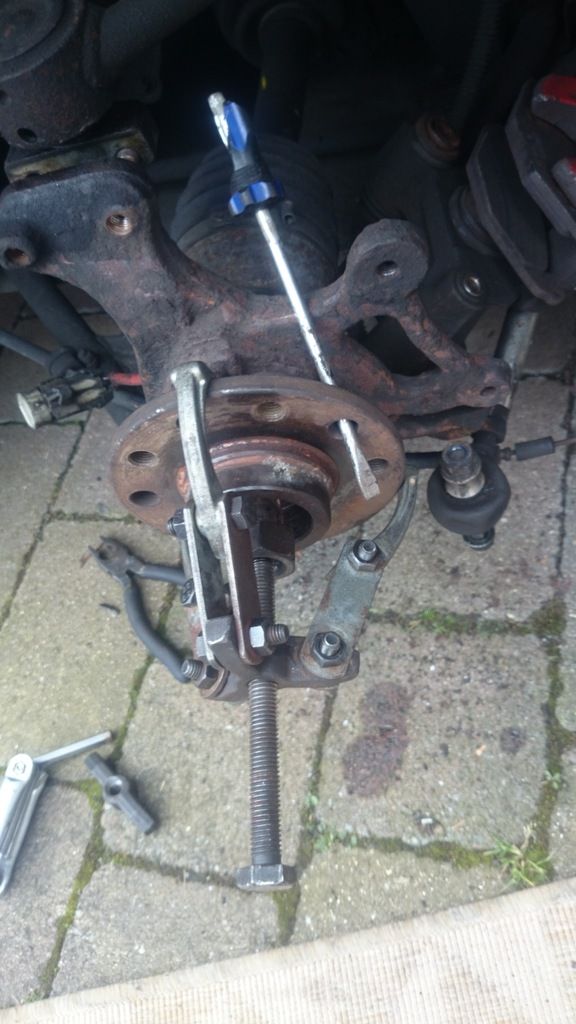
Not the most fun job, but the right tools helped a lot. Some tight bolts:


Posted Image


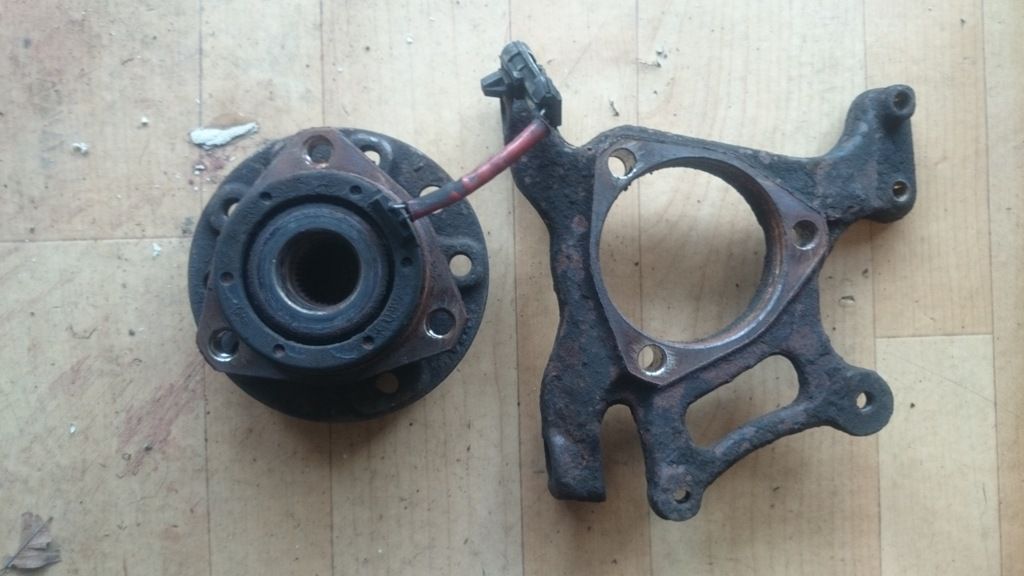
Out with the old:


Posted Image


In with the new (incl. nice new HCB's):


Posted Image


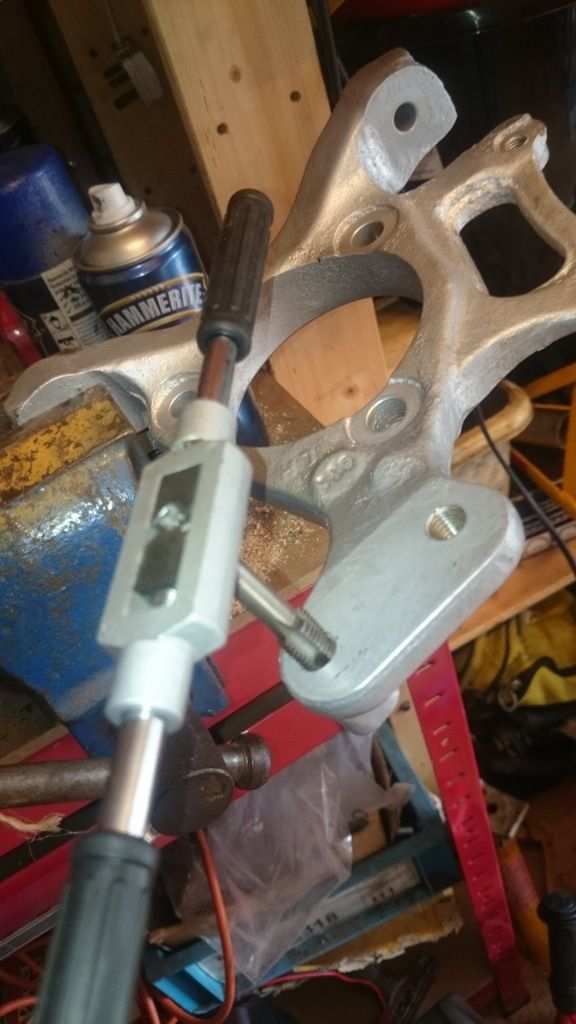
Tap the HCB threads to allow for correct torque:


Posted Image


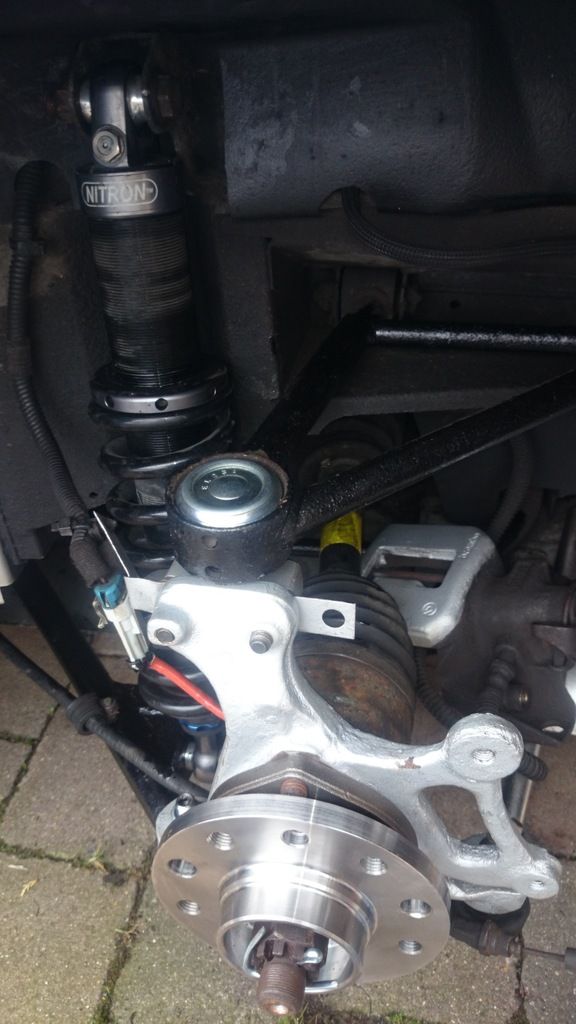
Looking better (wishbones coated in hammerite):
 
Posted Image
 
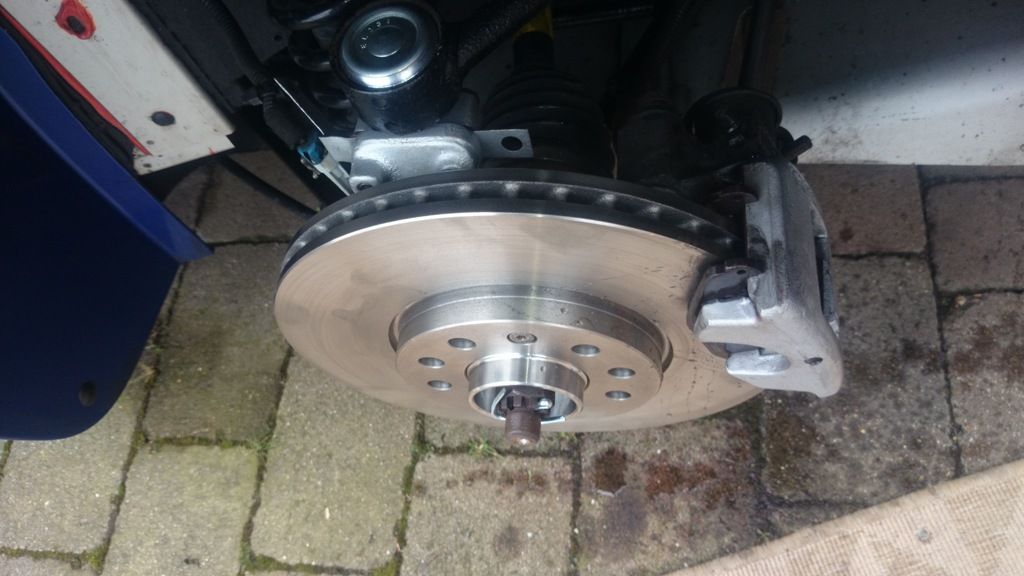
Looking better:
 
Posted Image
 
 
Now there's just the other side to do and the front brakes, and ball joints...

Edited by Captain Vimes, 04 April 2015 - 09:28 AM.


#263 ArticMonkey

ArticMonkey

    On the run from the grammar police!

  • PipPipPipPipPipPip
  • 4,792 posts
  • Gender:Male
  • Location:Essex

Posted 04 April 2015 - 09:59 AM

Looking good. You already got a tubby box and U-bend?

#264 Captain Vimes

Captain Vimes

    Scary Internerd

  • PipPipPipPipPipPip
  • 2,755 posts
  • Gender:Male
  • Location:South East
  • Interests:Motorbikes, VX220, Procrastination

Posted 04 April 2015 - 10:03 AM

Yep, tubby box and u-bend have been sitting in the shed for months I've just been waiting for the weather to pick up so I can get started.

#265 ArticMonkey

ArticMonkey

    On the run from the grammar police!

  • PipPipPipPipPipPip
  • 4,792 posts
  • Gender:Male
  • Location:Essex

Posted 04 April 2015 - 10:07 AM

I'll be taking the clam off when doing my exhaust at the end of the month. Along with new heat shield and exhaust wrap.

#266 Captain Vimes

Captain Vimes

    Scary Internerd

  • PipPipPipPipPipPip
  • 2,755 posts
  • Gender:Male
  • Location:South East
  • Interests:Motorbikes, VX220, Procrastination

Posted 25 April 2015 - 11:21 PM

More progress....


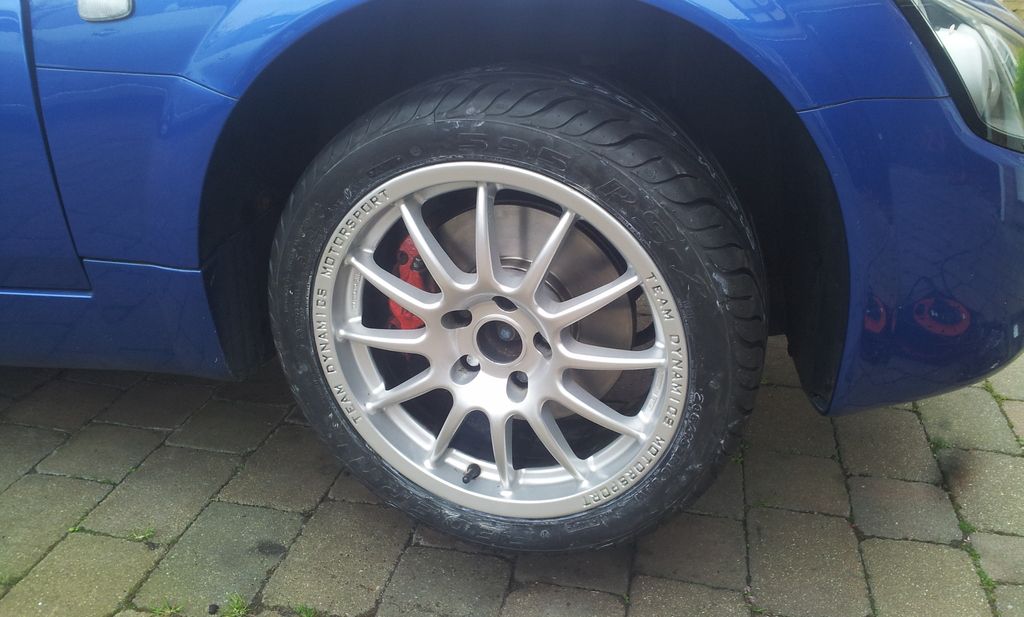
New offside rear ball joints, disc, wheel bearing, HCB's and general painting and cleaning done:


Posted Image


Posted Image


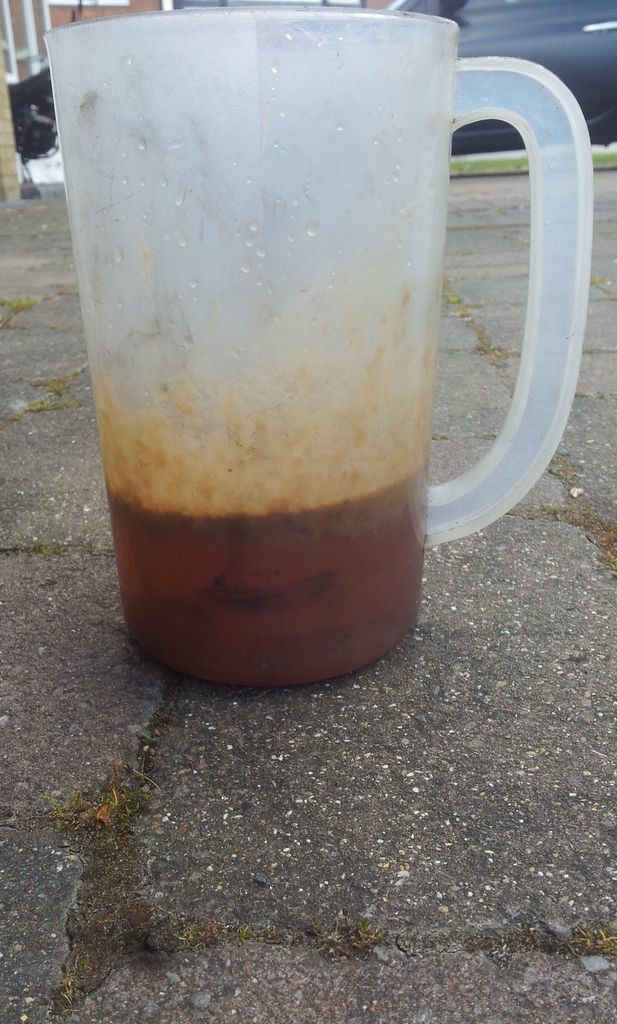
Moved the oil breather right to the back of the car and emptied the catch tank - no oil but lots of stinky water again:


Posted Image


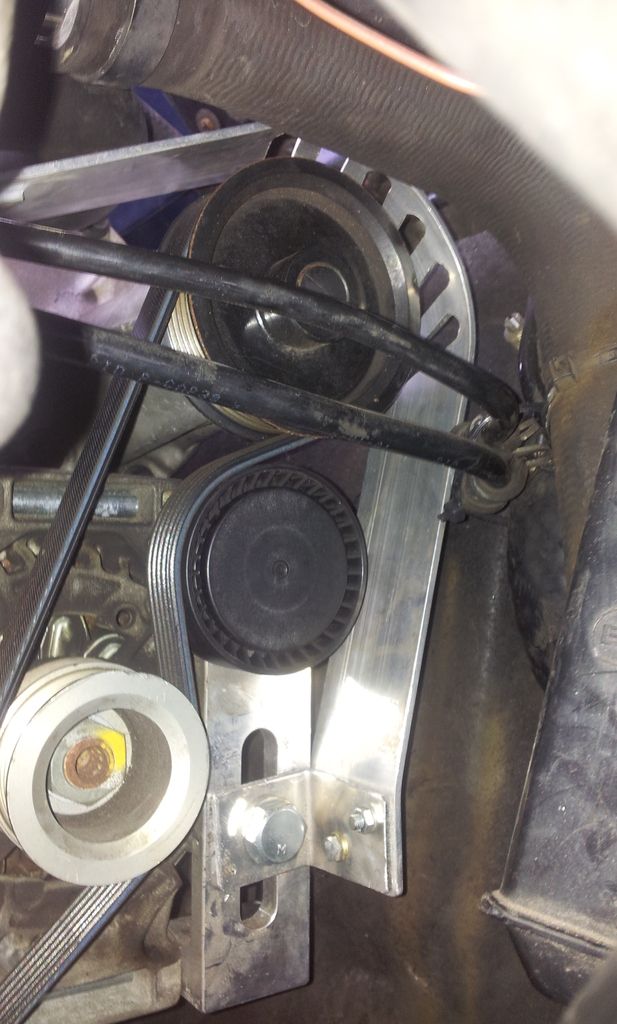
Plus, I got the Supercharger belt cover on:


Posted Image


Posted Image


Next job - change the exhaust...


#267 Andrew aka Stuwy

Andrew aka Stuwy

    Made In England

  • PipPipPipPipPipPipPip
  • 8,731 posts
  • Gender:Not Telling
  • Location:At Sea
  • Interests:most things are intersting

Posted 27 April 2015 - 01:09 PM

thumbsup


#268 Arno

Arno

    Need to get Out More

  • PipPipPipPip
  • 1,238 posts
  • Gender:Male
  • Location:Netherlands

Posted 27 April 2015 - 01:57 PM


Posted Image


Posted Image


One red and one silver caliper?? :D


Bye, Arno.


#269 Captain Vimes

Captain Vimes

    Scary Internerd

  • PipPipPipPipPipPip
  • 2,755 posts
  • Gender:Male
  • Location:South East
  • Interests:Motorbikes, VX220, Procrastination

Posted 27 April 2015 - 02:23 PM

It's a special red paint on the drivers side which creates drag and therefore helps with turn in on clockwise circuits. Watch the group buy section for more details (I can supply at under £100 per can!) (or i realised the high temp silver paint on the near side was rubbish and comes off with brake cleaner)

#270 Captain Vimes

Captain Vimes

    Scary Internerd

  • PipPipPipPipPipPip
  • 2,755 posts
  • Gender:Male
  • Location:South East
  • Interests:Motorbikes, VX220, Procrastination

Posted 02 May 2015 - 09:44 PM

So, original list of jobs from start of April is now pretty much done:


- Mini suspension refresh (tidy up rusty bits, replace ball joints, new HCB's front and rear)

- Brake refresh (New RS14 front pads, New discs, Paint callipers)

- New Front Tyres - Federal's again but dropping to 45 profile from 50's

- Swap Regal exhaust for Tubby box 

- Fit SC belt guard

- Change the oil breather setup (moved breather to the very back of the car)

+ Added an OEM hardtop


Pic from the front now that's done:


Posted Image


I got to drive it today after doing all the work and it feels massively different. Changing the front ball joints has transformed the way the car drives - the steering feel is amazing. It's always had quite heavy steering and having not driven any other vx's I assumed that was how they all were. It feels so nice to drive especially with the dampers backed right off as well, its been a joy to drive around this evening. .


A very happy vx owner - I just need to get out and start driving it more now.... except I still have a list of bits to do..


- Geo

[color=rgb(40,40,40);font-family:helvetica, arial, sans-serif;]- Space charge cooler away from rad & fill in gaps to ensure all air is forced through the rads and not round the edges[/color]
[color=rgb(40,40,40);font-family:helvetica, arial, sans-serif;]- MOT is due[/color]
[color=rgb(40,40,40);font-family:helvetica, arial, sans-serif;]- Cosmetics interior and exterior[/color]
[color=rgb(40,40,40);font-family:helvetica, arial, sans-serif;]- Outer toe link upgrade[/color]


#271 Steve.i.am

Steve.i.am

    Need to get Out More

  • PipPipPipPip
  • 990 posts
  • Gender:Male
  • Location:Sussex
  • Interests:Bends

Posted 03 May 2015 - 08:51 AM

Good stuff. Was thinking of doing the same airflow sealing at the front rads on mine. Wondered also if changing the coolant mix from 50:50 to 75:25 water:antifreeze would be a good idea, or not.

#272 CHILL Gone DUTCH

CHILL Gone DUTCH

    I ADMIT BATMAN THINKS HE IS QUICKER THAN ME

  • PipPipPipPipPipPipPipPip
  • 13,727 posts
  • Gender:Male
  • Location:UK

Posted 03 May 2015 - 09:18 AM

The bypass valve I put In will stop the condensation building up on the catchtank

#273 Aerodynamic

Aerodynamic

    Billy No Mates

  • PipPipPipPipPip
  • 1,455 posts

Posted 04 May 2015 - 05:06 PM

I like theses Wheel bearings, they are thick all they way around

and maybe possible to modify easy to 5/100, 5/112 or 5/114.3

So it´s easier to get more Wheels fit.

Where does these wheel bearings come from?


I also like the idea using Hammerite coating I´mactually thinking of sand blast my and go for

Hammerite coating instead of powder coating.


BR, Per


Out with the old:


Posted Image


In with the new (incl. nice new HCB's):


Posted Image


Tap the HCB threads to allow for correct torque:


Posted Image


Looking better (wishbones coated in hammerite):
 
Posted Image
 
Looking better:


Now there's just the other side to do and the front brakes, and ball joints...


#274 Captain Vimes

Captain Vimes

    Scary Internerd

  • PipPipPipPipPipPip
  • 2,755 posts
  • Gender:Male
  • Location:South East
  • Interests:Motorbikes, VX220, Procrastination

Posted 05 May 2015 - 09:32 PM

The bearings are from Eliseparts and manufactured by FAG. I'll let you know how the hammerite on the hub carrier is holding up in 12 months if you're interested. I coated it with plenty of paint and left it to dry for a week so hopefully it'll last a while..

#275 Captain Vimes

Captain Vimes

    Scary Internerd

  • PipPipPipPipPipPip
  • 2,755 posts
  • Gender:Male
  • Location:South East
  • Interests:Motorbikes, VX220, Procrastination

Posted 12 May 2015 - 09:03 PM

MOT passed and new passenger driveshaft fitted. 


Nearly ready for the national....


#276 Captain Vimes

Captain Vimes

    Scary Internerd

  • PipPipPipPipPipPip
  • 2,755 posts
  • Gender:Male
  • Location:South East
  • Interests:Motorbikes, VX220, Procrastination

Posted 17 May 2015 - 05:51 PM

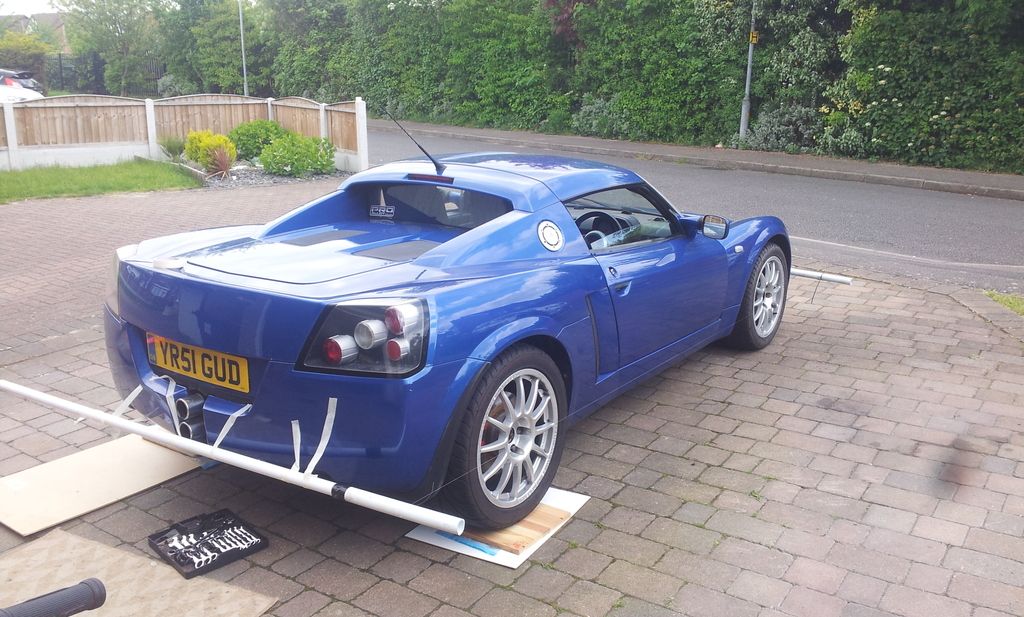
Geo done today. Ride height up from 125/117 to 130/120. It was good to confirm that the rear toe was pretty much spot on as I had previously set it using a 99p laser pen.

Rear toe changed from 1mm to 1.5mm toe in. It took ages to get it all set up and I discovered that my drive is NOT flat despite how it looks. Had to keep moving it to make sure results were consistent. It can go to BoT next time...
Posted Image

#277 Captain Vimes

Captain Vimes

    Scary Internerd

  • PipPipPipPipPipPip
  • 2,755 posts
  • Gender:Male
  • Location:South East
  • Interests:Motorbikes, VX220, Procrastination

Posted 31 May 2015 - 11:00 AM

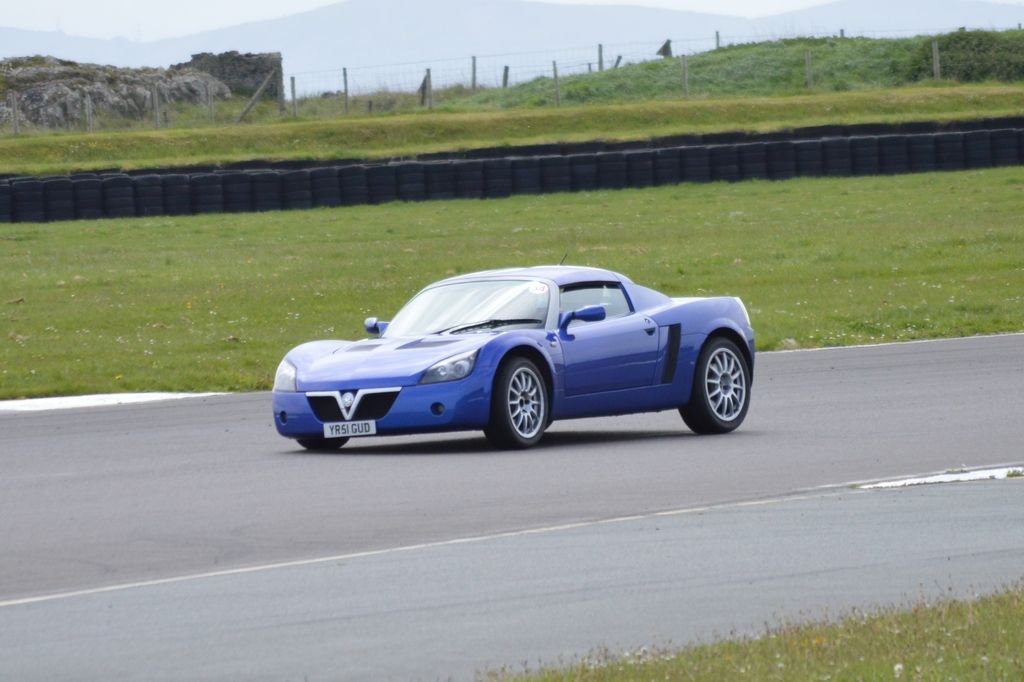
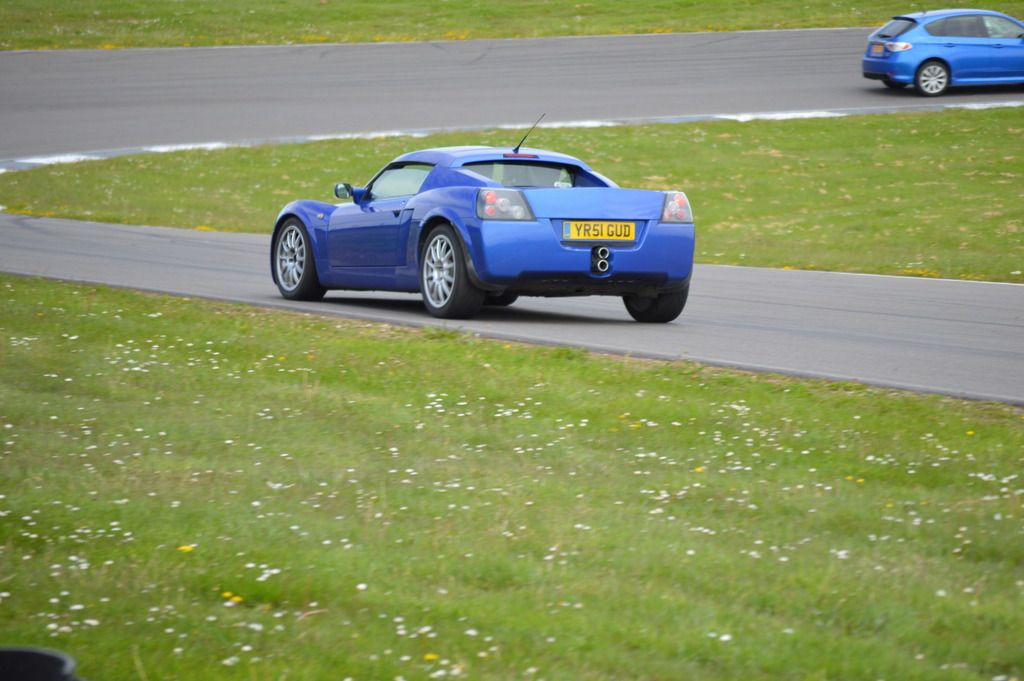
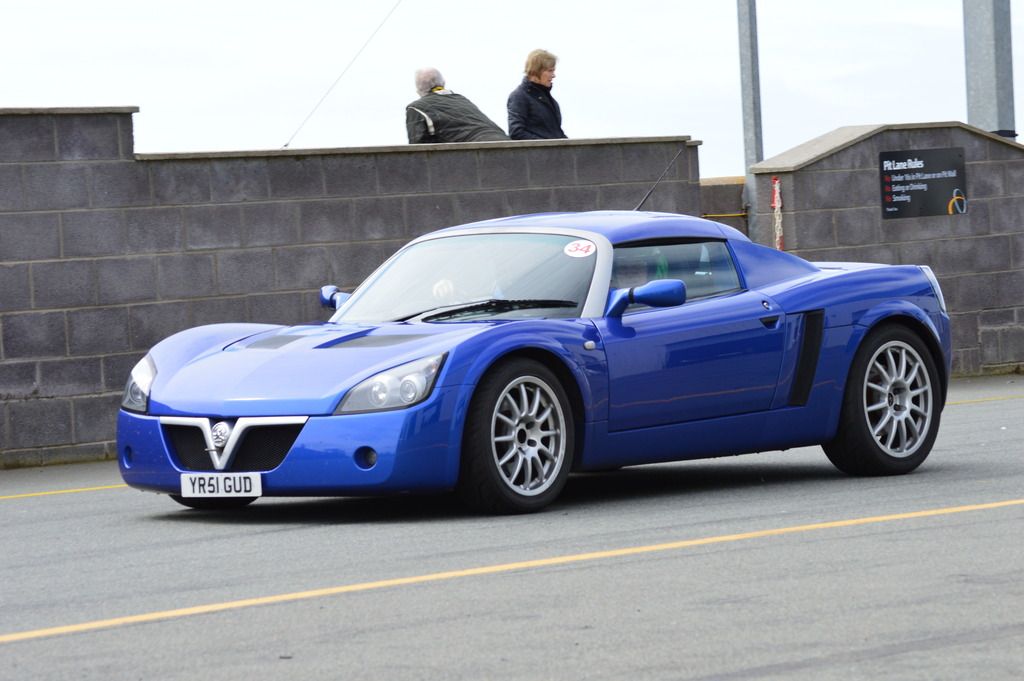
After all the work on the car, it performed perfectly on track at Anglesey. For the first time since fitting the SC I was able to just enjoy driving the car all day long including the 600+ mile round trip and over 100 miles on track.


The only actual issue was very minor - the Fez heater was stuck on warm. New part on it's way from Tom should fix that :)


Apart from that, some of the pictures show that the suspension may be a little soft on track. Not sure whether I want to change it though as it was great on the road with the dampers backed right off (my son even managed to fall asleep for 45 minutes of the journey) but it still managed to do a good job on track.


Couple of pics. 


Leaning like the titanic - I clearly have plenty of droop in the front suspension as it goes from this:

Posted Image


To this:-


Posted Image


Awaiting the fun:


Posted Image


#278 Captain Vimes

Captain Vimes

    Scary Internerd

  • PipPipPipPipPipPip
  • 2,755 posts
  • Gender:Male
  • Location:South East
  • Interests:Motorbikes, VX220, Procrastination

Posted 31 May 2015 - 11:29 AM

 My project thread wouldn't be complete without a video - a compilation from Anglesey showing the car working really well!


#279 Acidpopstar

Acidpopstar

    Scary Internerd

  • PipPipPipPipPipPip
  • 3,556 posts
  • Gender:Male
  • Location:Saltburn-by-the-Sea, North Yorkshire
  • Interests:Playing and teaching guitar / driving

Posted 31 May 2015 - 01:07 PM

Nice work as always Captain. Rubber trees the world over must fear your name :D


I may have asked you this already but where did you get your dinky rear view mirror?


Edited by Acidpopstar, 31 May 2015 - 01:07 PM.


#280 Zoobeef

Zoobeef

    Joes bedroom assistant.

  • PipPipPipPipPipPipPip
  • 11,103 posts
  • Gender:Male
  • Location:Retford/Bovington

Posted 31 May 2015 - 01:30 PM

Those mirrors are from Halfords I think. My old one certainly was.


That was one of the first trackdays where the back end hadn't been out at some point throughout the day.

I think that was a mixture of the 888s being at the right pressure and me still not pushing it to the full after my tyre incident!


8 user(s) are reading this topic

0 members, 8 guests, 0 anonymous users