Edited by gingerjon, 26 June 2014 - 09:41 PM.

Project 'once'
#481

Posted 26 June 2014 - 09:39 PM
#482

Posted 30 June 2014 - 12:41 PM
G, Lets swap for a month.... I too have spent 3 times the original planned budget for the "quick refresh" and have got bored of it being off the road!! Maybe a few weeks working on mine will spur you on with yours! I could do with the change of scenery!!
J
I have a window in August where I'll be on holiday for 2.5 weeks enjoying the change of scenery where you'd be very welcome to work on mine if it helps! ![]()
#483

Posted 01 July 2014 - 01:07 PM
So working the weekend, and a few nights away with work during the week, meant I haven't spent much time at MBR over the last couple of weeks. The bad news is I'm away visiting family this weekend, more family the weekend after, followed by a wknd stag do, then a wknd of the wedding, then I think I (currently) have a free weekend (start of Aug) and then I'm away for 3 weekends on holiday. Might be September before I'm back in the workshop on a sat...
Anyway, I have managed a couple of hours of work on it after work for a couple of nights since stripping the doors.
Onto the bulkhead, which I'd previously cut out and shaped.
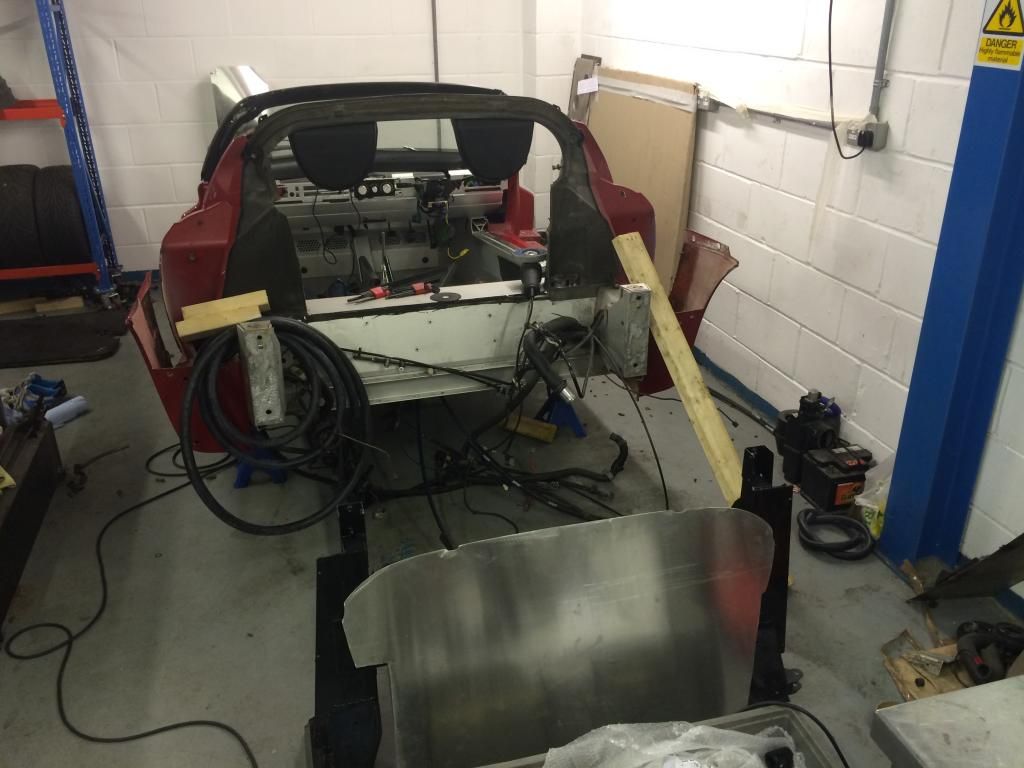
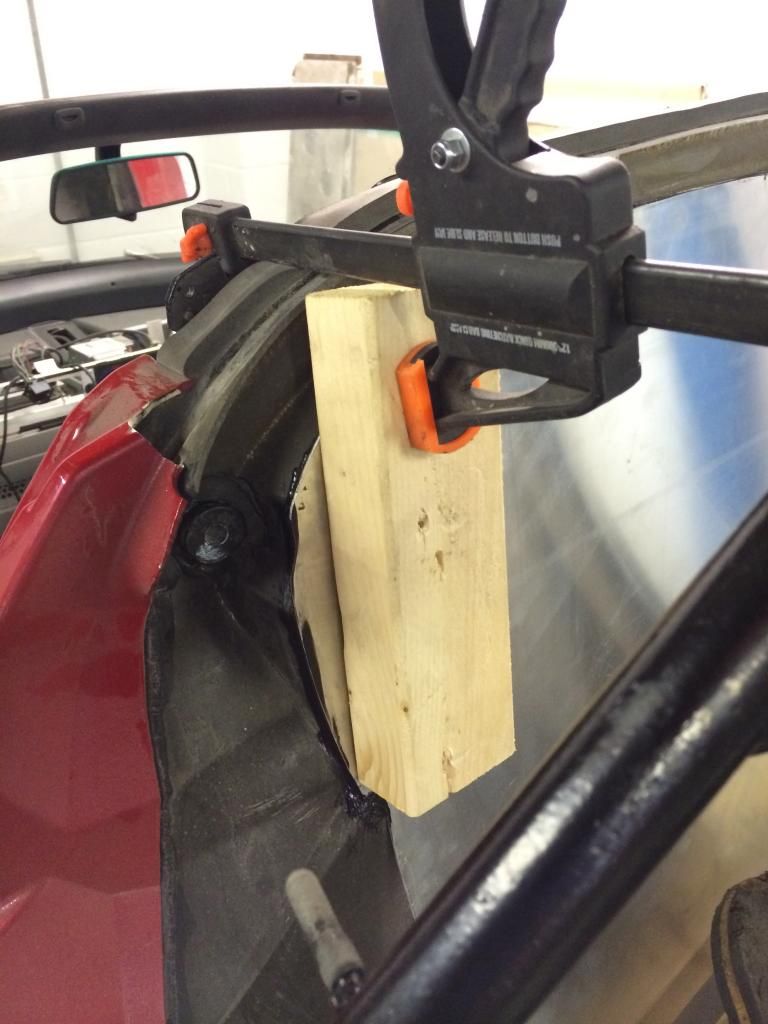
Unfortunately we could only find one clamp, so getting it to sit in place with the required pressure for the sealer to bond properly required some blue peter style thinking... and a wishbone
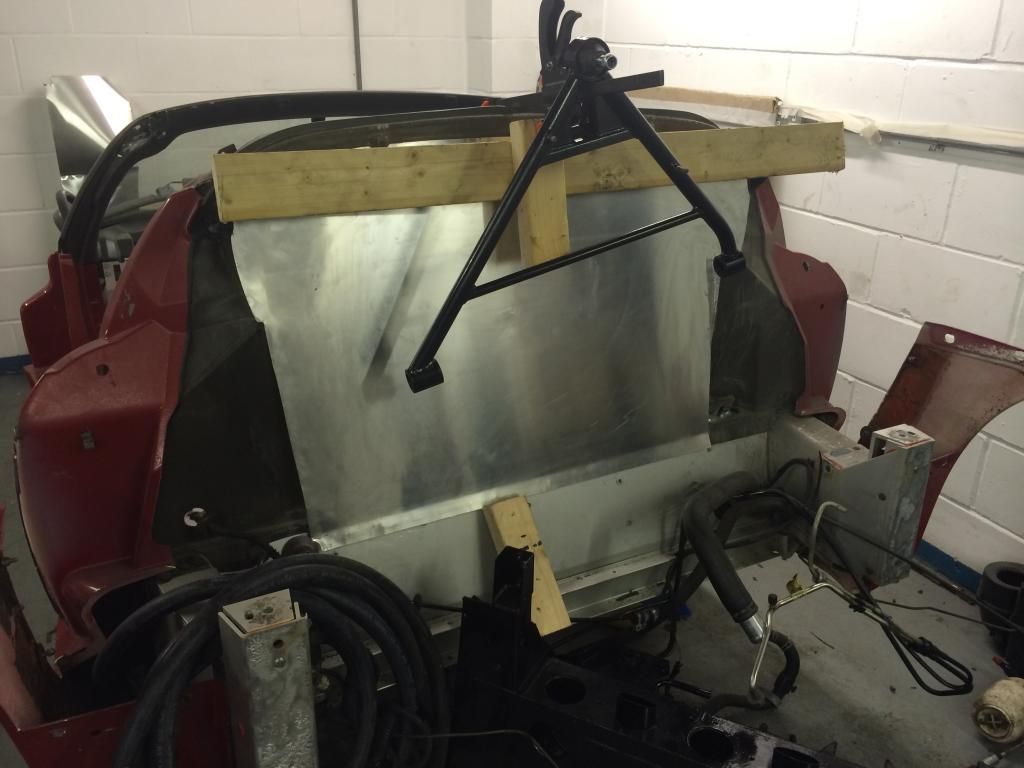
Basically needed the wood to apply even(ish) pressure accross the whole width of the bulkhead, and the wishbone to add weight to stop the clamp slipping up and off the rollbar cover. Was a little worried about dinking my newly powdercoated wishbone though as I had to leave it overnight, so set up a rudimentary trampoline for it! ![]()

Of course these things take time, as you need to leave it to set for at least 24 hours
So a day later, after doing the top, we needed to do the sides as well. So that mean more wood, and more clamping. Oh and that wishbone again ![]()

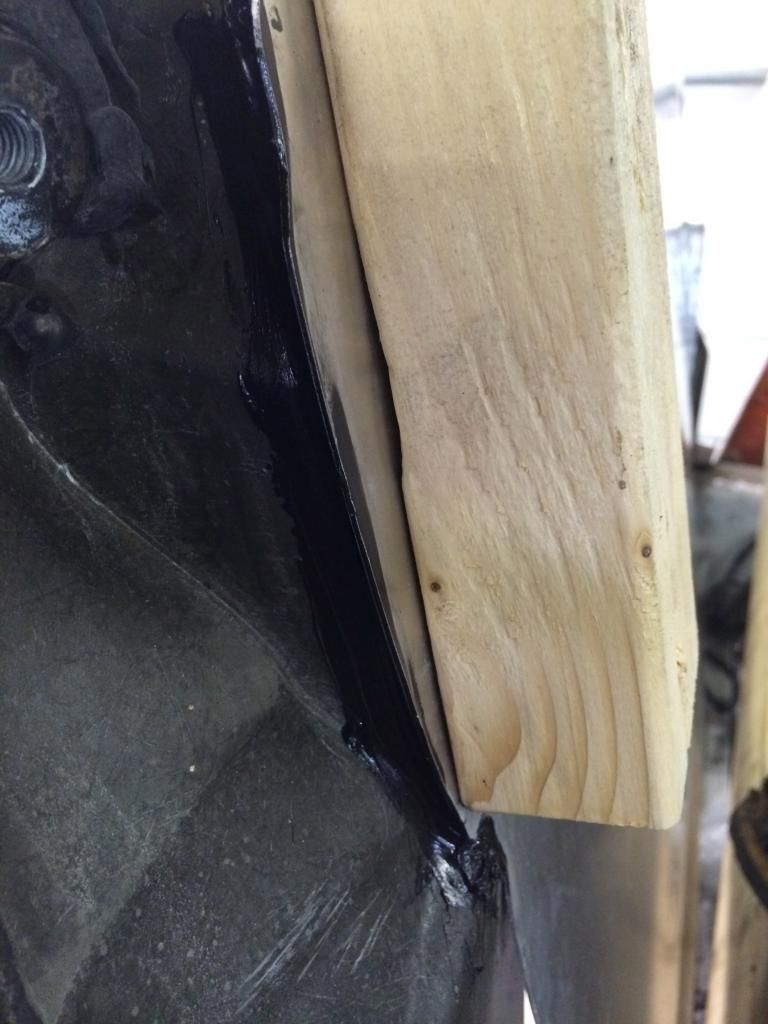 ]
]
#484

Posted 01 July 2014 - 01:24 PM
Which left the bottom to do, another night.
More wood, but not wishbones this time ![]()
![]()
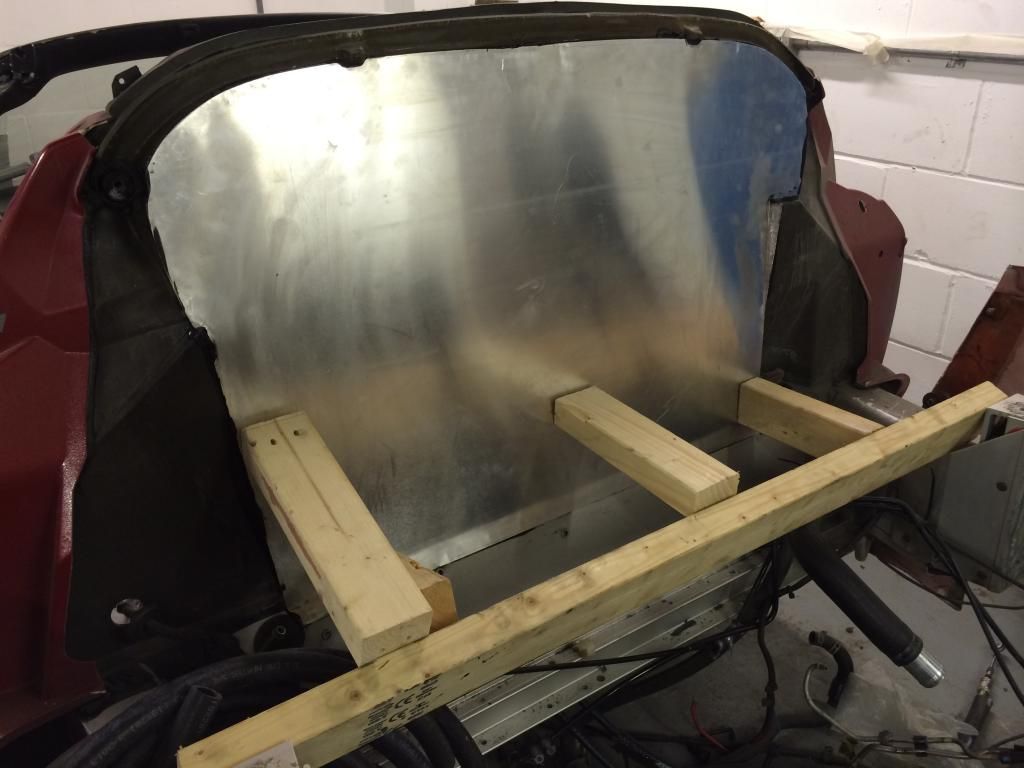

Added some extra sealer onto the inside panel as well (you won't see it as much of this will be hidden by the speaker panel and a new trim piece will be insereted where the window normally is.)

And the good news is when we removed the wood, the bulkhead remained in place ![]()


Tweaked the part that butts up against the section above the fuel tank pipes. Thankfully it looks far neater in real life than it does in this picture...
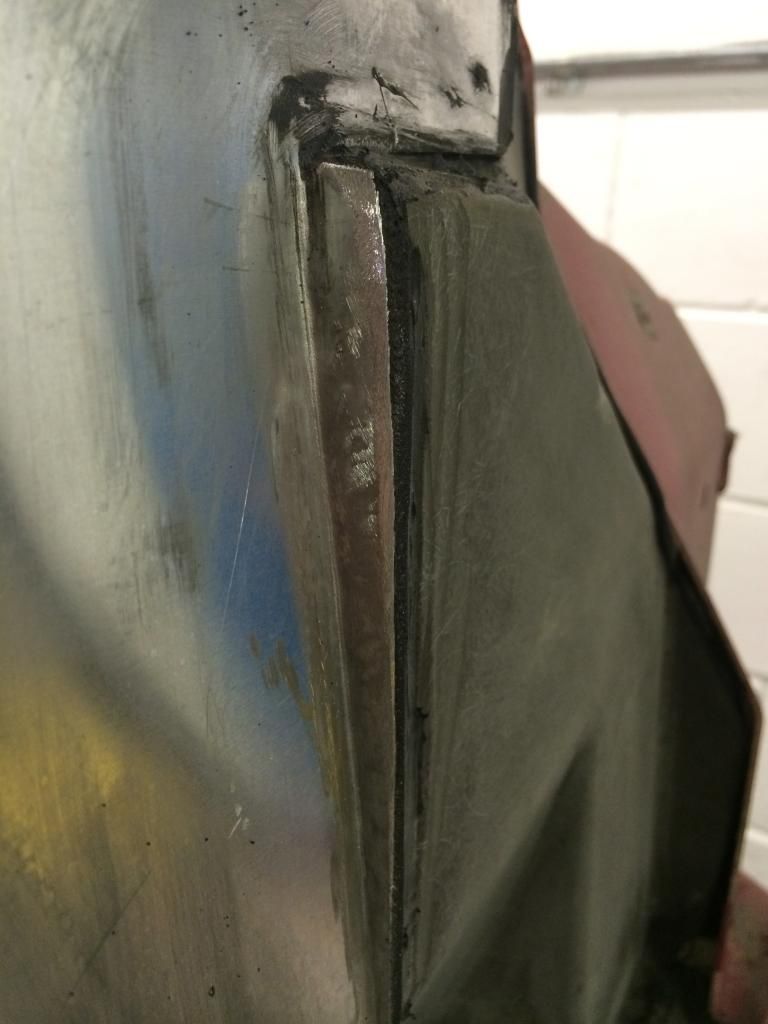
Added some extra sealant to smooth the transition from metal bulkhead to original


And the other side

View from behind

And tonight's job, is to make lots of templates ready to duplicate in the world's most expensive gold tinfoil ![]()
![]()
#485

Posted 01 July 2014 - 01:30 PM
In the meantime I've also sorted the front brakes.
Attached the calipers to the braided hoses, and added new crossover pipes too. AP 308mm discs attached to the new hubs also, just waiting on spacers for them (shame EP don't supply these as a matter of course considering just how little it would cost them...)

And in 'other news' some work to the engine has finally started (head off ready for flow work etc)


#486

Posted 01 July 2014 - 03:45 PM
#487

Posted 01 July 2014 - 04:00 PM
Nothing wrong with the oil filter design, it's the oil cooler sandwich plate which causes the problems
#488

Posted 04 July 2014 - 09:20 AM
Hi Graeme/et all,
I was looking at your installation pics of the EP bump steer arms in the pics below that you kindly posted (as I am thinking of buying them and installing them myself).
I have a question though, looking at the pic, if a car were running very low ground to chassis ride height, surely the comes a point where the wishbones are pointing upwards far enough that you cannot reduce the spacers between the steering arm and the ball joint? Any clarification would be helpful from someone who has installed this kit, thanks.

Edited by Nev, 04 July 2014 - 09:22 AM.
#489

Posted 04 July 2014 - 09:55 AM
Also, I can't see from the pic, but is the retaining nut on the bottom of the main downward point bolt a nylock or is it a castle nut with pin? I ask, as it's occurred to me that the plastic in a nylock could (possibly) get a bit hot from brake heat transfer?
Also, just to summarise/clarify my question/point in the post above this one, am I right in thinking that the maximum amount one can lower the ball joint is dictated by the depth of the "scallop" in the ends of the EP arms ? If so, surely this only allows a drop of (guessing from the pics) about 2 or 3 CM ?
Edited by Nev, 04 July 2014 - 10:04 AM.
#490

Posted 06 July 2014 - 03:05 PM
#491

Posted 06 July 2014 - 03:22 PM
#492

Posted 06 July 2014 - 03:39 PM
#493

Posted 06 July 2014 - 04:05 PM
#494

Posted 06 July 2014 - 04:23 PM
Ah, that confirms what I thought from looking at the pics, so a geo drop of more than 2.5 cm (approx.) can't be catered for by the EP bump steer kit. I had a preliminary inspection of the OEM steering arms today (without dismantling it all). Question: Is the centre hole that the upper wishbone ball-joint points down through a tapered one?Nev, the cut away on the EP steering arm mounts simply means that the geometry when dropped 2-3 cm is equivalent to the normal arms at normal ride height, maintaining the level of bump steer.
Edited by Nev, 06 July 2014 - 04:29 PM.
#495

Posted 06 July 2014 - 04:43 PM
#496

Posted 06 July 2014 - 05:09 PM
Come again? More to it than that..Nev, the cut away on the EP steering arm mounts simply means that the geometry when dropped 2-3 cm is equivalent to the normal arms at normal ride height, maintaining the level of bump steer. If you want to drop it more than that, the geometry changes so level of bump steer does, however because it's a eye joint it can accommodate a significant drop before reaching the limits of rotation
#497

Posted 08 July 2014 - 09:29 PM
Come again? More to it than that..Nev, the cut away on the EP steering arm mounts simply means that the geometry when dropped 2-3 cm is equivalent to the normal arms at normal ride height, maintaining the level of bump steer. If you want to drop it more than that, the geometry changes so level of bump steer does, however because it's a eye joint it can accommodate a significant drop before reaching the limits of rotation
Got time to explain then Simon?
#498

Posted 08 July 2014 - 09:36 PM
So anyway, managed to grab another couple of hours at the unit last week and this, and spent some time playing with the world's most expensive tinfoil. It is gold though, so I guess I can let DEI off...
No pressure not to fcuk this up then...

A bit crinkly and wrinkly, but it appears this is the finish you're going to get with this no matter how well you apply it. Plus much of it will be hidden by engine anwyay.

Both 'top' sides done

Just trying to work out the best way to get the lower panel to work properly with all the pipework etc there.
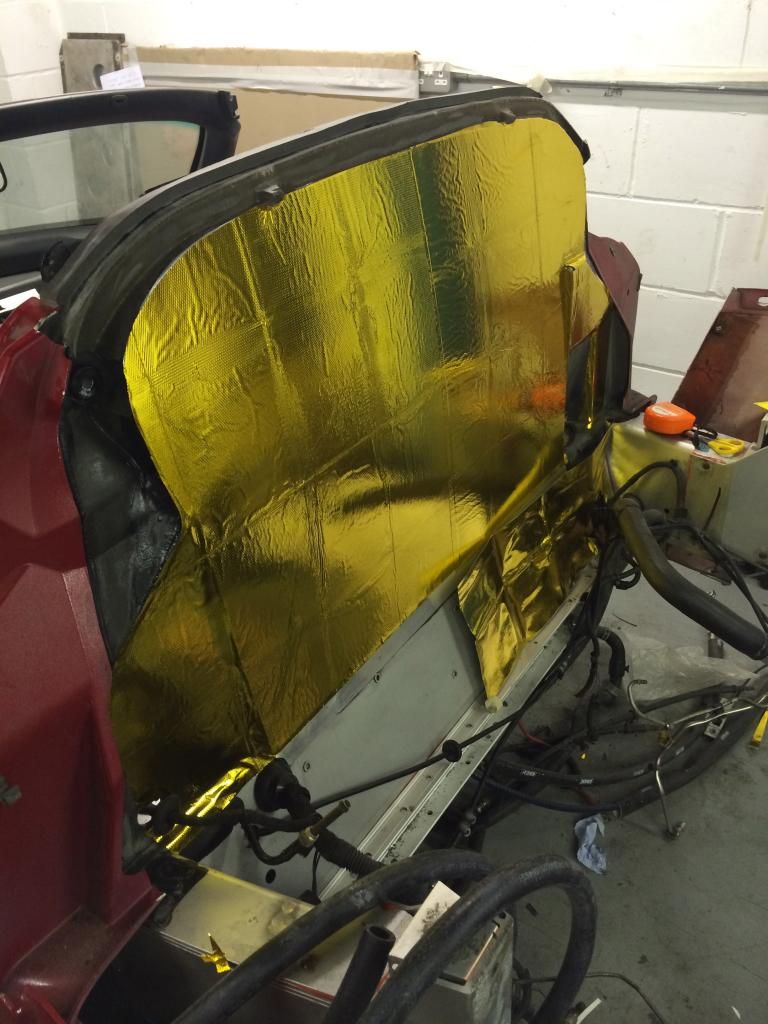
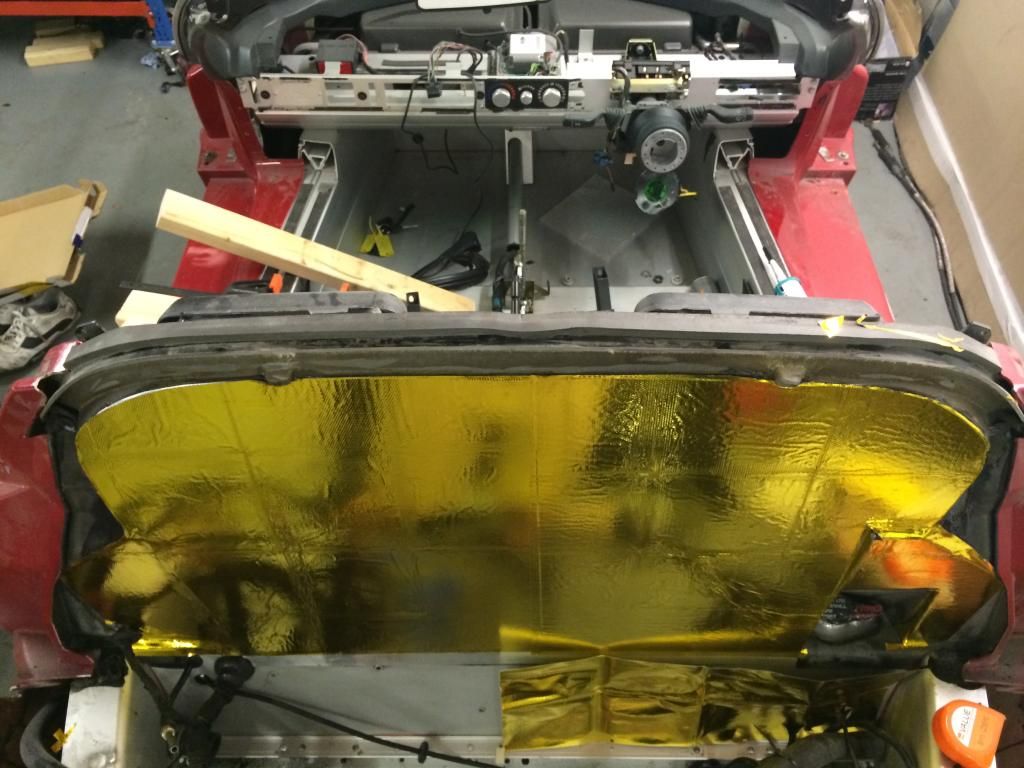
And last night, finishing it off


And that's it...
Now I'm waiting on Mr Bentley sorting the engine, and until then nothing can happen. Need it built up and dropped in on its mounts ASAP, so I can work on it before I go on holiday in August and have any chance of getting this fcuking thing finished before 2015. I've given him one Duncan to get it done, but we all know how well that usually ends ![]()
![]()
![]()
#499

Posted 08 July 2014 - 09:47 PM
No removable panel in the bulkhead for ease of supercharger removal/refitting? ![]()
#500

Posted 08 July 2014 - 09:50 PM
Also tagged with one or more of these keywords: saab, b207, supercharged, m62, ats dtc, composite worx, re-spray, coupe
The Market Place →
Car Parts For Sale →
Piper 2.5” Manifold And Miltek Mid Section For Z22seStarted by F757lkk@gmail.com , 30 Jun 2024 |
|

|
||
General Discussion →
Tuning & Modifications →
Supercharged Exhaust AdviceStarted by Donmizzi , 28 Jan 2021 |
|

|
||
General Discussion →
VX220 Discussion →
Looking To Join The Sc Club - Advice Please...Started by JamieShand , 06 Sep 2019 |
|
|
||
General Discussion →
VX220 Discussion →
Ebay Coupe Rear KitStarted by gazbucko , 23 Apr 2019 |
|

|
||
The Market Place →
Car Parts Wanted →
Coupe Rear Kit Wanted!Started by gazbucko , 23 Apr 2019 |
|

|
1 user(s) are reading this topic
0 members, 1 guests, 0 anonymous users


