Jump to content


Photo

Tip's Supercharged Adventure

supercharger project diy

  • Please log in to reply
176 replies to this topic

#1 TIP

TIP

    Need to get Out More

  • PipPipPipPip
  • 959 posts
  • Gender:Male
  • Location:kent
  • Interests:cars. sci-fi, rum, bass, sheds, making stuff, fixing other stuff (mainly plastic vauxhalls) and other geeky bloke stuff

Posted 28 July 2014 - 11:19 PM

I have finally made a start on my conversion (well at least have started buying bits). So I apologies in advance for the steady stream of inevitably daft and obvious questions.


I decided in mid-2008 that I wanted an Elise but after much research I found that the VX offered much more for much less.  I lurked on .org for a few months and was finally tempted by this advert.


http://www.vx220.org...h=1#entry783451


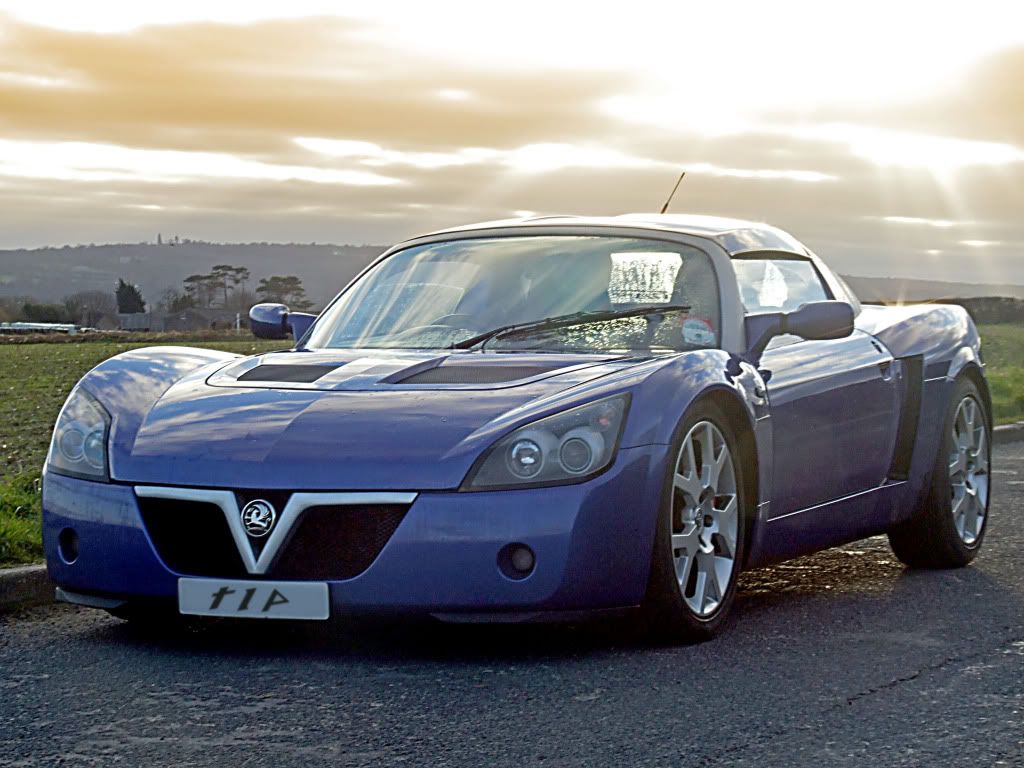
I ignored all the buying guides and brought the first one I looked at. And so “Vixen” joined the family in November 2008.


Posted Image

First photo the day I picked her up.


Since then she  performed impeccably as my daily driver until last year when I relented and added a shed to the collection, mainly because the mileage had crept up to 110k and my commute had also got longer and 70 miles a day just was not that much fun in the winter.


I really have run her on a fiver for the last 6 years and bar consumables the only mods I made were a set of TD's and some graphite paint. This year I finally found  some spare cash and with some creative man maths and a very understanding wife, I have been given 'permission' to give Vix the TLC she deserves.


 I realise that at 110k miles the engine is getting a little tired but I am going with the idea of SC her and if it proves to much I will pick up a second hand lower mileage engine and perform a transplant . 


Posted Image

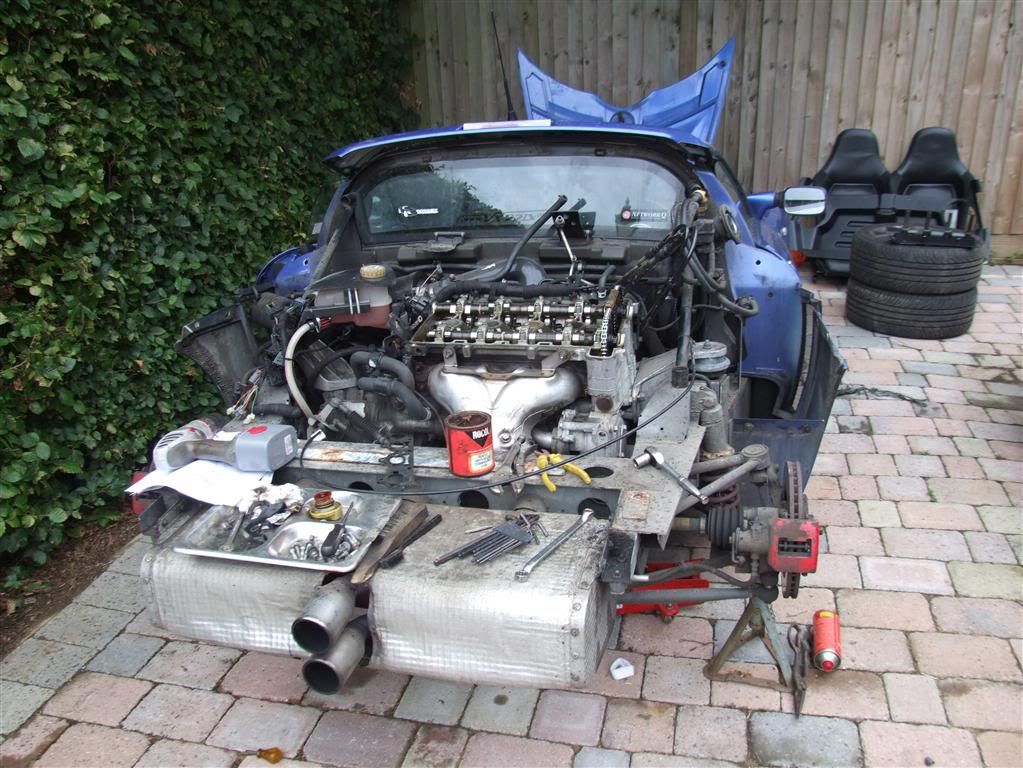
I managed to change the timing chain so I'm optimistic that my spannering skills should be up to speed . 


I will be going down the Courtney's mapping route as quite frankly I cant see further Mods happening any time soon. 


So on to the project.


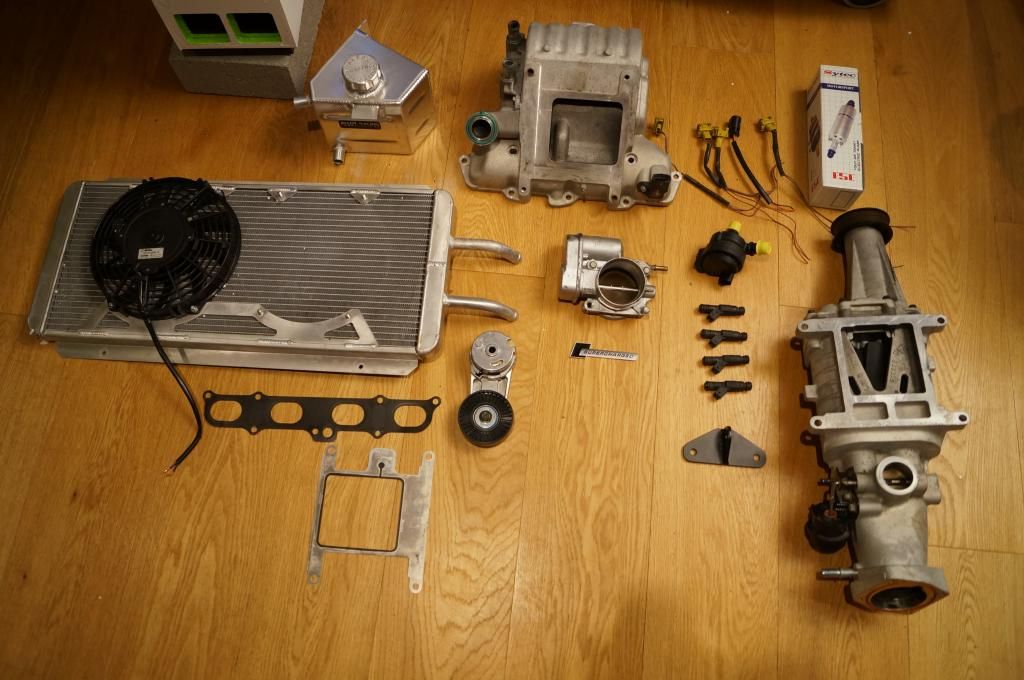
So far I have the following bits ready to go 

Posted Image


first question someone can help me with , the eagle eyed among you will notice that the charge cooler only has 1 fan. :angry:  The seller assured me that he used the existing OEM rad fan , but I cant help thinking he is telling porky pies as surely the OEM fan is larger than the spal fans fitted , and if so it means I have to source a new fan. Does £100 sound around the right money or does someone have a cheaper source ??


http://www.ebay.com/...S-/271139768022


as well as the above bits the following should arrive from Courtney's tomorrow so hopefully I can get started this week. could the collective cast their eye over the following list and point out any major omissions.


[font="arial, sans-serif;font-size:13px;"]Injector Plugs, Boots & Pins 2.2 S/C[/font]

[font="arial, sans-serif;font-size:13px;"]Inlet Manifold Alignment Bung 2.2 S/C[/font]

[font="arial, sans-serif;font-size:13px;"]Inlet Pipe Silicone Black 2.2 S/C VX220[/font]

[font="arial, sans-serif;font-size:13px;"]Alloy Inlet Pipe to Cone Filter[/font]

[font="arial, sans-serif;font-size:13px;"]Air Filter Cone Type 2.2 S/C[/font]

[font="arial, sans-serif;font-size:13px;"]Belt 2.2 S/C Stage 2 for OE Pulley[/font]

[font="arial, sans-serif;font-size:13px;"]Blank 2.2 S/C Map Sensor[/font]

[font="arial, sans-serif;font-size:13px;"]Blank Alloy 19mm[/font]

[font="arial, sans-serif;font-size:13px;"]Alternator Bolts and Washers 2.2 S/C (Set of 2)[/font]

[font="arial, sans-serif;font-size:13px;"]Inlet Manifold to Head Bolts and Washers (Set of 7)[/font]

[font="arial, sans-serif;font-size:13px;"]S/C to Inlet Manifold Bolts and Washers (Set of 4)[/font]

[font="arial, sans-serif;font-size:13px;"]Breather Filter[/font]

[font="arial, sans-serif;font-size:13px;"]Dipstick Bracket 2.2 S/C[/font]

[font="arial, sans-serif;font-size:13px;"]Elbow 90 Degree Silicone Water Hose Black[/font]

[font="arial, sans-serif;font-size:13px;"]Grommet 30mm OD x2[/font]

[font="arial, sans-serif;font-size:13px;"]Hose Clip 20-32 Stainless W2 x8[/font]

[font="arial, sans-serif;font-size:13px;"]Idle Pulley, Bracket and Bolt 2.2 S/C[/font]

[font="arial, sans-serif;font-size:13px;"]Map Sensor 2.2 S/C Stage 1 and 2[/font]

[font="arial, sans-serif;font-size:13px;"]Relay 4 Pin Fused 15 Amp[/font]

[font="arial, sans-serif;font-size:13px;"]Top Hose 2.2 S/C VX220/Speedster[/font]

[font="arial, sans-serif;font-size:13px;"]Water Hose Rubber Chargecooler System x 10m[/font]  


I know I could of saved a few quid sourcing from else where but convenience ruled .


100amp alternator from S-Works (thanks) and various odds and sods from car builder solutions 


really looking forward to the next couple of weeks plenty of challenges and plenty of questions , wish me luck :tt:


Tim  


#2 CocoPops

CocoPops

    SuperCharged Karting Super Hero

  • 17,181 posts
  • Gender:Male
  • Location:Thatcham, Berks

Posted 29 July 2014 - 06:13 AM

Graeme lambert is running one fan on his radiator/charge cooler combo. Other rub two. Theory says one fan is capable and allows better airflow at speed. So I'm sure it's an "issue" as such.

#3 PHB1969

PHB1969

    Premium Member

  • PipPipPipPip
  • 946 posts
  • Gender:Male
  • Location:Sinderby North Yorkshire

Posted 29 July 2014 - 07:03 AM

Unless I've missed them..... Charge cooler header tank Charge cooler pump Uprated fuel pump EDIT....looked at the list not the picture!! :(

Edited by PHB1969, 29 July 2014 - 07:05 AM.


#4 Graeme Lambert

Graeme Lambert

    Scary Internerd

  • PipPipPipPipPipPip
  • 5,543 posts
  • Gender:Male
  • Location:Steeple Claydon, Buckinghamshire

Posted 29 July 2014 - 07:17 AM

Graeme lambert is running one fan on his radiator/charge cooler combo. Other rub two. Theory says one fan is capable and allows better airflow at speed. So I'm sure it's an "issue" as such.

Yup and I'm not the only one now - lee is the same

#5 CocoPops

CocoPops

    SuperCharged Karting Super Hero

  • 17,181 posts
  • Gender:Male
  • Location:Thatcham, Berks

Posted 29 July 2014 - 07:32 AM

I prefer 2 fans, as I spend more time on the road than on track, therefore I like the extra airflow that can be manually controlled. I don't think either is a "bad" solution, just the merits of one are more suited to certain applications I guess.

#6 CHILL Gone DUTCH

CHILL Gone DUTCH

    I ADMIT BATMAN THINKS HE IS QUICKER THAN ME

  • PipPipPipPipPipPipPipPip
  • 13,727 posts
  • Gender:Male
  • Location:UK

Posted 29 July 2014 - 07:44 AM

Next time my clam comes off I'm removing one if my fans

#7 TIP

TIP

    Need to get Out More

  • PipPipPipPip
  • 959 posts
  • Gender:Male
  • Location:kent
  • Interests:cars. sci-fi, rum, bass, sheds, making stuff, fixing other stuff (mainly plastic vauxhalls) and other geeky bloke stuff

Posted 29 July 2014 - 08:05 AM

this will most commonly be used on the road so I think I would prefer two fans that I can manually switch on.


is my guess that the OEM rad fan is much bigger correct?, as if I need to get a second fan I would like to get it ordered .


or CHILL do you fancy taking your clam off this week  ;)


#8 CHILL Gone DUTCH

CHILL Gone DUTCH

    I ADMIT BATMAN THINKS HE IS QUICKER THAN ME

  • PipPipPipPipPipPipPipPip
  • 13,727 posts
  • Gender:Male
  • Location:UK

Posted 29 July 2014 - 08:08 AM

No Lol

Edited by CHILL Gone DUTCH, 29 July 2014 - 08:09 AM.


#9 Captain Vimes

Captain Vimes

    Scary Internerd

  • PipPipPipPipPipPip
  • 2,755 posts
  • Gender:Male
  • Location:South East
  • Interests:Motorbikes, VX220, Procrastination

Posted 29 July 2014 - 09:04 AM

I'm only running one fan. Have the second brand new spall fan from pro-alloy sitting in my garage doing nothing.... I'd be interested in turning it into cash....

#10 TIP

TIP

    Need to get Out More

  • PipPipPipPip
  • 959 posts
  • Gender:Male
  • Location:kent
  • Interests:cars. sci-fi, rum, bass, sheds, making stuff, fixing other stuff (mainly plastic vauxhalls) and other geeky bloke stuff

Posted 29 July 2014 - 09:24 AM

I'm only running one fan. Have the second brand new spall fan from pro-alloy sitting in my garage doing nothing.... I'd be interested in turning it into cash....


I love .org


just wish I had checked here before ordering one from demon tweeks, I have requested to cancel the order but with distance selling regs I cant see a problem with that.


PM sent 


#11 TIP

TIP

    Need to get Out More

  • PipPipPipPip
  • 959 posts
  • Gender:Male
  • Location:kent
  • Interests:cars. sci-fi, rum, bass, sheds, making stuff, fixing other stuff (mainly plastic vauxhalls) and other geeky bloke stuff

Posted 30 July 2014 - 09:31 PM

a huge thank you to Captain Vimes for hand delivering his spare fan and for letting me poke about in his engine bay, it really was very useful to get some idea of what I am about to attempt.


I am very tempted by the Dutch software now however...... 


off I go to reread the OBD tuner threads......


#12 Captain Vimes

Captain Vimes

    Scary Internerd

  • PipPipPipPipPipPip
  • 2,755 posts
  • Gender:Male
  • Location:South East
  • Interests:Motorbikes, VX220, Procrastination

Posted 30 July 2014 - 10:22 PM

Good to meet you this evening and glad I could be of some help. Shame I couldn't take you out for a spin but you'll have your own sc vx to play with soon. Good luck with the conversion next week. Sure you'll get it done in no time.

#13 J13ME

J13ME

    Super Member

  • PipPip
  • 260 posts
  • Gender:Male
  • Location:East Anglia
  • Interests:Cars, bikes, cars that are faster than bikes!

Posted 31 July 2014 - 09:41 AM

Will be keeping an eye in this. I bought my car Courtenay charged so don't have much idea where anything is which isn't good. So lots of pics please :D

#14 XXX

XXX

    Invisible ex-VX owner

  • PipPipPipPipPipPip
  • 4,471 posts
  • Gender:Male
  • Location:South Croydon, Surrey

Posted 31 July 2014 - 09:24 PM

Good to see that your VX is still going strong! Don't spot you in the mornings anymore now Hollie left LB. You still there?


Sold my Blue NA last year :( owing to lack of use....! 110k? Give the guy a medal...... lol


#15 TIP

TIP

    Need to get Out More

  • PipPipPipPip
  • 959 posts
  • Gender:Male
  • Location:kent
  • Interests:cars. sci-fi, rum, bass, sheds, making stuff, fixing other stuff (mainly plastic vauxhalls) and other geeky bloke stuff

Posted 02 August 2014 - 10:30 AM

Good to see that your VX is still going strong! Don't spot you in the mornings anymore now Hollie left LB. You still there?


Sold my Blue NA last year :( owing to lack of use....! 110k? Give the guy a medal...... lol


Still at lpbs , been 7 years now!  :blink: ...


mines does not get used as much as it used to, its too easy to jump in the shed, hence I'm SC'ing her to make her more exciting again.


also considered selling but a combination of the following factors convinced me to keep her.  She's worth next to FA, I've got the space to keep a spare car and even after 8 years I still really like the looks and get that warm/smug  "I own that" feeling when I park up and walk away.


Edited by TIP, 02 August 2014 - 10:33 AM.


#16 TIP

TIP

    Need to get Out More

  • PipPipPipPip
  • 959 posts
  • Gender:Male
  • Location:kent
  • Interests:cars. sci-fi, rum, bass, sheds, making stuff, fixing other stuff (mainly plastic vauxhalls) and other geeky bloke stuff

Posted 04 August 2014 - 08:11 PM

DAY 1 


Front clam off, pretty much every arch liner fixing had to be dremmelled!! also one of the lower door opening bolts was solid (dremmelled!) I guess drill it out and fit a new rivnut? need to buy some fibre glass to repair the number plate plinth , its a bit cracked due to a suicidal giant rabbit from a few years back.


Rads bolted together and settled into the surround, wanted to space them out a bit so bodged some spacers from washers and some M8 nuts. All C clip fitting to the rad surround were solid (dremmel)  drilled  a new central hole for the fan wires. Plan to add some foam to the surround before bolting up because there are big gaps. I carefully measured and planned where to drill the holes for new CC inlet/outlet and then drilled them exactly 10 mm to high ???,  dremmel sanding drum solved that (the surround is made from very soft cheese)


CC pipes run through sill. used a length of water pipe and just jammed it in from the back (fnar fnar) attached hoses with cable tie and gave it a gentle tug ( innuendo over, promise) much much easier than I expected... 


ECU removed . drilling out the shear bolt was awkward ,  got to decide who to send it to... CS or OBD????  leaning toward OBD (thanks Kev  :rolleyes: )


I need to do a big shop at Car builder solutions (luckily just up the road) for new fixings plus some other odds and sods I'm bound to have forgotten.


looking forward to tomorrow 


Todays Lessons 

1. Dremmelling is fun and lots quicker than holding a bare hacksaw blade wrapped in a rag to try a cut through rusty bloody C clips.

2. Measure again ( I know this , I measured twice planned to cut once, fecked it up,  really measure again!)

3. Take more photos , make time for photos. had camera there but was so busy forgot to document my ineptitude.

4. the position of the screw into the C clip behind the ABS pipework is not designed by a rational human. This will be left out on reassembly, life is too short. 


Edited by TIP, 04 August 2014 - 08:17 PM.


#17 Captain Vimes

Captain Vimes

    Scary Internerd

  • PipPipPipPipPipPip
  • 2,755 posts
  • Gender:Male
  • Location:South East
  • Interests:Motorbikes, VX220, Procrastination

Posted 04 August 2014 - 09:15 PM

Sounds like great progress already. Pleased you had no trouble with the cc pipes- we struggled with mine for some reason. I bought a box of u clips to refit the arch liners but made the mistake of buying from Halfords and they're also made of cheese but do the job better than cable ties (which snapped on track..) Keep us updated with progress and look forward to pics. If you want help deciding on software then come over to Essex and get a passenger ride in mine on Dutch and stuwys on cs map although the final decider for me was the thought of having to waste a day driving to cs and back.

#18 TIP

TIP

    Need to get Out More

  • PipPipPipPip
  • 959 posts
  • Gender:Male
  • Location:kent
  • Interests:cars. sci-fi, rum, bass, sheds, making stuff, fixing other stuff (mainly plastic vauxhalls) and other geeky bloke stuff

Posted 07 August 2014 - 09:58 AM

DAY 2 and 3


REAR Clam off 

since I had already had the rear off a couple of years ago to do the chain this was easier. a few wheel arch liner bolts had to face the dremmel but on the whole a easy enough job , except the 8mm nuts under the roll bar cover.


Ordered the following from speedy fasteners Monday night and arrived Wednesday morning so started bolting the rad surround back together.

http://www.ebay.co.u...=STRK:MEBIDX:IT


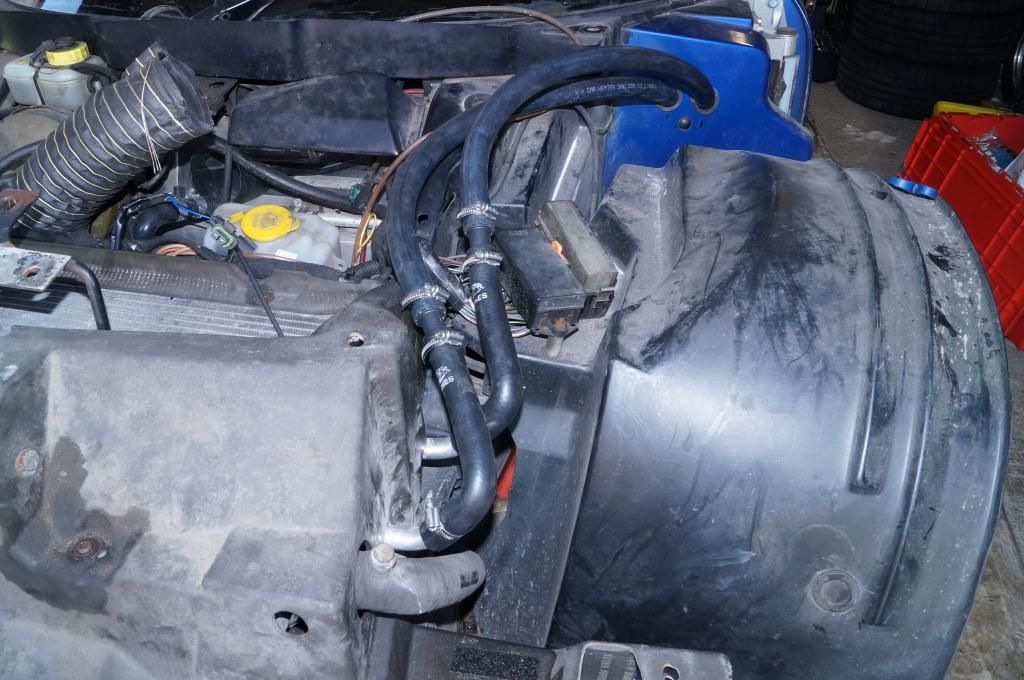
Posted Image

was not happy with he way the pipes would lay so added a couple of 90 degree bends, all seems to lay a bit neater now just want to add a couple of P clips.


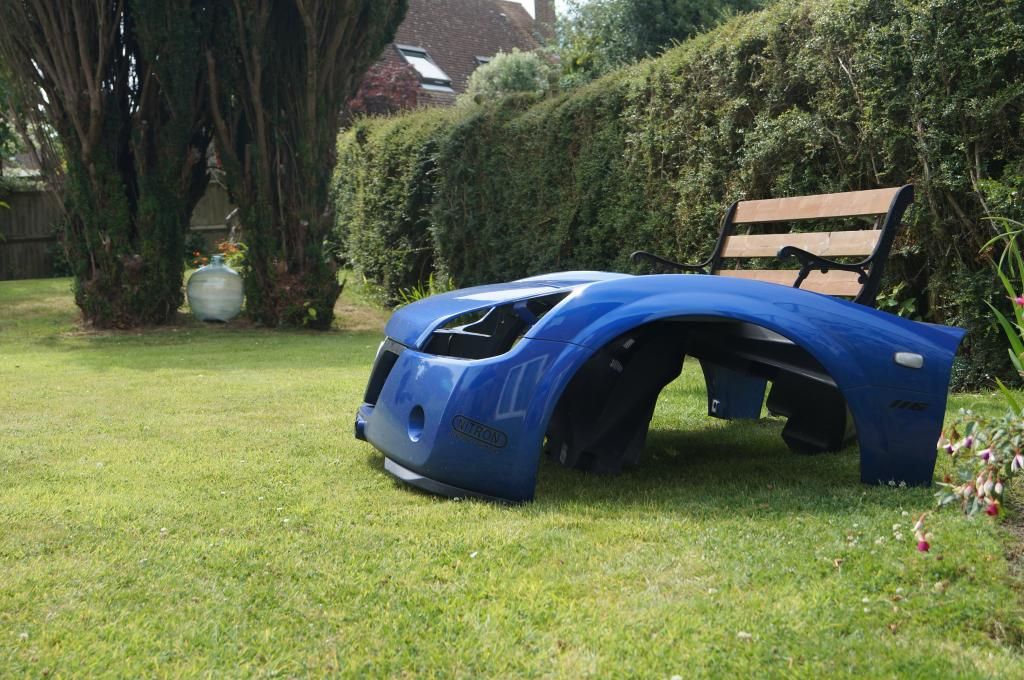
Posted Image

random pic of the front clam?


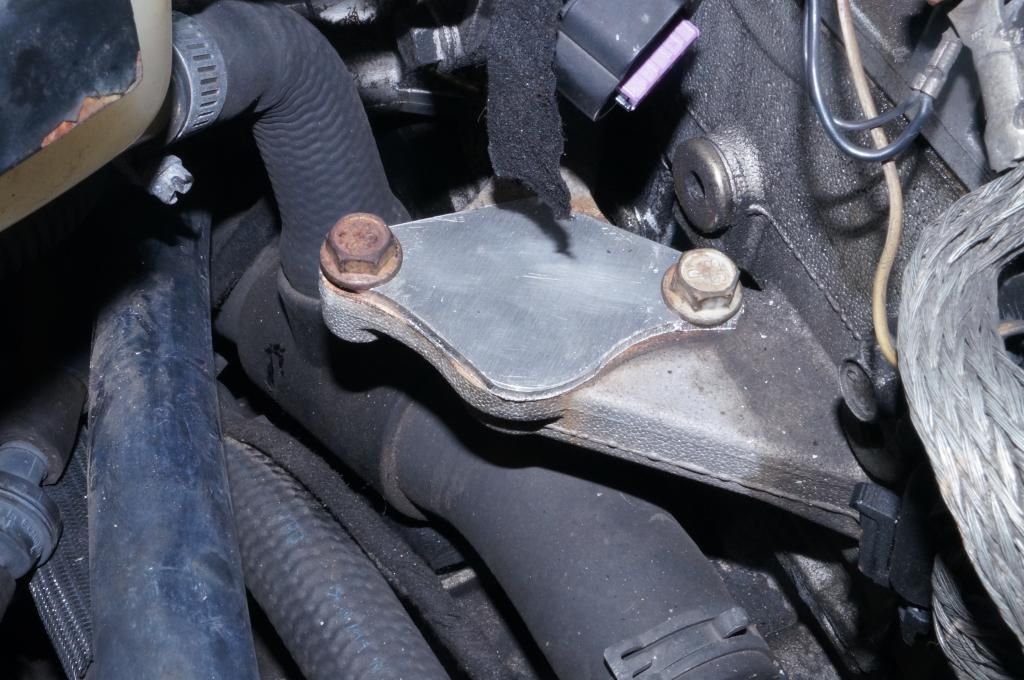
Posted Image

blanking plate made up 


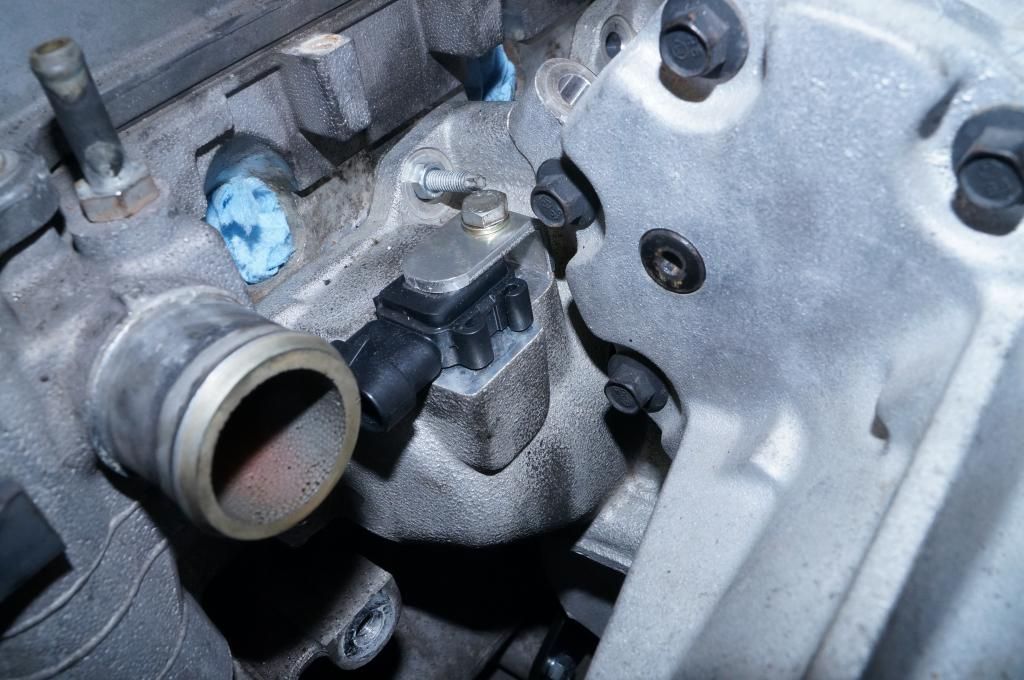
Posted Image

bracket made for MAP sensor, used the "joe Mod" to thicken up the grommet. NOt sure which way the sensor should sit to make pluging in easier?


Posted Image


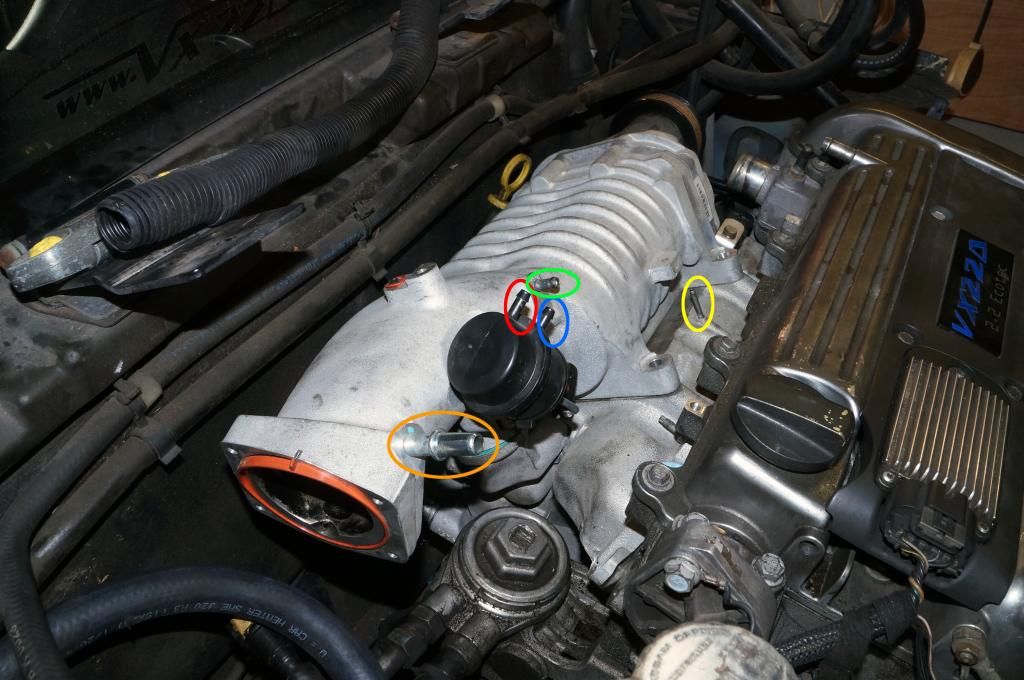
manifold and supercharger test fitted.

Bit confused with the plumbing of the vents etc.

can anyone point me in the right direction as to what connects to what 

Orange - ?

Red - ?

Blue - ?

Green - ?

Yellow - ?


#19 Steve.i.am

Steve.i.am

    Need to get Out More

  • PipPipPipPip
  • 990 posts
  • Gender:Male
  • Location:Sussex
  • Interests:Bends

Posted 07 August 2014 - 10:16 AM

Orange - brake servo vacuum Red left open Blue to green Yellow - fpr - goes to fuel rail

#20 smiley

smiley

    Thetan level 15

  • PipPipPipPipPipPipPip
  • 10,427 posts
  • Gender:Male
  • Location:Netherlands

Posted 07 August 2014 - 10:23 AM

Red left open Blue to green  

I think you mean red to green , and blue left open.


Also tagged with one or more of these keywords: supercharger, project, diy

1 user(s) are reading this topic

0 members, 1 guests, 0 anonymous users