Progress has been zero the past couple of weekss, but made some small steps today. Took out the drivers side driveshaft, and replaced the oil seal, and properly fitted my oil breather pipe, after various failed attempts with the clam on. Driveshaft is getting in the way abit, so pulling it out makes things easier moving around the car. Got a low mileage one to put on, to match the one i replaced last August of the same pair. Hoping to start making some progress with re-assembling the heater box that iv got as a replacement from Vocky, going to be sealing it all up and making some adjustments.

Daryl's Plastic Box Of Joy
Started by
D-DAWG83
, Oct 06 2015 09:21 AM
183 replies to this topic
#81

D-DAWG83
-
-

- 1,276 posts
Billy No Mates
- Gender:Male
- Location:Milton Keynes
- Interests:Cars, motorsport, music and films
Posted 15 January 2016 - 04:36 PM
#82
D-DAWG83
-
-
- 1,276 posts
Billy No Mates
- Gender:Male
- Location:Milton Keynes
- Interests:Cars, motorsport, music and films
Posted 02 February 2016 - 06:11 PM
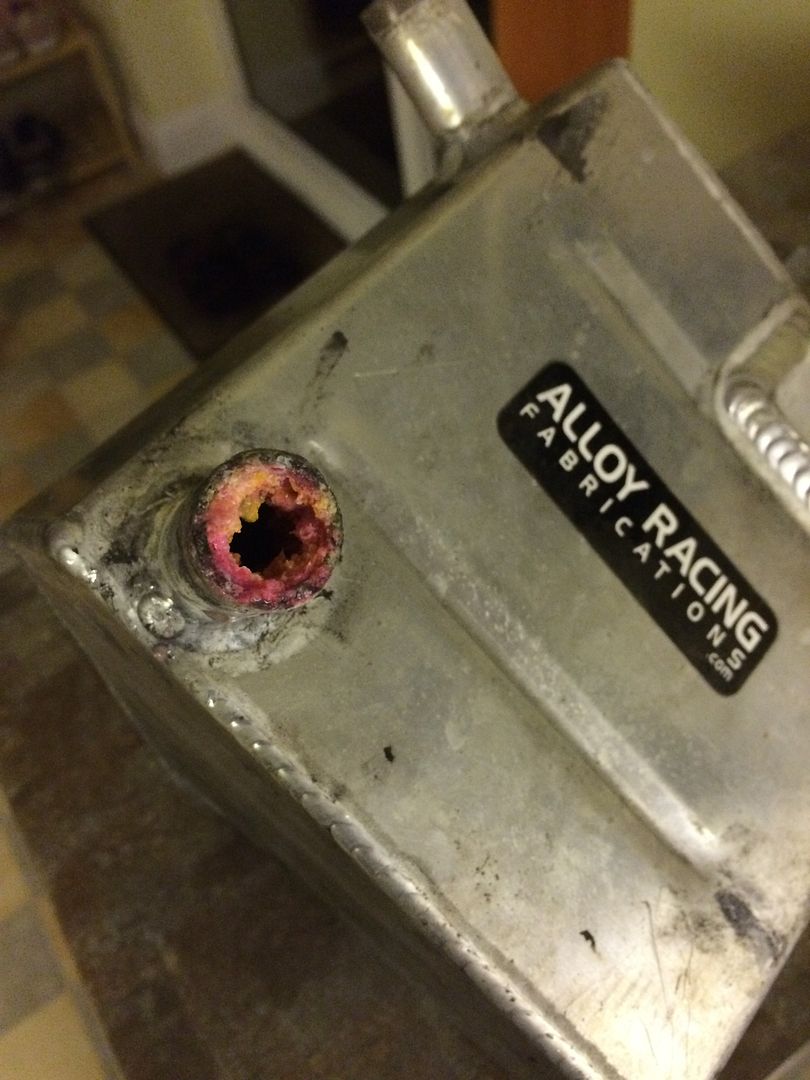
Slight but steady progress. Pulled off the CC tank, and glad i did as it had lots of crystalised coolant in the pipe. Will probably be painting it black for a while, see how i like it.
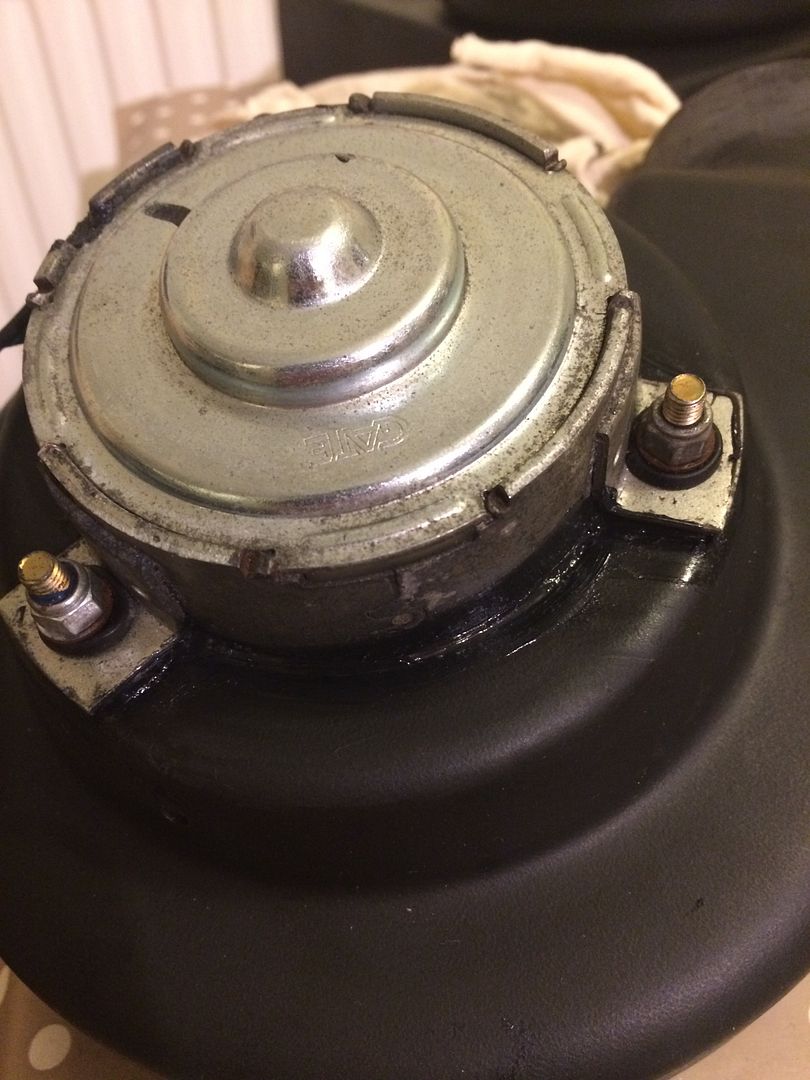
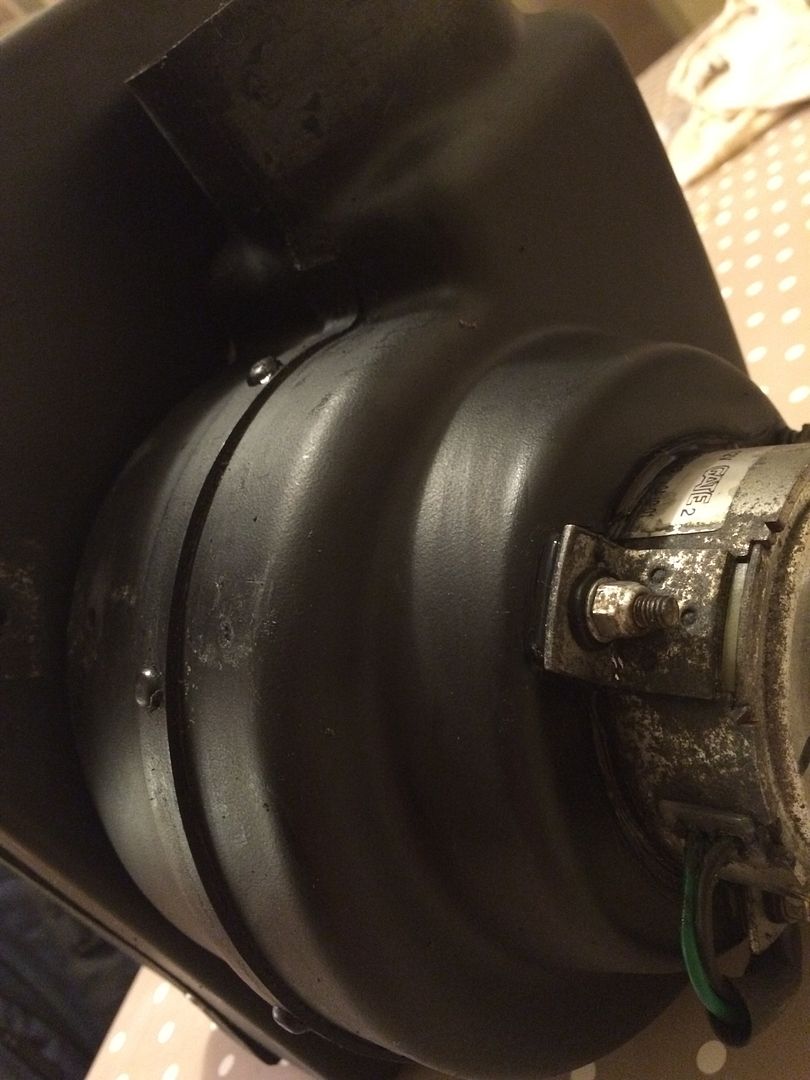
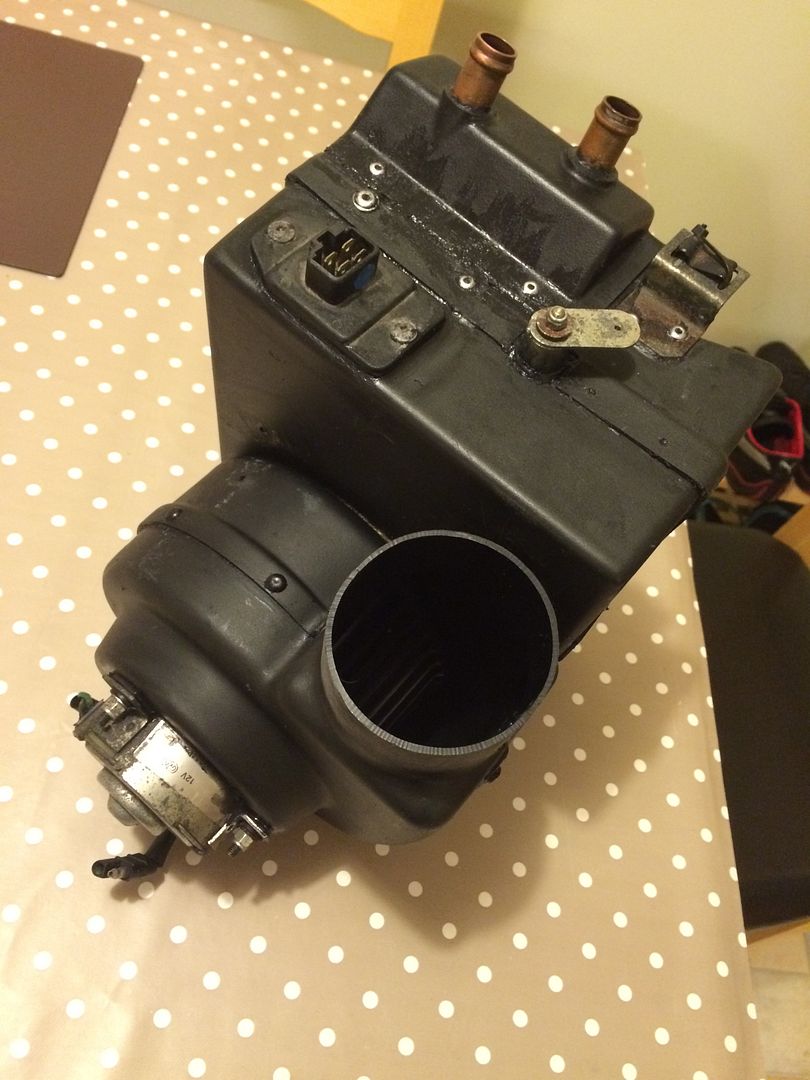
Also got my act together and got the heater box reassembled. Extended the foam a little on the flap, so it sealed all the way around. Still has free movement, but fits alot better now. Went around every gap with silicone as well as sealing all the rivet holes etc. Hopefully it will work a treat.

Original flap on the right, refoamed one on the left.
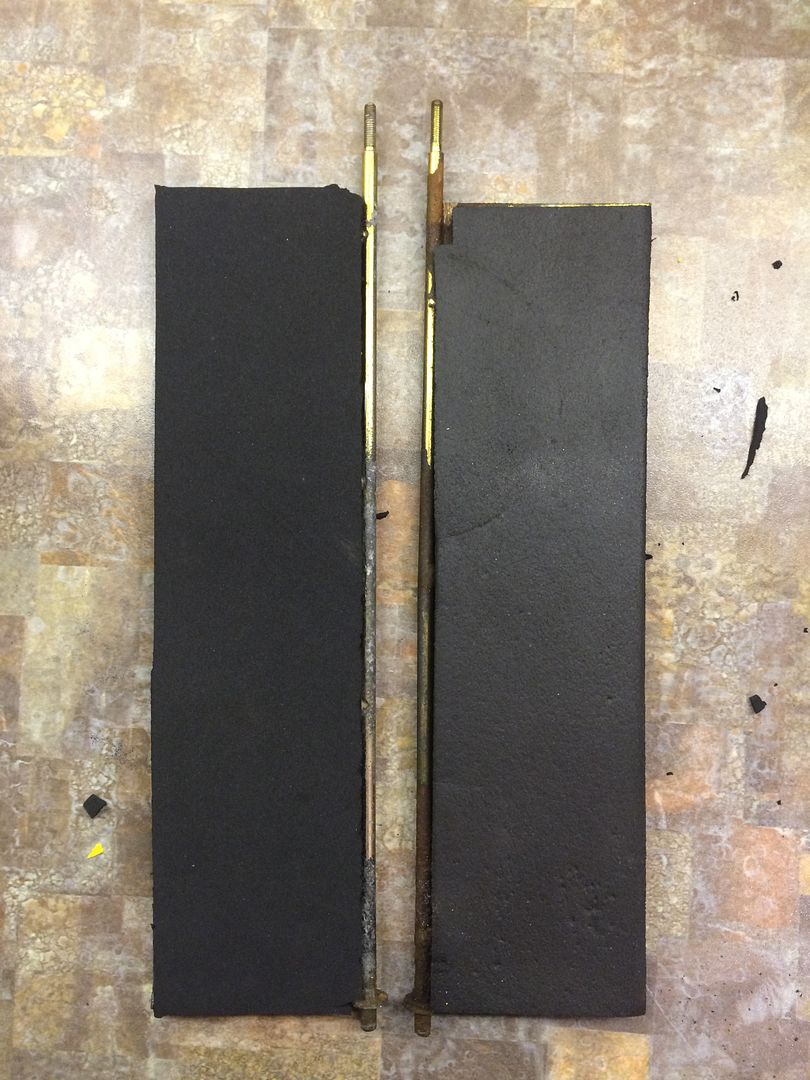
Doing the same thing with the junction box under the screen also, so that has a similar issue with lots of gaps, though as it does not get so hot there, the distortion is not as bad.
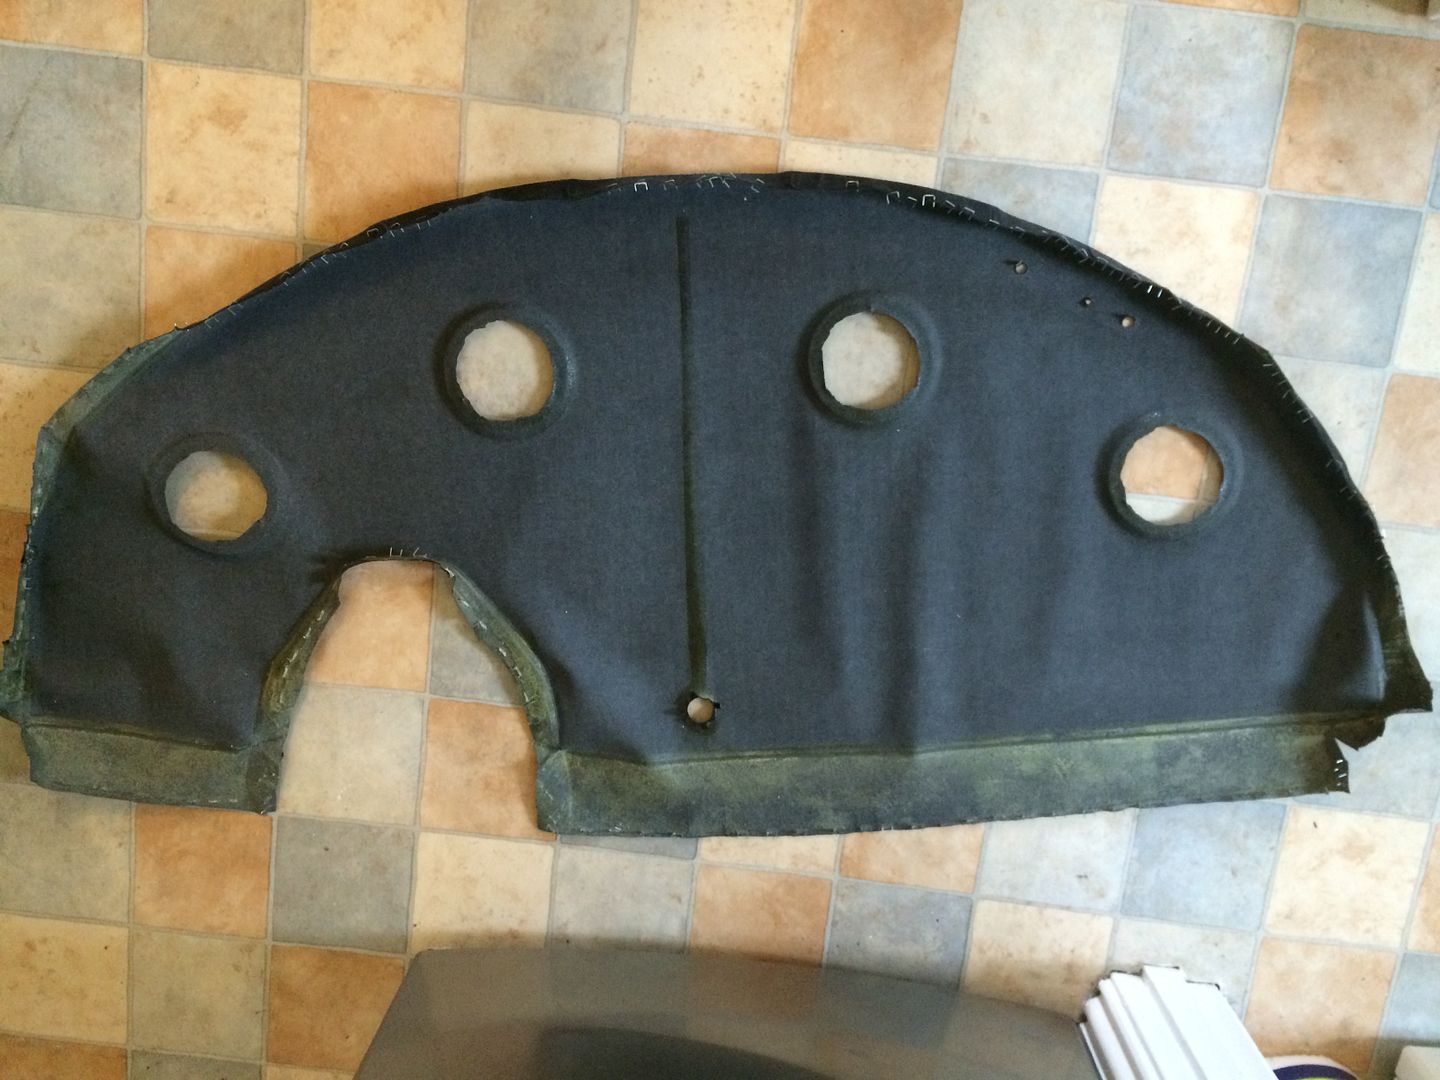
While the dash was out, i thought id have a go at retrimming it myself, as its the less expensive way to start with. The covering that was on it bubbled loads in the heat, and it annoyed me, so ripped it off. The chassis mounting bracket came away in 2 bits as well, so i need to try to source another one from somewhere.
Covering was only stuck arounf the edges, and in the groove, which explains the bubbling. Thinking il get a new covering now i have a template, and glue it down properly.

Also got my act together and got the heater box reassembled. Extended the foam a little on the flap, so it sealed all the way around. Still has free movement, but fits alot better now. Went around every gap with silicone as well as sealing all the rivet holes etc. Hopefully it will work a treat.


Original flap on the right, refoamed one on the left.

Doing the same thing with the junction box under the screen also, so that has a similar issue with lots of gaps, though as it does not get so hot there, the distortion is not as bad.
While the dash was out, i thought id have a go at retrimming it myself, as its the less expensive way to start with. The covering that was on it bubbled loads in the heat, and it annoyed me, so ripped it off. The chassis mounting bracket came away in 2 bits as well, so i need to try to source another one from somewhere.
Covering was only stuck arounf the edges, and in the groove, which explains the bubbling. Thinking il get a new covering now i have a template, and glue it down properly.

#83
D-DAWG83
-
-
- 1,276 posts
Billy No Mates
- Gender:Male
- Location:Milton Keynes
- Interests:Cars, motorsport, music and films
Posted 03 February 2016 - 02:49 PM
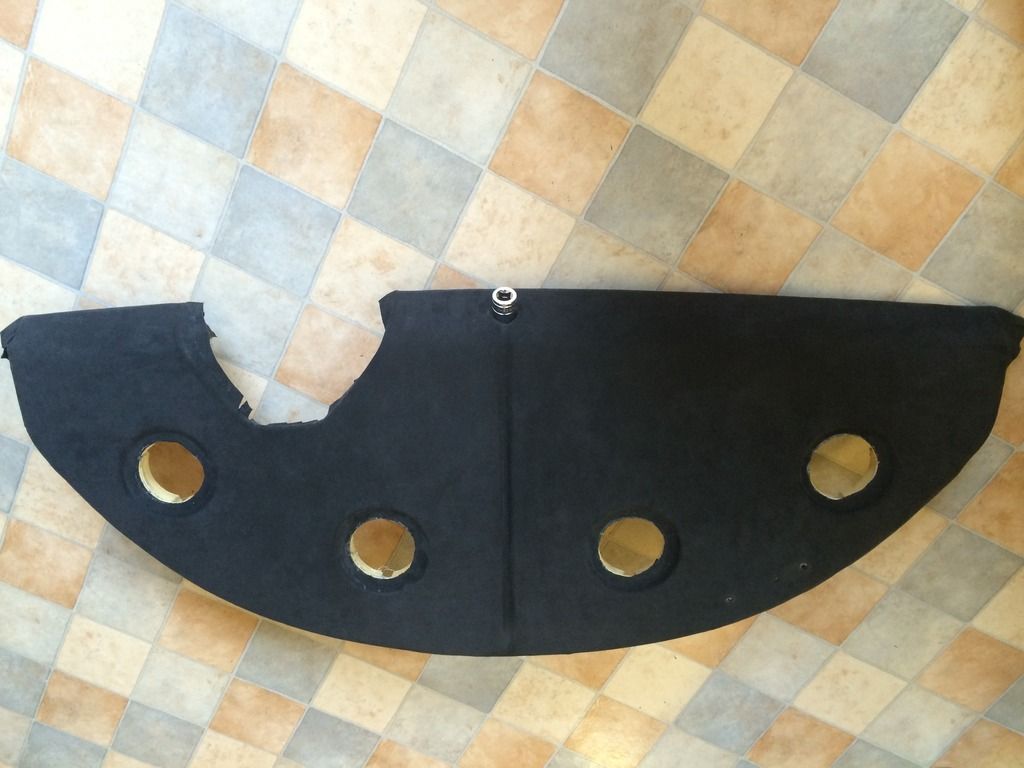
Well, i thought id have a go at reapplying the covering on the dash this morning. I think its come out pretty well. Getting the central groove stuck was a pain, but hopefully itl hold out. Atleast it shouldnt bubble in the heat now.
Just got to do the edges now, but thought id wait to see how the starter button area and groove settle first. Spot the novel device used to keep the material in the starter recess....
Just got to do the edges now, but thought id wait to see how the starter button area and groove settle first. Spot the novel device used to keep the material in the starter recess....

#84
Wreelybro
-

-
- 1,641 posts
Billy No Mates
- Gender:Male
- Location:Leighton Buzzard
-
Interests:Racing WRC/F1/Miglia/Time Attack/MotoGp etc...
360 Gaming 10-Pin Bowling.
Posted 03 February 2016 - 03:50 PM
Getting there matey!! Let me know if need some help in the next few weeks..
#85
D-DAWG83
-
-
- 1,276 posts
Billy No Mates
- Gender:Male
- Location:Milton Keynes
- Interests:Cars, motorsport, music and films
Posted 03 February 2016 - 03:53 PM
Cheers Matt. Hopefully will start to get things put back together. Just debating if i should remove the rear subframe, and clean up the usual suspect areas, seeing as it can be done fairly quickly. Will save me doing it at the end of the year. Will get the other bits sorted, and see where i am time wise
#86
Wreelybro
-
-
- 1,641 posts
Billy No Mates
- Gender:Male
- Location:Leighton Buzzard
-
Interests:Racing WRC/F1/Miglia/Time Attack/MotoGp etc...
360 Gaming 10-Pin Bowling.
Posted 03 February 2016 - 04:06 PM
Cheers Matt. Hopefully will start to get things put back together. Just debating if i should remove the rear subframe, and clean up the usual suspect areas, seeing as it can be done fairly quickly. Will save me doing it at the end of the year. Will get the other bits sorted, and see where i am time wise
Probably worth doing tbh as it's in bits already!
#87
Wreelybro
-
-
- 1,641 posts
Billy No Mates
- Gender:Male
- Location:Leighton Buzzard
-
Interests:Racing WRC/F1/Miglia/Time Attack/MotoGp etc...
360 Gaming 10-Pin Bowling.
Posted 03 February 2016 - 04:09 PM
Get yourself a can of [color=rgb(40,40,40);font-family:helvetica, arial, sans-serif;]Duralac too![/color]
#88
D-DAWG83
-
-
- 1,276 posts
Billy No Mates
- Gender:Male
- Location:Milton Keynes
- Interests:Cars, motorsport, music and films
Posted 03 February 2016 - 04:26 PM
Already got some in anticipation
#89
D-DAWG83
-
-
- 1,276 posts
Billy No Mates
- Gender:Male
- Location:Milton Keynes
- Interests:Cars, motorsport, music and films
Posted 10 February 2016 - 12:47 AM
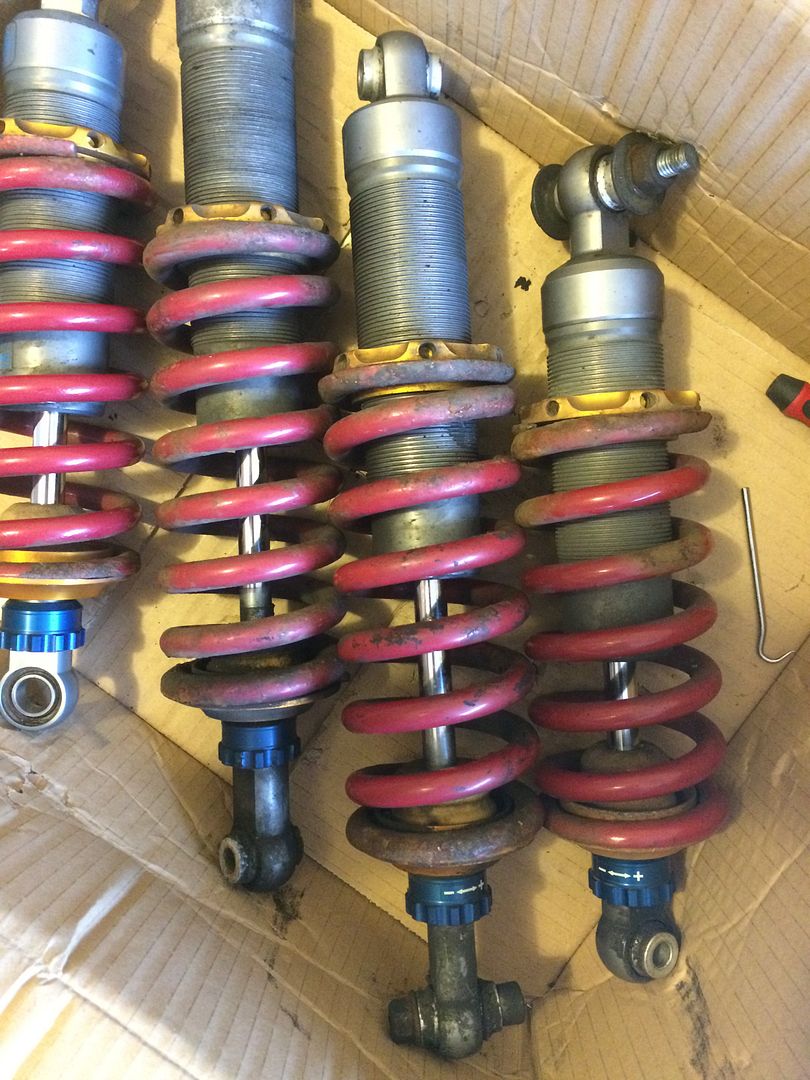
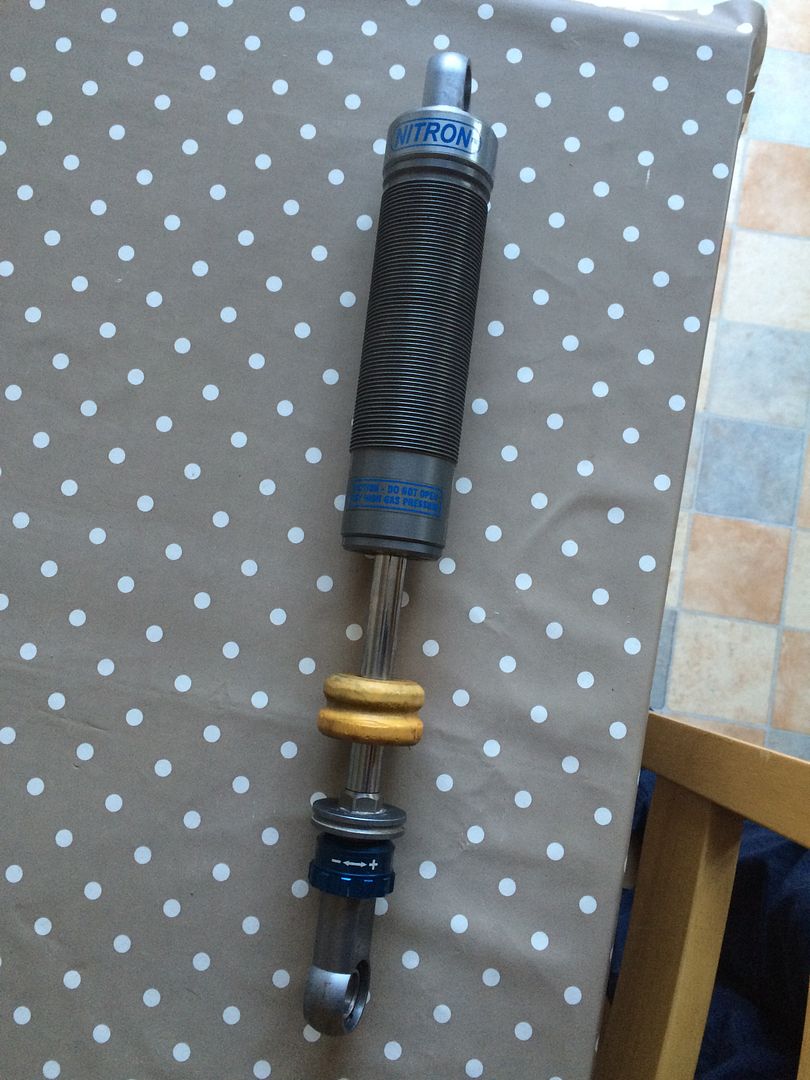
Well, today i used a rotary file, (great tool) and ground away wnough material on the airbox bracket to get a socket in to remove the rear subframe bolt. Next job will be sorting out about removing the rear subframe, and getting everything cleaned up and sorted. Wont paint the subframe, but will be happy to see it pressure washed, and degreased after a CV boot failure sprayed grease eveywhere. Also interested in seeing how much corrosion I have between the chassis and the subframe. Dambers and springs have been parted, which a messy job, loads of dust, and debris. Springs are pretty corroded, so will probably get them powder coated again, to make them look decent. Also found that the ride height L-R was totally different, not sure if this normal or not. Dont know which side was higher, as I didnt label the dampers. Tried various methods of getting the circlip that holds the bearings in the dampers out, but alll failed, so leaving them in now, and just going to grease them up. Probably sending the dampers for a refurb next year.
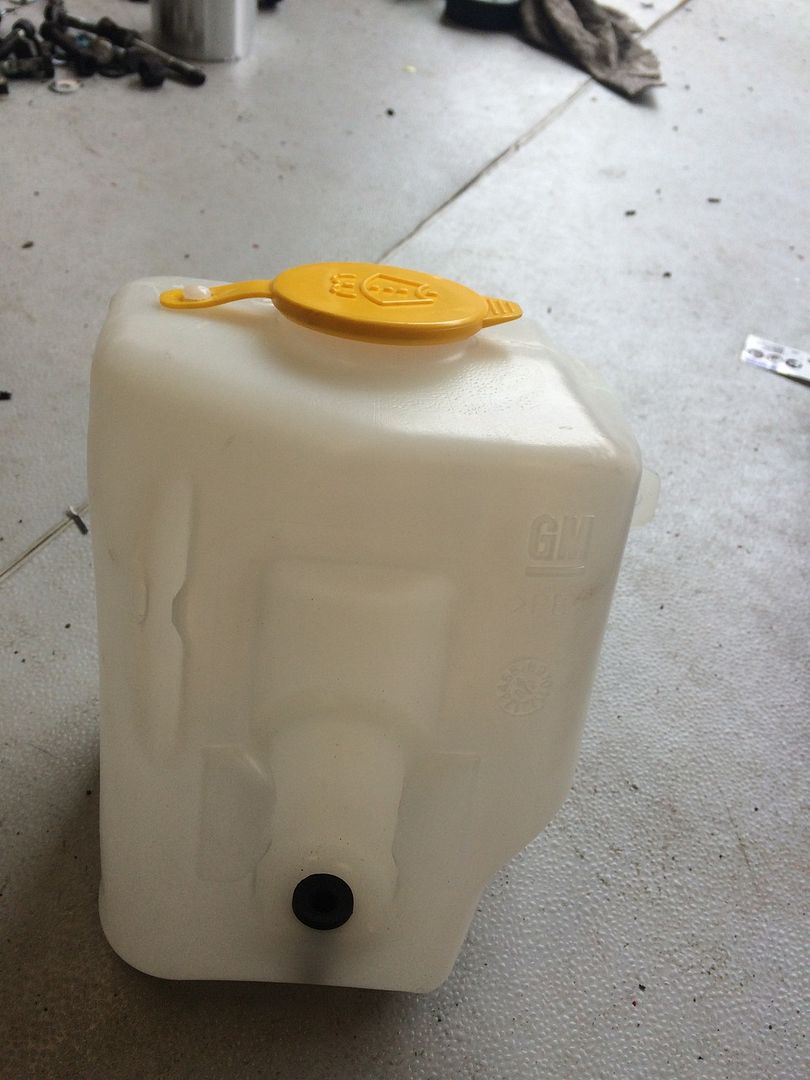
Fitted new header tank, which makes me realise how bad the original was. Going to start getting my back side in gear now, and get the car back together. Hoping to get booked in with MBR at the end of March ish.
#90
D-DAWG83
-
-
- 1,276 posts
Billy No Mates
- Gender:Male
- Location:Milton Keynes
- Interests:Cars, motorsport, music and films
Posted 10 February 2016 - 08:36 AM
Everyone loves pictures
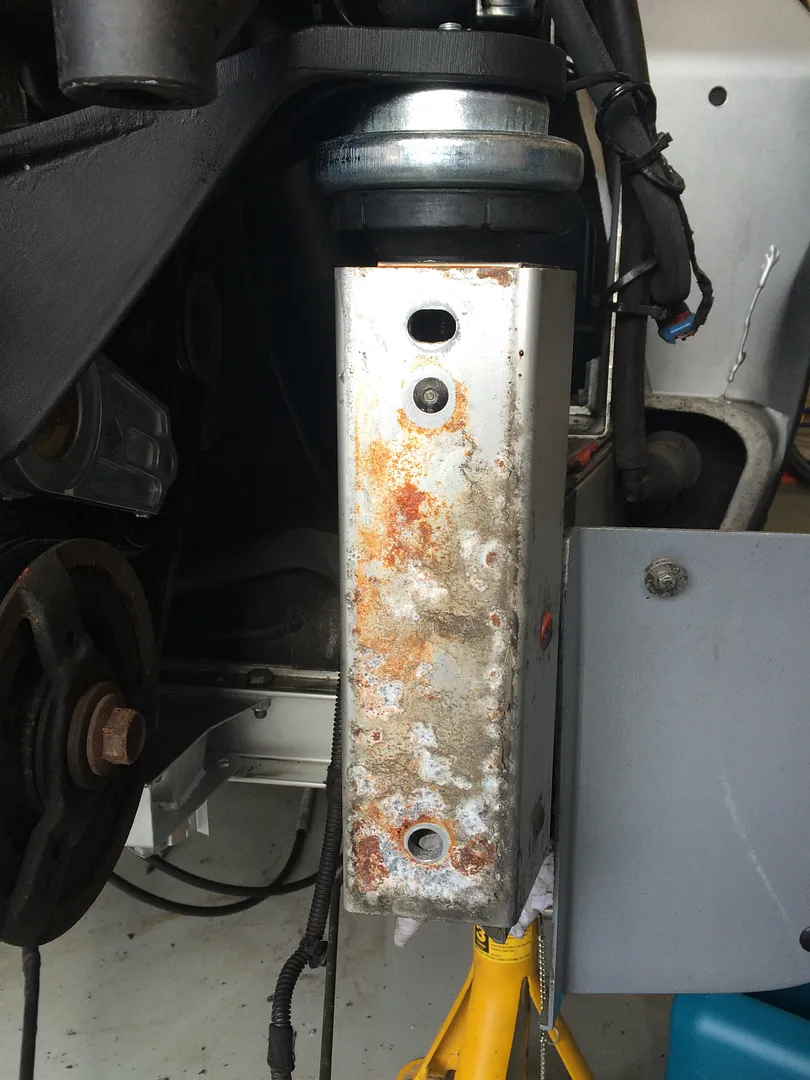
Before being stripped
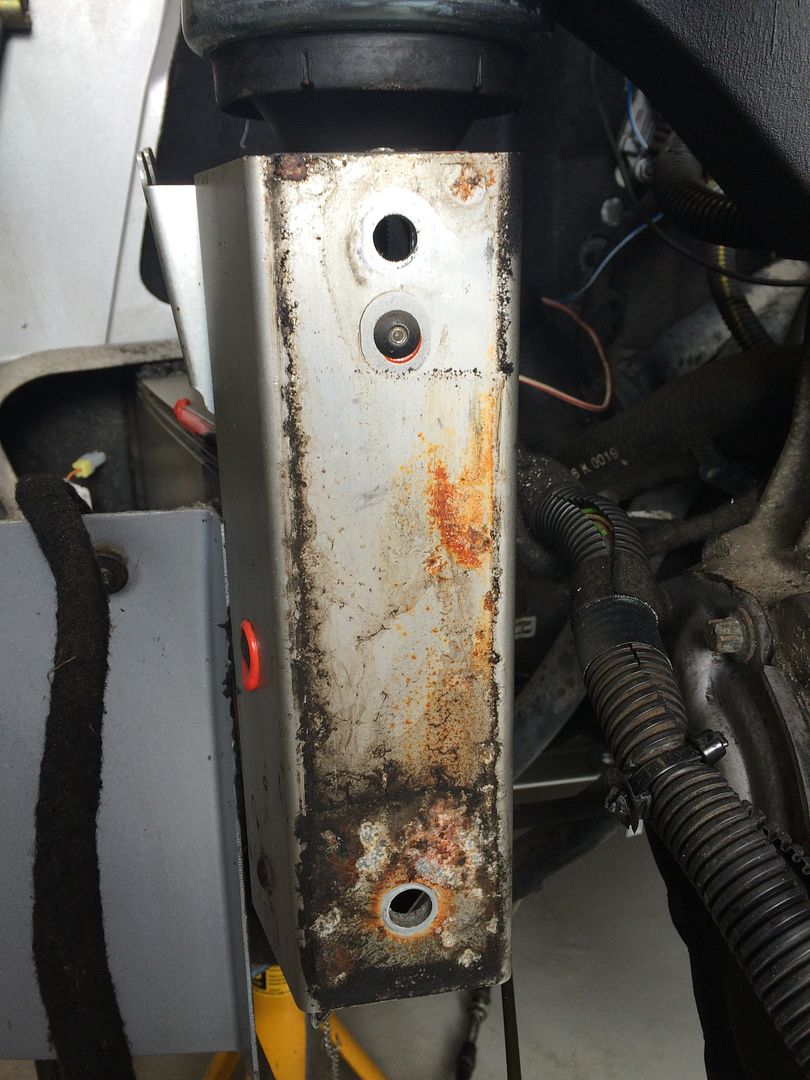
Quick clean up
Before being stripped

Quick clean up

#91
D-DAWG83
-
-
- 1,276 posts
Billy No Mates
- Gender:Male
- Location:Milton Keynes
- Interests:Cars, motorsport, music and films
Posted 10 February 2016 - 04:17 PM
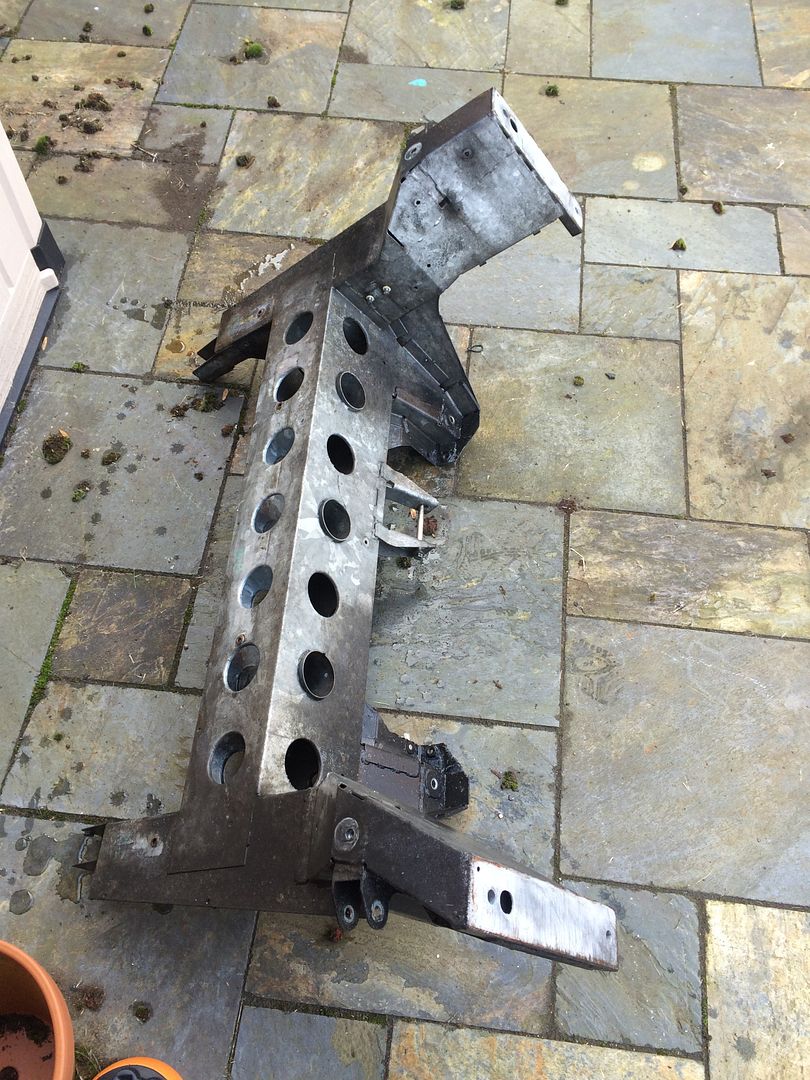
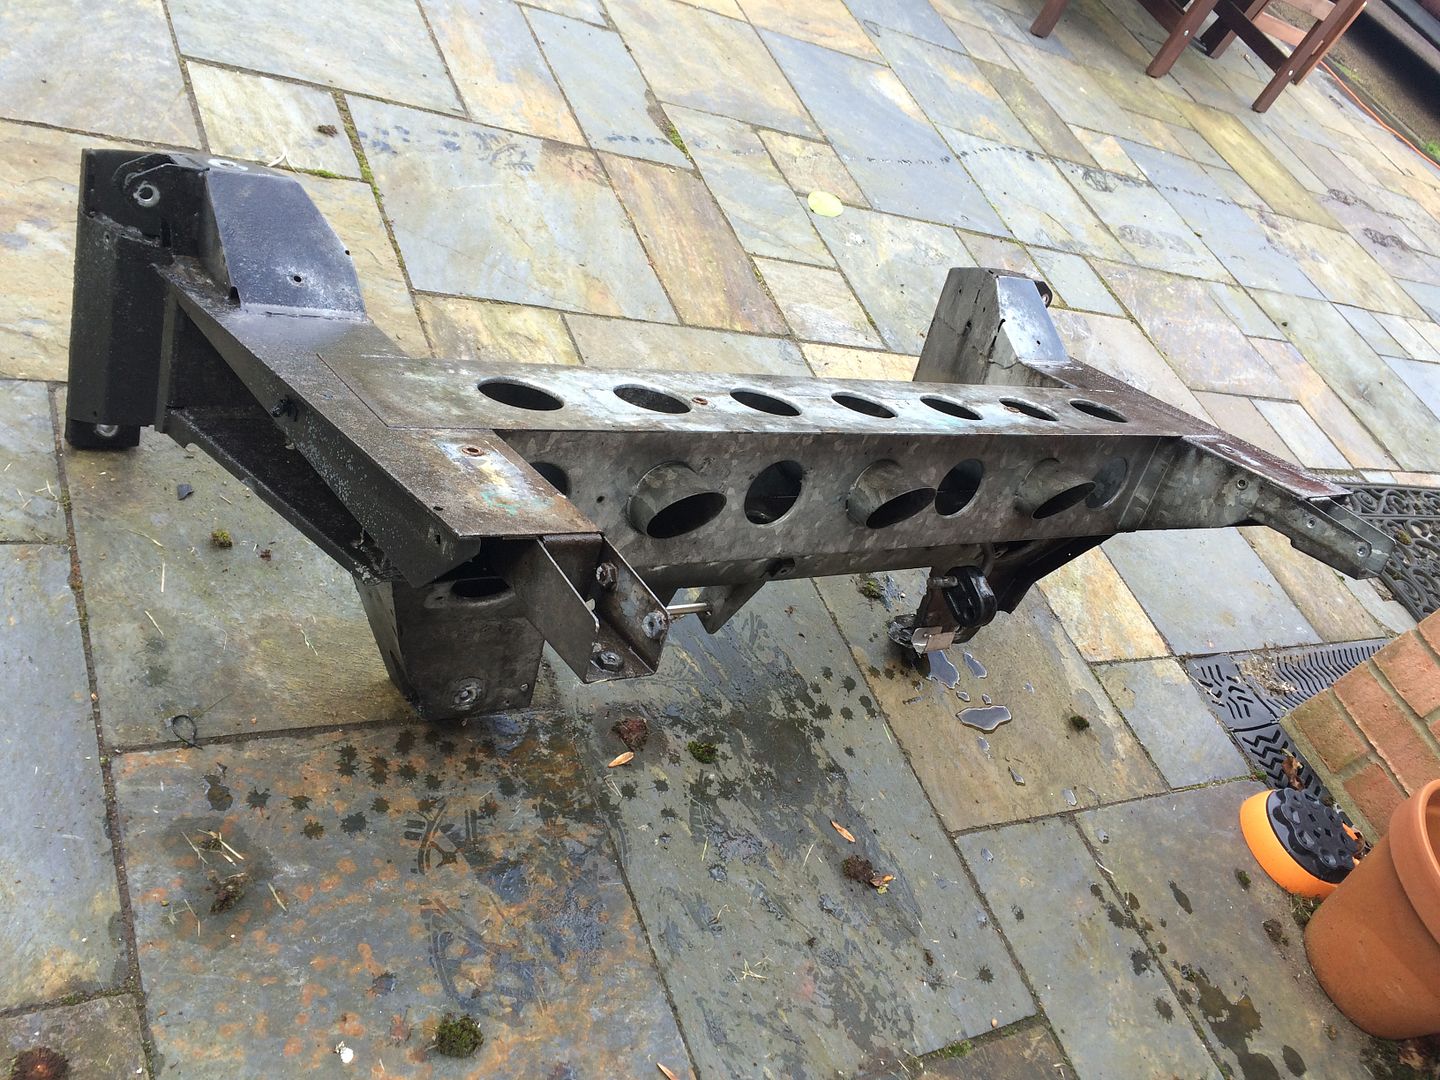
Well todays project has been removing and cleaning the rear subframe. Was pretty easy to do, as already had most things off that require it to be removed. No before pics for the subframe, as time was tight, but after abit of a scrub with a brush, and a soak in Megs Super Degreaser, followed buy a blast with the patio cleaner attachment, its come up pretty well. Not going to paint it, but happy that the grease from the CV joint has now fully been removed after the boot came off. Shims are not bad, and happy with the chassis, but obviously will reserve judgement till after the clean up.


#92
D-DAWG83
-
-
- 1,276 posts
Billy No Mates
- Gender:Male
- Location:Milton Keynes
- Interests:Cars, motorsport, music and films
Posted 07 March 2016 - 07:37 PM
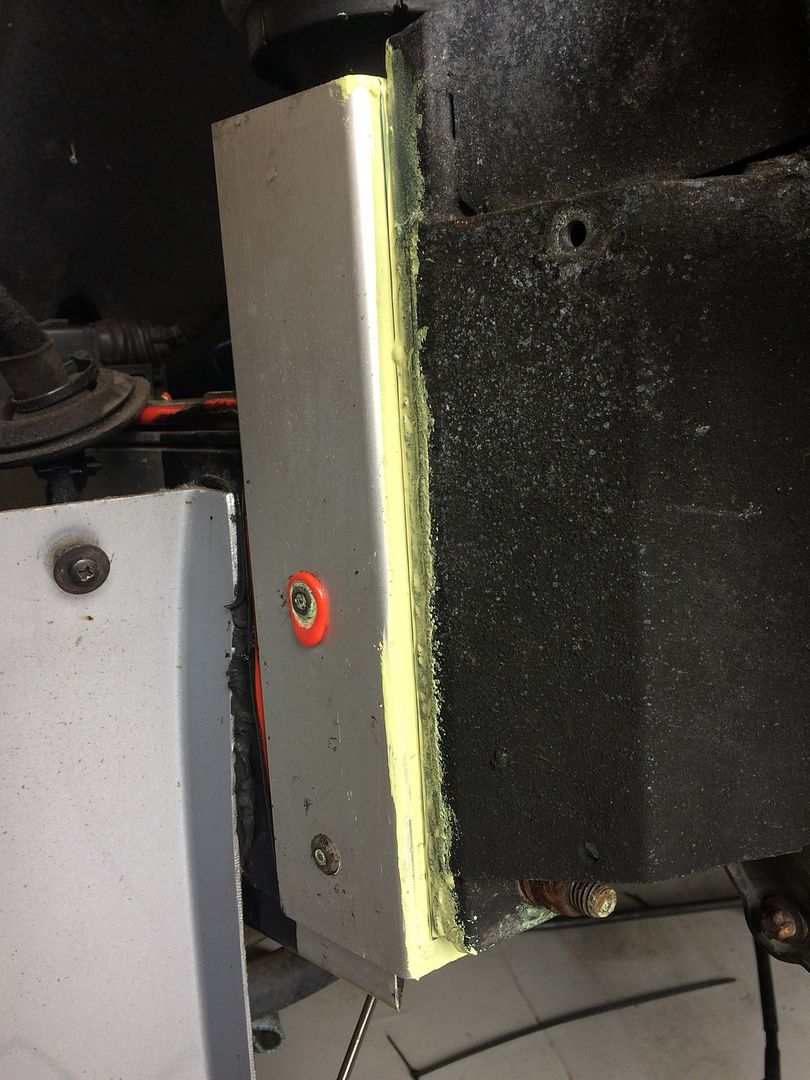
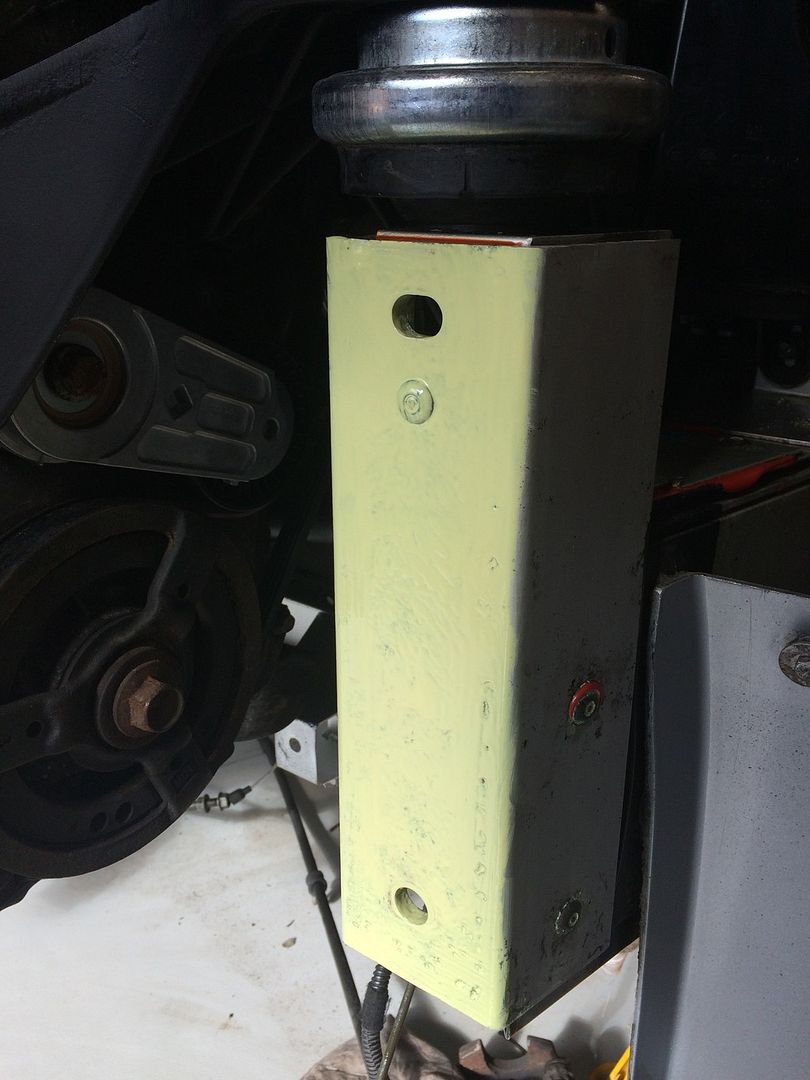
Been a little slow with progress, but got all the wishbones, uprights and everything else dry blasted, and thats now at the platers. Also bolted the rear subframe up, which was fun. Soaked the faces with ACF50, and coated the faces with Duralac, though it took ages to get it all lined and bolted up, for some reason the passenger side took ages to get the top bolt sorted, so hopefully the Duralac will be ok, it was still tacky, but slightly worried i didnt apply enough, but im sure itl be fine. Its great fun to clean off!


#93
D-DAWG83
-
-
- 1,276 posts
Billy No Mates
- Gender:Male
- Location:Milton Keynes
- Interests:Cars, motorsport, music and films
Posted 11 March 2016 - 05:01 PM
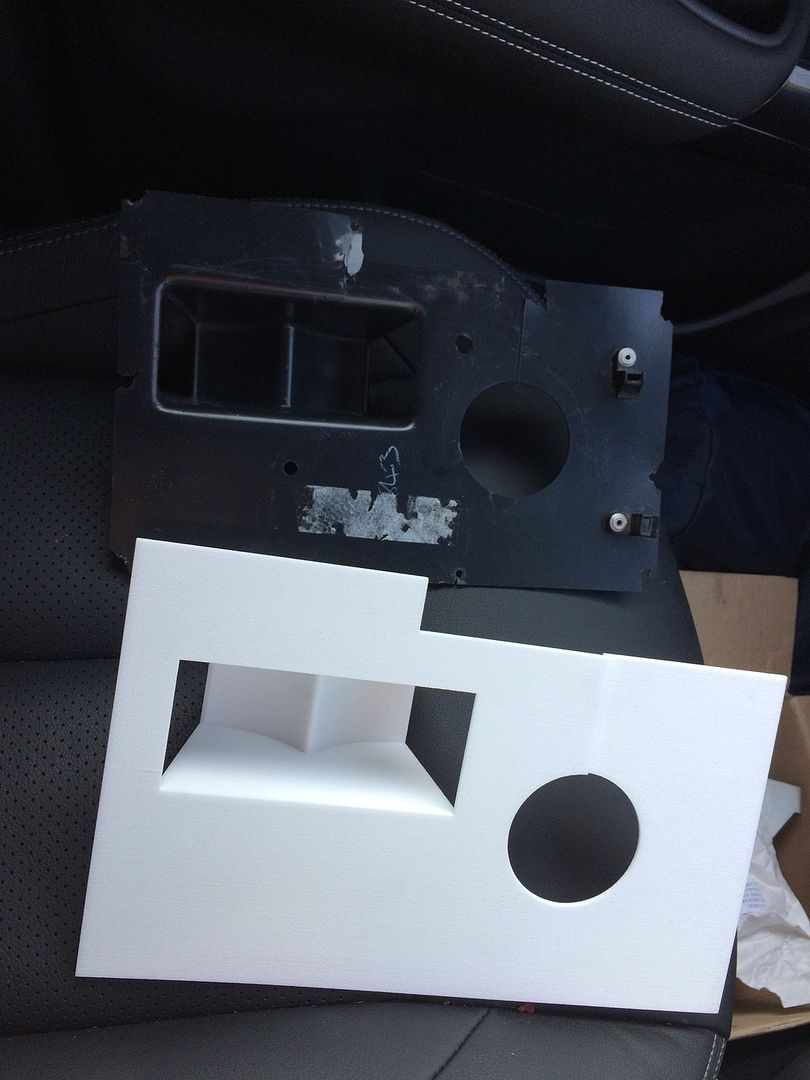
Been sorting a few jobs out, one of which is the VX specific air iverter plenum that rivets to the area under the dash. Cant seem to get hold of these for love no money, so lickily a friend of mine made me one. It needs holes and a little bit of tickling, but will do the job.
An old one that i managed to secure through Liz.
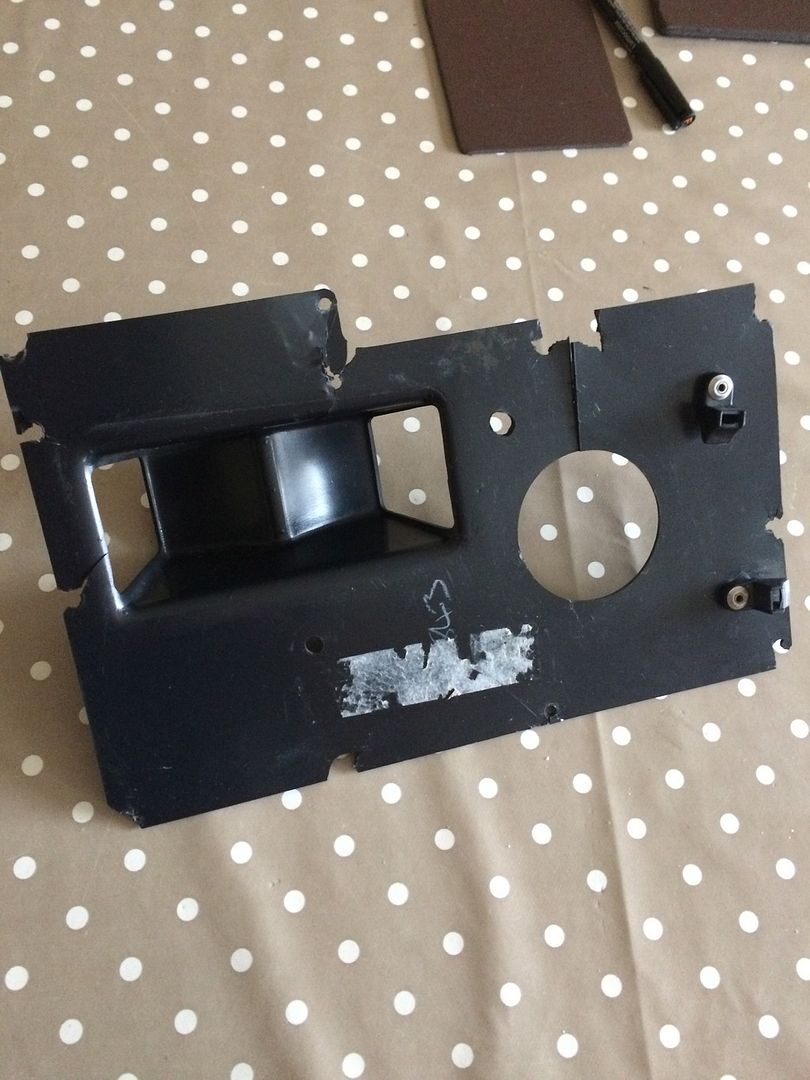
New one with it
An old one that i managed to secure through Liz.

New one with it

#94
FLD
-

-
- 13,717 posts
WANNABE MY LOVER
- Gender:Male
- Location:Near nantwich
- Interests:Tugging my todger.
Posted 11 March 2016 - 05:46 PM
Nice work there.
#95
Wreelybro
-
-
- 1,641 posts
Billy No Mates
- Gender:Male
- Location:Leighton Buzzard
-
Interests:Racing WRC/F1/Miglia/Time Attack/MotoGp etc...
360 Gaming 10-Pin Bowling.
Posted 14 March 2016 - 11:51 AM
Nice one mate!
#96
D-DAWG83
-
-
- 1,276 posts
Billy No Mates
- Gender:Male
- Location:Milton Keynes
- Interests:Cars, motorsport, music and films
Posted 14 March 2016 - 07:36 PM
Well today i spent alot of time trying to drill holes, drag holes and enlarge the holes, as hot having a whole part to template off, it was all a little guess work. Some silicone, and tomorrow it can go back on.
Also found out my Piper Exhaust has bowed on the flange, apparently not uncommon. Due to time and money, iv re-fitted it. It has all pulled up nicely, but when funds allow, il be getting a Tullet i think.
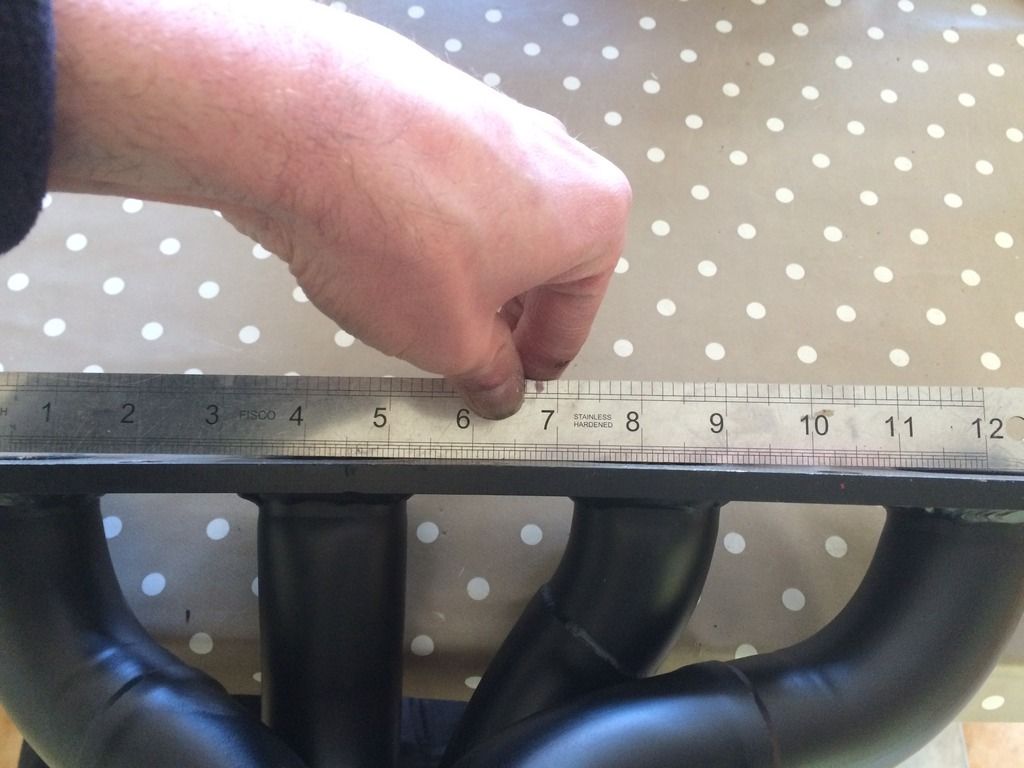
Also found out my Piper Exhaust has bowed on the flange, apparently not uncommon. Due to time and money, iv re-fitted it. It has all pulled up nicely, but when funds allow, il be getting a Tullet i think.

#97
D-DAWG83
-
-
- 1,276 posts
Billy No Mates
- Gender:Male
- Location:Milton Keynes
- Interests:Cars, motorsport, music and films
Posted 17 March 2016 - 11:18 PM
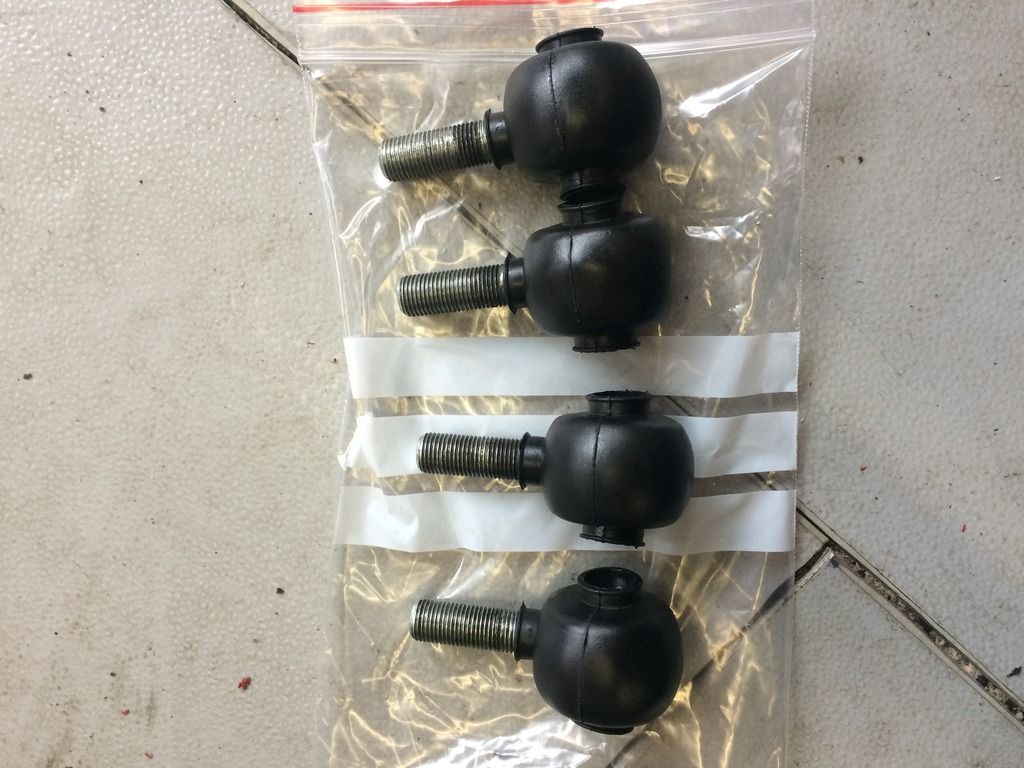
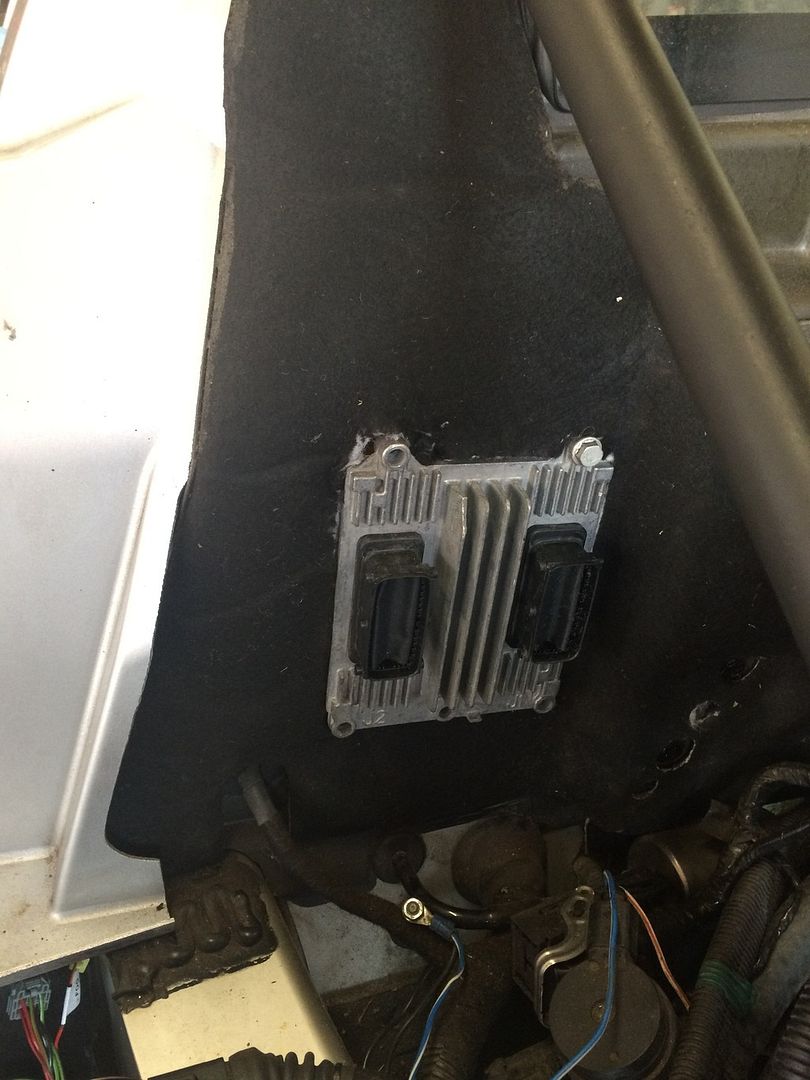
Starting to make progress with getting it back together now. Should be picking the suspension up tomorrow morning. Just got to reassemble the air diverter, and then the front end can go back together. Hoovered out all the chunky stuff under the dash, so that can go back on soon. Got the manifold all bomted up now, and that has closed up nicely, deapite my fears. Finally got round to meshing the heater intakes up, and also put a chuck of air filter foam over the inlet for the heater. With abit of luck, it will work a treat. Also cleaned up the mid undertray, and put some tape over the previously marked areas and put some new foam on the handbrake bits. Cleaned up my washer bottle, as it was disgusting, and that has come up like new. Also relocated the ECU, and made a little rain cover for it out of some scrap carbon. Covered the rear area behind the ECU with gold tape to reflect some heat. Also put new boots over the toe link bearings. One bearing was a little corroded, but still moved ok, so coated it with some ACF50, and left it as is for now. Im liking the Spitfire kit, with the brace, so when funds allow, that will be on the list.
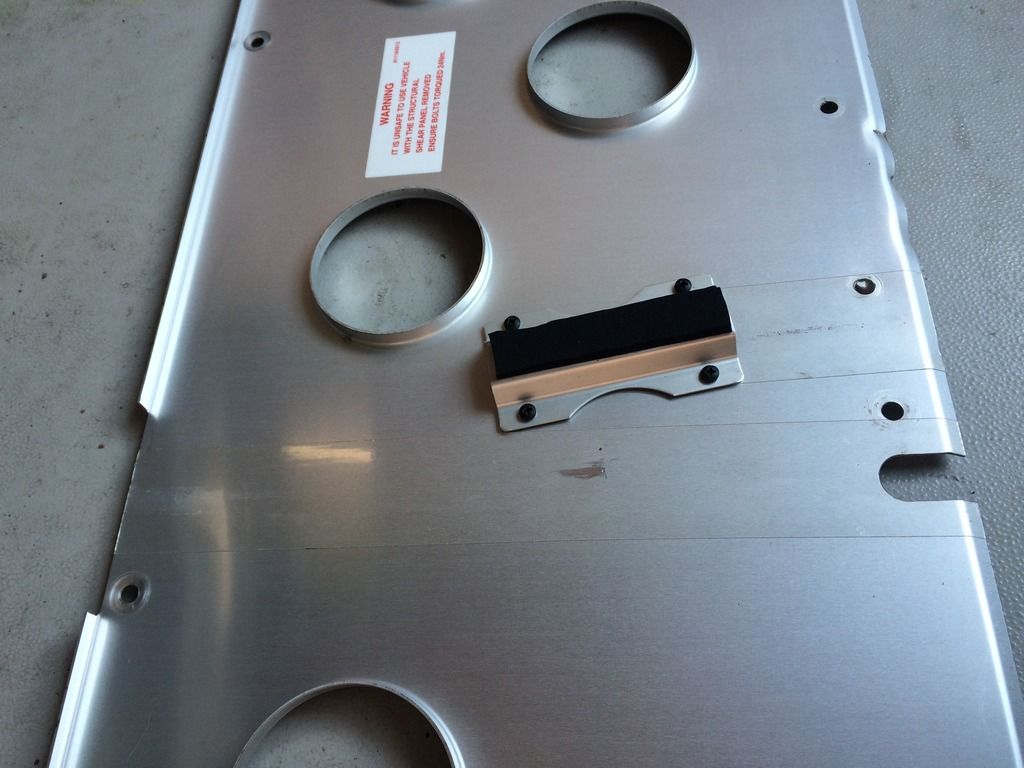
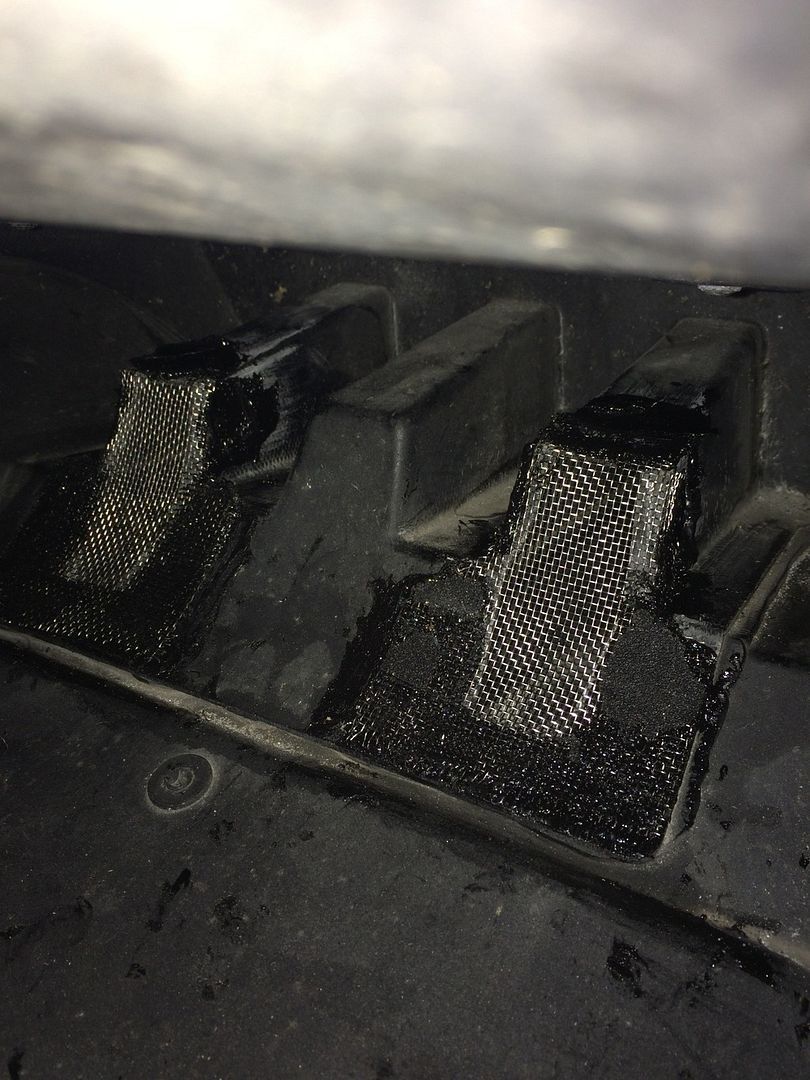
The mesh is not my neatest work ever, but its a pain because of the shape. Ended up bonding it in 3 stages. One for the bottom bit, one for the side faces, and one for the top face. All with various clamps, wedges and spanners wedged in to keep it all in shape and in contact.


The mesh is not my neatest work ever, but its a pain because of the shape. Ended up bonding it in 3 stages. One for the bottom bit, one for the side faces, and one for the top face. All with various clamps, wedges and spanners wedged in to keep it all in shape and in contact.
#98
Wreelybro
-
-
- 1,641 posts
Billy No Mates
- Gender:Male
- Location:Leighton Buzzard
-
Interests:Racing WRC/F1/Miglia/Time Attack/MotoGp etc...
360 Gaming 10-Pin Bowling.
Posted 18 March 2016 - 10:22 AM
Bit of Satin paint over that and will look fine mate. Coming on nicely now.. See you on Monday..
#99
Nev
-

-
- 11,587 posts
Nipper's Minion
- Gender:Male
- Location:Bristol
- Interests:Rock climbing, skiing, kayaking, surfing, mountaineering, budgies, chess, practical mechanics.
Posted 18 March 2016 - 10:55 AM
Wow, lots of useful jobs done 
#100
D-DAWG83
-
-
- 1,276 posts
Billy No Mates
- Gender:Male
- Location:Milton Keynes
- Interests:Cars, motorsport, music and films
Posted 18 March 2016 - 01:16 PM
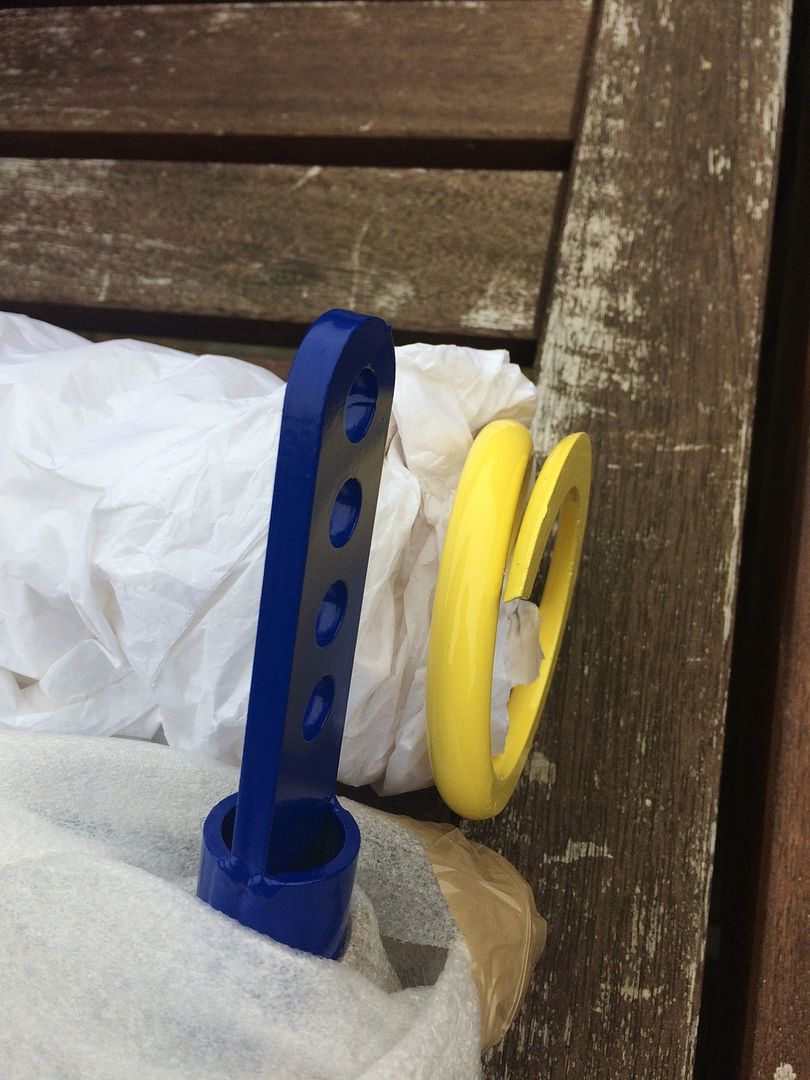
Well, just got everything back from the platers, just dont mention Ikea....


1 user(s) are reading this topic
0 members, 1 guests, 0 anonymous users

