The formatting of my last post looks terrible for some reason. I'm not able to edit it. Why?
Limited timeframe to edit posts.
It get's bigger for premium members.
Thetan level 15


Posted 03 February 2016 - 01:19 PM
The formatting of my last post looks terrible for some reason. I'm not able to edit it. Why?
Limited timeframe to edit posts.
It get's bigger for premium members.
Supercharger of Doom

Posted 03 February 2016 - 01:21 PM
Because I replied. You get a limited time to edit a post before it gets "locked" (10 or 20 minutes, something like that) and the soon as someone replies it's locked for editing, irrespective.I'm not able to edit it. Why?
Super Member
Posted 03 February 2016 - 02:30 PM
hmmmm, I see both good and bad in that feature. This time it was all bad 
The wife called to let me kow that price to customer was 1500sek - 1700sek which equals some £110 - £125 
However, they are on lots of Opel models incl the VXT...
She and one of the guys in the shop were on their way to see if there are any wreck in the yard that has the sensor. Not many car guys can that kind of help from the wife/gf I guess? 
I ADMIT BATMAN THINKS HE IS QUICKER THAN ME
Posted 03 February 2016 - 03:29 PM
Scary Internerd

Posted 03 February 2016 - 05:12 PM
Scary Internerd

Posted 03 February 2016 - 05:47 PM
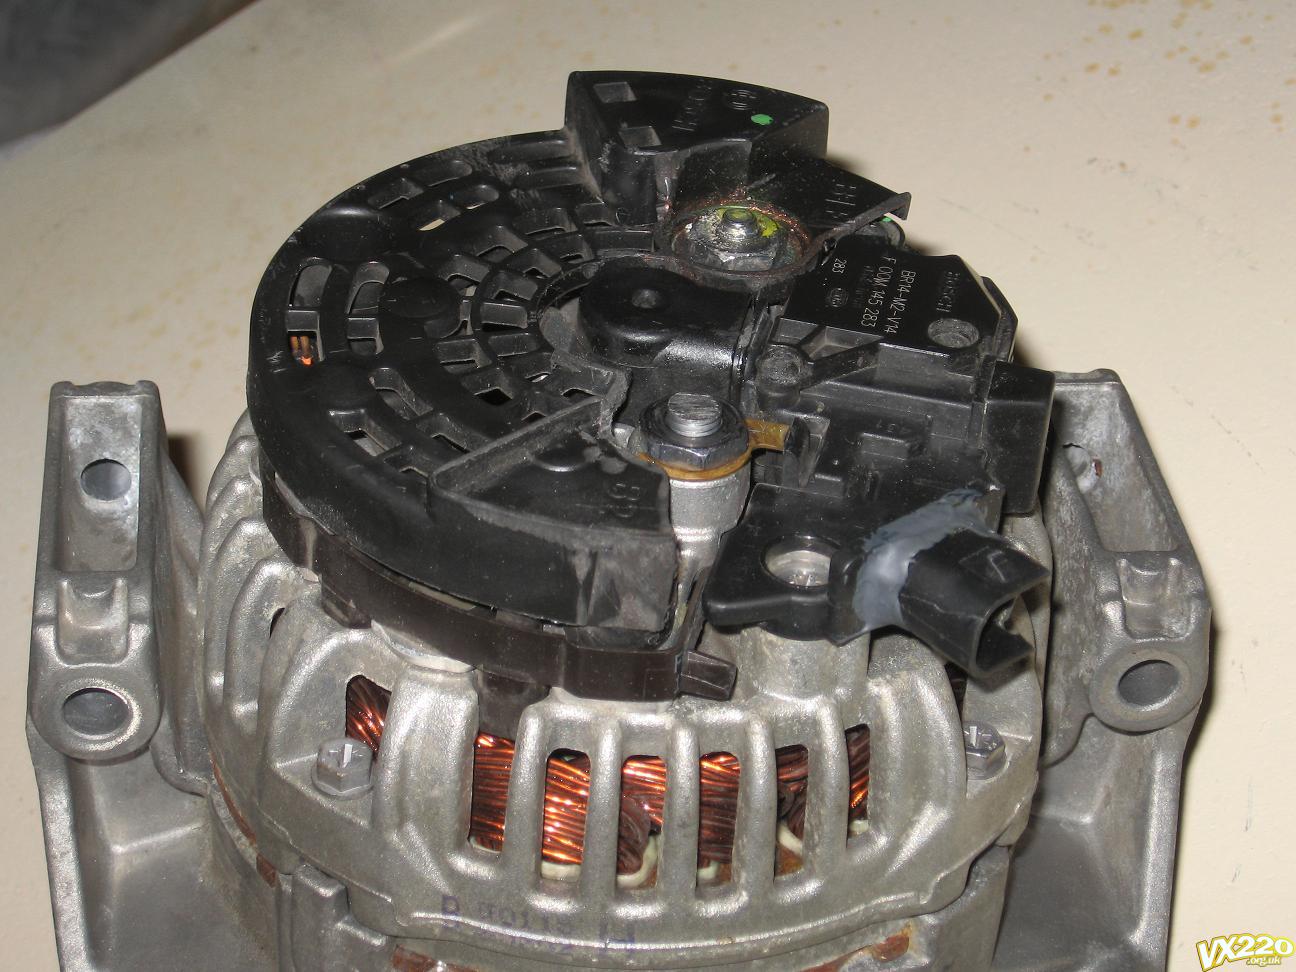
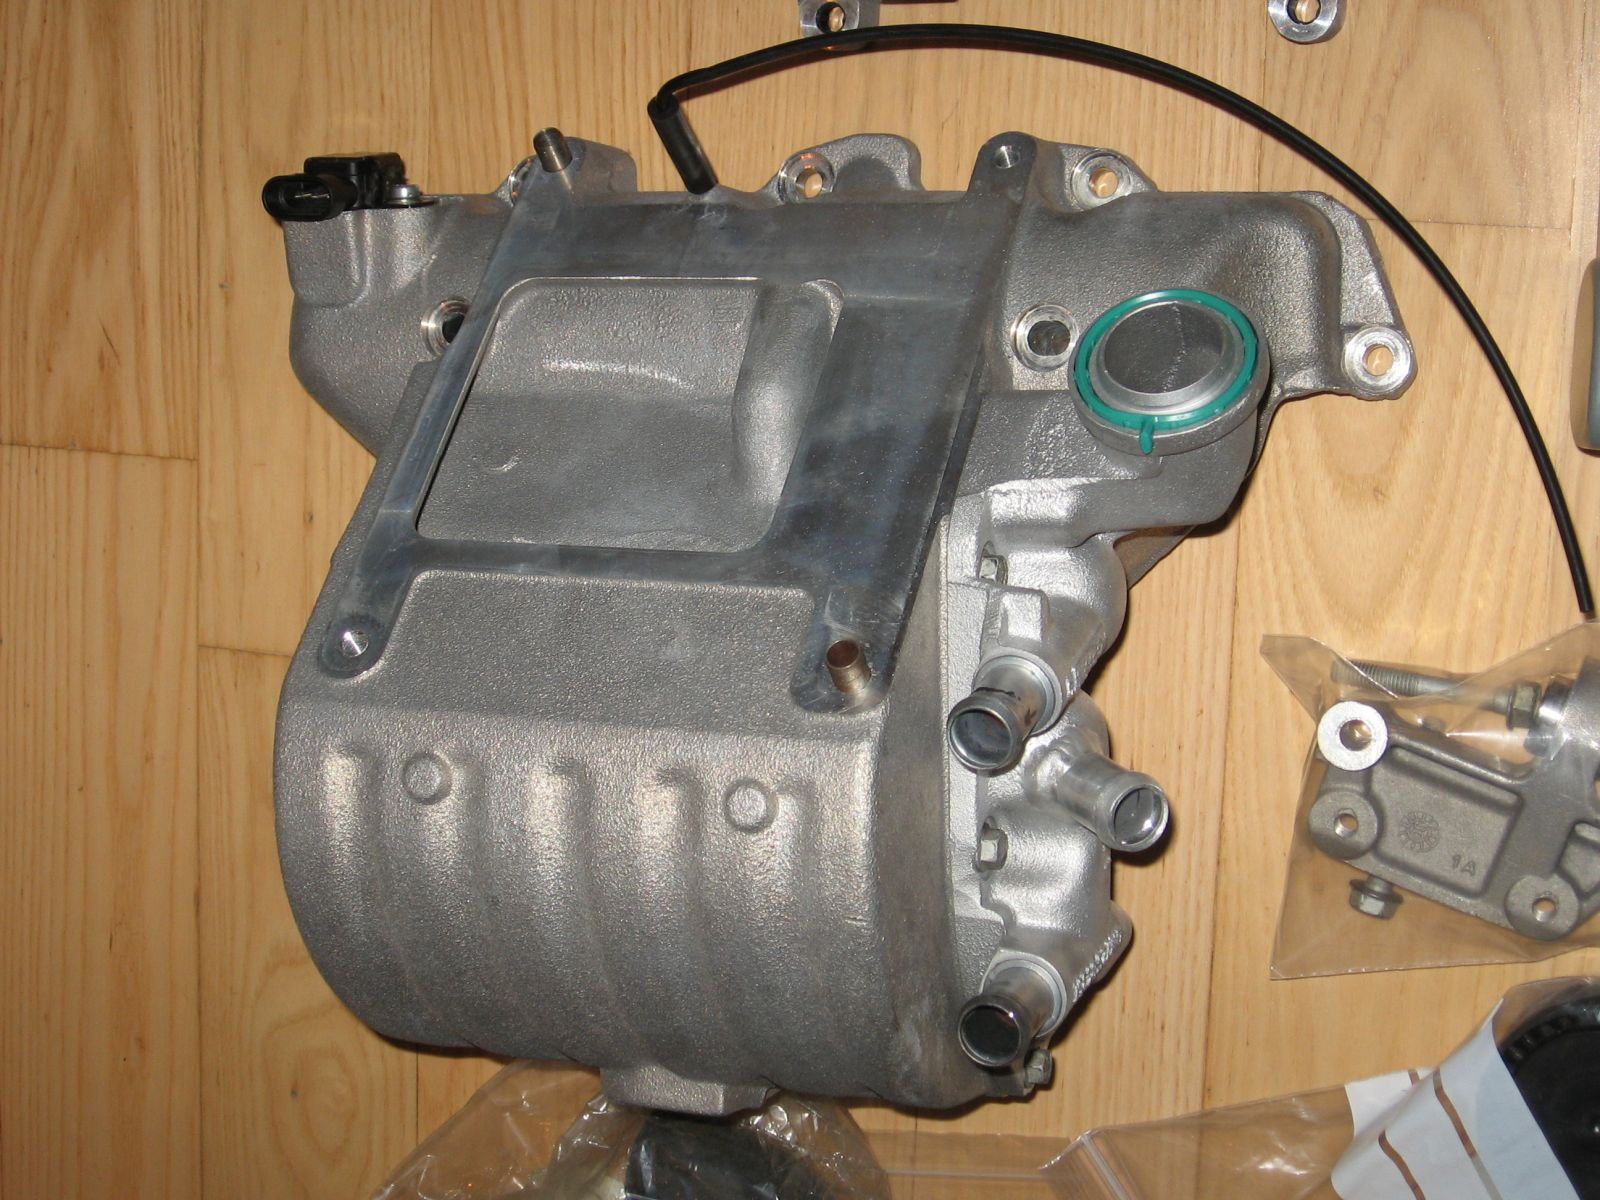
Don't mess with loose wires and capacitor => 100A Alternator with modified plastic cap:
Super Member
Posted 04 February 2016 - 07:02 AM
What my pics don't work
Have only read until the first conversion was done (and then some) but no pics up to june 2013 at least.
For me that is, don't now for others...
Good to hear my thread is useful!
When I look back I realise how few pics I took of the conversion itself. I was hoping to take a few more but just got stuck in..
FYI - For the alternator mod, I cut the plastic cap so the resistor is still mounted as standard and modified the other side accordingly. It all fits fine still.
Yeah, I found some really good pics there
Don't mess with loose wires and capacitor => 100A Alternator with modified plastic cap:
I had this exact picture on the monitor beside me when I started my dremel
So, got another 1.5h (0.5h was searching for my angle grinder and setting up the Dremel) last night after the kids, finally, agreed it was time to sleep. The goal was to mod alternator, figure out where the intake bracket goes and hopefully mock up alternator, bracket and intake...
Result: Success (I think)
Started with removing the plastic cover
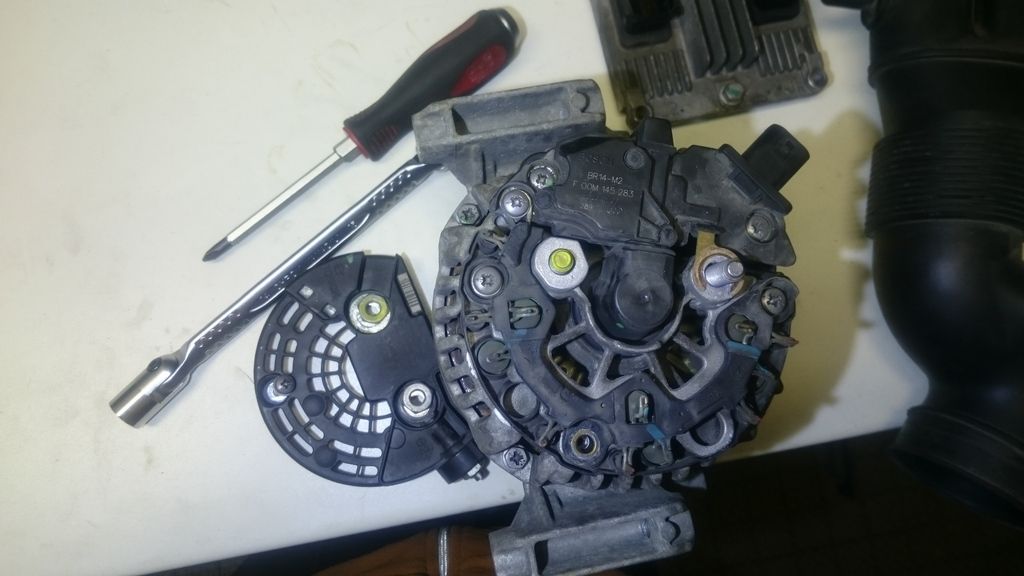
Then, after carefully looking at Exmantaas' picture and setting up the Dremmel. A hacked up cover
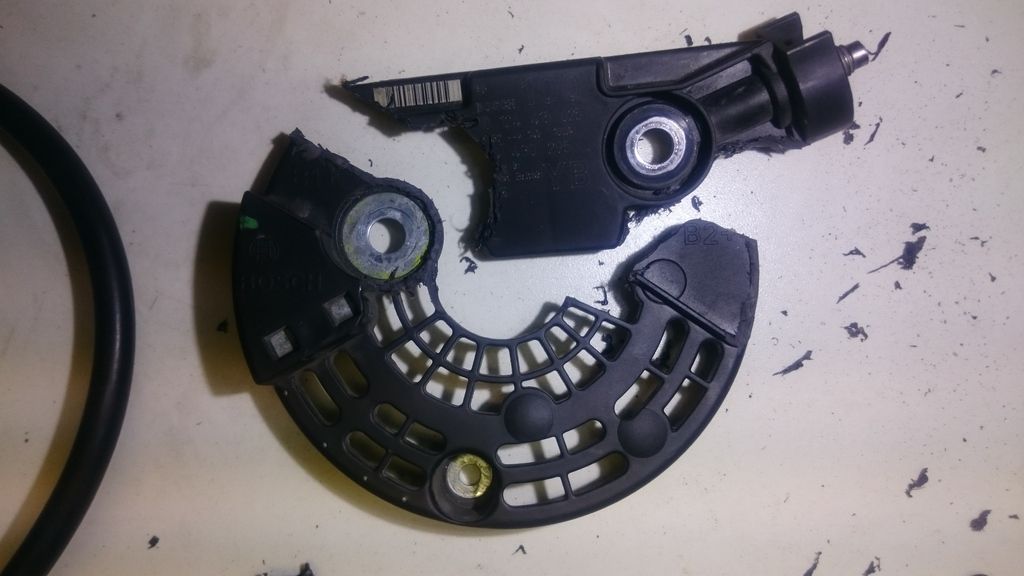
Then back together again. Looks pretty much like Exmantaas'

And finally back in the car, with intake bracket and intake
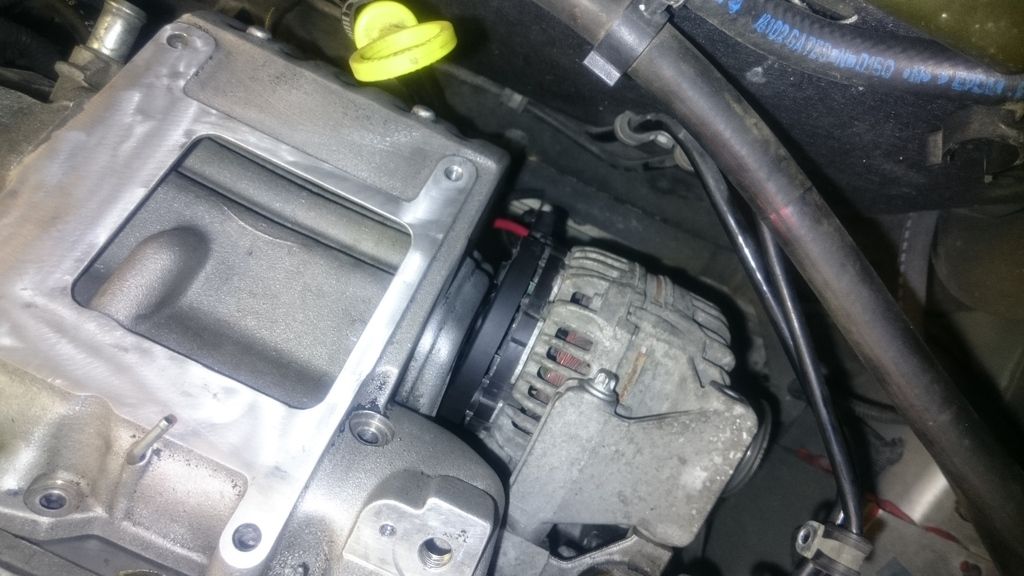
I think there is more room than what is shown in the picture
Hmmmm, is this starting to become more of a build thread than a simple modular-pulley-question-thread?
I guess next step is to start with the electrical work and wait for the idler pulley from CMS.
By the way, the 3 bar sensor can also be found on the 2.2tid Saabs. And there just happen to be one in the wifes yard of wrecked cars. It wasn't fully handled by the insurance company yet so it might take a couple of days before I get it.
Any directions regarding how to hook up the CC pump? I saw that Vimes used the main lead from the starter which looked like a pretty good idea. Are there any better ?
Super Member
Posted 04 February 2016 - 07:54 AM
What dimensions should I get for the dual pass mod pipe? Same as the two stock ones? If yes, what are they? Forgot to measure yesterday and my welding buddy wanted to know...
Does anyone have a picture of the modified end plate so the angle between stock pipes and the new one is clearly visible?
Super Moderator

Posted 04 February 2016 - 07:57 AM

Super Member
Posted 04 February 2016 - 08:45 AM
That looks innovative, as expected
Thanks.
Billy No Mates

Posted 04 February 2016 - 10:38 AM
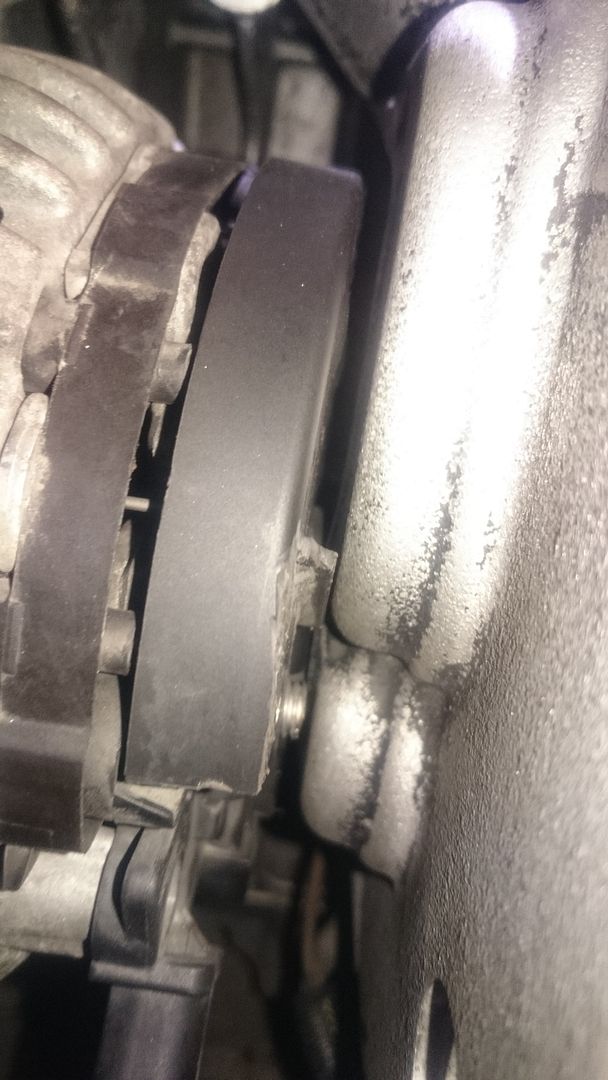
And this is mine. A liiiitle to close to the neighbour (wrong angle) but it worked.

And C´mon. Make a proper build thread now.
I ADMIT BATMAN THINKS HE IS QUICKER THAN ME
Posted 04 February 2016 - 10:47 AM
Scary Internerd
Posted 04 February 2016 - 03:38 PM
19mm
This is how I get mine done
That looks a bit overengineered... 
Super Member
Posted 04 February 2016 - 04:59 PM

Super Member
Posted 04 February 2016 - 09:36 PM
Got a moment today as well.
The result was not as uplifting as yesterday. Mainly because I focused on fixing a puncture on one of the family Saabs. Did not work!
But got some Speedster work done nevertheless. And here starts the electrical questions...
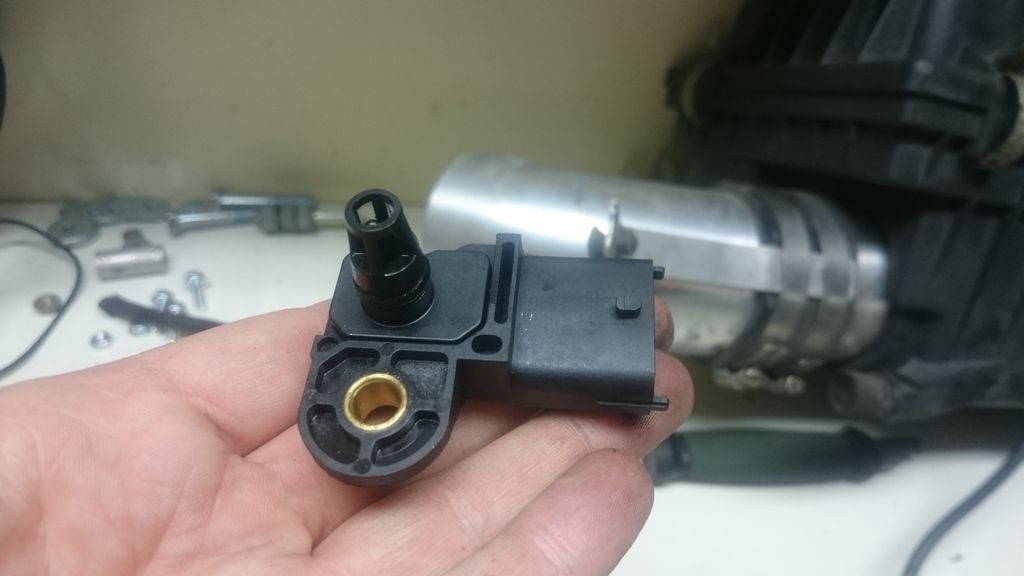
First. Does this look like the correct TMAP sensor. I was hoping for some more information on it.
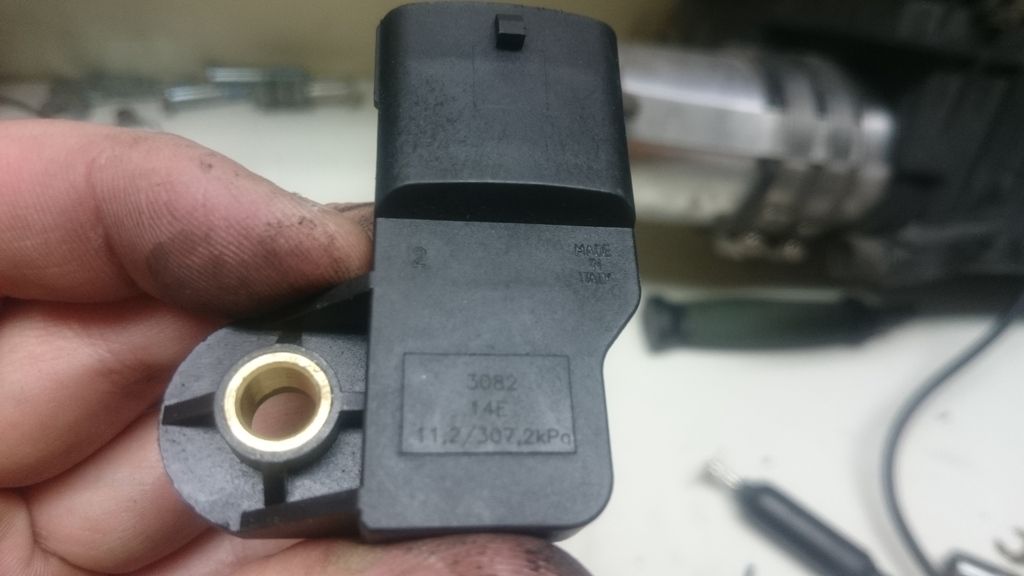
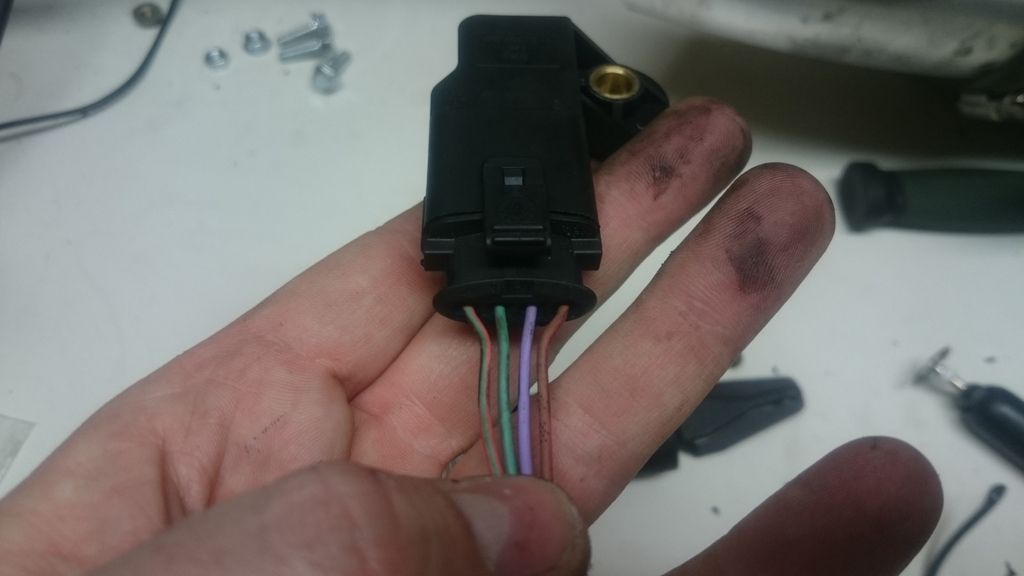
And with the connector attached.
From left to right:
red-green (marked 4)
green (small purple line, marked 3)
purple (2)
brown-red (1)
Now for the big one.
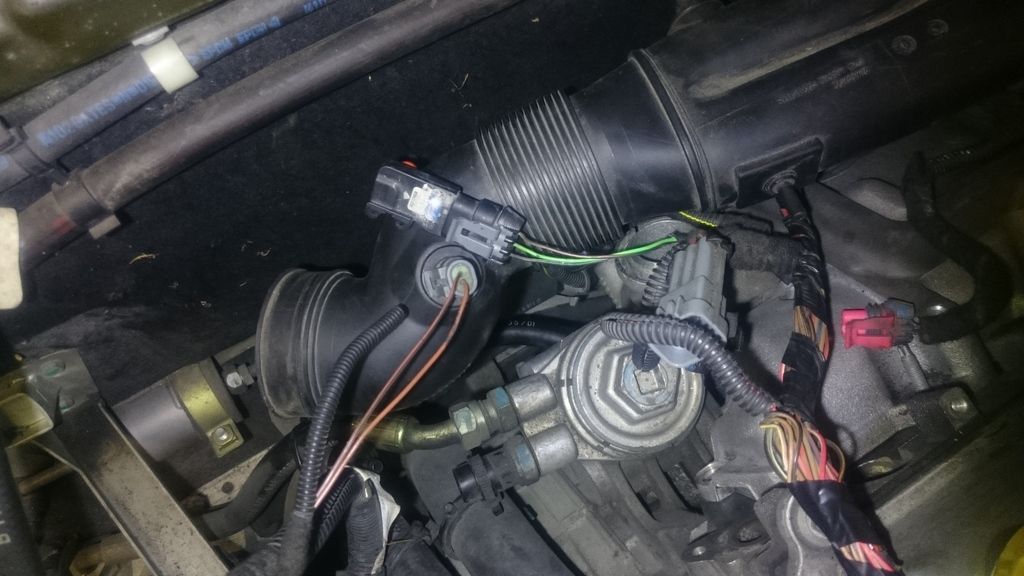
Can someone confirm that the two sensors I'm replacing with this four pin one are the two below?
I even attached them to where they were before to identify them easier.
The two pin is coloured (left to right): brown-black (ground?), brown
And the three pin is white-black, green, brown-black (ground again?)
And for last, the biggest one
How to connect the new sensor to the old wiring?
Super Moderator
Posted 04 February 2016 - 09:39 PM
Supercharger of Doom
Posted 04 February 2016 - 10:16 PM
No idea. Physically looks okay and guess it's a 3.0bar sensor (judging by the 307kPa) but never seen one without the Bosch labels on with the Bosch part numbers.First. Does this look like the correct TMAP sensor. I was hoping for some more information on it.
CorrectCan someone confirm that the two sensors I'm replacing with this four pin one are the two below?
Download the OBDTuner manual and use the instructions in thereHow to connect the new sensor to the old wiring?
Scary Internerd
Posted 05 February 2016 - 12:43 AM
The benefit is one less 90degree bend with a join 3 jubilee clips
You can just put a pipe straight on with 1 clip
So neater and less weak points I guess!
Yeah, I do the same with the long hose directly connected, but a bit more simple  :
:
Super Member
Posted 05 February 2016 - 07:24 AM
No idea. Physically looks okay and guess it's a 3.0bar sensor (judging by the 307kPa) but never seen one without the Bosch labels on with the Bosch part numbers.First. Does this look like the correct TMAP sensor. I was hoping for some more information on it.
CorrectCan someone confirm that the two sensors I'm replacing with this four pin one are the two below?
Download the OBDTuner manual and use the instructions in thereHow to connect the new sensor to the old wiring?
3bar sensor - It looks good to me to (with the 307kpa) but got a creeping feeling when there was no part number on it. Will look into it some more.
Existing connectors - Thanks! Kind of knew I was right but when you're all alone in the garage it's nice to get confirmation
Wiring it up - DOH ! RTFM I guess
Haven't looked into the details of wiring yet. Besides the TMAP and injectors, what other stuff am I going to have to do?
Thetan level 15
Posted 05 February 2016 - 08:53 AM
The hvap connector wires needs to be extended. (2)
(that thing that plugs into that weird hoses contruction just under your fuel filler neck.


0 members, 1 guests, 0 anonymous users

