Max Side Air Intakes
#61

Posted 31 August 2018 - 04:21 PM
My wife is away on a hen weekend with lots of girlfriends in sunny Bristol. She left this morning and is probably tipsy now! Anyone living in the area, has been warned!
But, it does mean that I can crack on and resolve the front end & if the sheets arrive, then I'll have that done as well.
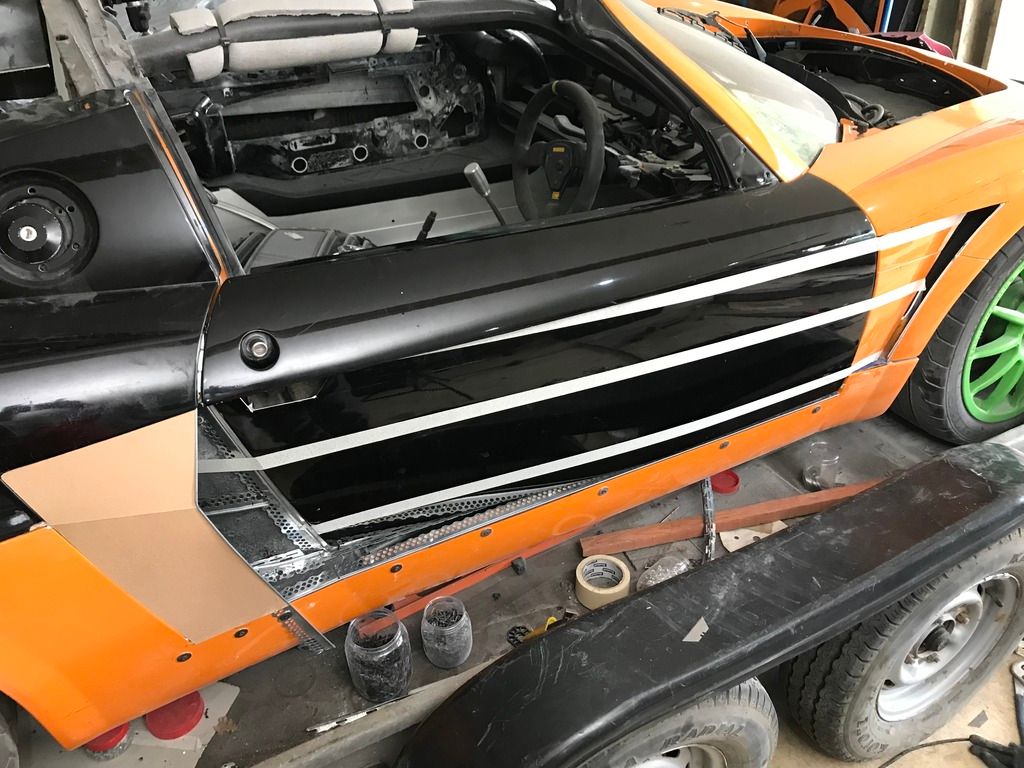
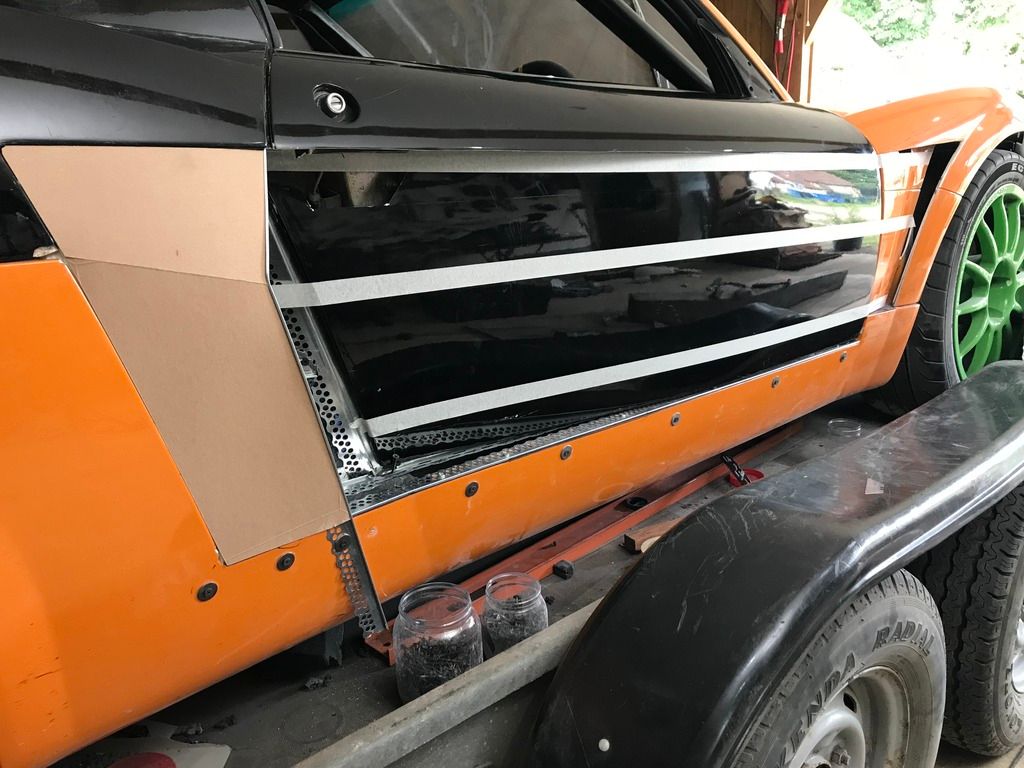
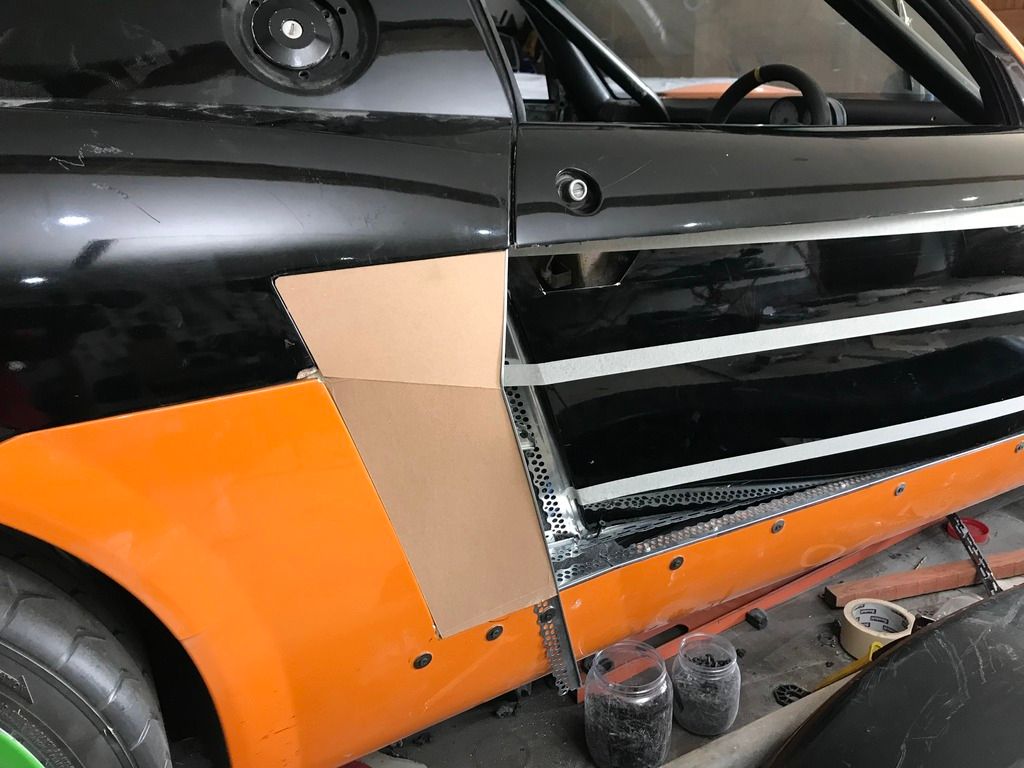
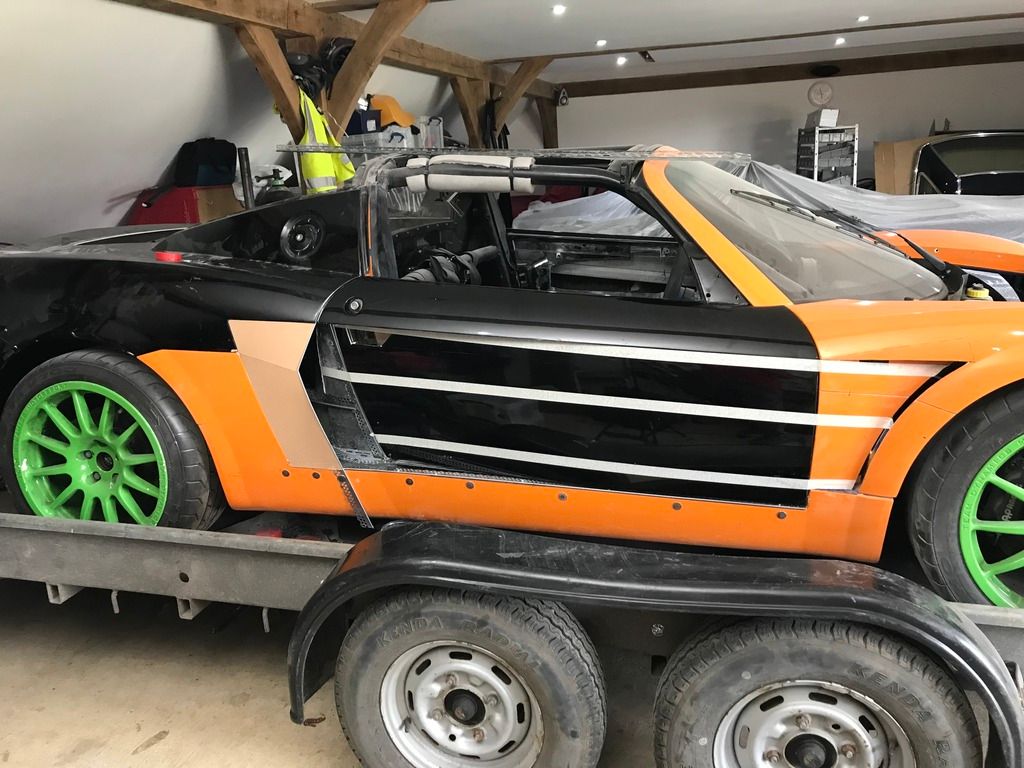
The side scoop intake has been revised slightly & I think could work well. The Scoop in the door does not effect the door glass, window runners, door locks At all. The front wing vent behind the wheel and the new one in the new Audi bumper will hopefully make a difference or perhaps NOT? Who knows?
But, it was based on numerous modern cars with similar air channelling tricks, like this one....
https://youtu.be/rf6W47RLexw
I will update with photos again soon.
Max
#62

Posted 31 August 2018 - 04:29 PM
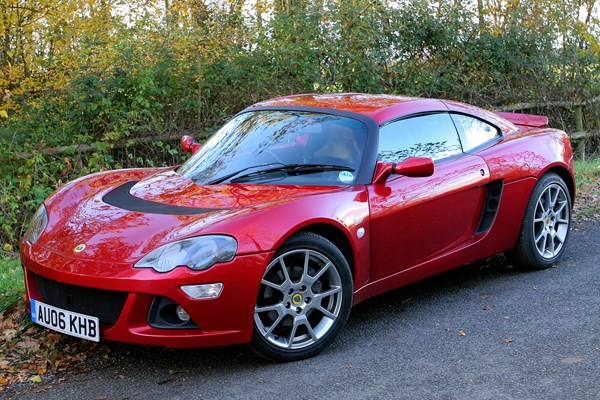
doors similar to the europa
#63

Posted 01 September 2018 - 06:30 AM
There's numerous cars that do the same thing. What I've done is not new or clever. I guess had Lotus been given the go ahead to revise the VX, they may have done a similar thing, just better. All I've done was to get the dremmel out and have a go. If I'm not careful, my VX will look like a cheap clone, it's a fine line to tread.
A bonus for me is that the conversions I'm carrying out will not add any weight, I may well lose a little from the rear end.
A worry for me is that I'm starting to like my VX without the huge surfboard rear wing on scaffold poles. I wish I had the talent to come up with a proper working diffuser/ underfloor aero system. But alas, anything I came up with would be nothing more than extra weight. I have to remember that my car is nothing more than a track car, so all the fancy sh1t I'm doing to it is just for my vanity.
As you know, I NEVER took care of my car, it looked like trash most of its life. Mind you, your car looks pretty 'used' now! It used to look mint when I remember it at BOT a few years ago.
#64

Posted 07 September 2018 - 06:17 PM
I got home a 3.30 today after a busy day. I really didn’t fancy working on the VX, but I dragged myself into the garage. I just stood and looked and thought ‘What the F am I doing.’ The car looked like Stevie Wonder was let loose with a Dremel with a set of plans from Ikea.
Anyway, luckily, I had a plan in place to do the Side scoop, which again is getting far more involved than I expected (I’m a complete tool.) A couple of people contacted me to say that they’d like to do the scoop conversion and was wondering what I was up to. Of course, I said, no idea. I was going to bodge the job for myself as I never expected anyone to want to do the same.
So, I have now decided to make a complete mould of the modified sill (which allows the scooped door to close) combined with the new rear intake area. It should (hopefully) allow people to cut out & easily & fit the new combined panel/sill in place simply & easily. I am making mine out of Carbon fibre, which will be overfitted onto the cutout area but should still look fine.
The new combined panel is relatively complicated, as I wanted the panel scoop behind the door to be flush with the door. But hopefully with my cunning plan, it should be relatively straightforward to produce, but it’s just an idea and it could end up a total shamble. Anyway, the side is still not finished, all edge trims will be riveted & wired in place, not screwed. I ran out of time we’ve friends coming over soon. Just as well, I’m knackered.
What do people think of using the old tubby side pod? Or should I go more NA style?
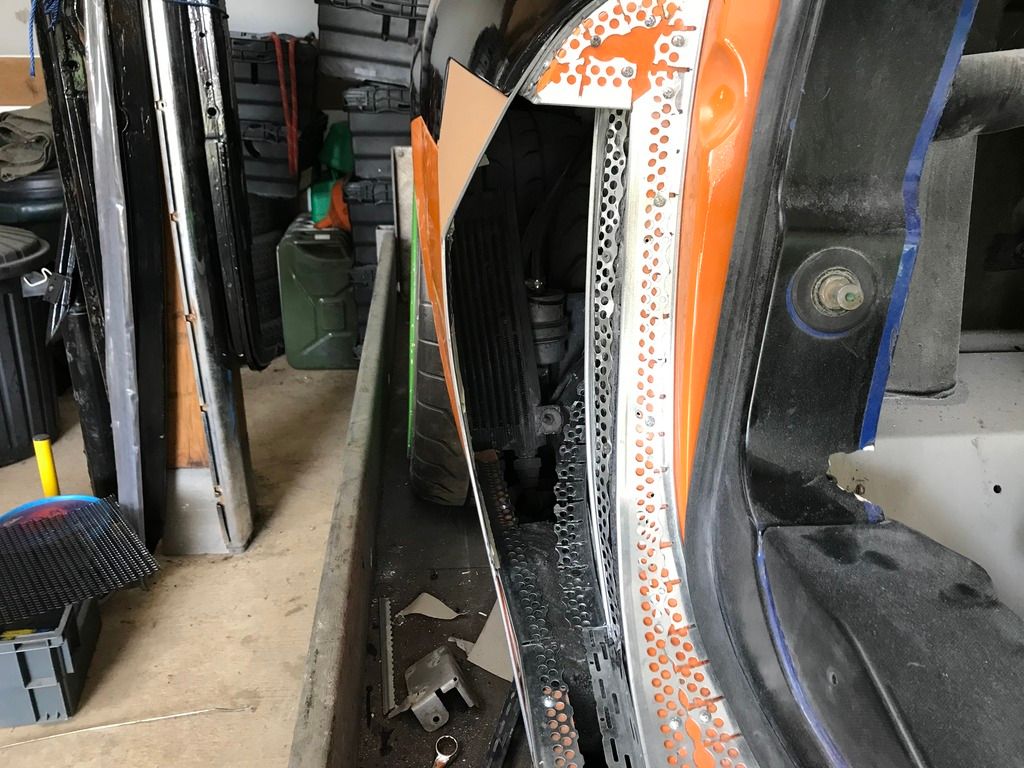
As the sill was opened up, I’ve fitted a lightweight 80mm pipe in the sill void to gain some additional air to the rear engine area. I’m also going to fit a couple of air vents in the front of the black plastic sill cover as I can also get a decent additional cold air feed from the sill void to the driver & passenger! Bonus on track.
#65

Posted 08 September 2018 - 03:35 PM
Lines look good bye.
#66

Posted 08 September 2018 - 03:35 PM
Damn autocorrect
#67

Posted 08 September 2018 - 05:17 PM
Is that plaster beading?
Lines look good bye.
LOL, yes it is.
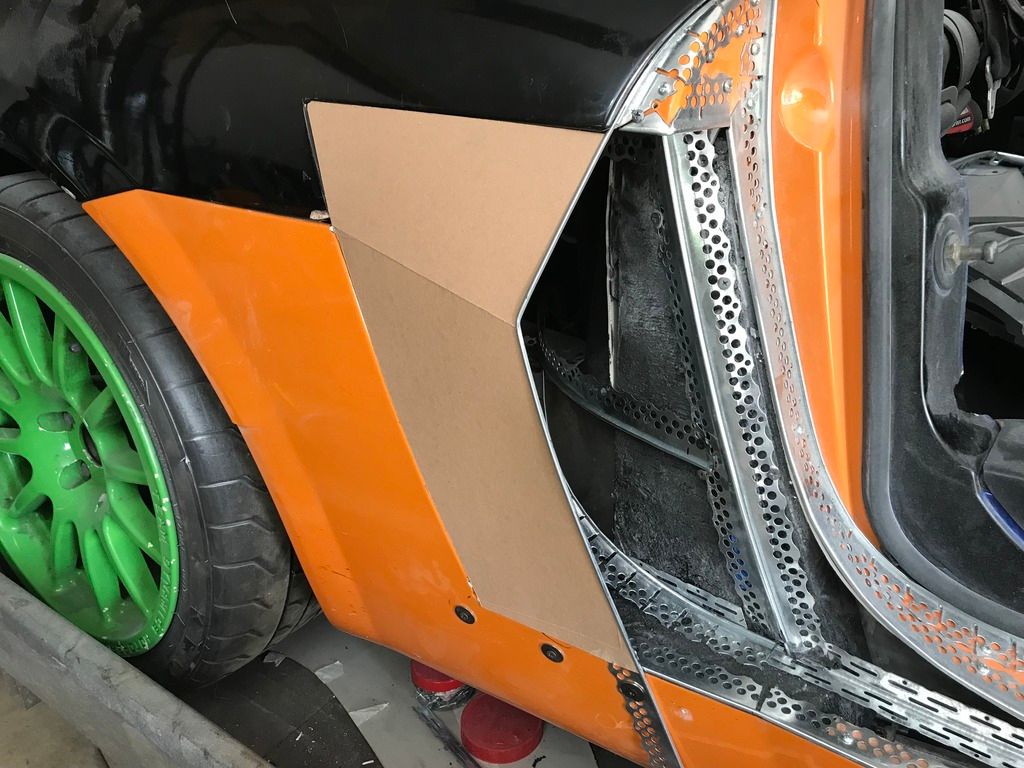
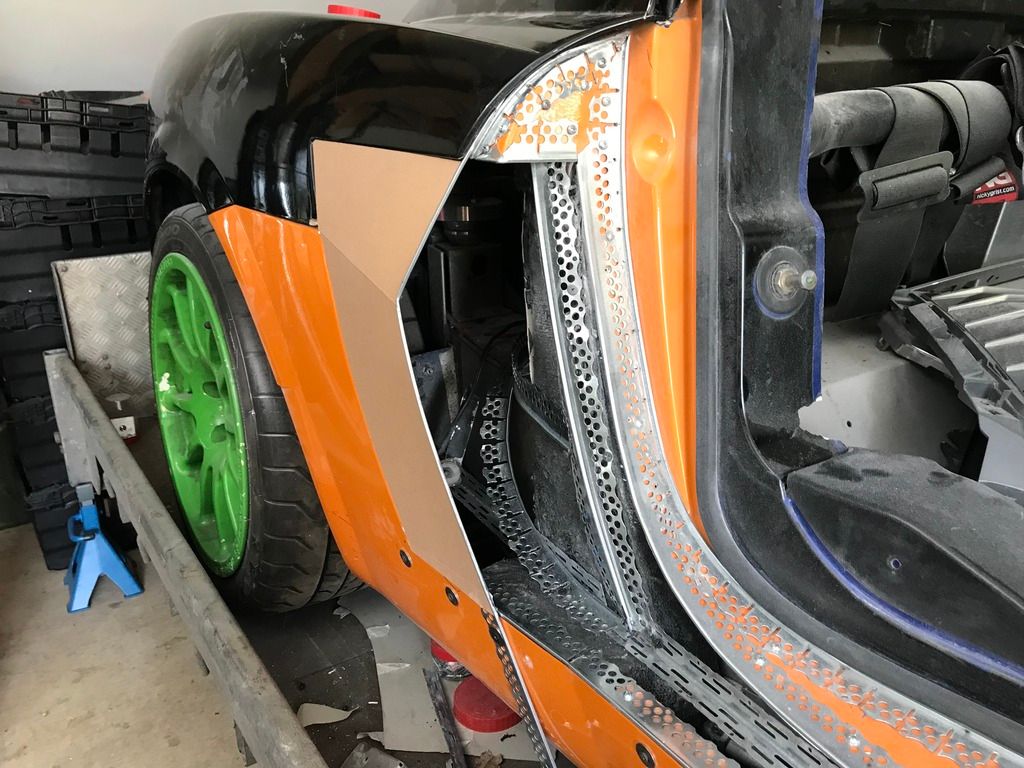
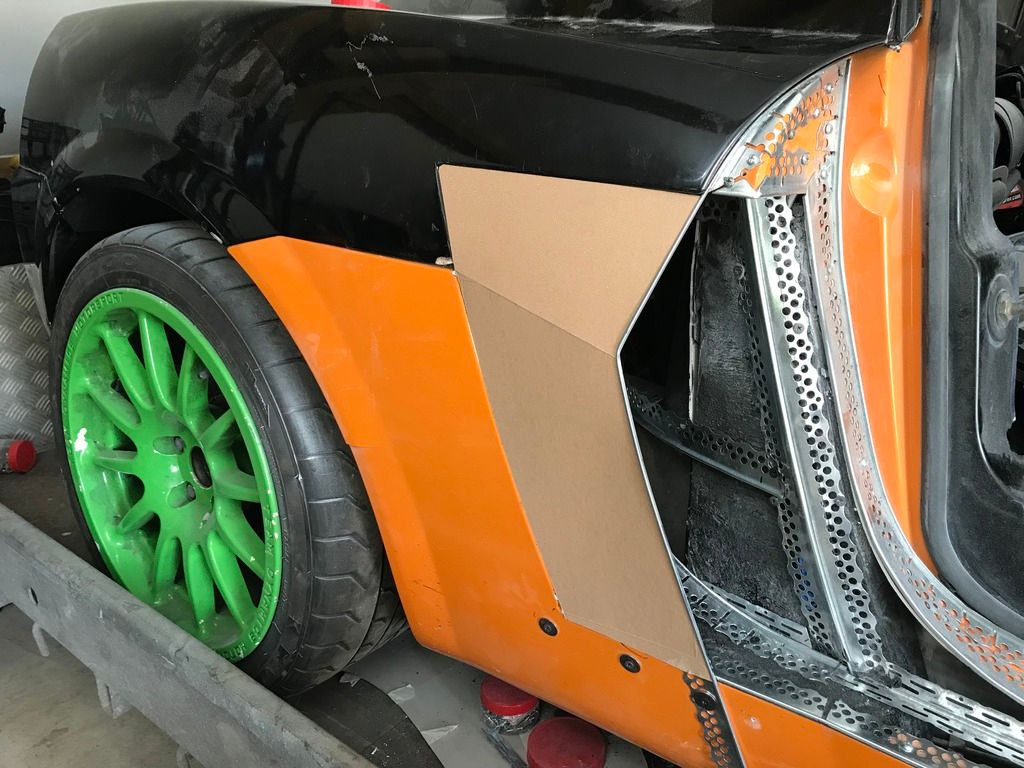
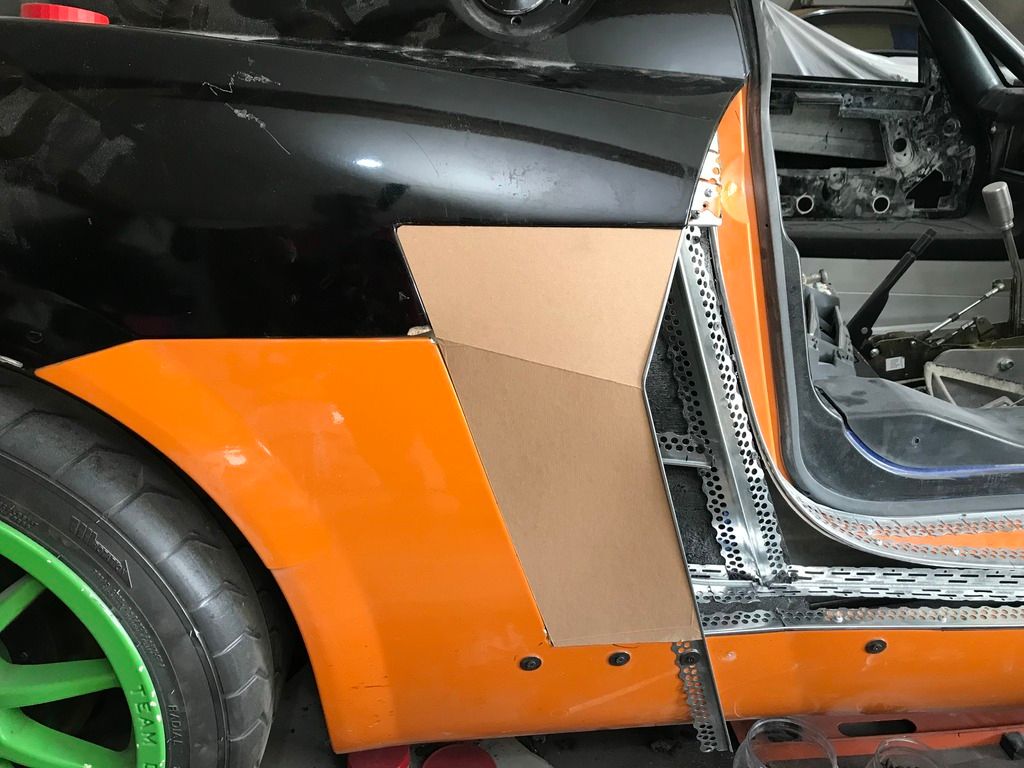
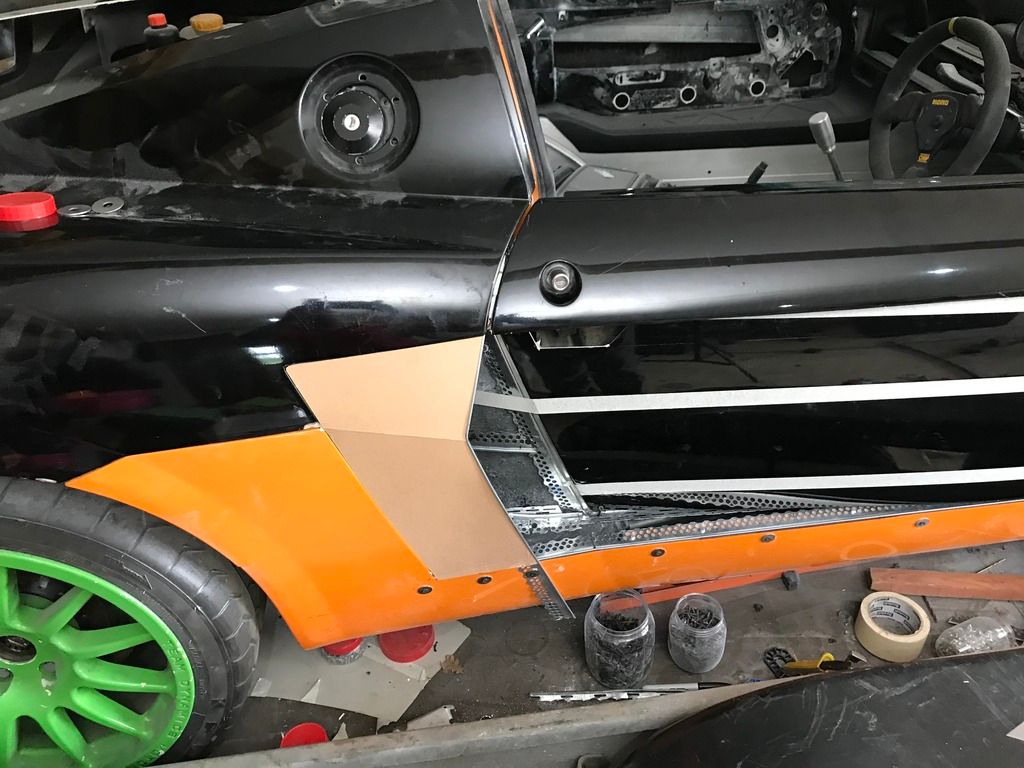
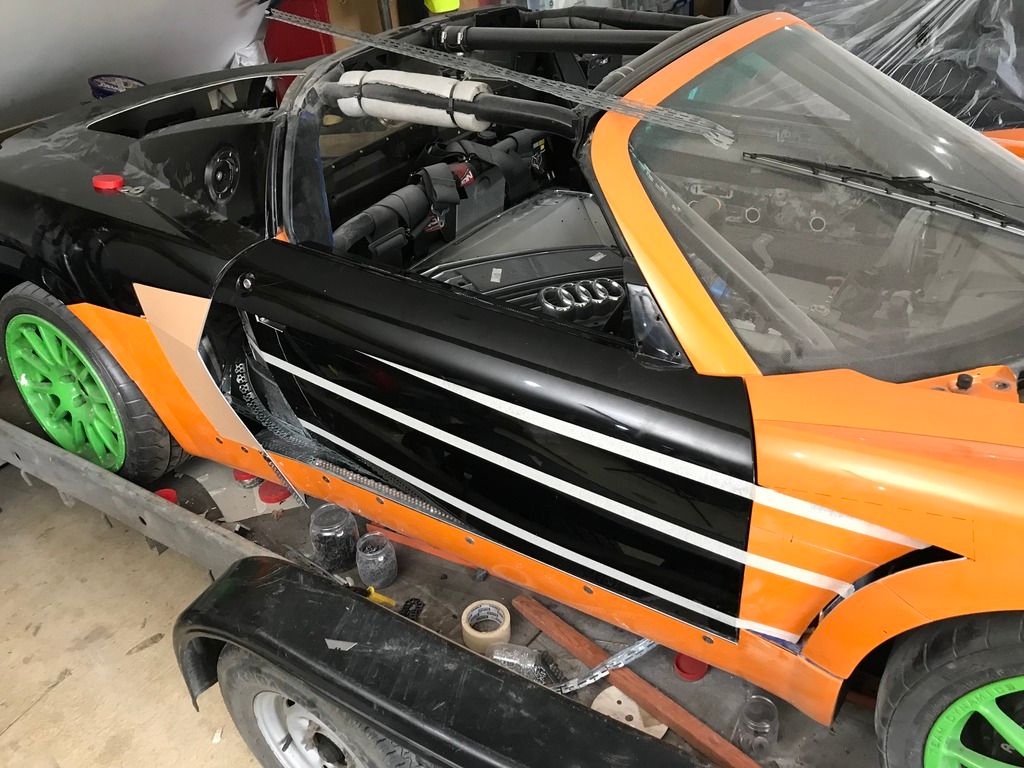
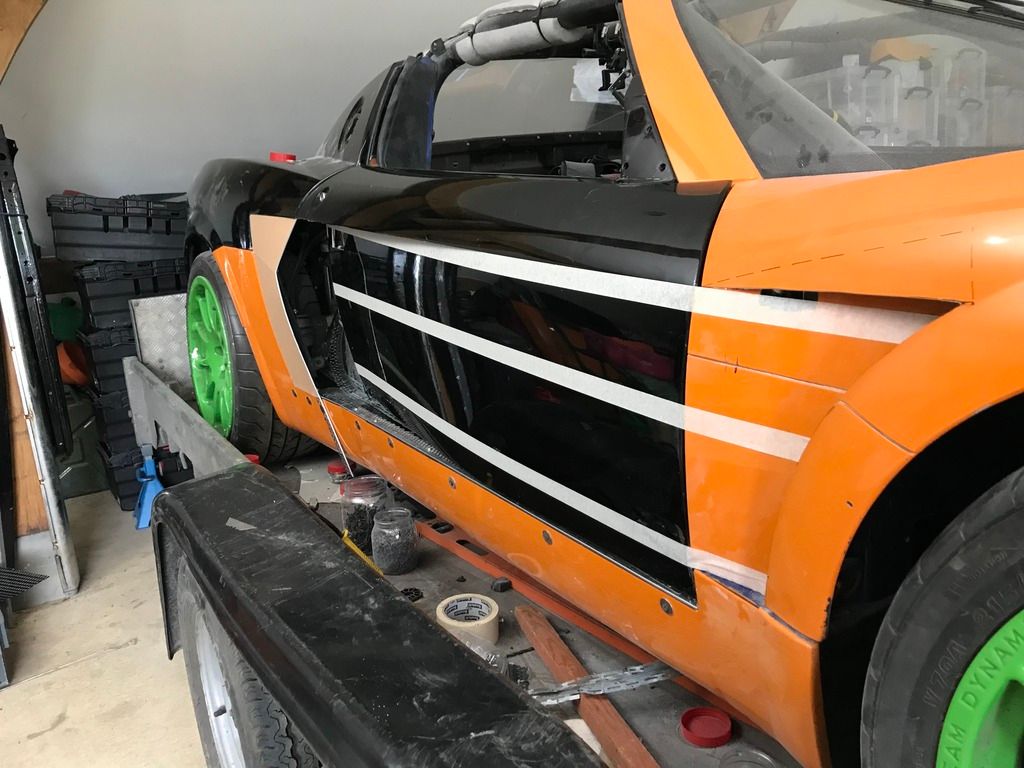
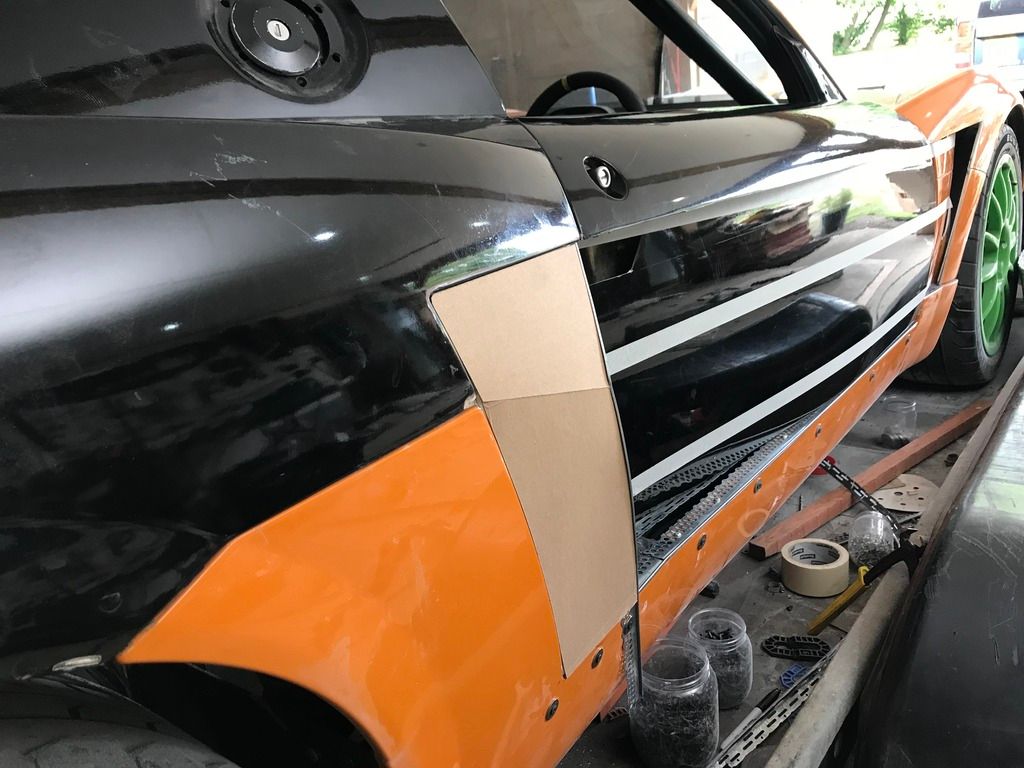
So, I'm digging a deeper hole for myself and I can't help it. Don't get me wrong, I am enjoying the head-scratching, problem-solving and doing something I've never attempted before. But, before I go any further, I would appreciate honest opinions on the side pod ears. I just don't think the CF tubby ones I had looked right on the car now. Standard na vents look too, well, standard and they wouldn't fit now anyway. So I have no choice but to make something more suitable.
I know there are a few waiting for me to finish this, so please let me know if it looks pants, average or good. Clearly, to me, it looks ok, but then I'm a bit too close to the project to scrutinise it and be objective about the overall look. The pods are just made in cardboard for now but will be made out of CF along with the air scoop, sill & probably the front wing vent detail. It may even look smart with the lower door skin being made out of CF. I don't think it will be a big job to do all the parts.
Now that I have started major work on the sides, front end, bonnet, coupe back, door mirrors and soon on the lower bumper /diffuser, I may as well do the mini wheel arches & flared sills too.
As I mentioned previously, I had a cunning plan to make the air scoop/sill side section. Well, it's not rocket science, that's for sure.
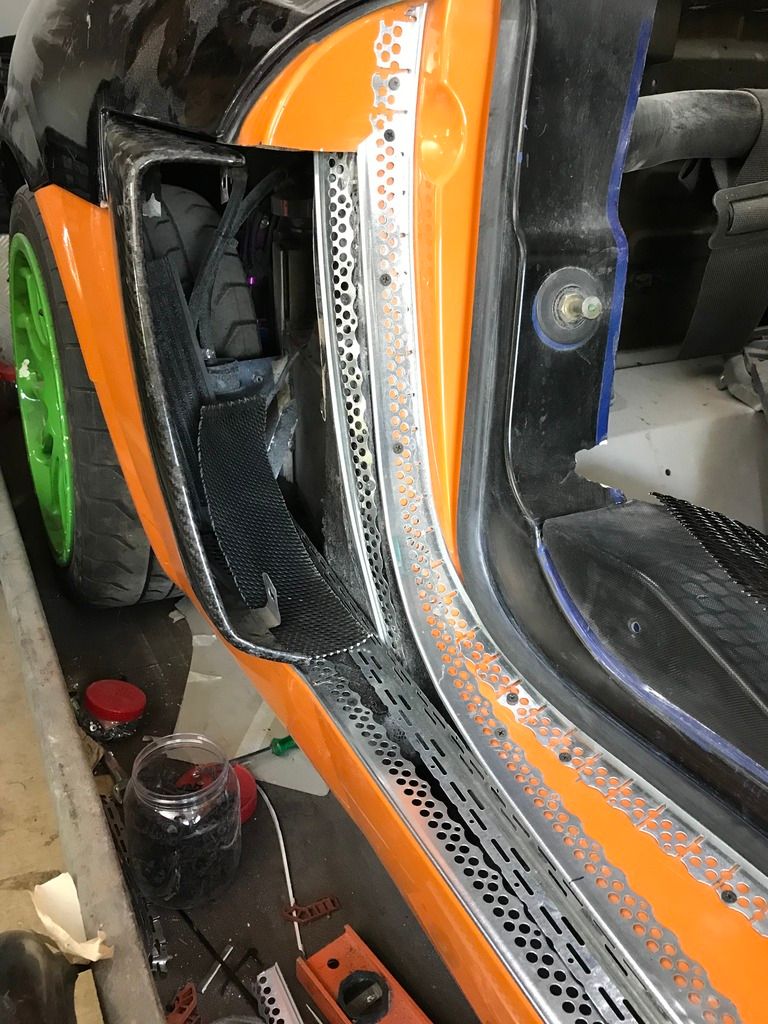
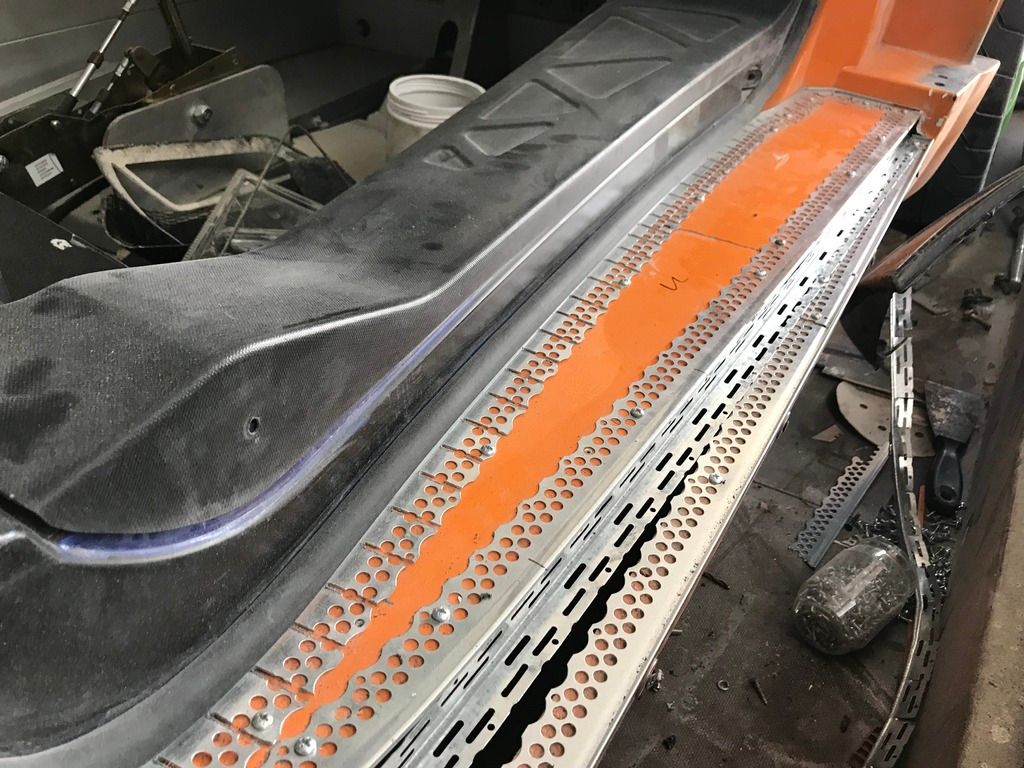
Here it is...Using various building materials I have in the past designed and set out open tread spiral walls, compound curve walls & ceilings, most done with nothing more than plaster bead, thin fibreglass pre-made sheets & well made accurate templates.
My first Idea was to use a resin & fibreglass cut strand & powder mix then literally trowling on the stuff into the plaster beaded areas. One of my plasterers is utterly amazing and the smoothness & finish he achieves is near glass flatness.
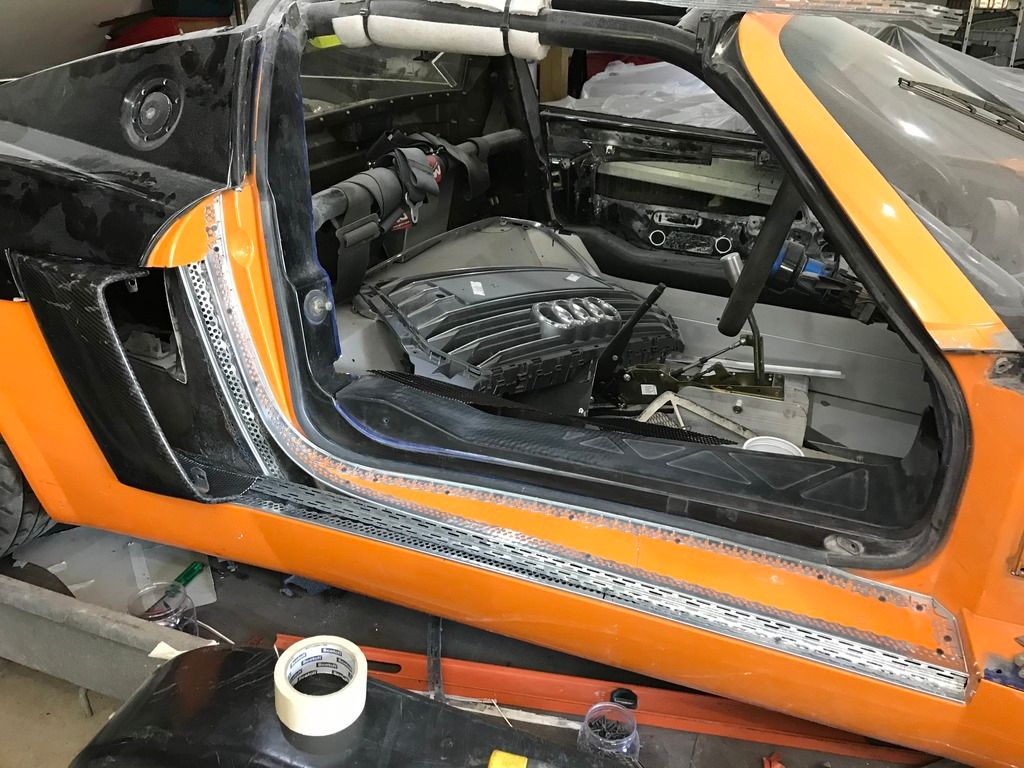
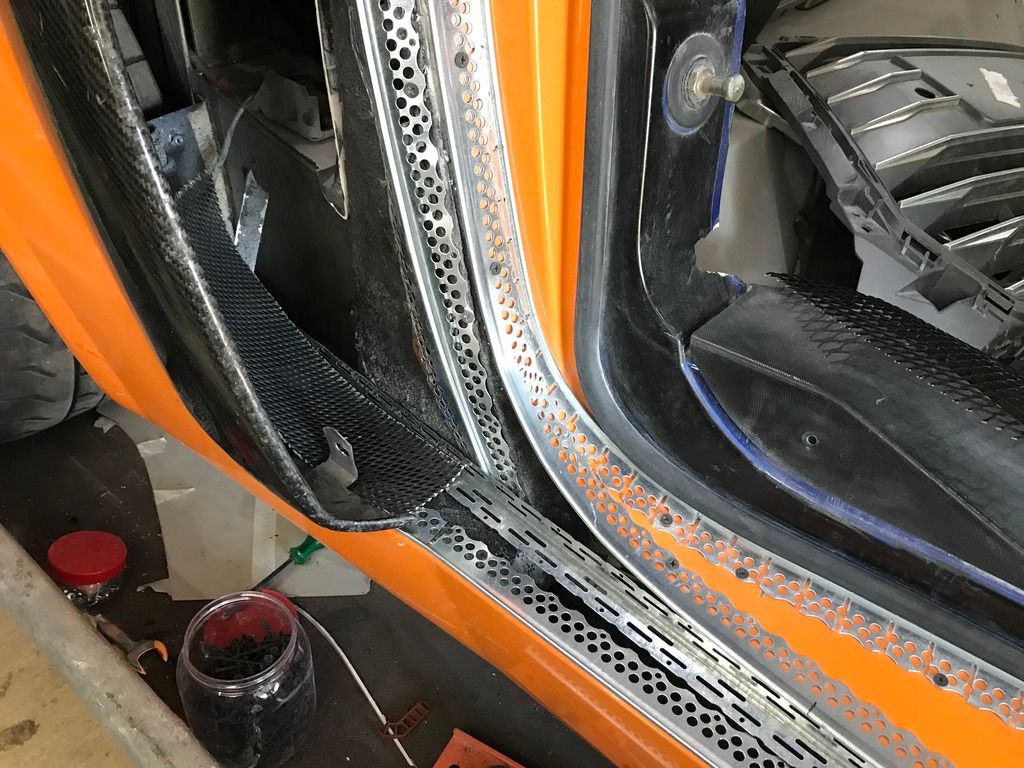
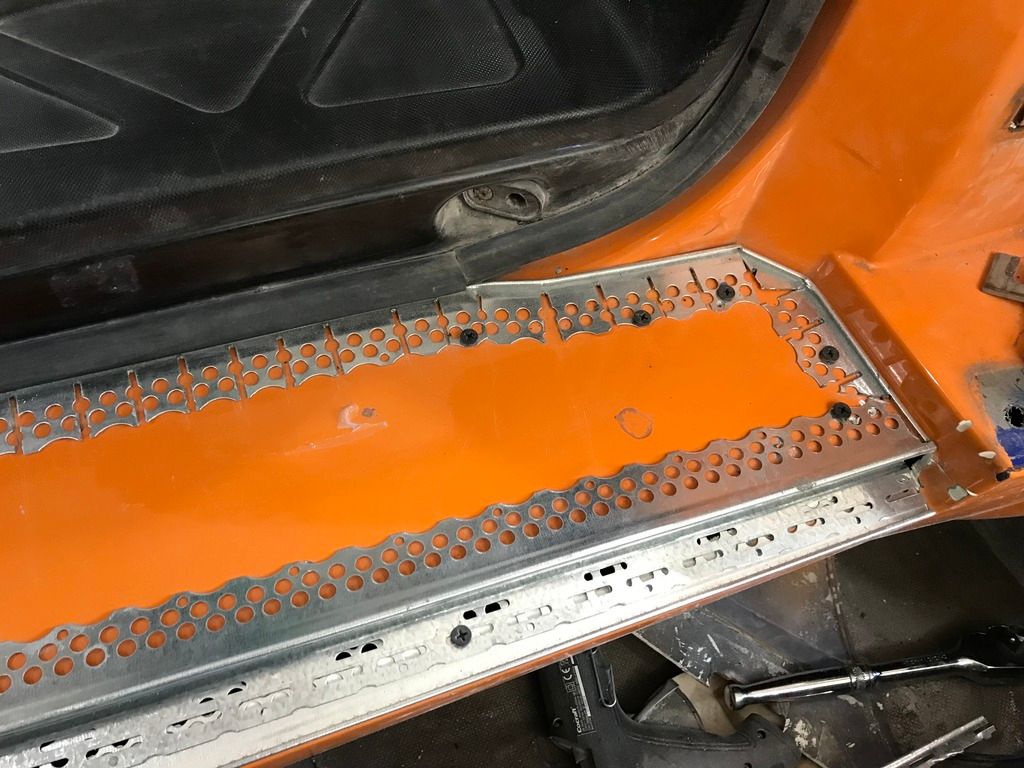
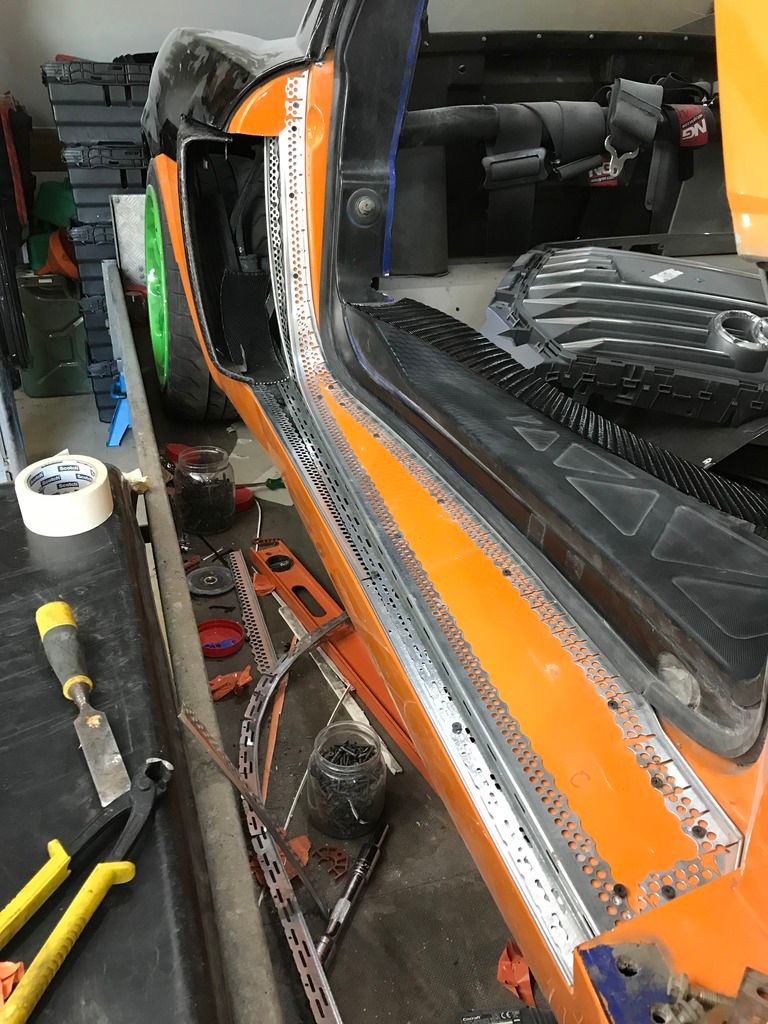
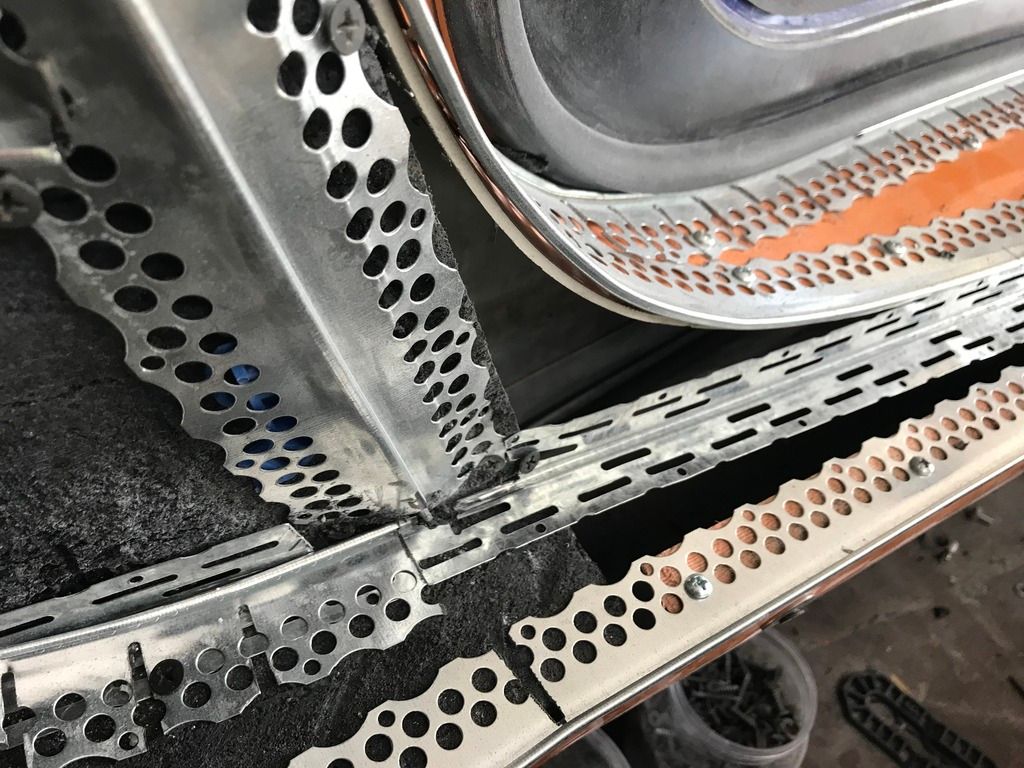
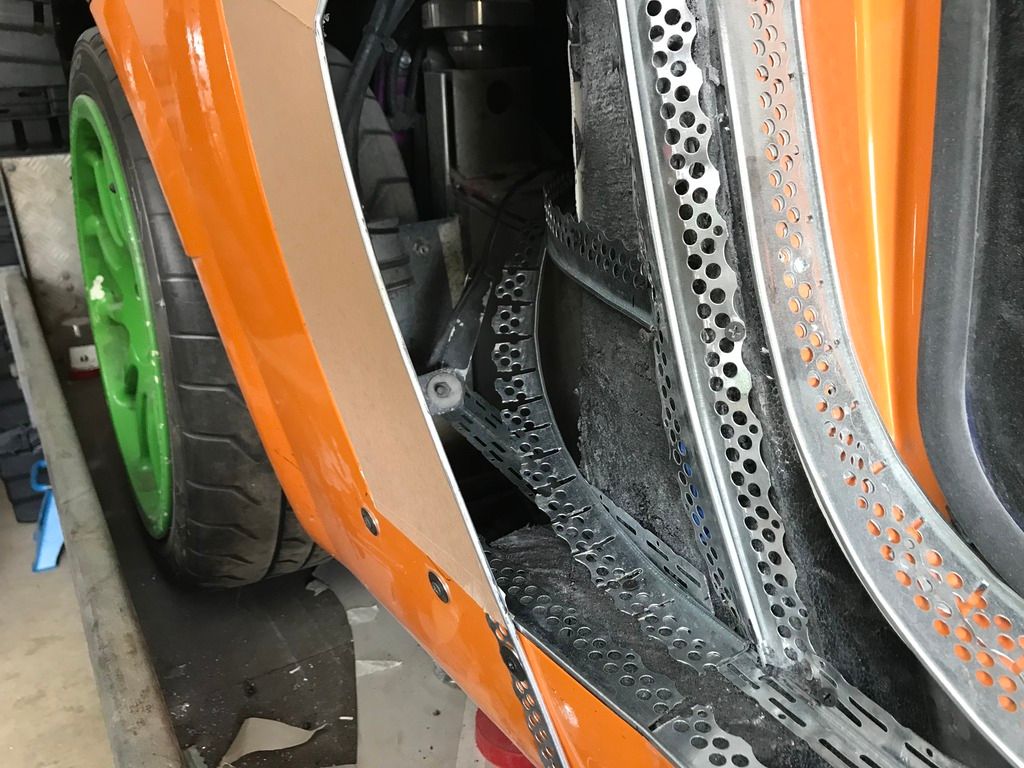
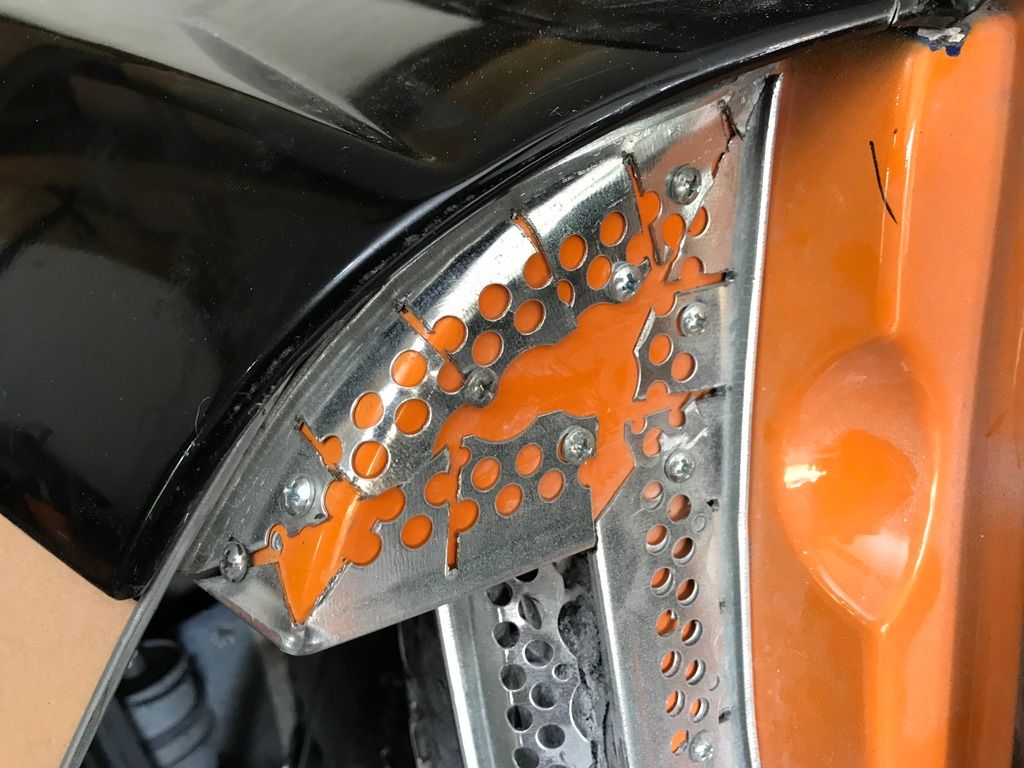
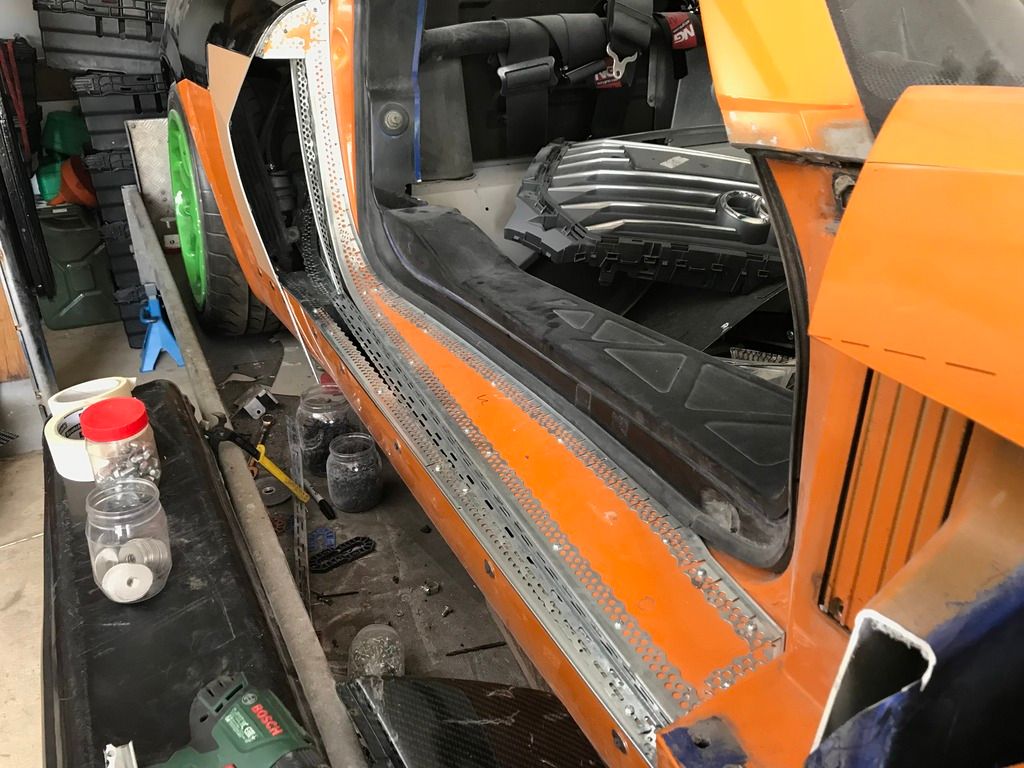
However, I now need to make a decent mould to allow copies to be made. So, I've used a commercial nano-ceramic coating spray on my car sills/bodywork areas where I want to make a mould from. I then fitted the plaster beads using very short self-tapping screws, which holds the beads really well to the fibreglass bodywork.
Next, I will use a fibreglass resin within the beaded areas. The resin will pass through the beading holes, eventually making it very strong. I will then fit 1mm smooth fibreglass sheets made from templates of the beaded areas. After this, wet layed CF twill will be used to form a hopefully smooth, flat and perfectly formed panel. This should, with the beading, resin and CF make a VERY rigid panel.
OK, I have used short self-tapping screws because once the CF goes hard I hope to just prise the whole damn thing off in one go. The self-tappers, just pop out of the fibreglass bodywork, as I've tried it out. This way, it's easy to make a perfectly fitting over panel for what I want. It may be a complete pain & may not be as easy as I'm hoping, but I will let you see the results, regardless.
Obviously, all the screw holes will be covered up by the panel anyway. Once the CF panel has been removed, I can fix any minor imperfections or fill/ sand areas on a bench. The bonus is that I will be able to sand to the plaster beading keeping the edges perfectly formed and the thickness even. After that is completed I will be able to make a good mould of the CF panel or should I say my fibreglass man will be able to do that for people. With luck, the final combined panel produced will be both accurate and simple to fit, should anyone want to make similar changes to their car. NO, I'm not interested, but I'll happily supply templates of areas to cut out & you will be able to purchase the air scoop/sill panel, side pod ears & front wing vent too if there is adequate interest.
Lots of photos again, sorry it must get boring for some looking at the same old stuff.
Any comments, good, bad or ugly on the revised side pod ears or anything else on the side scoop/ wing vent would be appreciated, as I am fast approaching the point of no return before I have to commit.
Thanks
Max
#68

Posted 08 September 2018 - 06:53 PM
Only add another 3 weeks of headscratching and modifications
#69

Posted 08 September 2018 - 07:41 PM
keep it NA against the bodywork and do a Lamborghini Mucielago and have them motorise out
Only add another 3 weeks of headscratching and modifications
lol. My abilities definitely won't stretch to that!
I didn't want the ears to look like Prince Charles. They would just flap in the wind and slow me down. ![]()
#70

Posted 08 September 2018 - 07:43 PM
hope you havent put all the dry wall screws through any pipes
#71

Posted 08 September 2018 - 07:50 PM
I will obviously add slight curvatures to the surfaces of the revised side pods as they look too flat in the cardboard mockup.
#72

Posted 08 September 2018 - 08:02 PM
hope you havent put all the dry wall screws through any pipes
I was amazed at how little pipework was in the sills. The sills were cut open fully & the entire sill visible. Anyway, the self-tapping screws were barely 5mm.
Also, the black foam that has been spoken about previously has approx 100mm gap at the bottom of it, so it does not block the sills, far from it. So, the sills can easily be used as a cold air feed. The white foam in the centre of the sill is soft and only 20mm thick. So, once you've made a hole in the front wheel arch, it's easy to push over with a thin flexible stick or extendable broom handle.
#73

Posted 08 September 2018 - 08:55 PM
#74

Posted 08 September 2018 - 10:00 PM
#75

Posted 09 September 2018 - 06:26 AM
Assume the beads are stainless? Rust is probably not an issue I suppose once it's all covered in grp though?
Plastic beads may be easier to use if you need to do more as you can manipulate them in to shape easily.
Sent from my G8441 using Tapatalk
#76

Posted 09 September 2018 - 06:31 AM
I like it.
Assume the beads are stainless? Rust is probably not an issue I suppose once it's all covered in grp though?
Plastic beads may be easier to use if you need to do more as you can manipulate them in to shape easily.
Sent from my G8441 using Tapatalk
Dan, the plaster beads is only to make the mould, they will not be part of the final panels
#77

Posted 09 September 2018 - 06:33 AM
Sent from my G8441 using Tapatalk
#78

Posted 09 September 2018 - 07:12 AM
Good use of plaster work beading, great for resin + glass to bond onto.
It'll be interesting to see how this turns out.
If mine ever takes a prang to the back, I'll be getting my dremel out too and trying a novel re-model!
#79

Posted 09 September 2018 - 10:31 AM

#80

Posted 09 September 2018 - 11:59 AM
Good use of plaster work beading, great for resin + glass to bond onto.
It'll be interesting to see how this turns out.
If mine ever takes a prang to the back, I'll be getting my dremel out too and trying a novel re-model!
Nev,
Back it into a tree when you're out next! 😠I now keep seeing cars with front bumpers, rear ends, sills, vents, light etc, that I think may work quite well with the VX.
It would be relatively easy to cut off the vx wheel arches move them out 50mm fit plaster beads on the body, then remake the wheel arches. Or, cut down each of the top of the wing crease lines with lights attached and move out the wing with wheel arches, then blend back on the wing tops. It would create an interesting vent behind the front wheels & rear side pods behind the doors. Damn it, move the sills out too! Bolt some wheel spacers or wider wheels for a macho stance.
I quite like the new style tall, flat wheel arch lips, very now!
Steve, the Ferrari is just stunning
1 user(s) are reading this topic
0 members, 1 guests, 0 anonymous users


