Max Side Air Intakes
#101

Posted 11 September 2018 - 08:59 AM
#102

Posted 11 September 2018 - 12:07 PM
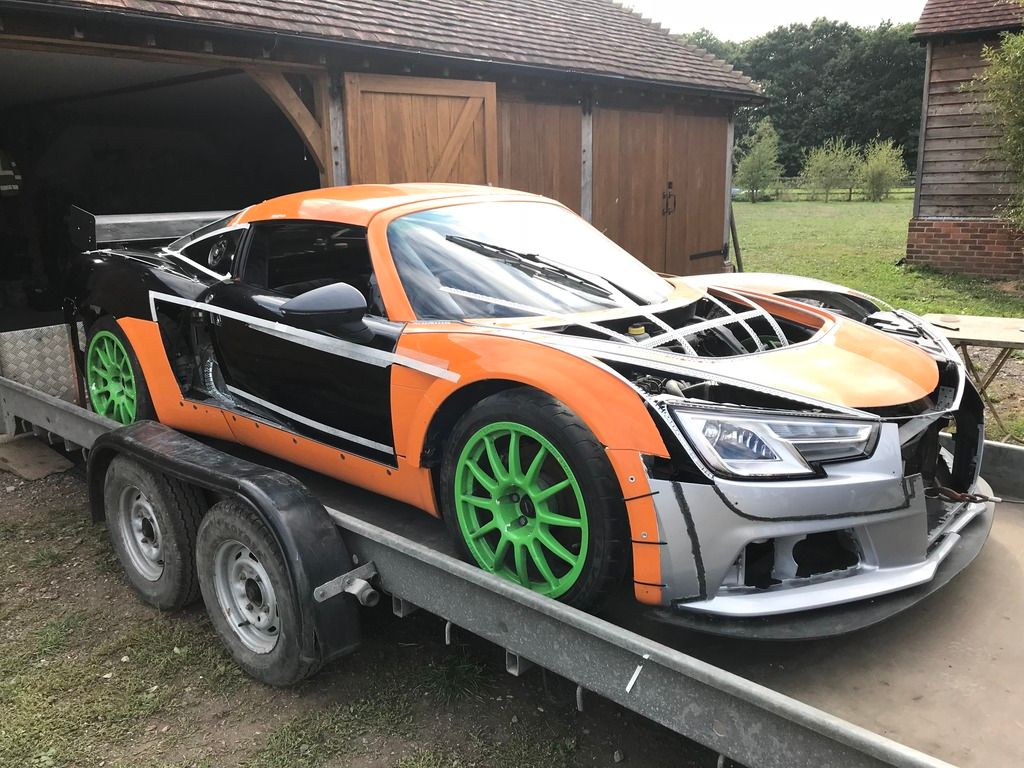
I hope to have the bonnet and front looking rather different by tomorrow. It won’t be fibreglassed but should be the right shape.
#103

Posted 11 September 2018 - 08:26 PM
Really enjoying the way you are documenting this build. Good work ![]()
![]()
![]()
![]()
![]()
![]()
#104

Posted 11 September 2018 - 08:38 PM
everytime I think about it , your idea of using edge beading is genius
Yep, totally agree on that - genius (I've specced a ton at work and it never crossed my mind) ![]()
#105

Posted 12 September 2018 - 06:42 AM
Plaster beads:
Single edge beads have been the most useful so far. Although you'll need to check what's available and what could work the best for you. These single edge plaster beads are the ones I'm using the most and I'll be talking about below.
Firstly, they work really well. However, all novices beware that cutting them should be done with a proper hand held disc grinder fitted with a metal cutting disc and NOT a lightweight dremel blade.
Trust me, it will kick and snag and bounce off! Also, make sure the metal cutting disc is 3mm thick, no less! Anything less WILL snag on the beads and the edge of the metal blade will disintegrate, so always have the guard fitted. You can slide it around to cut at different angles.
Next, don't EVER cut the beads whilst holding them in your hand. It WILL snag and the grinder will bounce off and it's likely to cause a nasty accident. Instead, get a length of 4x2 timber. Screw a length of roof batten to it. Next, screw your bead to the roof batten. On occasions I have wanted to cut the width of the beading lengthways to reduce the width. Especially useful for forming curves, where you need a narrow strip which will bend more easily on tight curves.
So, screw the bead to the roof batten which is screwed to your 4x2 timber, so that the width you want to cut off overhangs the batten. Next, simply run the disc cutter down the edge of the batten, cutting of the width you don't want. This prevents it kicking up, gives you an extremely straight cut and does not kink the beads. Kinked beads are useless!
Forming curves using the beads:
Again have a length of roofing batten, fixed to the 4x2 timber. However, cut out a section of the roofing batten of say 150-200mm. You will use this area to cut slots into the beading so that you can bend it to form curves. Mark on the beading approx areas where you need to form curves with a permanent marker. Screw the beading down using just two screws on the batten with the area you need to cut slots into between your 150-200mm removed section. You can now cut your slots safely every approx 10-30mm apart. Slots cut closer together will be able to be bent more consistently around tighter bends. As I said make sure your cutting blade is at least 3mm width, no thinner! Cut down into the bead stopping 4mm short, no less!!! Try always cutting through the holes of the beads as this allows the beads to bend more easily. Unscrew your length of bead and move along and screw down again, just working within the 150-200mm gap. It's safe! When you bend the plaster beading to form the curve, the slots you've juts cut is where you want the beads to bend. You need to bend the curve very gently otherwise you will kink the plaster beading into a hexagonal curve.
Don't bother using snips, they will twist the beads slightly and you need a wider slot when you bend. Often the snips will kink the beads or crush the edge of the bead.
Once you have bent it into the approx shape you want, grind the back face of the plaster beading. Where you have bent the beading, you will get a small deformed bulge area at the ends of each slot you've cut. Grinding this bulge off, lets it sit flusher and also makes bending it into its final shape easier.
Forming the basic shape:
If for instance you want to fit the plaster beads onto a flattish surface, sometimes it's easier to make a paper or cardboard template. Spray it to a plywood board board with contact adhesive or use masking tape. Then on screw the beading to the template and bend then screw to hold it into position on the plywood base. Then unscrew it and make good any areas. I forgot to mention. De-burr the edges after you do any any cutting with the flat surface of your disc cutter. Failure to do this will probably get you a shape slither of metal into your hand or under your finger nail. So, wear gloves at all times when you're handling the cut beads. You can sand the edge of the beading to remove any minor variations in the curvature of the beads or to remove the slight hexagonal appearance if required.
I found that using a blunt narrow chisel or wide screwdriver was useful to push the beading edges flat on the bodywork without damaging the leading edge, especially in corners and whilst screwing down.
Also, get a panel hammer to tap the beading flat on bodywork prior to screwing it down or using double sided tape (see below) was useful.
Hot air gun:
Using a hot air gun is not generally necessary when you curve the beads, although tighter bends will benefit from heating up first. Use proper heat proof gloves!
Fixing the beads to your car's bodywork:
You can you short self tapping metal screws, they will hold very firmly and pull out later when required. Or, use self adhesive double sided tape. Awesome stuff! I have used the thin foam 10mm width double sided tape more recently and it's fab. It holds amazingly well and after you fibreglass within the beads, you can prise it off easily enough. Or run a sharp blade into the foam to release the beads. The sticky remains comes off with petrol or Ive been using cellulose thinners. It shouldn't effect your paint! Or, put masking tape down where the beads will sit and stick the double sided tape to the masking tape. Also use masking tape outside the beaded areas. This will be really useful to protect from resin! It's probably worthwhile sticking plastic sheeting outside the beaded area up to the masking tape to prevent resin going where you don't want it, especially when gravity will make the resin run downwards! If working on the side of your car. Or, better still, cover the area in plastic sheet first held down with low tac spray adhesive, then put your beads on top. This WILL protect your bodywork from scratches and prevent resin from going on the bodywork. Fixing the beads you will have to cut away the plastic first to get the double sided tape to hold firmly.
Scrim tape:
THIS a fab product, for use in tape and jointing plaster boards. (a little secret) It's sticky on one side AND is made of woven fibreglass! Yay! Use this stuff inside you beaded areas as a cheap clean way to fit a basic initial fibreglass area within your plaster beaded area you want to fibreglass or carbon fibre. It's perfect after you paint on a thin coat of resin onto the scrim tape. You can wrap the scrim tape around brackets, plastic or whatever as it can be easily formed around objects prior to the next stage below.
** Scrim tape would also be useful to use to strengthen cracks, weak bodywork areas or to hold panels in place with a dab of resin perhaps?
Fibreglass material:
I don't see the point in using fibreglass strand material. It's messy, especially when using resin. Bits come off and it's a PITA.
Ive bought woven fibreglass cloth and carbon fibre cloth. A couple of pieces of double sided tape will hold it reasonably well on your plaster beaded area. Pull it taught and using a NEW SHARP BLADE, just cut by running the blade along the edge of your plaster beading. You will then have a perfectly cut piece of material, ready to resin in. You can repeat this to build up the thickness or just use it as a template and a pair of scissors.
Fixings:
Whatever you are making, it may need to be attached to your car. For instance, making and fixing new side pods, roof vent, extended sills, wheel arches etc.
So, make sure you buy fibreglass fixings. Essentially, a perforated round or square plate with a screw thread welded or a nut. Available in common M3-M10 sizes off the shelf. Make sure you resin / build these into your part.
Remember, you can also fit a rubber seal to the edge of your part, which will fit against your bodywork. It will look clean and tidy or you can paint them to your car body colour too. Make sure you look up seals first so that you know what's available how thick the edge of your part needs to be for the seal to fit
Keep safe, wear safety glass, ear fenders and gloves! Also a half mask with proper filters for cutting fibreglass or protecting against resin fumes.
I Hope this will be useful!
Mum x
#106

Posted 15 September 2018 - 04:37 PM
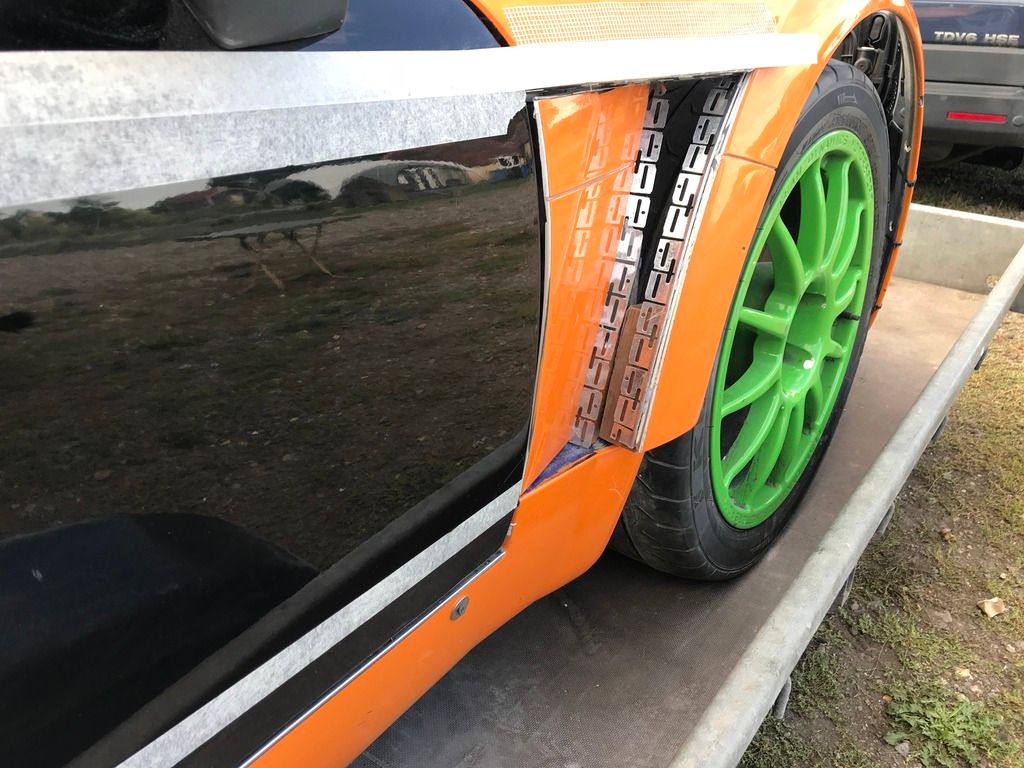
Wing vent update:
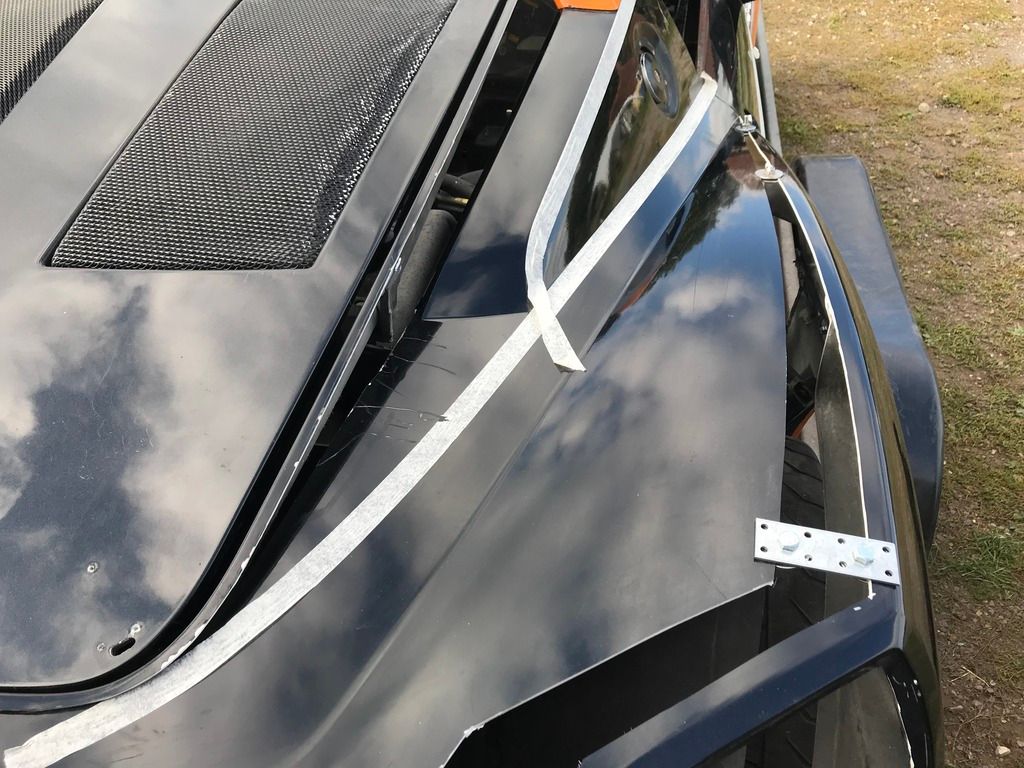
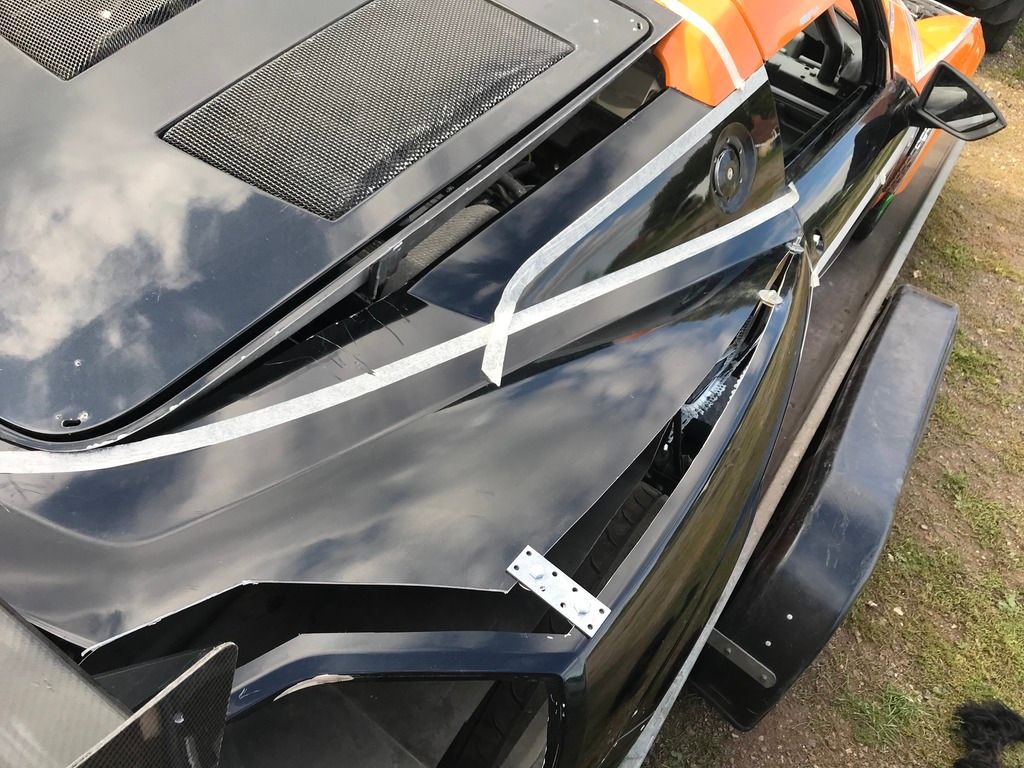
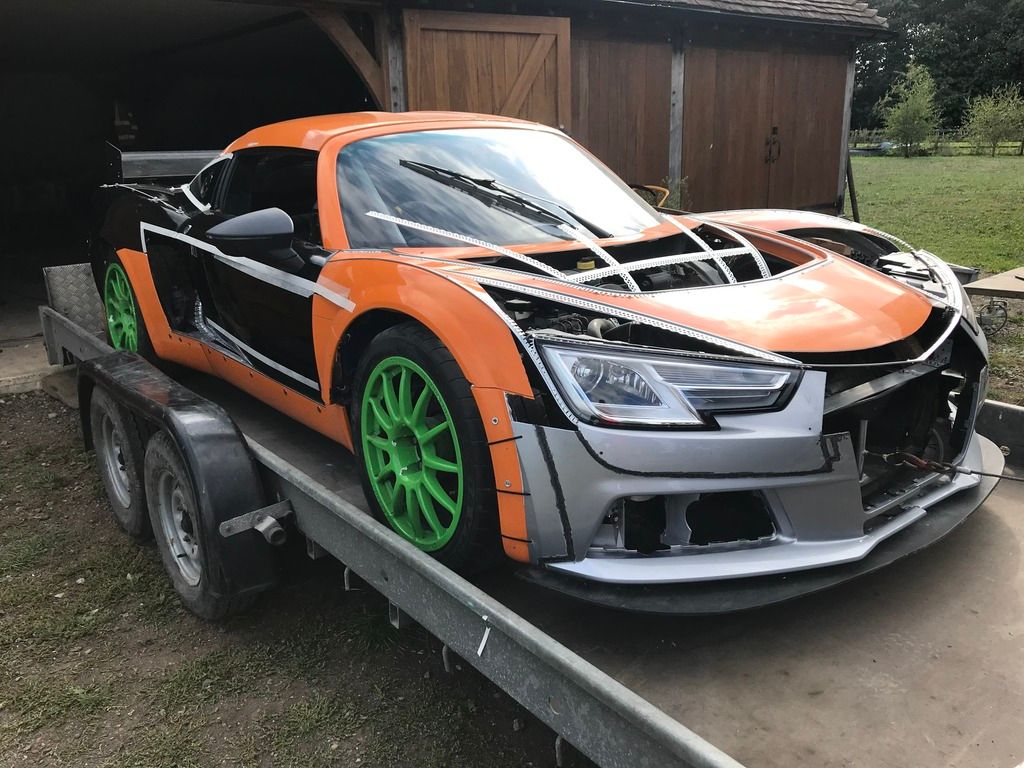
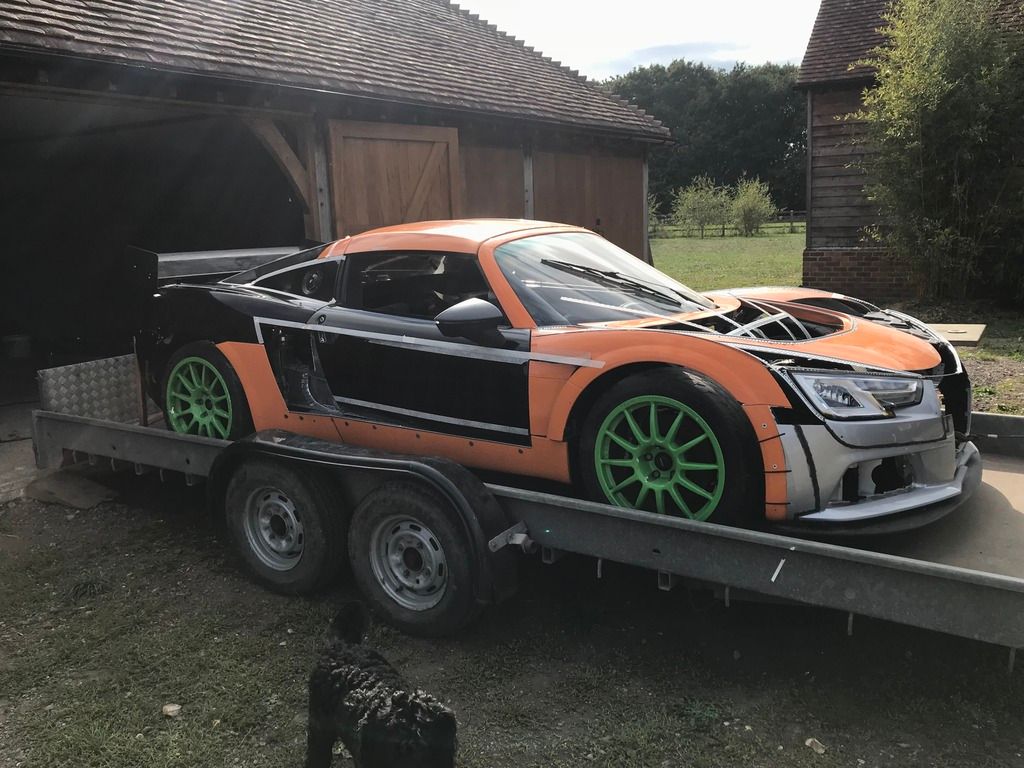
I finally got around to sorting out the driver's side wing vent, which I cut incorrectly at the wrong angle. Mind you, even if it was cut correctly at the time, it would have been wrong anyway due to me now moving out the wings to allow wider tyres.
I also made a start on the bonnet radiator scoop. At the rate by only doing a few hours at a time, it could take much longer than I anticipated!
#107

Posted 16 September 2018 - 06:04 PM
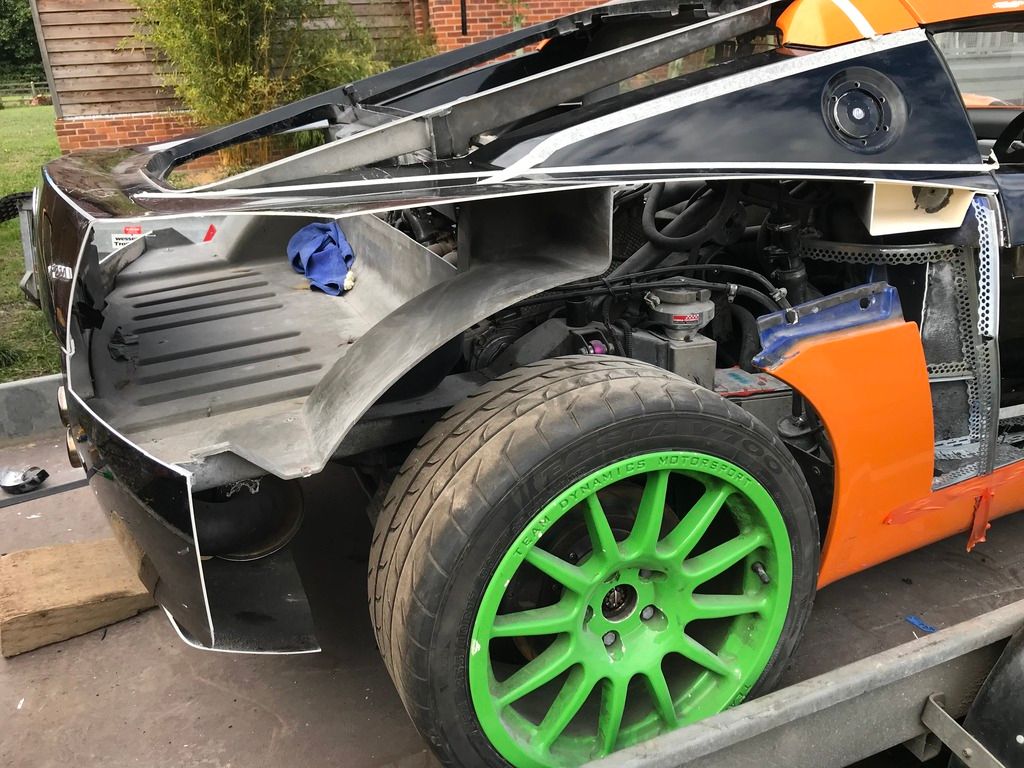
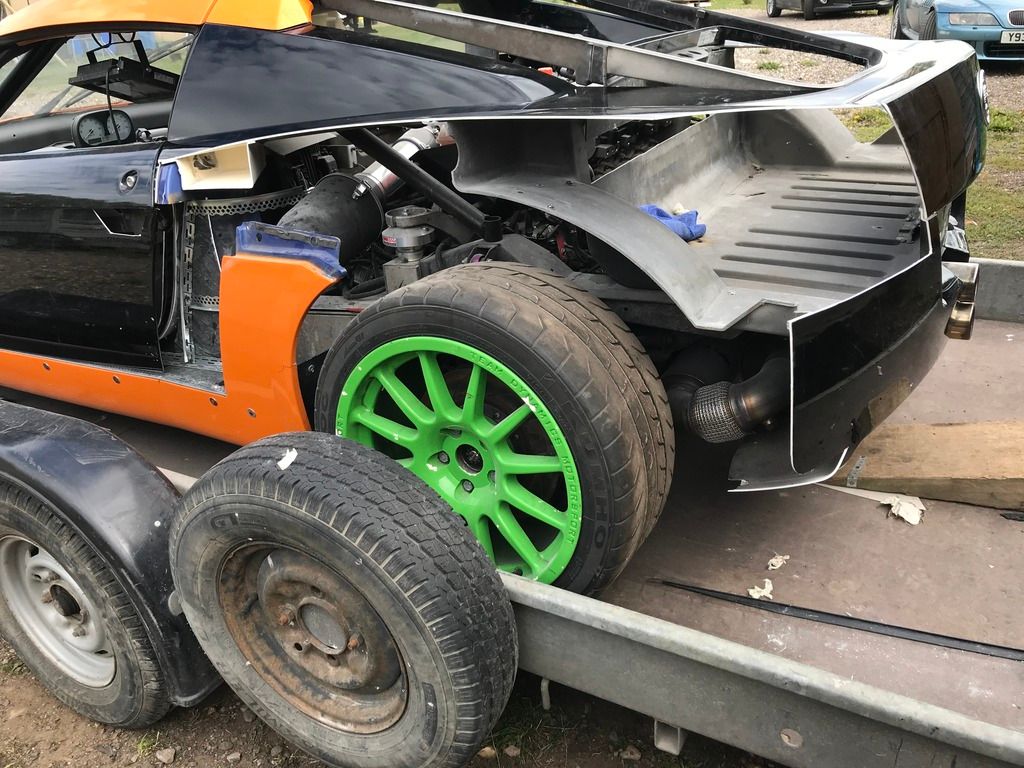
Improvised wider wheel arches:
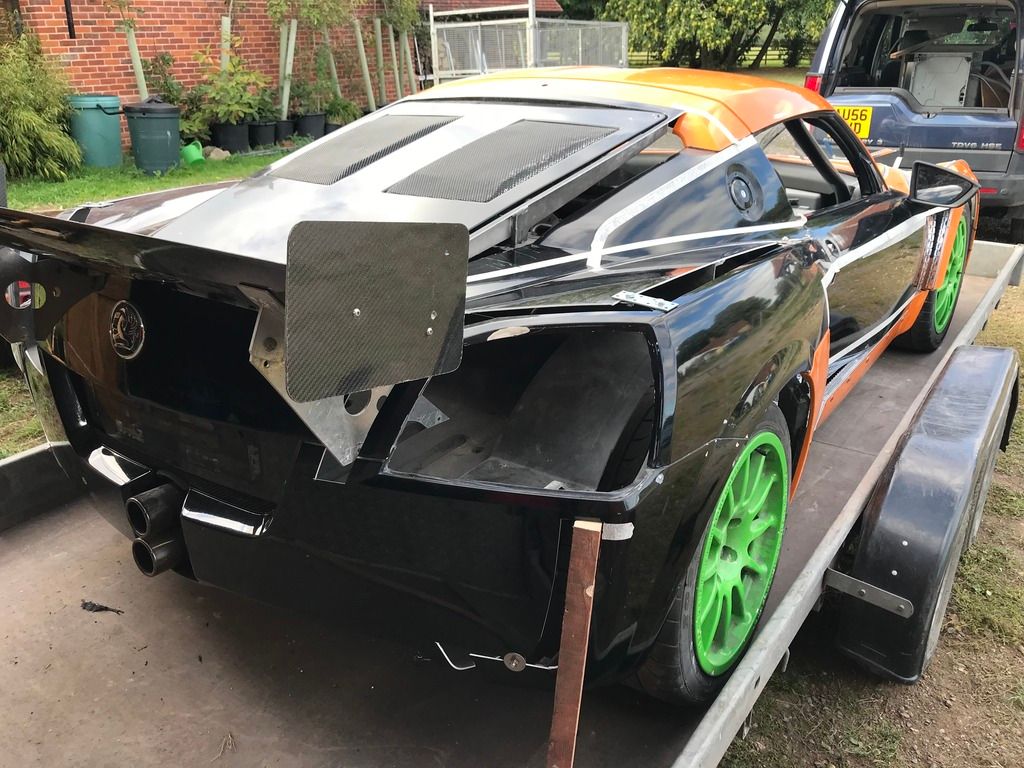
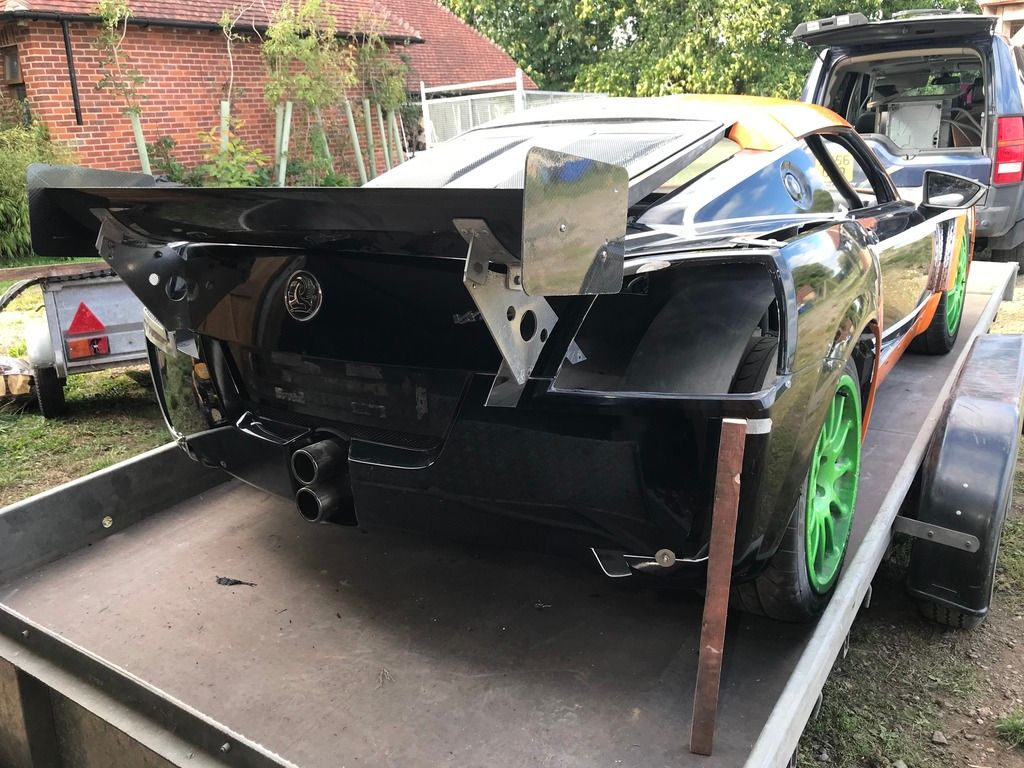
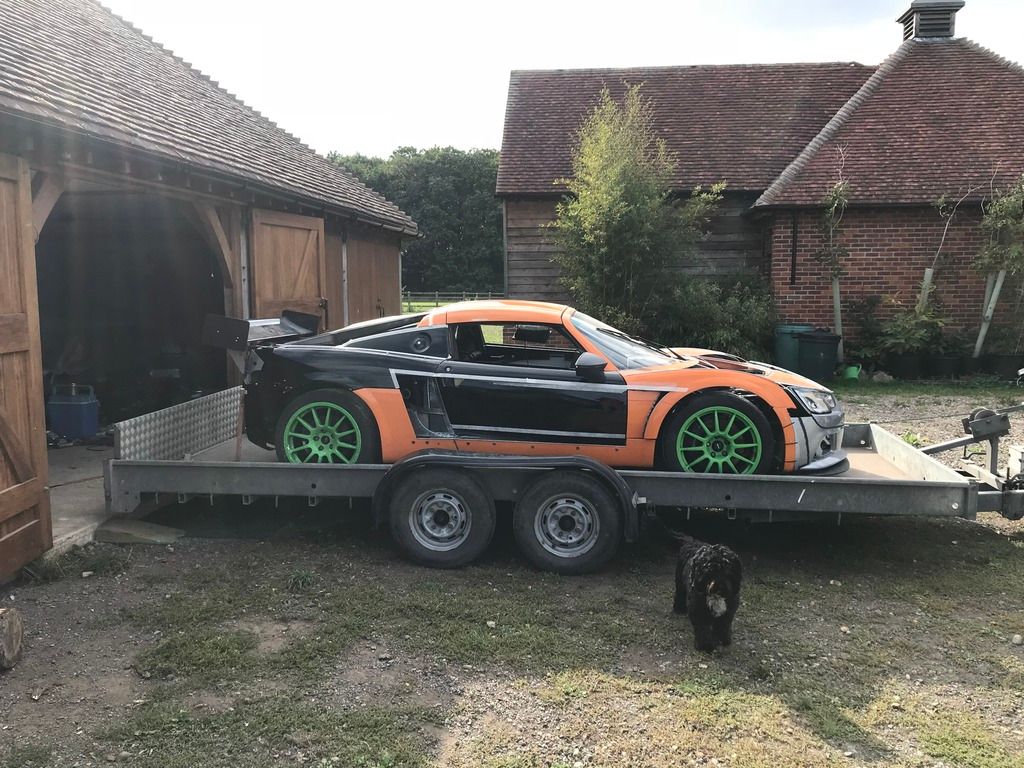
I’ve had to make start on preparations for the new rear end. Rather than attempting to make complicated and time-consuming wheel arches for each corner of my VX. I opted to do much the same as what I did on the front end ie moving out the wings. However, the rear was far more involved, but nevertheless a very straightforward process. The patching together along the wing tops and wheel arch liners is far easier than trying to form a new wider looking OEM style wheel arches & also to blend them in seamlessly. I personally like a wide sharp stance, with a pinched in waist. To my eyes at least, the sides & front is starting to look lush now.
This option made the most sense to me as the rear end is being completely overhauled anyway, just like the front. The sills were cut at the crease just below the door edge, then rotated to its new position, which is good news as it also makes access to the side air scoop into the engine bay area fully accessible for me to create nice canard style scoops. I will also be installing 80-90mm diameter pipes in the sills to aid cooling to exactly where I want cool air in the engine bay.
I love the front wing vents! But, because I must also cut and rotate the front section of the sill (similar to how I’ve done the back of the sill) to meet the new location of the front wheel arch, I will also increase the wheel arch vent downwards, so that it is the full height of the door scoop, which will look far better.
Bonus! Now that the car is getting bigger in all directions, the wing mirrors don’t look as big Steve, yay!
I will obviously be getting bigger, wider wheels to fill out the arches, which will give the added benefit of a better range of tyres.
I stuck my wing out back on the car and it’s grown on me again!?!??
As for the rear end revamp, I still haven’t decided on a what car parts to use. Hopefully, I can now measure up my VX to gauge dimensions and therefore which parts may fit better.
I had a couple of forum members from Europe contact me, looks like other’s are going to try their hand at changing their VX’s appearance using Audi parts…
#108

Posted 16 September 2018 - 07:53 PM
#109

Posted 16 September 2018 - 08:59 PM
This has some nice lines. From my experience of glassing it's worth taking time and having a perfect plug to mould from. I've rushed things in the past and spent longer finishing mould a and mouldings than I would have finishing the plug properly. It's very easy to get bored or exasperated with the finishing as it takes a long time. Please don't skimp, it's looking good and I'd love to see a good outcome.
Cheers! I completely agree with you. I hope to get the plug as perfect as possible, time will tell. Most of the amateur large moulds I have seen have been of poor quality and required vast amounts of fettling time in order to finish them to a decent standard. If my plugs produce sh!t moulds, then they will be binned. I wouldn't want to have rippled, poor fitting panels with uneven surfaces, even on my track car. However, if they come out looking like OEM quality, then I will make a road car for myself.
I had a long chat with my best plasterer yesterday. He was sent photos of what has been done so far. He has convinced me that he can plaster the car (not with wall plaster!) within the beaded areas and get them looking close to the correct shape. I know it will be super flat and smooth from his previous work.
I only use him for the hardest and most complicated work such as compound curved walls. He isn't cheap (£500 per day) and also lives on the Isle of Wight! So I need to get the car ready for him, which includes me laying CF within the beaded areas, but below the bead level. I also need to make some contour profiles to get the correct wing/bonnet shape that I want.
#110

Posted 16 September 2018 - 09:14 PM
I know this isn’t finished but the rear wing may need to go a little higher as you need to get clean airflow under it.
#111

Posted 16 September 2018 - 09:22 PM
#112

Posted 16 September 2018 - 09:50 PM
#113

Posted 17 September 2018 - 03:24 AM
Why on earth use CF for the plug? And don’t disregard chopped mat, it’s much easier to mash into place to get the plug looking right than twill or some other weave. You want a solid well shaped plug, not a structural part.
I have acquired 5x 25m rolls of CF 2x2 twill for less than £100 per roll from the guys doing a car for me. They bought it in for a customer that changed his mind and went for 1x1, so I couldn't really refuse. I would never use up 125m of CF otherwise. The plug won't be entirely made from CF, but a mixture.
I would use mainly fibreglass woven material over chopped strand for the way I'm intending to make the plug anyway. I also have access to a cheap supply of woven FG. The main plugs will be bolted to box sectioned frames.
I have no doubt it's not the typical way to produce high quality stable plugs. But nevertheless, it's the method that I'll be using and It will be the first and last time I do this...
#114

Posted 17 September 2018 - 04:03 AM
As your extending the rear wings out, are you still going to have an “ear†or will the leading edge of the wing incorporate an air intake for the full height of the panel?
I know this isn’t finished but the rear wing may need to go a little higher as you need to get clean airflow under it.
Dave,
I'm still not sure if I'll be using a huge rear wing. If I do, it will be higher and further back than I had previously. I may well also incorporate a Porsche style pronounced boot lip below a main wing depending on the position of the main wing or perhaps just on its own initially, again depending on the rear I choose.
There is a good possibility that I could acquire all the rear end of a friend's track damaged 458 including rear lights and diffuser. I'm just waiting for a price from him.
The other problem is, I'm not intending to run my car low, which dramatically reduces the effectiveness of a motorsport style diffuser and also channelling underside air. Ive no intentions of going to GT hubs, so running the car low just isn't likely.
Personally, I don't think I'll require side pods (ears) as the opening to th engine /boot area is now possibly too big. I'm just considering my options at th moment. A good clean exit path for the air entering the rear end will be required, so rear grills/ vents Is a must and preferably linking upto the top of the rear diffuser.
Also, the last thing I want, is for my car to look like it's a rocket ship but go like an old biplane or that the driver i.e. me, has the skills of Joe. That would be the worst!ðŸ˜
#115

Posted 17 September 2018 - 01:56 PM
#116

Posted 17 September 2018 - 03:38 PM
#117

Posted 17 September 2018 - 04:39 PM
Hey, don’t be nasty about Joe, he told me he did an entire lap without falling off this year, it was at that Norfolk track, about 9am
was that on his push bike ?
#118

Posted 17 September 2018 - 05:08 PM
However, lap times don’t lie! I believe your best time at that Norfolk track was a very tidy 3.5 turns of an egg timer. Well done!😂
#119

Posted 17 September 2018 - 05:37 PM
awww.. all just jealous ![]()
Max i do look forward to seeing you on track again
i might not get close to you... this will be due to not wanting to be hit by any parts falling off or not wanting to run over self tapping screws, or have chicken wire wrapped round my car
so if you could just pull over and stop when you see me coming that would be great ![]()
#120

Posted 17 September 2018 - 06:32 PM
1 user(s) are reading this topic
0 members, 1 guests, 0 anonymous users


