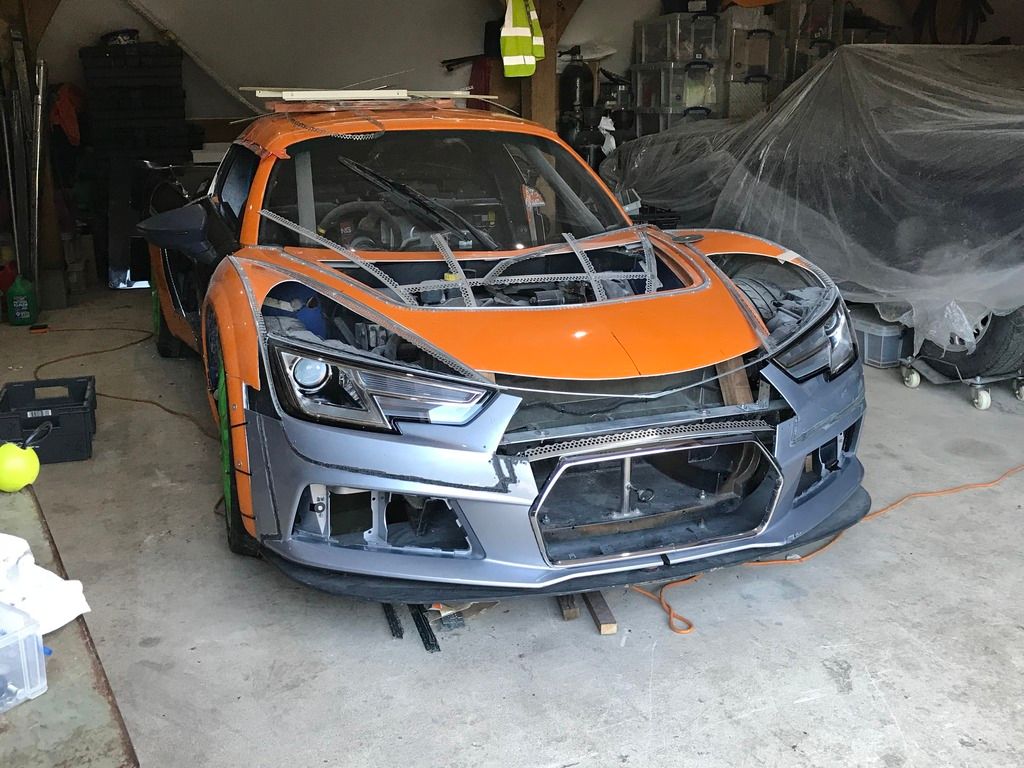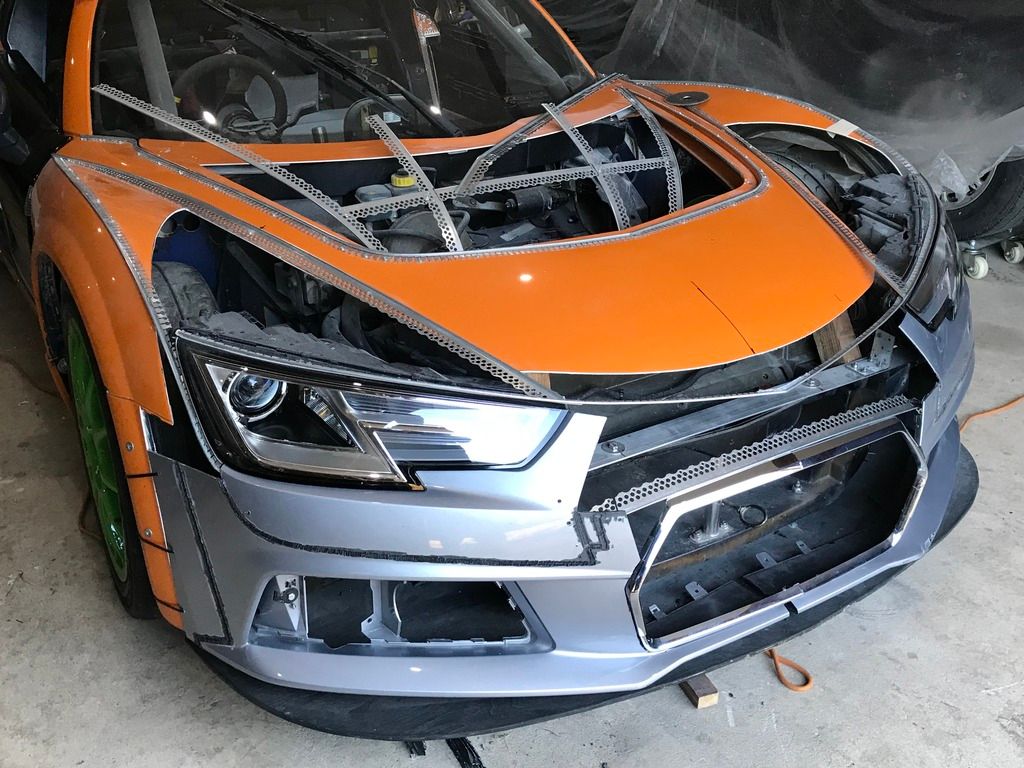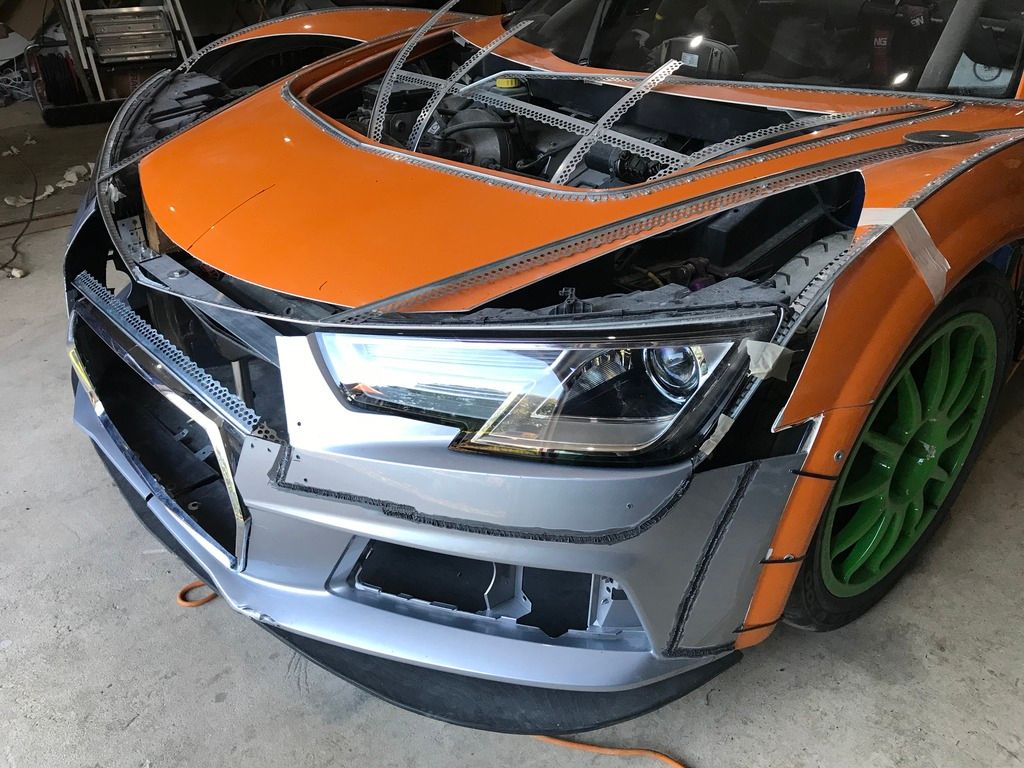
Revised Vx Front End
#161

Posted 13 September 2018 - 05:01 PM
#162

Posted 13 September 2018 - 05:08 PM
Pasted it into google and for some reason got given pictures of nuts and hedgehogs?
Translate was more sucessful... where the hedgehogs came from I'll never know ![]()
#163

Posted 13 September 2018 - 05:17 PM
#164

Posted 13 September 2018 - 05:19 PM
#165

Posted 13 September 2018 - 06:30 PM
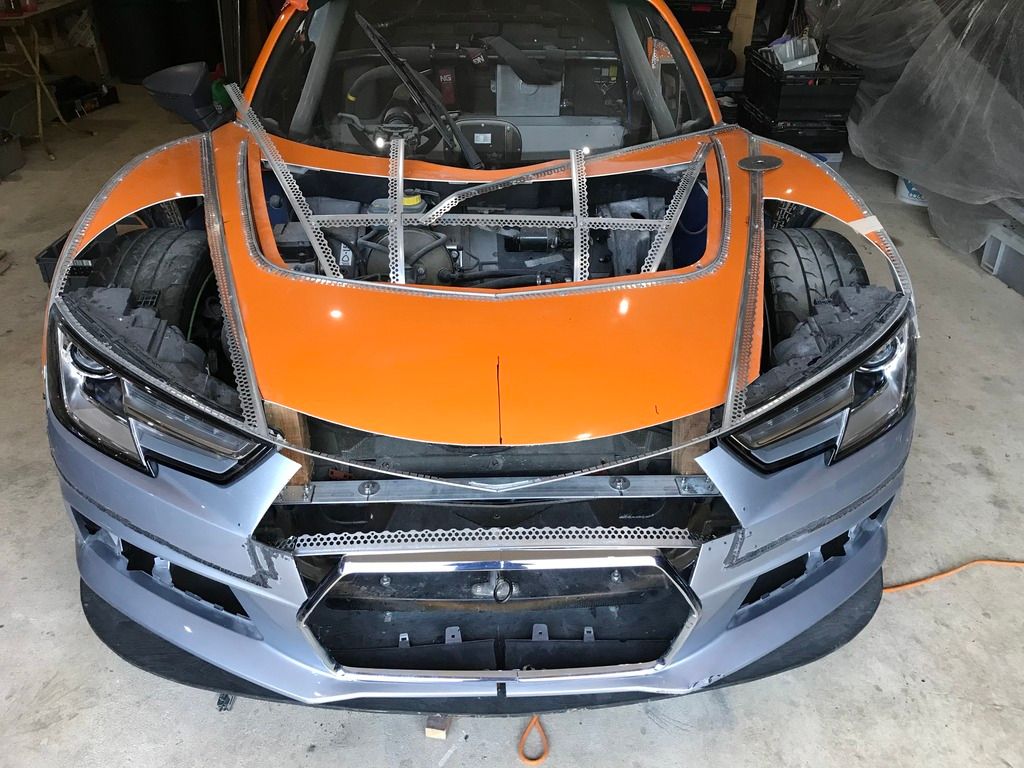
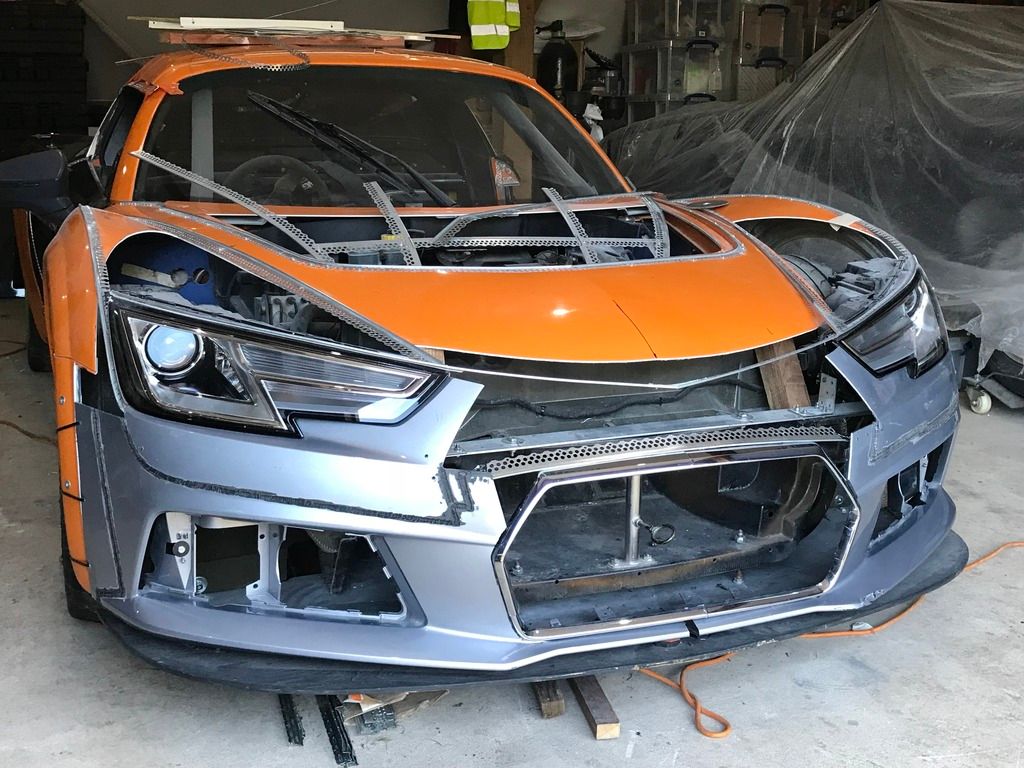
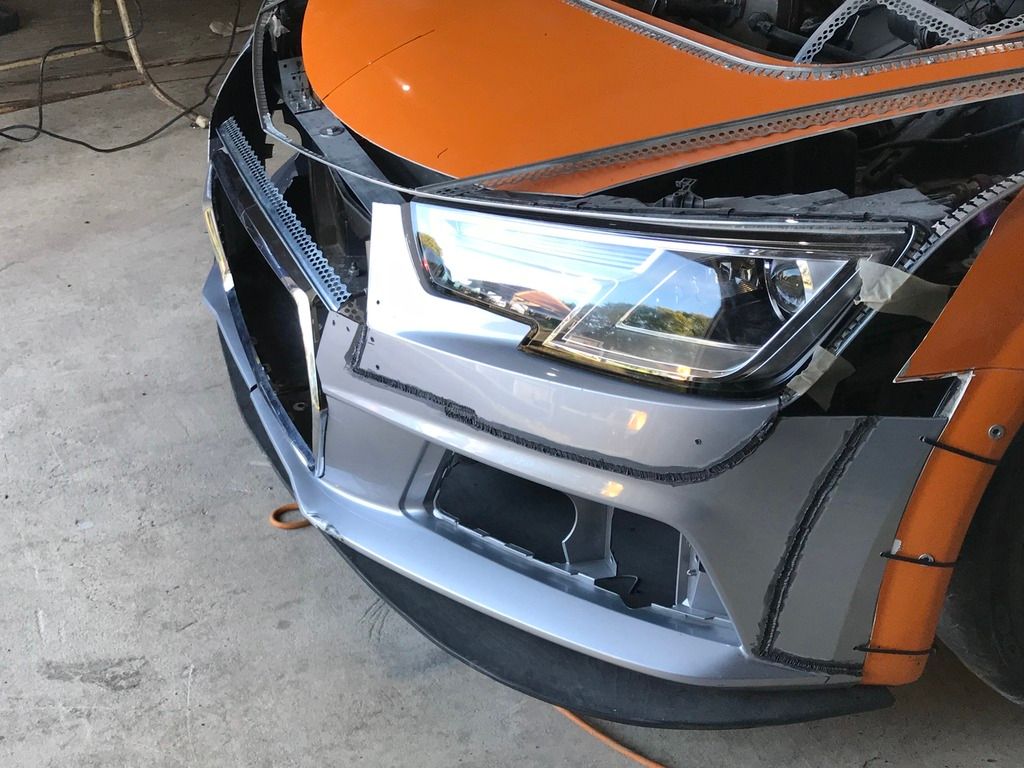
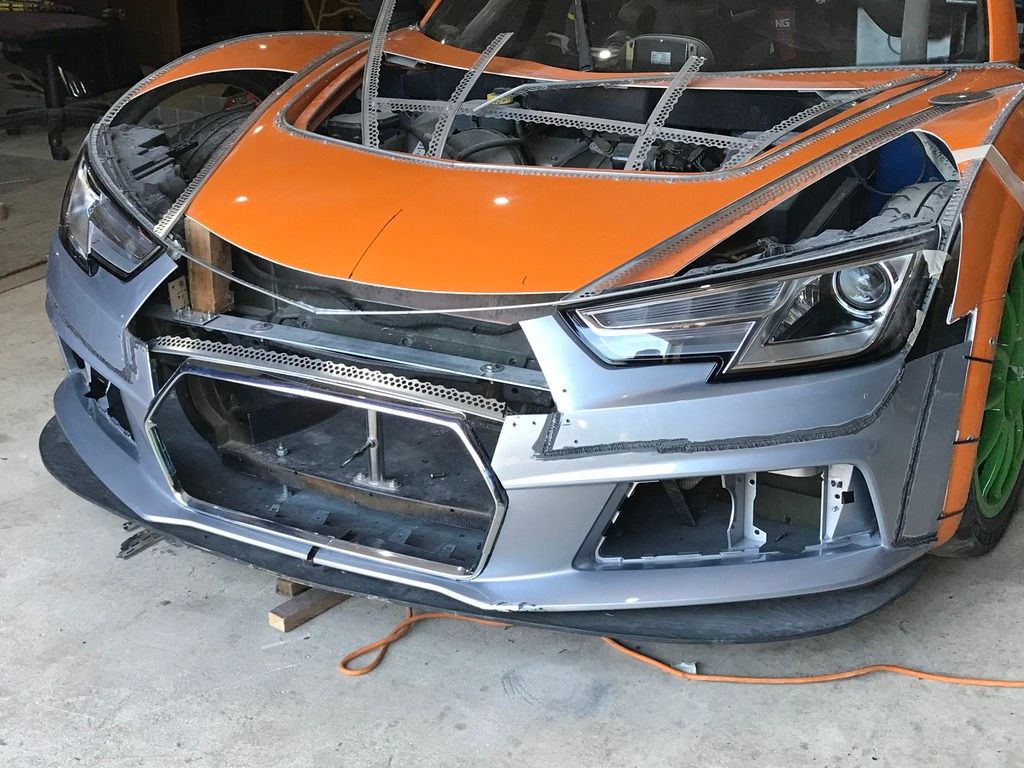
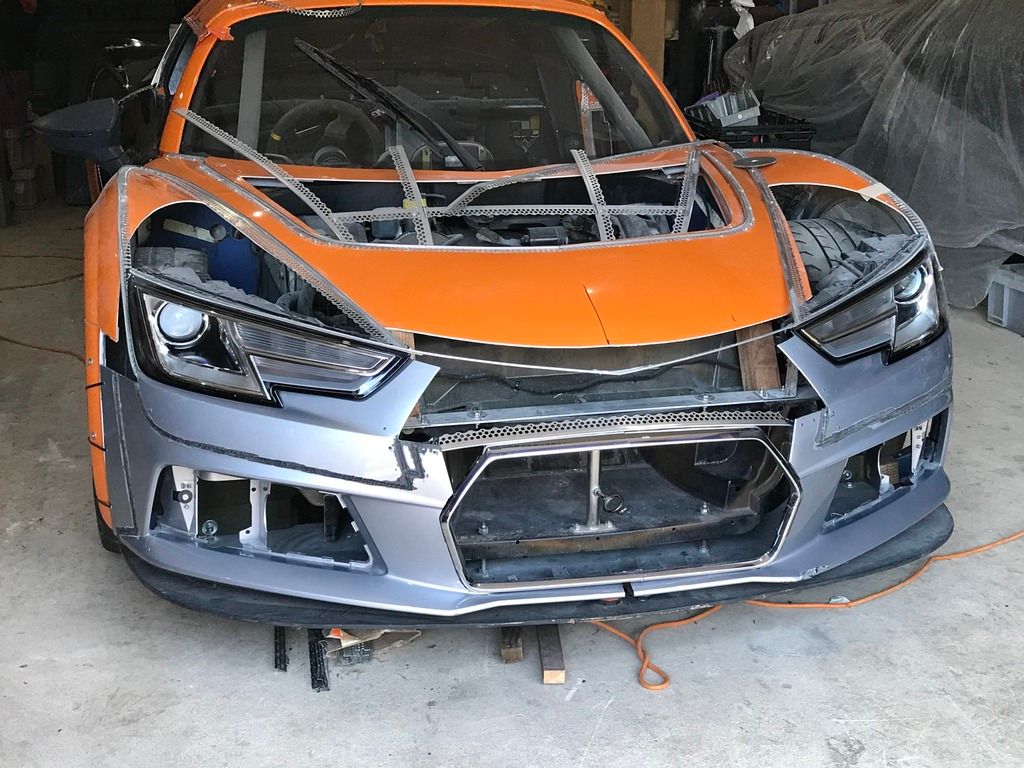
Bonnet and new wing Surface:
So, driving back home today, I was thinking about how I could create a nice flowing bonnet as the old VX bonnet creases were not where I wanted them for the new Audi lights. Also, the Shorter original bonnet has a very short stubby bonnet with a noticeable snoop nose.
My new longer bonnet requires a new surface. Also, the wing creases needed moving to meet the new Audi headlights. I couldn’t extend the wing curvature or the main bonnet curvature as they would have not been a smooth compound curve for the longer bonnet & headlights.
BOOM! And there it was…The idea of re-skinning the surface with sheet fibreglass or CF which I could make from accurate templates taken from my plaster fitted beads. I would then have a couple of options to either sand & blend back the new surface to the old VX clam or cut out and lower the new surface flush with the original bonnet and then add additional fibreglass cloth to the underside to strengthen it.
This way, the surface will be very accurate, smooth with creases exactly where I want them. The additional bonus is that very little mess would be created by using the normal method? And, with very little skill needed to produce the fibreglass compound creases and curvatures.
So, what do you think?
#166

Posted 13 September 2018 - 06:43 PM
#167

Posted 13 September 2018 - 06:45 PM
#168

Posted 13 September 2018 - 06:53 PM
You have got some skills max
Chris, I've never done anything like this before. It is just about being methodical. As I said before, I have always spent time working out what I should first, rather than plodding ahead with no plan. I am good at problem-solving though. I'm not boasting, I just know I am because people tell me so.
Anyway, I have managed to minimise doing the bodywork without doing anything more than looking at a couple of fibreglassing videos on youtube.
It's sometimes a better option to know less rather than following other peoples ideas. Once you see someone else's method, it's hard not to copy or vary what they are doing. It makes you think of all the ways to do the same thing with the knowledge you have.
It's looking a nice conversion to my eyes.
#169

Posted 13 September 2018 - 06:56 PM
Plasterer NOOOO.
I'm an Architect. But I'll always have a go at anything. You only learn by mistakes or good advice.
#170

Posted 13 September 2018 - 07:00 PM
Good work
#171

Posted 13 September 2018 - 08:16 PM
#172

Posted 13 September 2018 - 08:20 PM
#173

Posted 13 September 2018 - 09:01 PM
#174

Posted 14 September 2018 - 04:08 AM
Max this is starting to really look great. I’ll be honest I went off it for a while but these latest pics show it coming together nicely. Your problem I see now though is you’ve made the front look very sharpe and modern....... the rear end now needs to follow suit.....?
I totally agree with you. The front, sides with new sills and the coupe back with buttress grills look sharp and modern. The rear will need similar transformation including the lights otherwise it will look just wrong.
I have given the rear a reasonable amount of thought and have a couple of ideas that could work well. But, I have enough to deal with at the moment with work and what I've already started on the VX.
As for the front, it could still go badly wrong and end up being looking like a cardboard origami kit car and then I will go back to a standard VX clam and then hide.
All the new edges will definitely need sanding, rounding off and blending in to look more natural and less sharp regardless. But, the plaster bead edges will give a good consistent base to work from. In a worse case scenario, the beads can be used to fill up and will give clean even flowing edges.
I am still intending to have moulds made for myself. Otherwise a small accident on track will mean redoing all of this again, which I just wouldn't do.
Max
#175

Posted 24 September 2018 - 06:44 PM
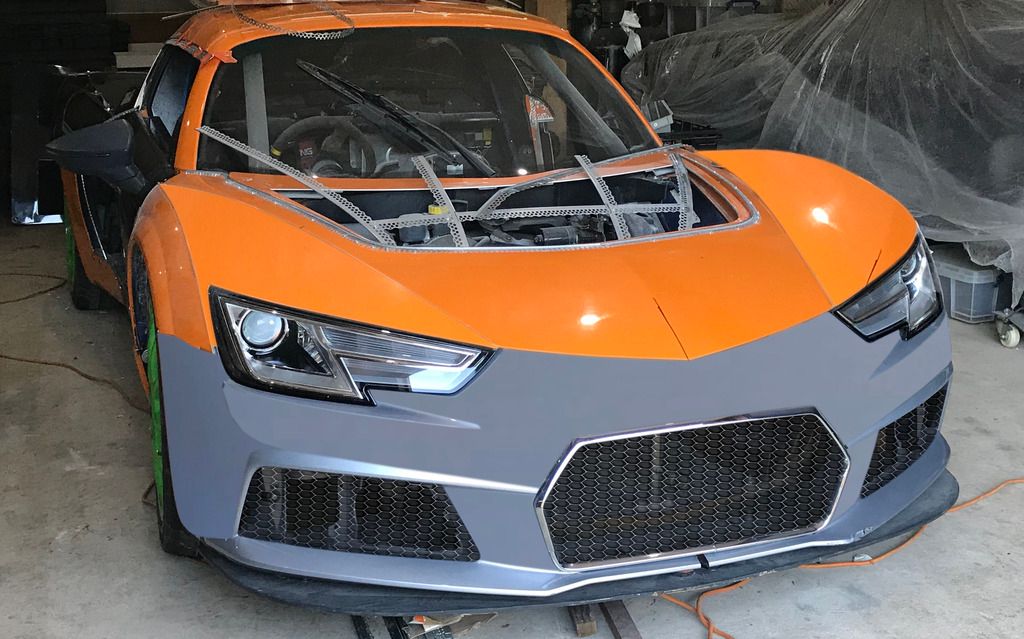
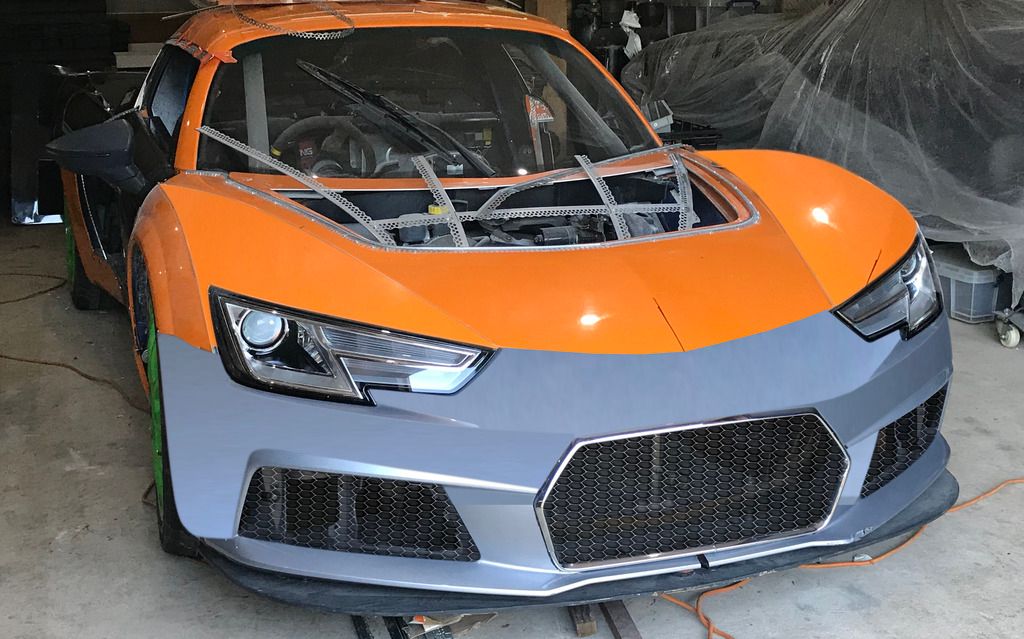
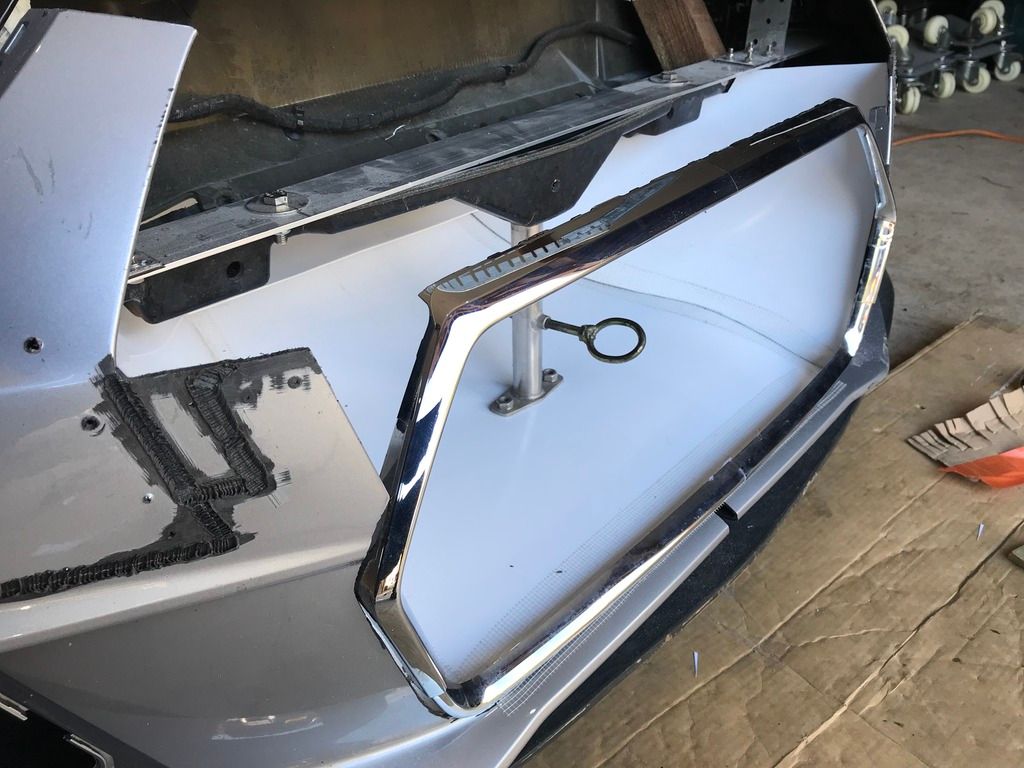
Grill Update:
I've not a lot to show. I finished later than expected but only had time to cut down the grill. The photoshop'd image took as long as the cutting down! But, I needed to know what it would look like.
I don't think I like the 'V' shape on the bonnet any thoughts? I also tried a standard looking grill shape, more like the standard VX grill, but I preferred this shape (I think?)
#177

Posted 24 September 2018 - 07:54 PM
fwiw im using a similar looking grill, and can say the stuff ive got is very good quality - surprisingly good really.
https://www.ebay.de/...O4AAOSwbw1aDyw5
#178

Posted 24 September 2018 - 08:26 PM
fwiw im using a similar looking grill, and can say the stuff ive got is very good quality - surprisingly good really.
https://www.ebay.de/...O4AAOSwbw1aDyw5
Thanks, it's a descent size too!
#179

Posted 24 September 2018 - 08:44 PM
#180

Posted 25 September 2018 - 03:08 PM
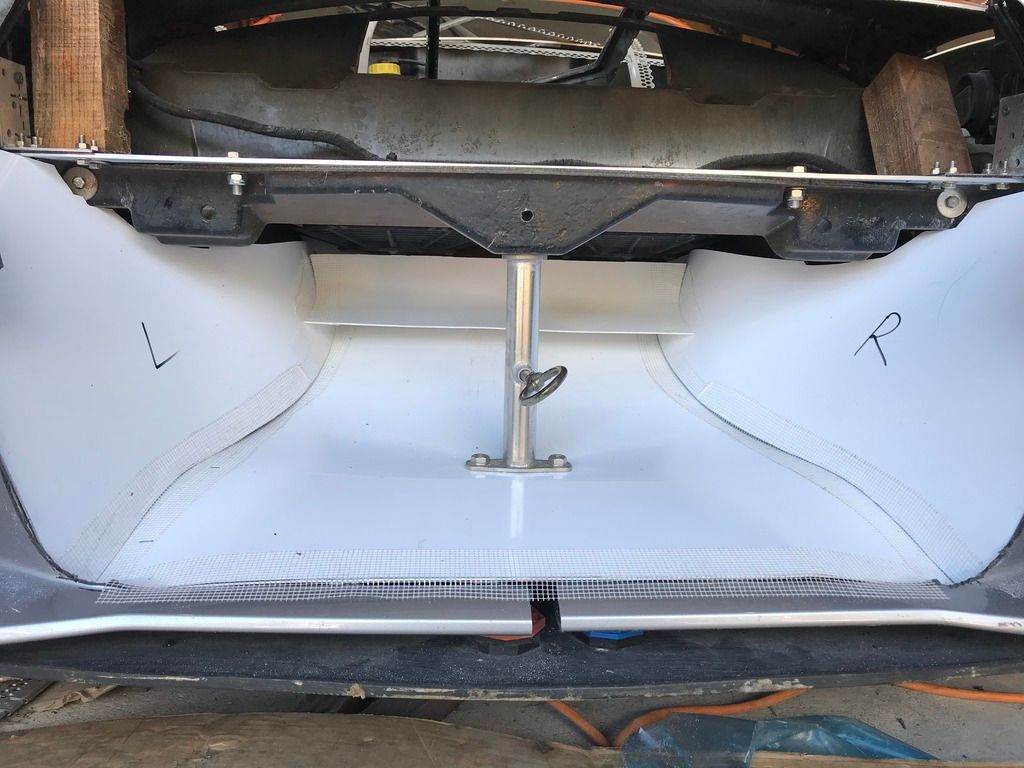
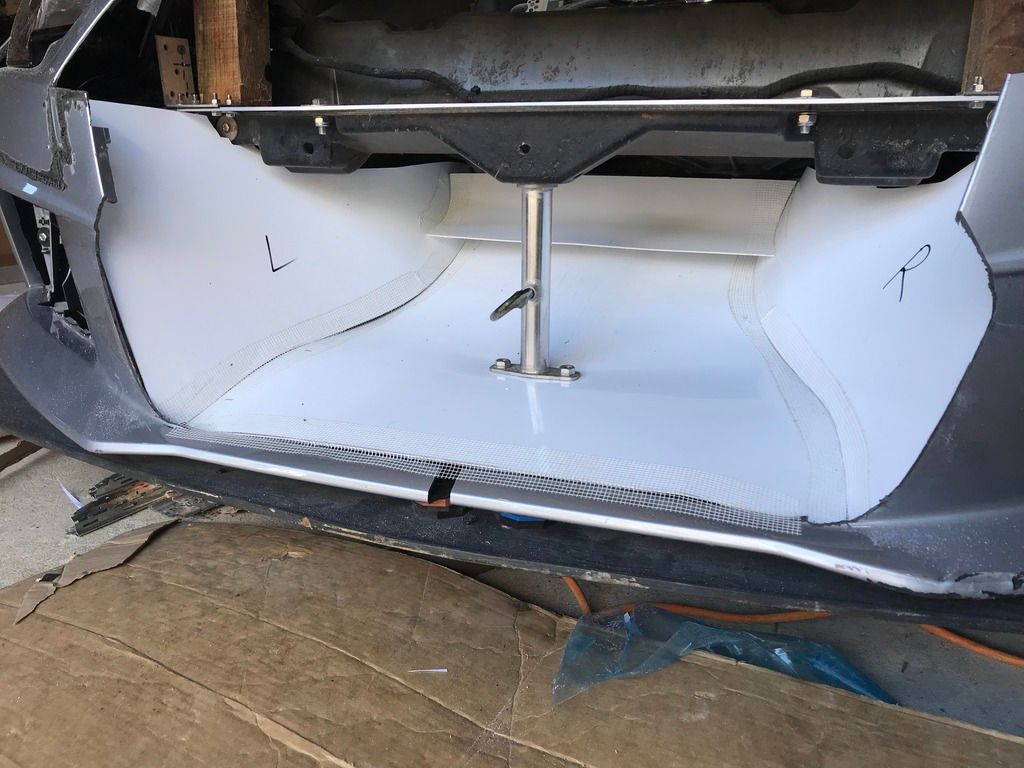
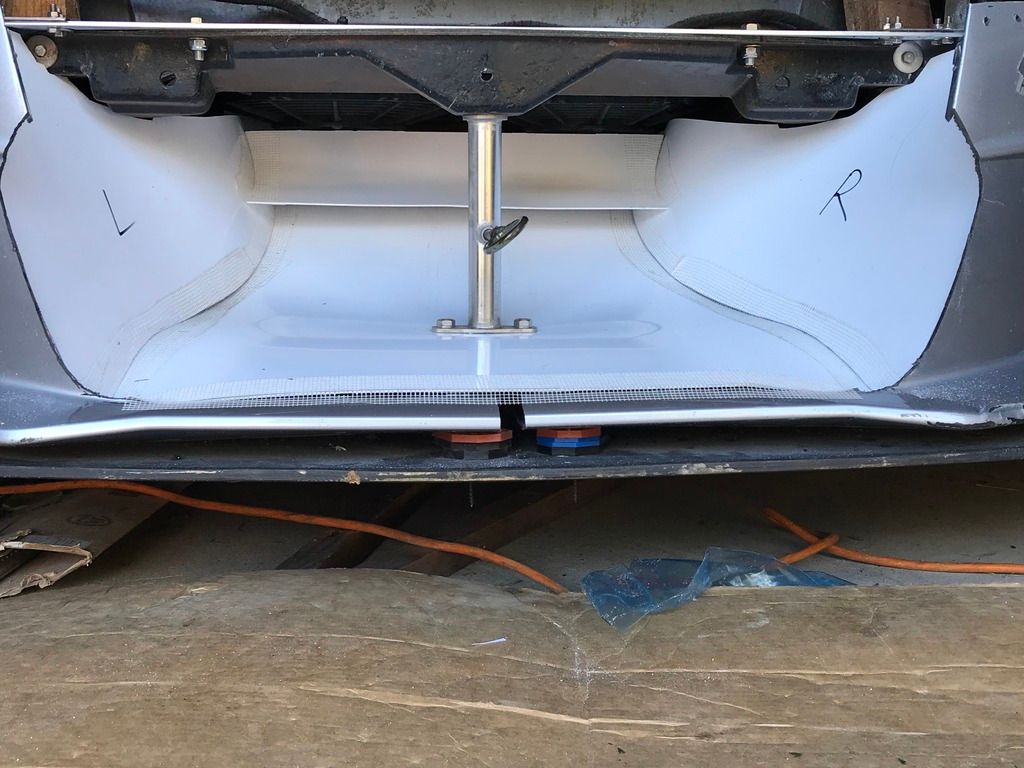
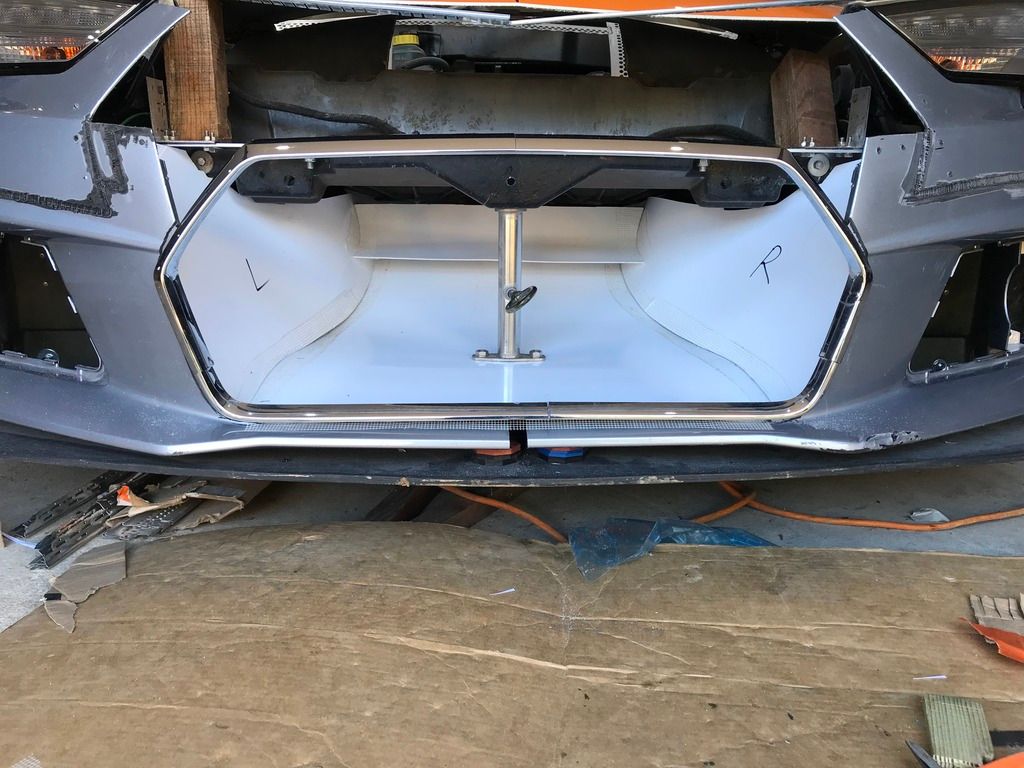
Radiator / Crash box air intake Update:
I've wanted to make this modification for ages and can now finally tick it off the list. Anyway, I'm hoping it will also work as a minor aero mod as well as to increase radiator cooling.
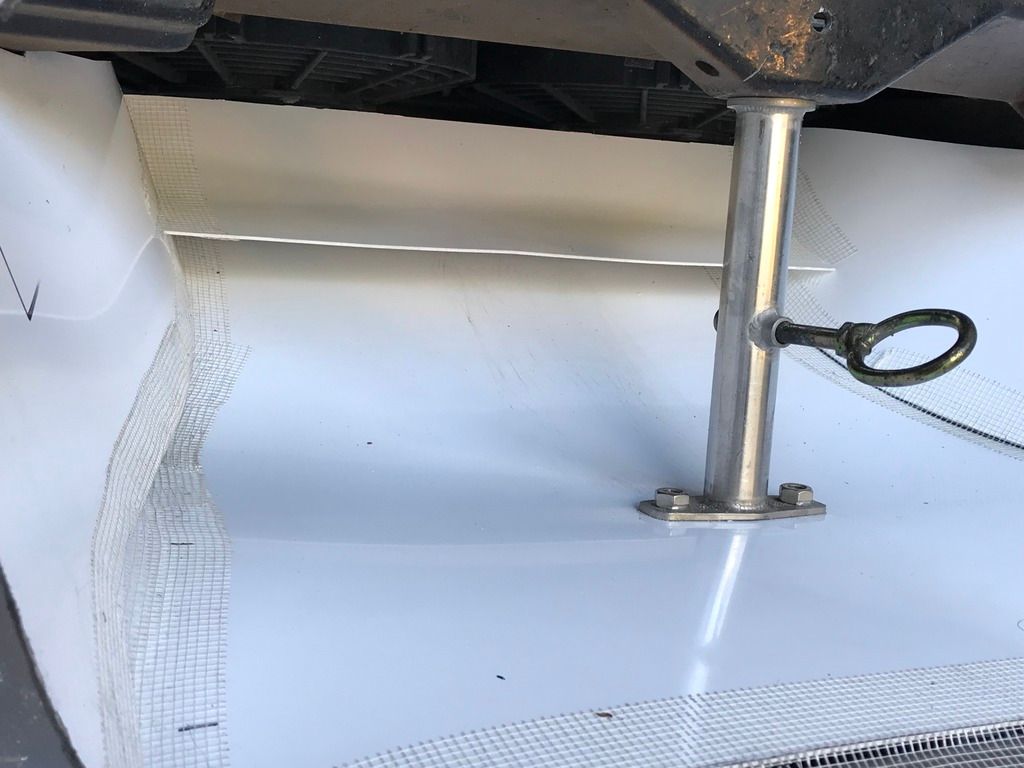
What you see in the photos below will be made in carbon fibre. the crash box has a main curved base with better sidewalls to improve the air flow. I have also fitted a smaller aerofoil higher up to direct some of the air flow to the front of the radiator and also to act as a diffuser/canard.
Materials used:
Once again, I have improvised using products that I am familiar with. The white material is 1.5mm solid PVC sheet, which is available from many places online. Generally used to line bathroom walls, shower areas etc. The PVC is cheap, approx £13 for a 2.4m x 1.2m sheet. It is great for forming complex shapes. One great advantage is that you can use a hot air gun to form it into any shape. Once it cools, it will hold it new shape 100%. 1mm thickness sheets may be better, I only had 1.5mm sheets in stock!
I guess you could even heat it over simple shaped objects, over foam forms, into wheel arch liners? etc, then use it as a mould. I heated the top diffuser over a large pipe to create its shape. I will later use silicon sealant to seal the corners/edges before laying CF over it. It will make useful moulds. Cutting the PVC sheet is best done with a 16-20mm diamond dremmel cutter on a low speed! On high speed, you will melt the PVC! Using a heat gun does make the PVC more brittle. When no heat is used it is very flexible and compound curves can be created easily.
Anyone who fancies doing this crash box mod for themselves, I have made a set of PVC templates for the crash box. I could email it out in Autocad, pdf etc or with dimensions so that you can print it off at the correct size, stick it down to your PVC sheet and cut it out.
I will also be using this technique to make complicated deflectors to channel air from my new front bumper vents towards my wing vents, which will then feed into the engine air intake. As well as making various brackets and supports for my new headlights and also to support the front bumper structure. obviously, I will be using CF wrapped over/around or on the white PVC.
I hope this useful method can and will be used by some. I am sure you will come up with many other uses for it. I may make a new simple CF dashboard too! Another one for the list!!!
Oh yeah, don't forget the plasterer's scrim tape. IT IS AWESOME STUFF! it's cheap, sticky backed, holds really well, bonds corners together, is made out of fibreglass and will make a very strong fix for cracked bodywork, strengthening edges and over plaster beads before fibreglassing.
Max
2 user(s) are reading this topic
0 members, 2 guests, 0 anonymous users


