my dash had never come off so you can imagine the hours of cleaning requied.
by the time tg was starting this was how far i'd got


Newbie
Posted 03 February 2013 - 09:48 PM
Iceman


Posted 03 February 2013 - 09:54 PM
my dash had never come off so you can imagine the hours of cleaning required

Joined - in the past 10.02.2004

Posted 03 February 2013 - 09:54 PM

Newbie
Posted 03 February 2013 - 10:06 PM

 ).
Add to that gaps which make barn doors look good in between the various parts of it and the fact that the heater even delivered anything is both a surprise and a miracle. The fact that the foam around the seal between the dash and the incoming ducting was strewn across the underside of dash makes the miracle all the more astonishing.
).
Add to that gaps which make barn doors look good in between the various parts of it and the fact that the heater even delivered anything is both a surprise and a miracle. The fact that the foam around the seal between the dash and the incoming ducting was strewn across the underside of dash makes the miracle all the more astonishing.
Moonlander

Posted 04 February 2013 - 07:48 PM
Newbie
Posted 04 February 2013 - 07:48 PM
Super Duper Member

Posted 04 February 2013 - 08:04 PM
I've only had a quick look through this thread but it looks like a good project 
Scary Internerd

Posted 06 February 2013 - 01:08 PM
I don't know how you do the fez conversion with the clam on - my back hurts and i can get a lot closer than with a clam in the way. My advice is to pay Tom to fit it for you
RaceMode

Posted 06 February 2013 - 01:15 PM

404 Not Found

Posted 06 February 2013 - 01:22 PM
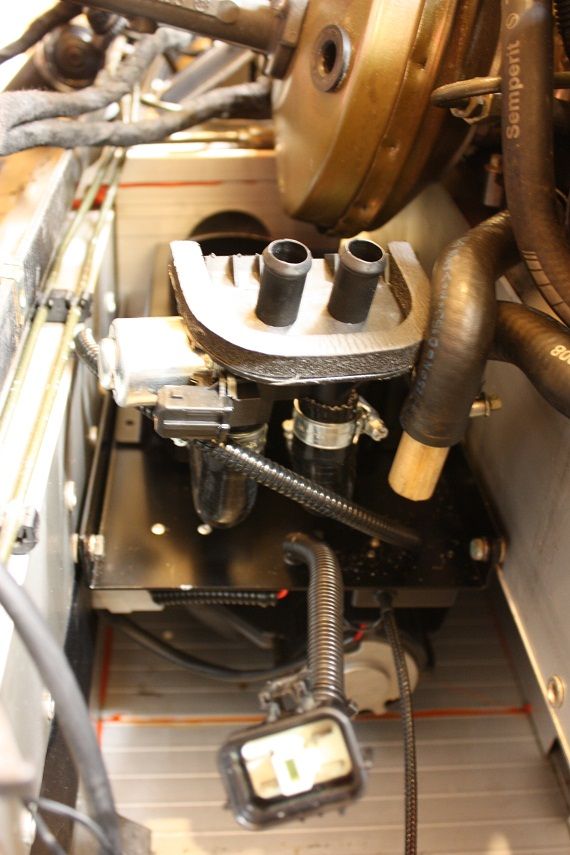
Might take the servo out too, and paint it. did look at a new one but £300 seemed a bit on the steep side for esthetics alone.
Scary Internerd
Posted 06 February 2013 - 01:34 PM
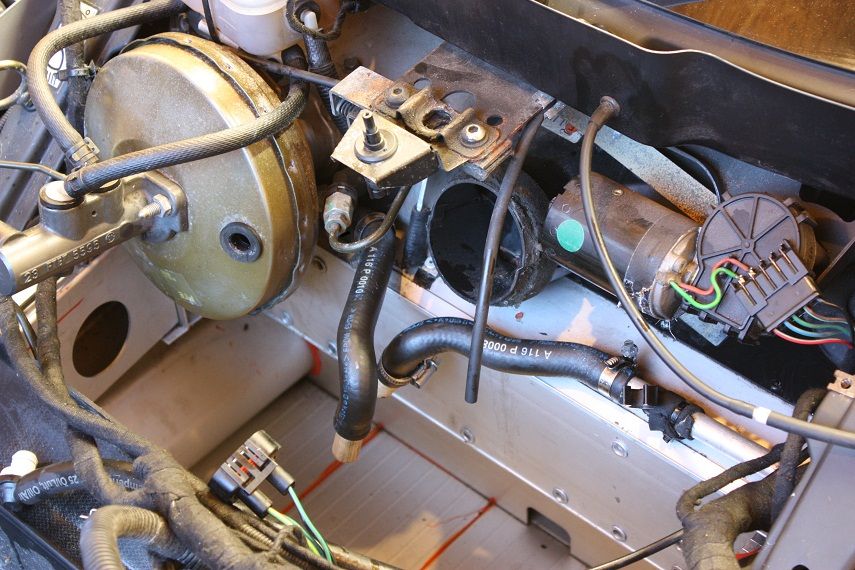
whats this bit ? duct for pipes , main chassis leg?
I Fancy Joe

Posted 06 February 2013 - 01:41 PM
get that rad surround coated in plastidip :)/>
Why? To me, it just looks like you're trying to cover up some damage by doing that. Not like it's corroding away, unprotected. :unsure:/>
Supercharger of Doom

Posted 06 February 2013 - 01:55 PM
get that rad surround coated in plastidip :)/>
Why? To me, it just looks like you're trying to cover up some damage by doing that. Not like it's corroding away, unprotected. :unsure:/>
Why do people cover the dash?, hardtop?, windscreen surround? Or have their interiors trimmed, Etc etc its just purely down to presentation. I think the original state looks tacky and sh*t, lukes looks good covered.

Scary Internerd
Posted 06 February 2013 - 02:04 PM
Supercharger of Doom
Posted 06 February 2013 - 02:23 PM
Billy No Mates

Posted 06 February 2013 - 02:39 PM
No issue with keeping things clean, tidy and honest but in 99% of cases, I prefer the original factory fresh finish to things. Christ, I did my full suspension refresh and replaced absolutely everything four years ago as it felt silly not to have new everything once I'd started. I'm even toying with the idea of doing it all over again this year, as it's been four years. It's just the extremes that I can't get to grips with and the resulting hours on end that need to be invested in keeping highly polished things gleaming and making sure bolt heads are all lined up exactly and cable ties some arbitrary distance apart. I think I basically hate concours cars and the OCD that seems to set in with them.
P.S. Front compartment of mine is absolutely spotless after way too many heater removal/flood/refit sessions and the resulting floods of coolant.
Supercharger of Doom
Posted 06 February 2013 - 02:44 PM
Whipping Boy
Posted 06 February 2013 - 02:57 PM
whats this bit ? duct for pipes , main chassis leg?
Dont think it has any pipes running down it. Felt pretty solid when I cleaned it...
Need to get Out More
Posted 06 February 2013 - 03:17 PM
Scary Internerd
Posted 07 February 2013 - 12:43 PM
I think I basically hate concours cars and the OCD that seems to set in with them.


0 members, 2 guests, 0 anonymous users