Anyone know of anygood quality digital 4 channel or 6 channel Thermocouple devices? I know I won't need 6 channels but it's always handy?

Haggi's New Project
Started by
haggi961
, Aug 30 2009 08:33 PM
750 replies to this topic
#681

haggi961
-
-

- 6,003 posts
1cobrav8 is my god
- Gender:Male
- Location:Richmond, N.Yorks
- Interests:Keeping fit and in shape, and pretty much anything to do with an engine.
Posted 16 June 2016 - 09:53 PM
#682
Crabash
-

-
- 1,686 posts
Scared
- Gender:Male
- Location:Durham
Posted 18 June 2016 - 07:19 AM
25 quid ebay
#683
haggi961
-
-
- 6,003 posts
1cobrav8 is my god
- Gender:Male
- Location:Richmond, N.Yorks
- Interests:Keeping fit and in shape, and pretty much anything to do with an engine.
Posted 27 June 2016 - 07:55 PM
Update time. This is my favourite update as it means the car is entering the final stages of looking like a 2010 cup Exige.
Right where do I start. I started talking to the Alastair on Facebook messenger after he posted pictures of spraying his car on Facebook. Must admit it is one sexy looking vx and one of my favourites out there. Anyway after chatting to him for a while he agreed to do the body work and spraying of the car with his Wife (not girlfriend) so Elite Motor Worx began.
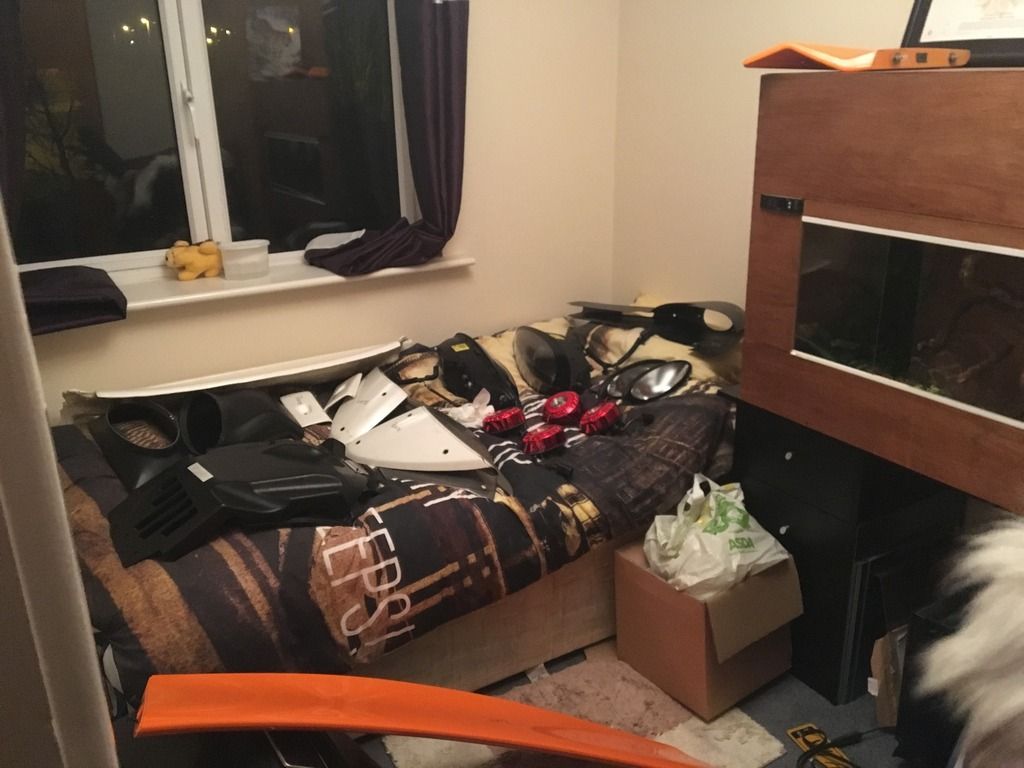
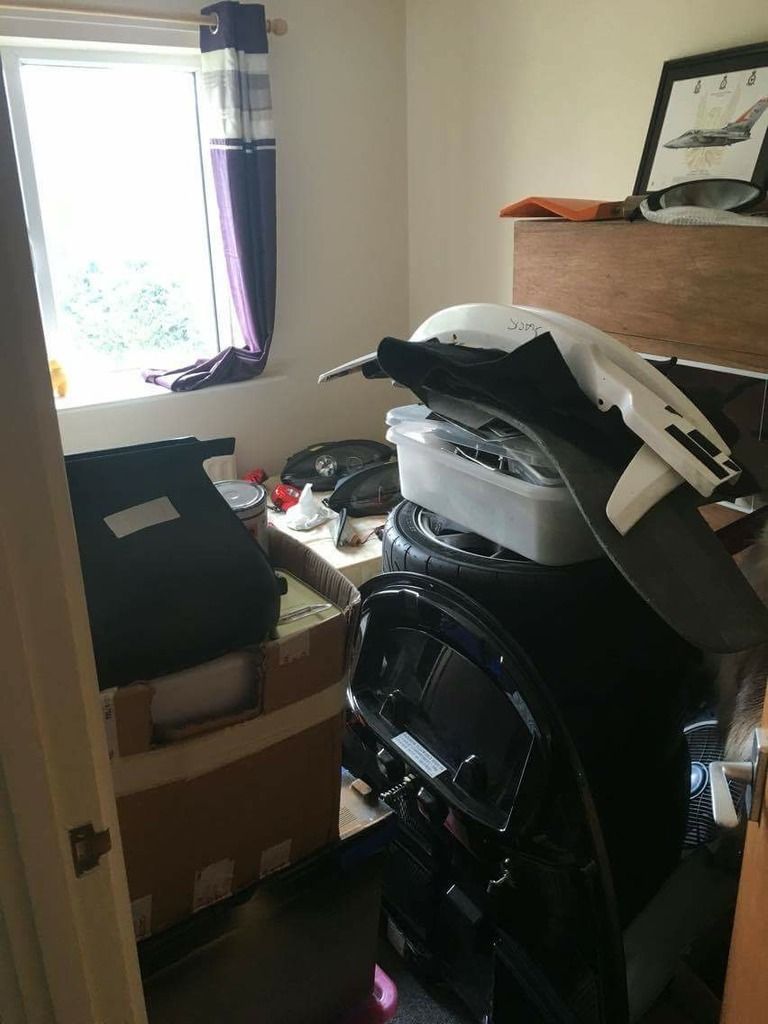
After the car passed the Mot I set about making my way down to Dorset to drop the car off and bits. They very kindly let me stay at their house for the weekend where we discussed what's happening with the car and also made a start of stripping bits off. Which lead to filling their spare room.
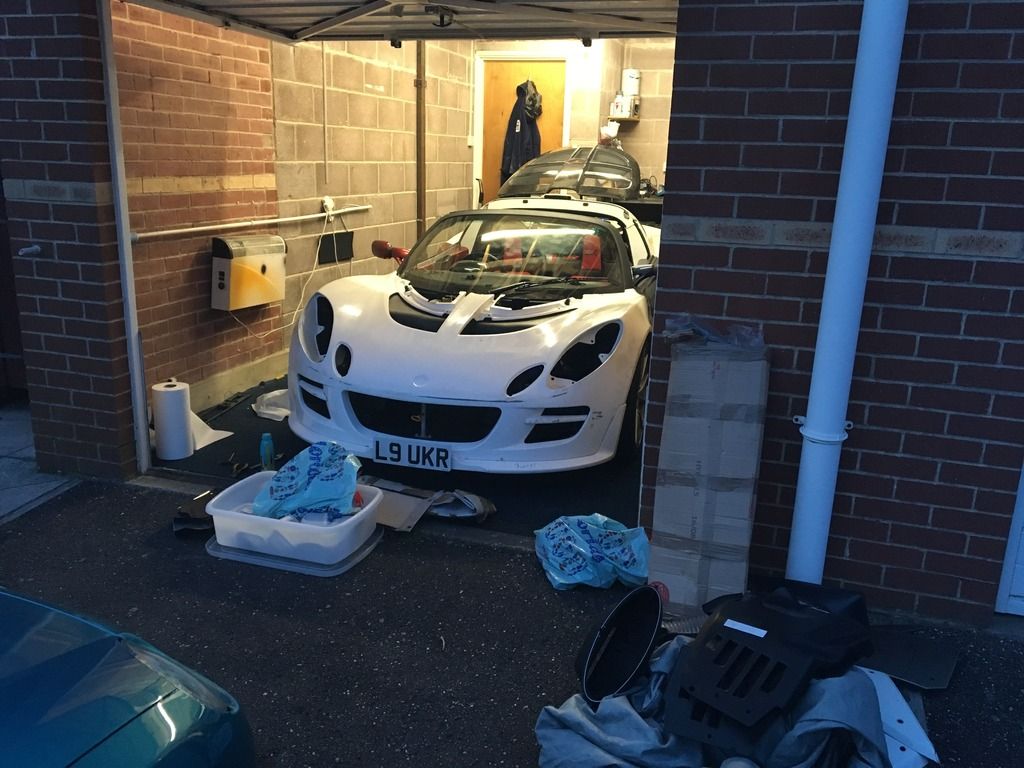
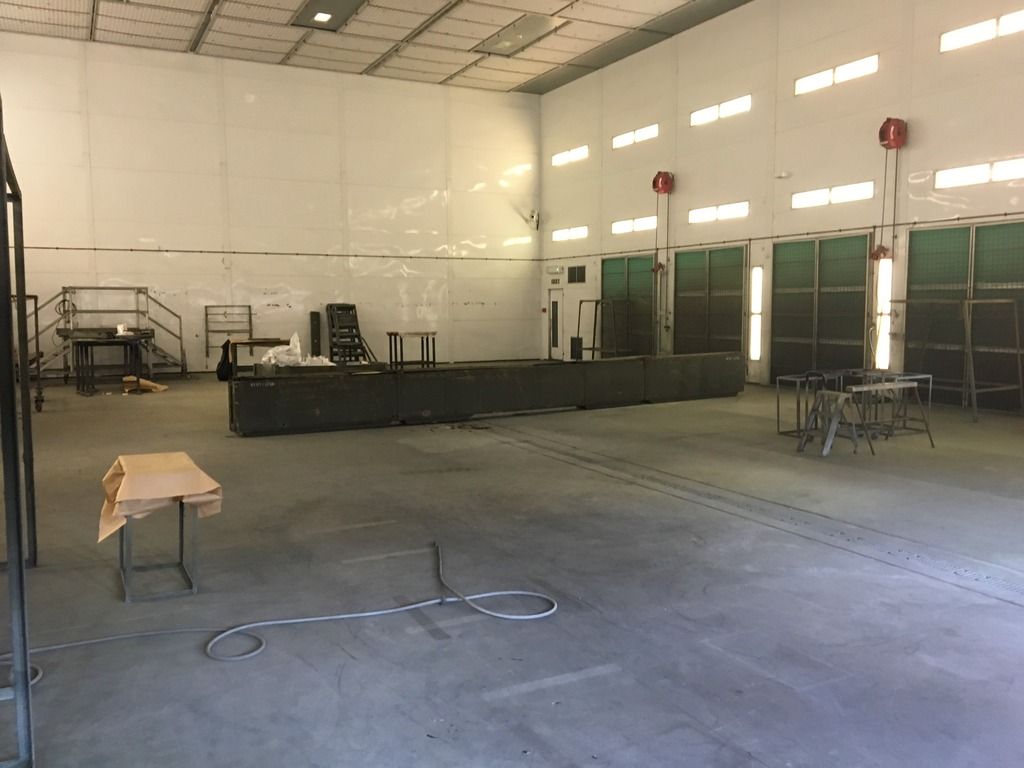
They also took me to the spray workshop where all the magic is going to happen. What a setup that place is and the biggest spray booth I've ever seen.
I then went back Yorkshire leaving my car with someone I have only met once lol.
Over the next couple of months I got updates from Alistair of pictures and framed videos of the progress they both made. These pictures and videos were an awesome boost every time he sent me a new one.
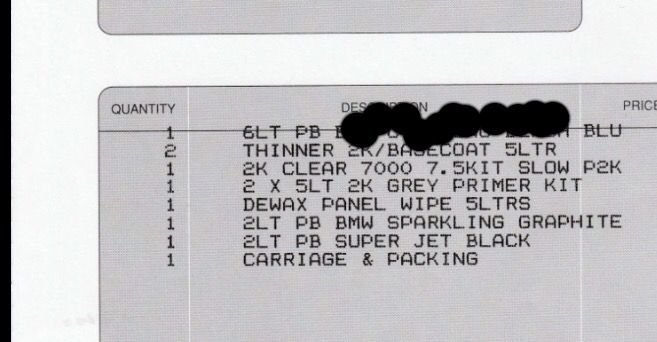
I then set about ordering all the primer, paint, lacquer that they needed for the job. The blue is a secret so no one else steals it lol
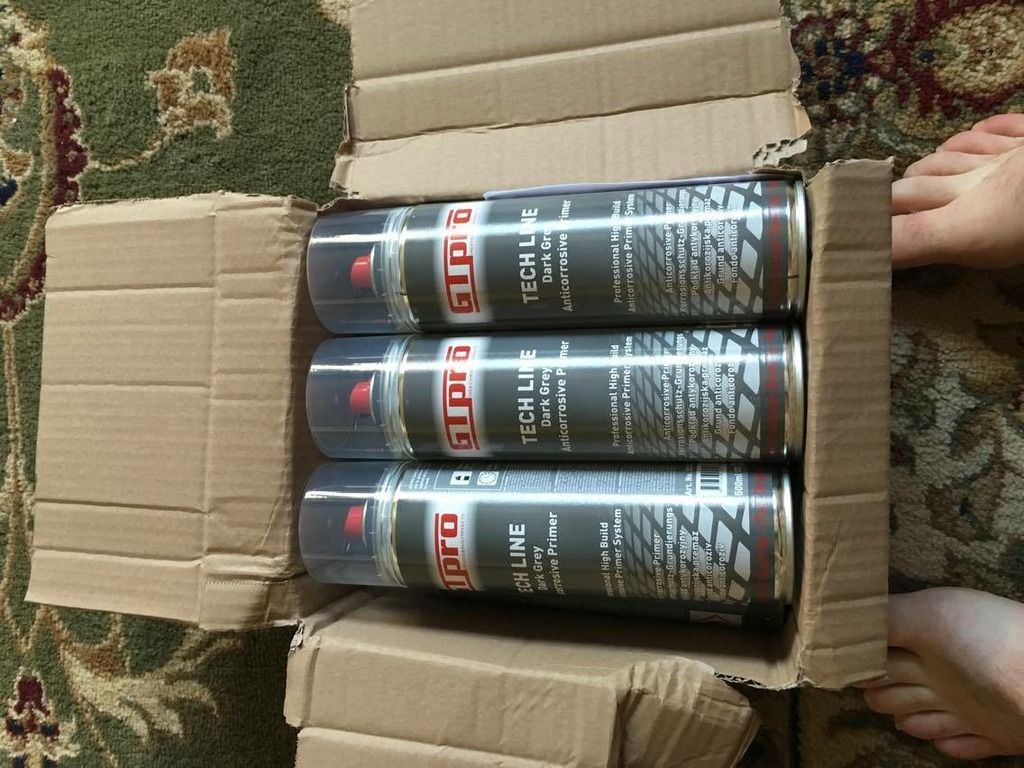

A video of them both unboxing the paint, lacquer ect. They don't half move quick lol

Right where do I start. I started talking to the Alastair on Facebook messenger after he posted pictures of spraying his car on Facebook. Must admit it is one sexy looking vx and one of my favourites out there. Anyway after chatting to him for a while he agreed to do the body work and spraying of the car with his Wife (not girlfriend) so Elite Motor Worx began.
After the car passed the Mot I set about making my way down to Dorset to drop the car off and bits. They very kindly let me stay at their house for the weekend where we discussed what's happening with the car and also made a start of stripping bits off. Which lead to filling their spare room.


They also took me to the spray workshop where all the magic is going to happen. What a setup that place is and the biggest spray booth I've ever seen.

I then went back Yorkshire leaving my car with someone I have only met once lol.
Over the next couple of months I got updates from Alistair of pictures and framed videos of the progress they both made. These pictures and videos were an awesome boost every time he sent me a new one.
I then set about ordering all the primer, paint, lacquer that they needed for the job. The blue is a secret so no one else steals it lol


A video of them both unboxing the paint, lacquer ect. They don't half move quick lol
#684
haggi961
-
-
- 6,003 posts
1cobrav8 is my god
- Gender:Male
- Location:Richmond, N.Yorks
- Interests:Keeping fit and in shape, and pretty much anything to do with an engine.
Posted 27 June 2016 - 07:56 PM
Also ordered my cup Exige graphics straight from lotus.

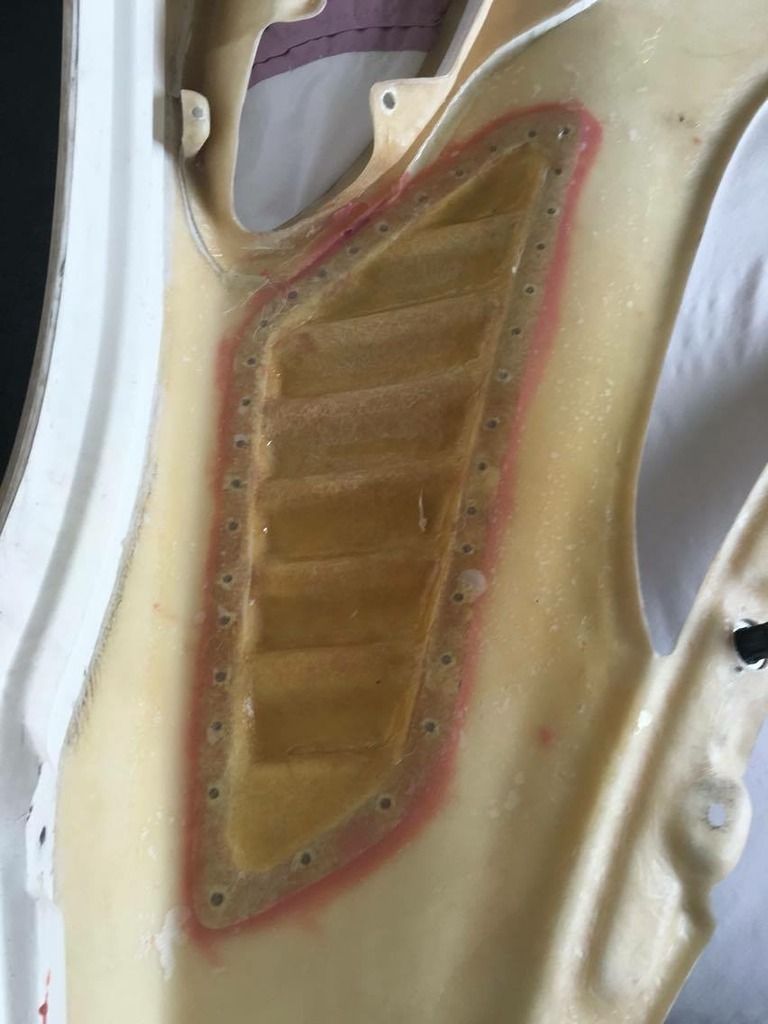
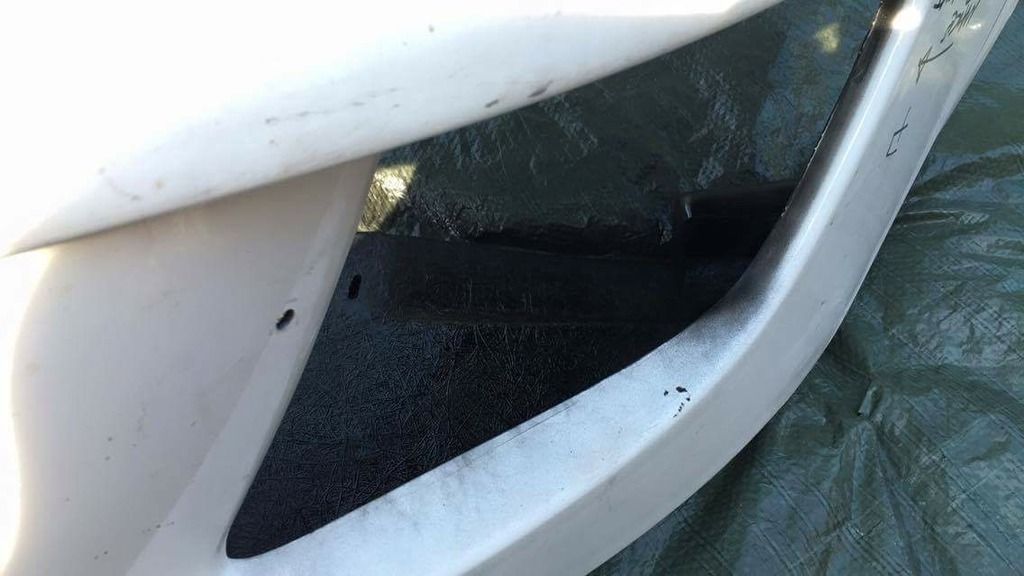
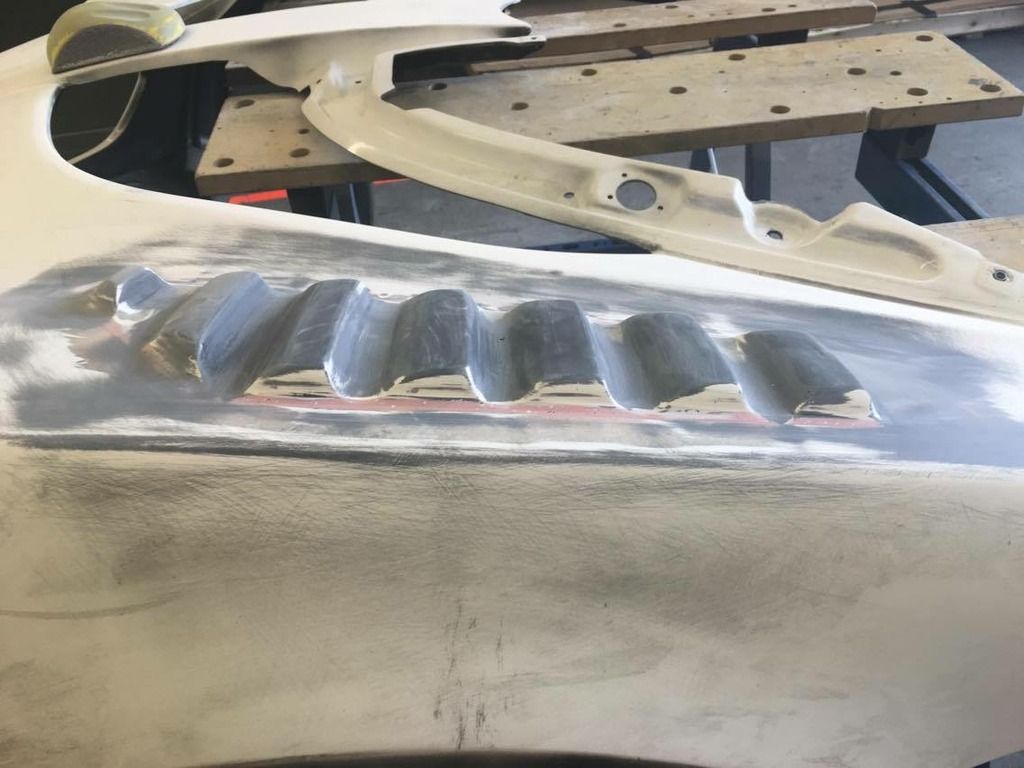
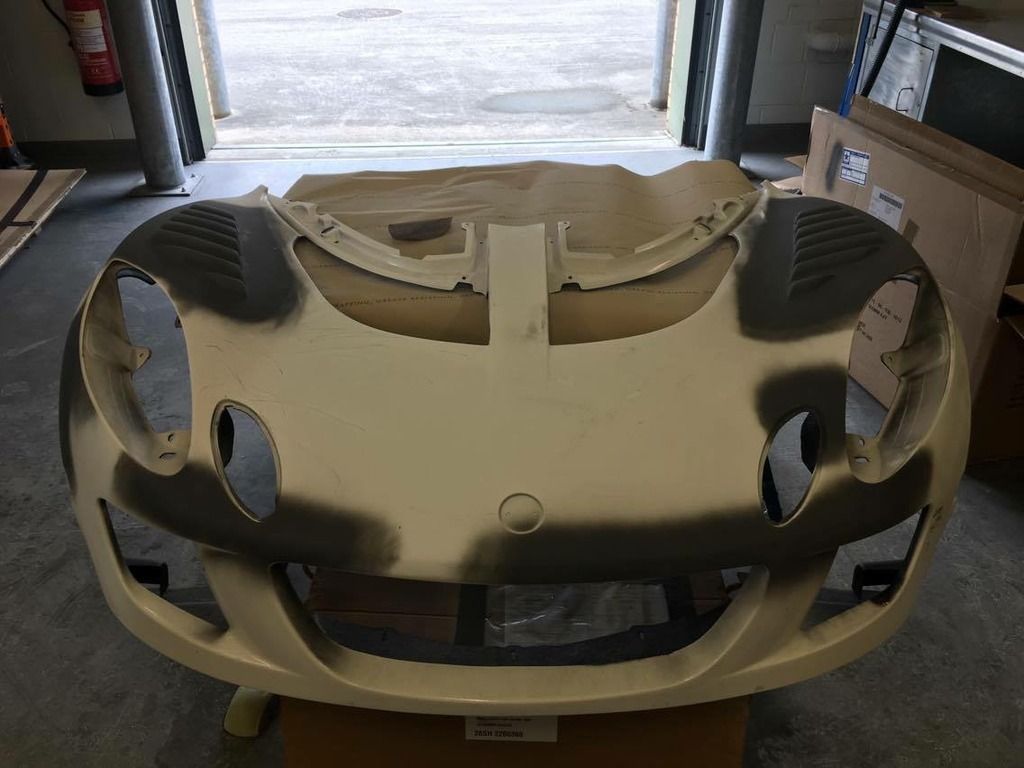
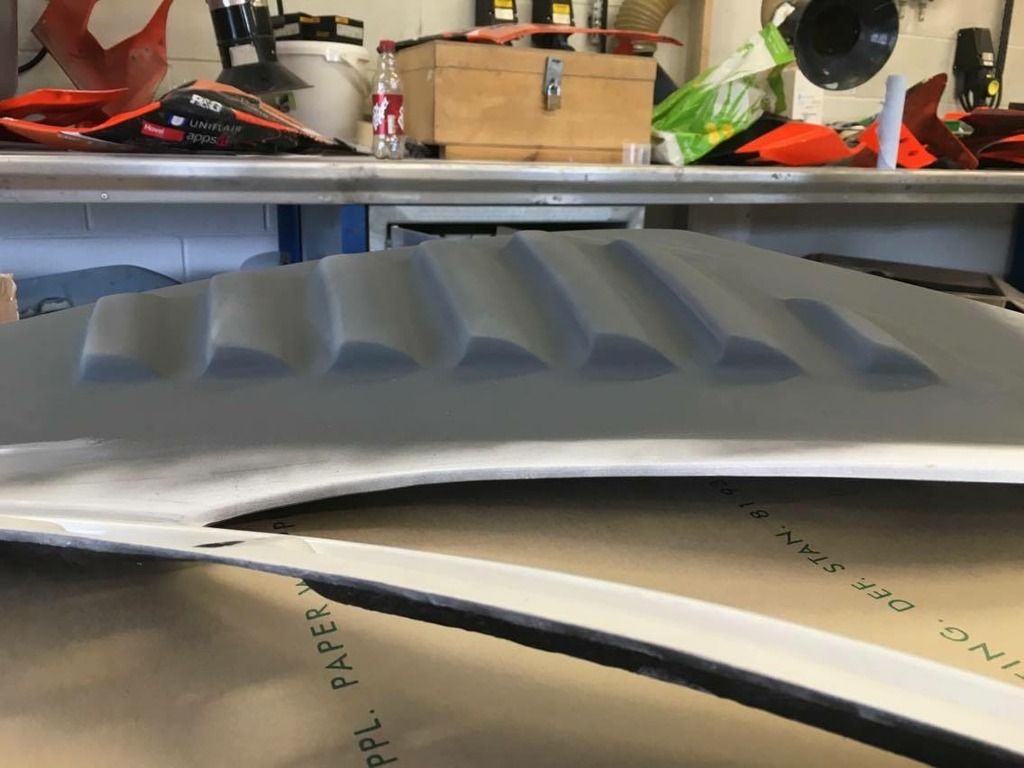
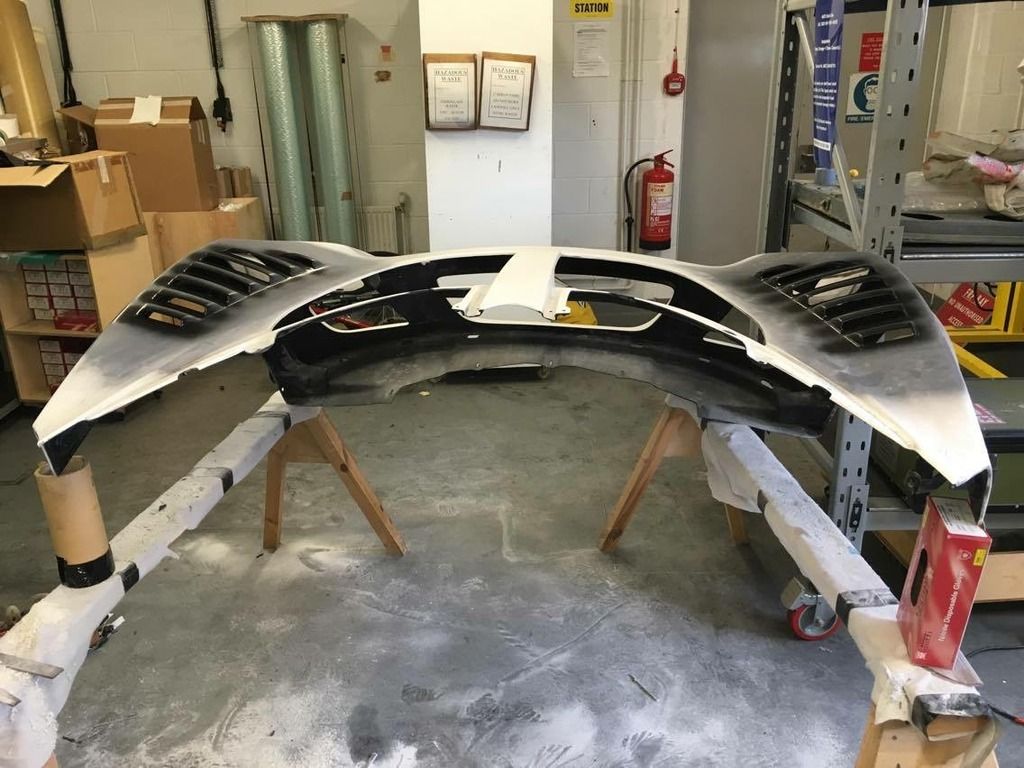
The first thing they tackled was the fitting of the louvres. They had to cut the front clam up and fit the vx220 louvres into the Exige clam. The vx220 louvres have never been fitted to a Exige clam before so this is a one of a kind thing. It was surprising how well they followed the Exige body lines and they did amazing job lining them up. I do have a video of them both fitting the louvres but it's to big to upload to photo bucket.
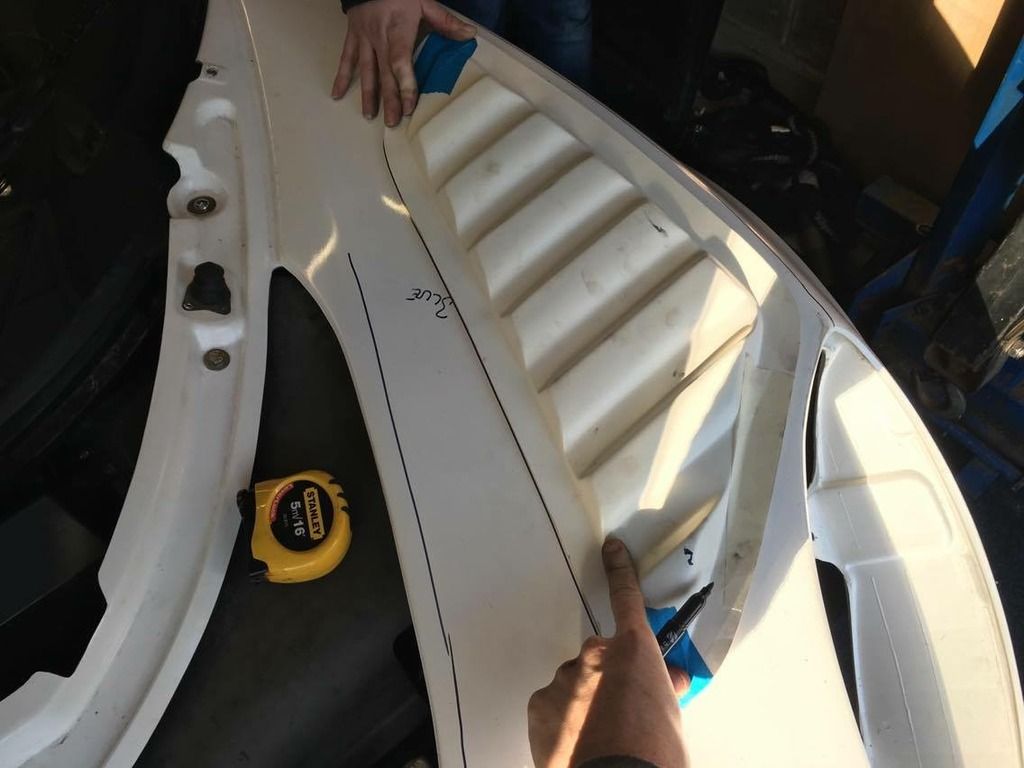
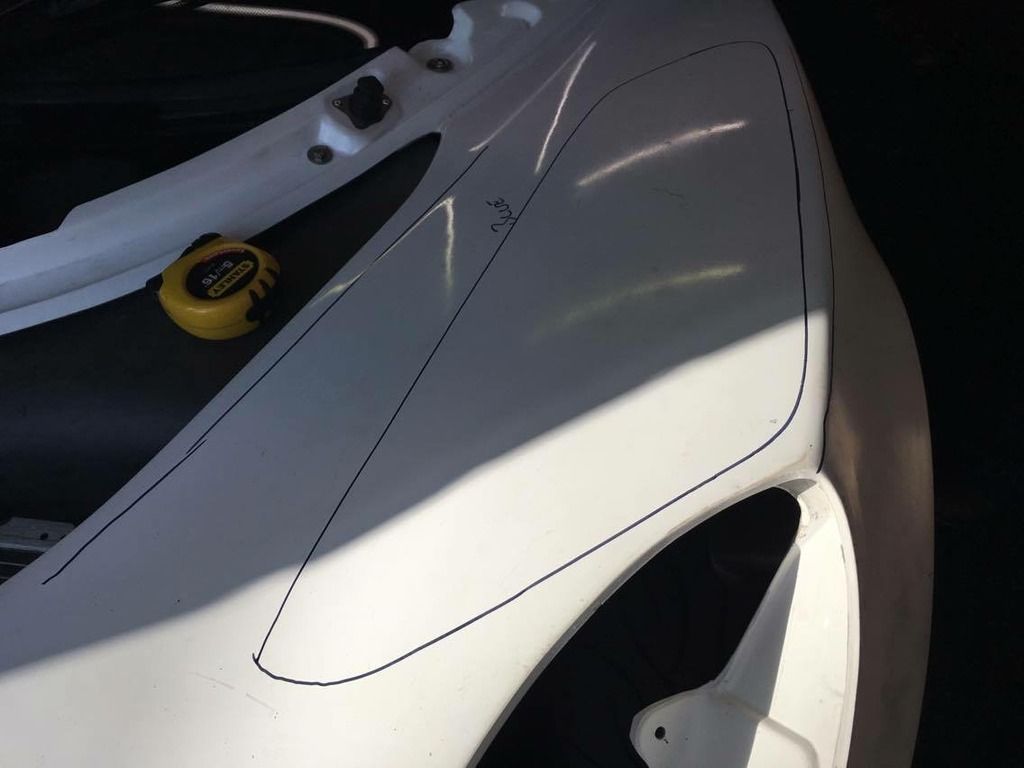
After lots of measuring and cutting they bonded the louvres in with special air craft type glue and then riveted until the glue sets. Mega strong stuff that glue is.
Video to show how strong
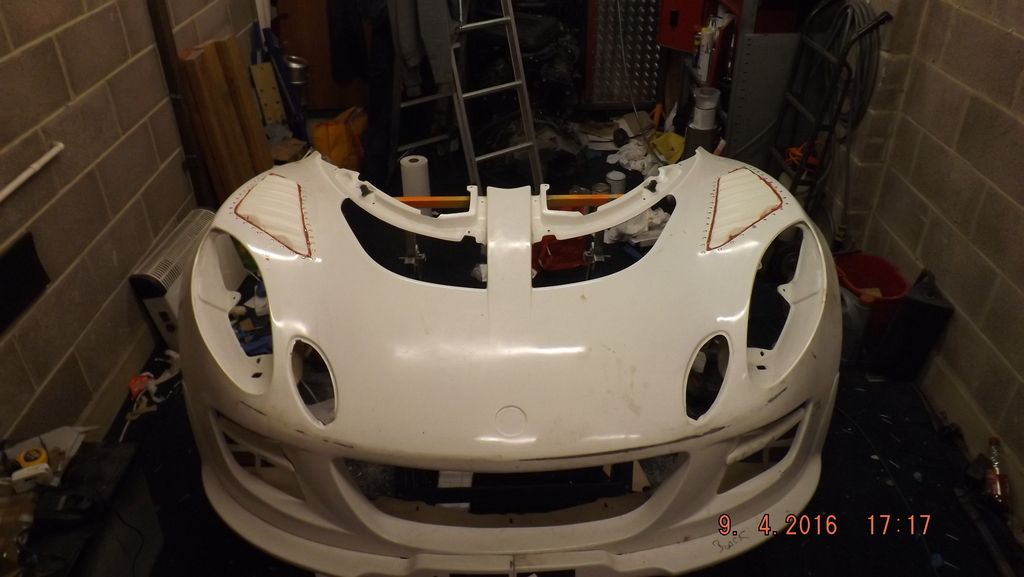


#685
haggi961
-
-
- 6,003 posts
1cobrav8 is my god
- Gender:Male
- Location:Richmond, N.Yorks
- Interests:Keeping fit and in shape, and pretty much anything to do with an engine.
Posted 27 June 2016 - 07:58 PM
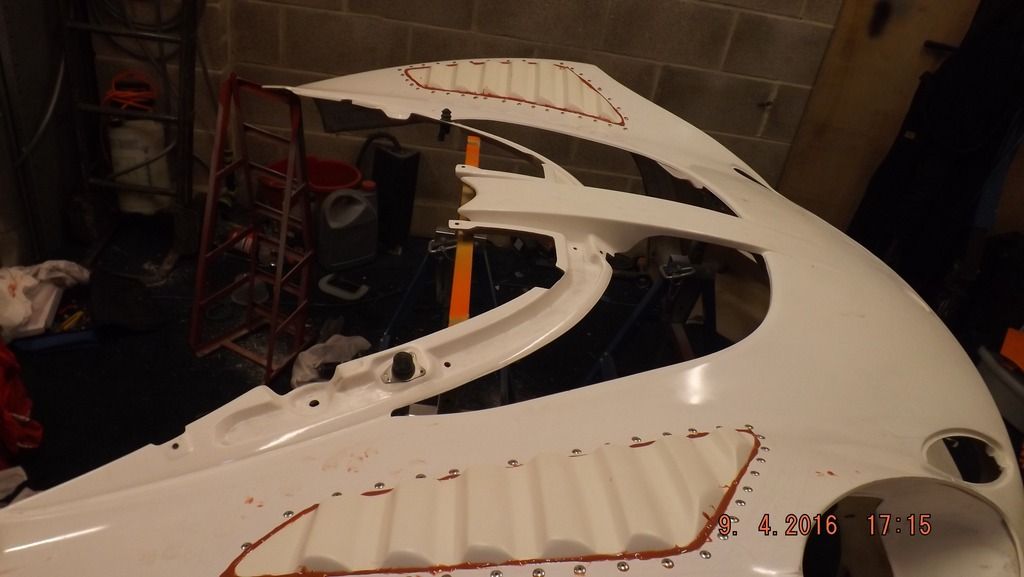
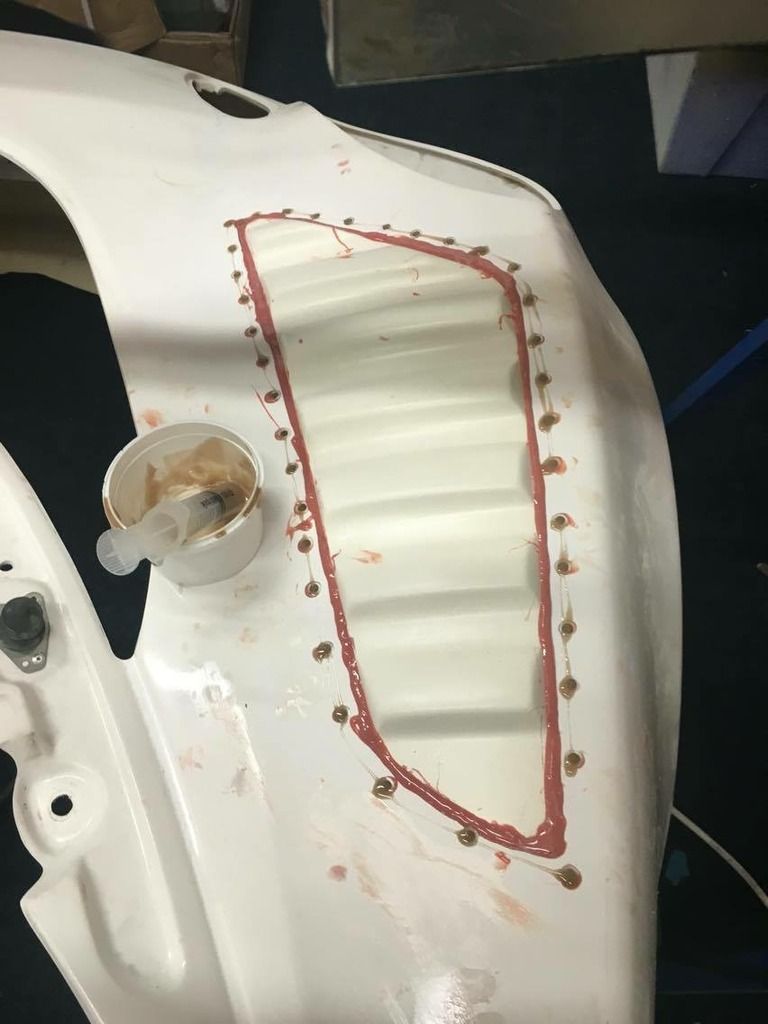
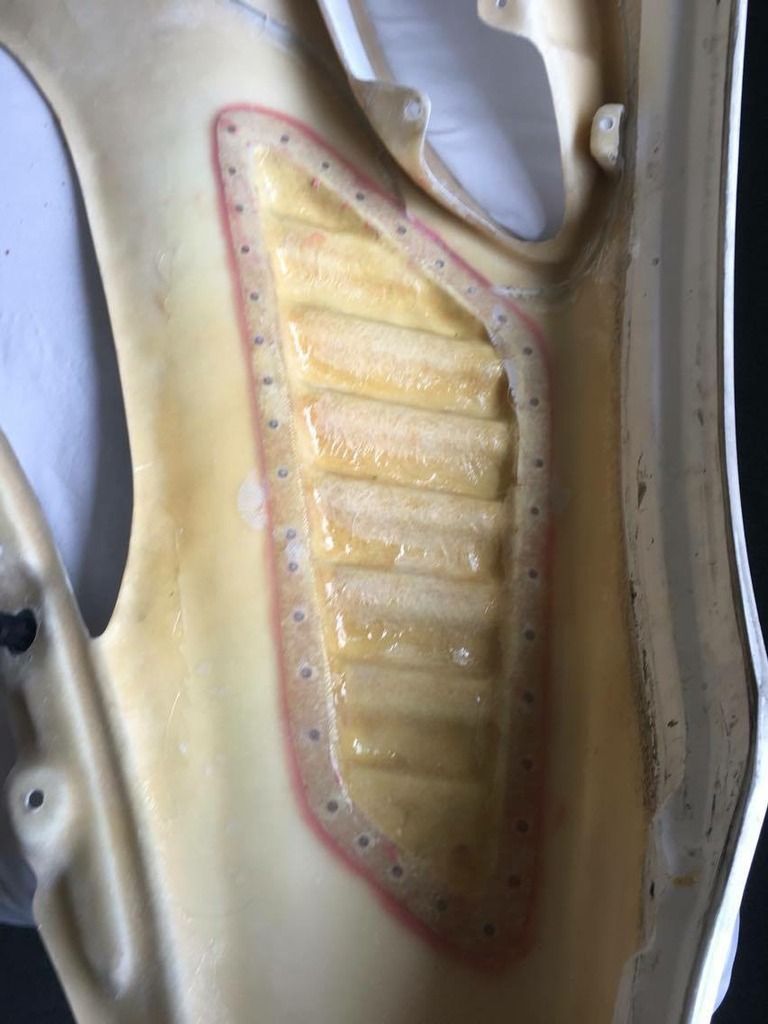
Rivets drilled out and filled in.
Alistair kindly said he would make me a badge from cf for the rear so he sent me a few designs over and this is the one I liked the best.
Plans for the Titanium spring bracket that Alistair came up with to mount on the clam and keep the oem plastic tunnel in place. I wanted to use the tunnel to direct cold air to the inlet manifold to help with inlet temps.
Video to show it working

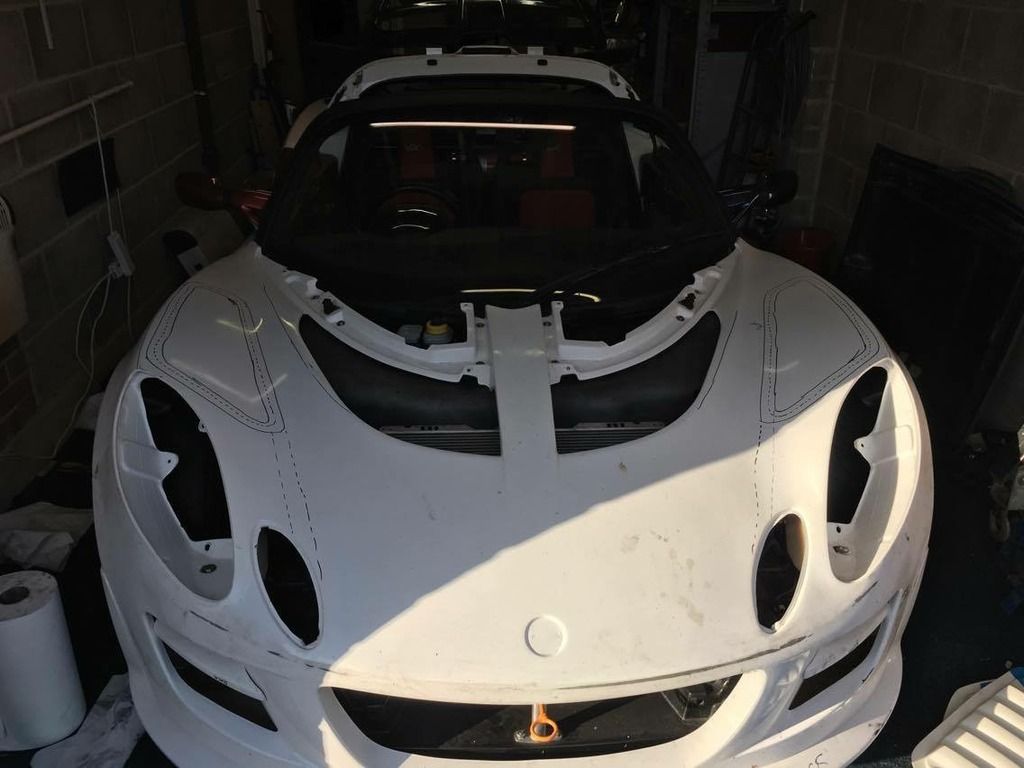
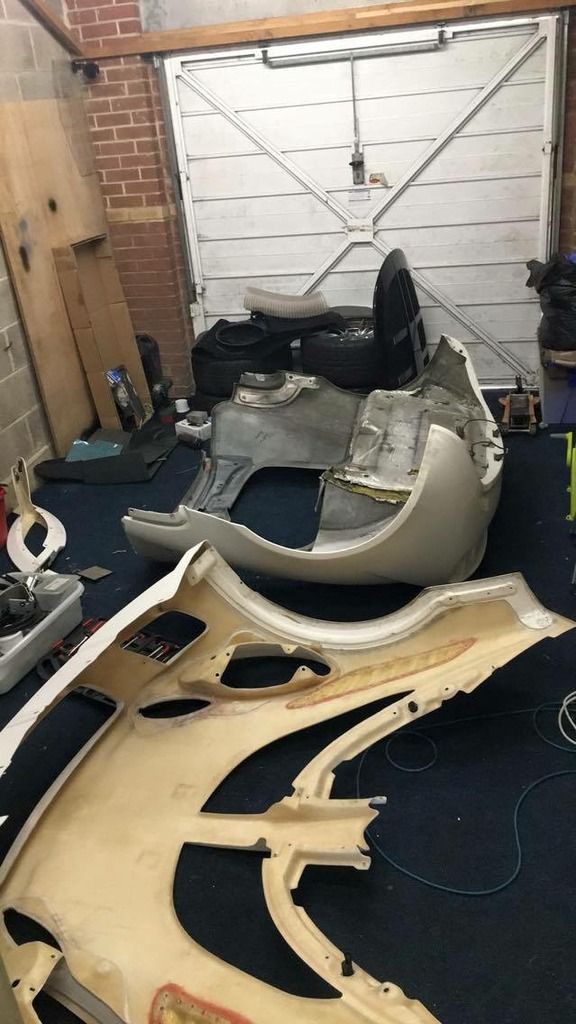
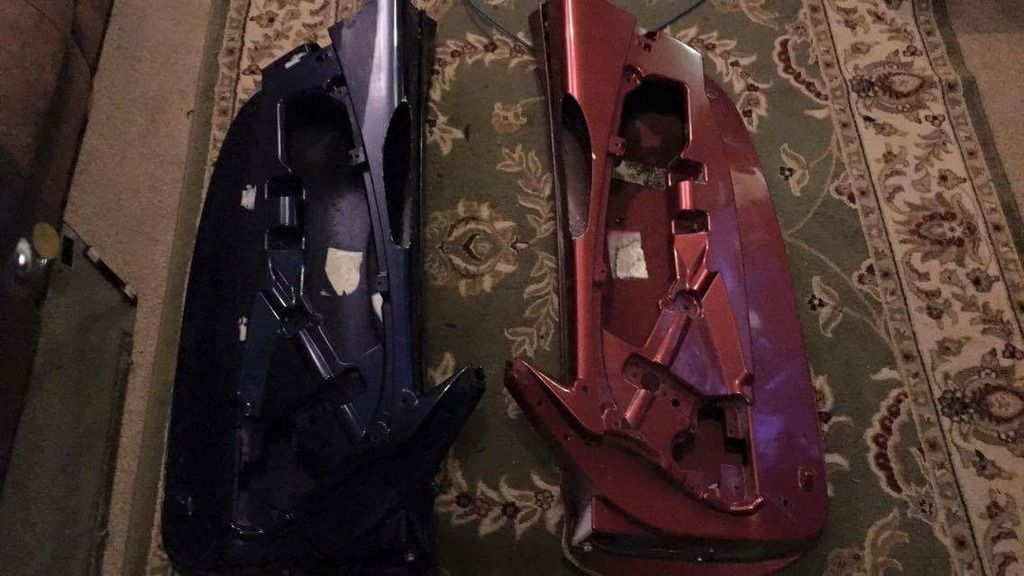
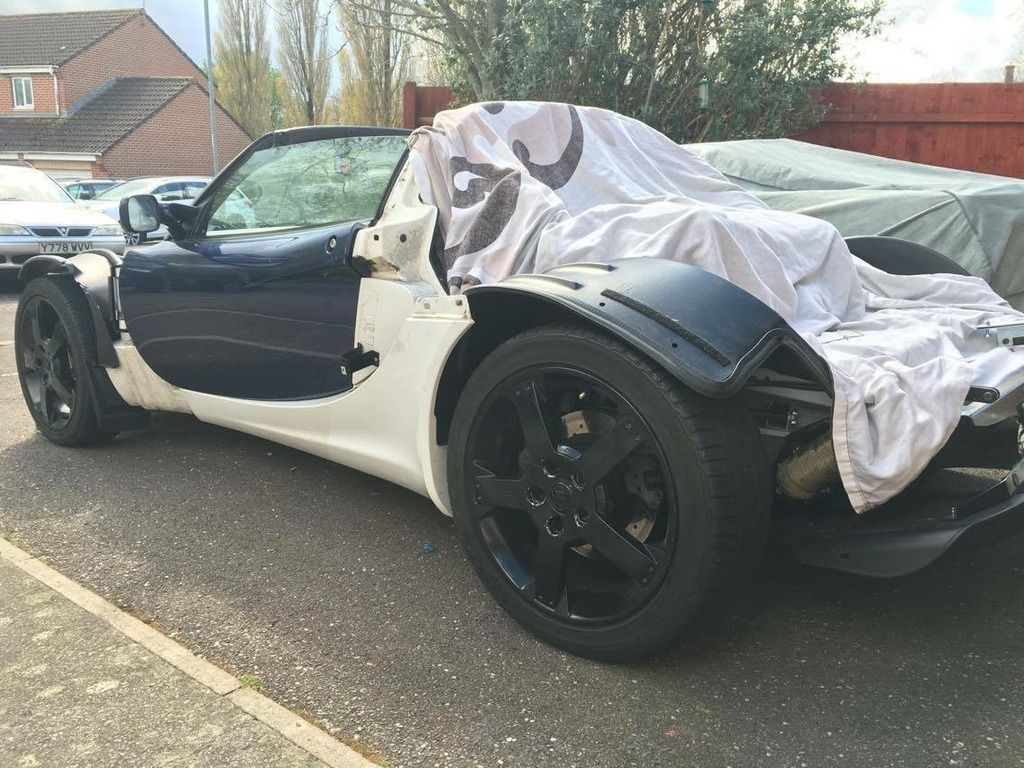
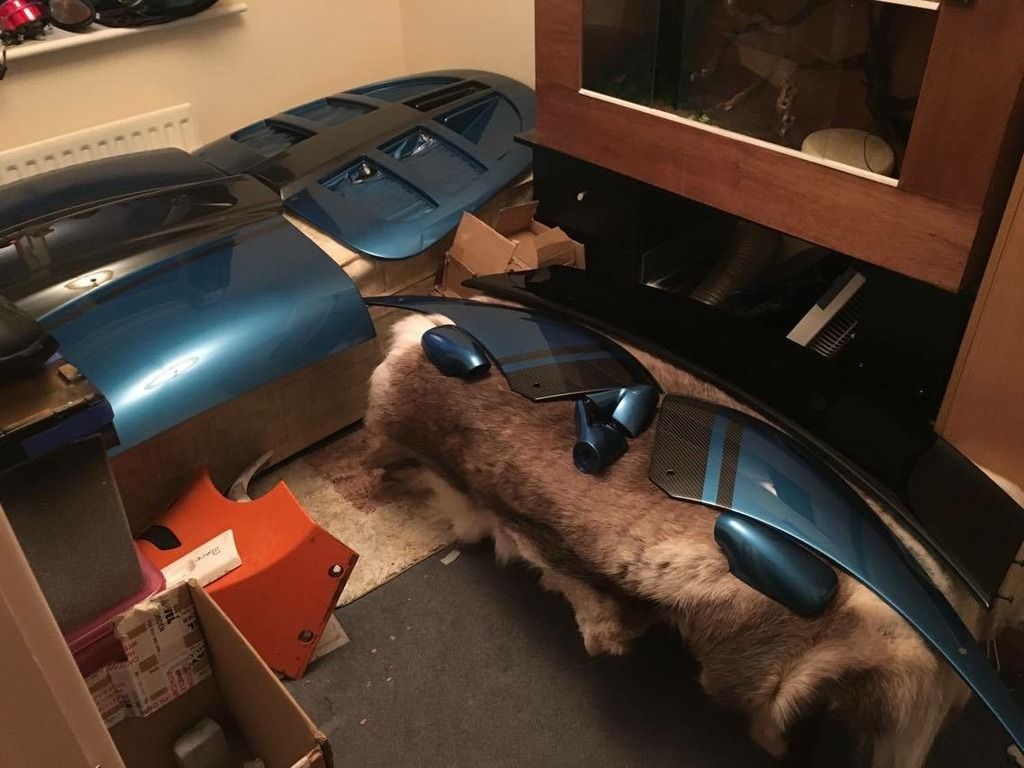
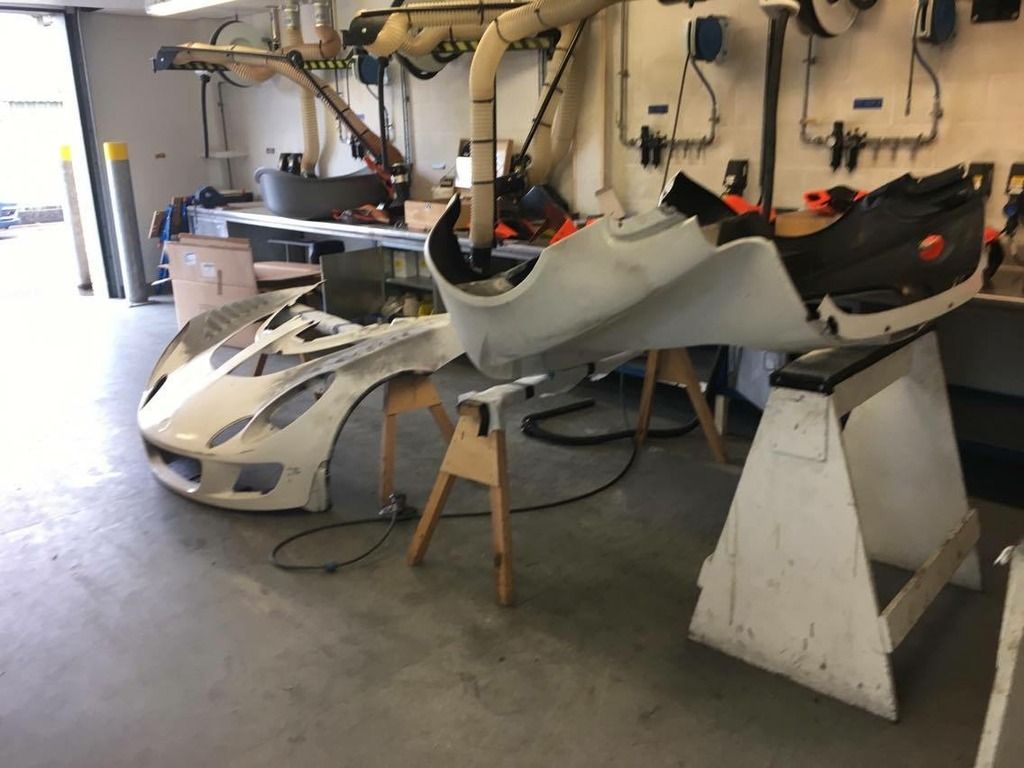
Next they stripped the car down completely which consisted of filling their garage and there spare room with some more car parts.


Alistair kindly said he would make me a badge from cf for the rear so he sent me a few designs over and this is the one I liked the best.

Plans for the Titanium spring bracket that Alistair came up with to mount on the clam and keep the oem plastic tunnel in place. I wanted to use the tunnel to direct cold air to the inlet manifold to help with inlet temps.
Video to show it working
Next they stripped the car down completely which consisted of filling their garage and there spare room with some more car parts.


#686
haggi961
-
-
- 6,003 posts
1cobrav8 is my god
- Gender:Male
- Location:Richmond, N.Yorks
- Interests:Keeping fit and in shape, and pretty much anything to do with an engine.
Posted 27 June 2016 - 07:58 PM
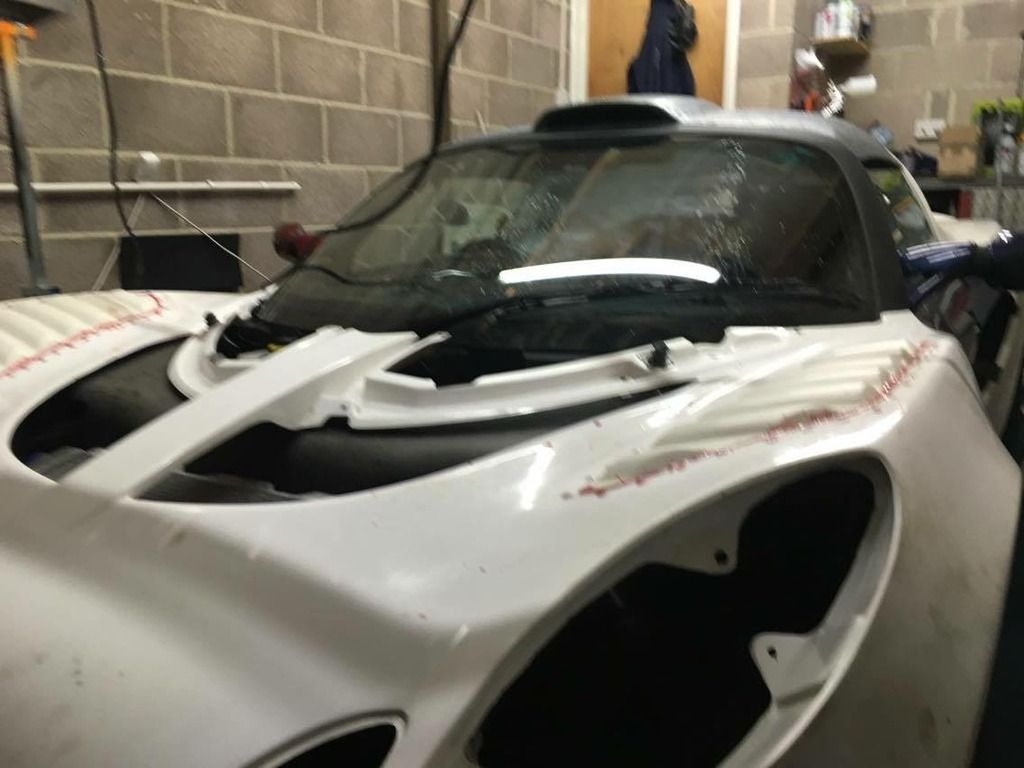
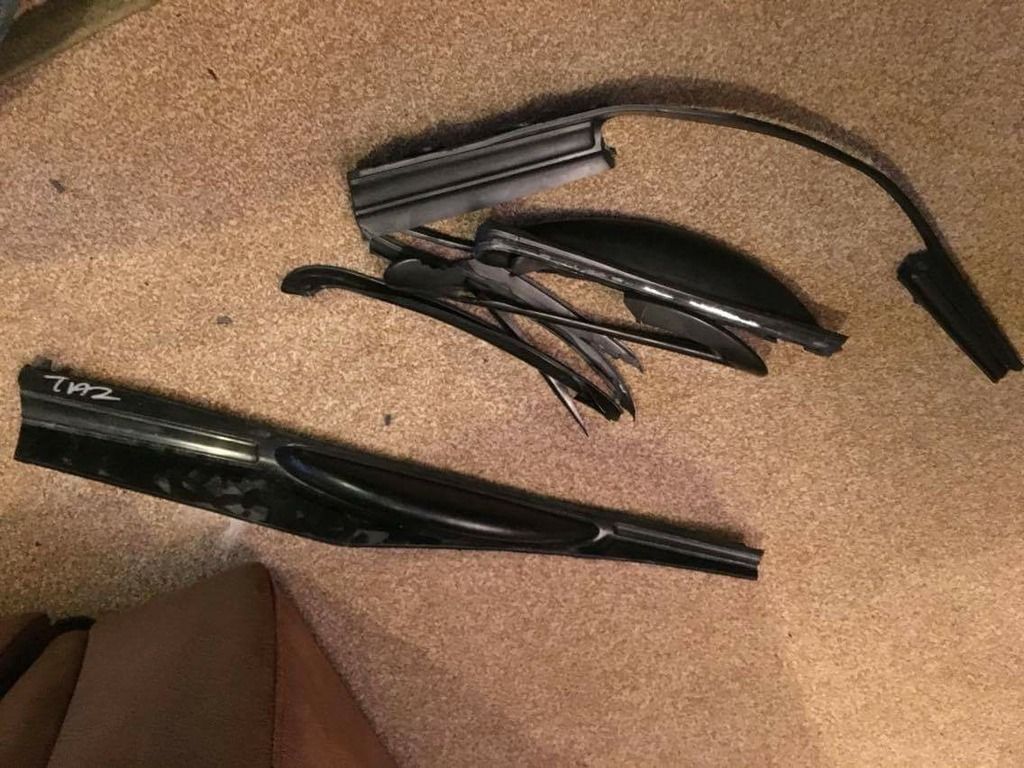
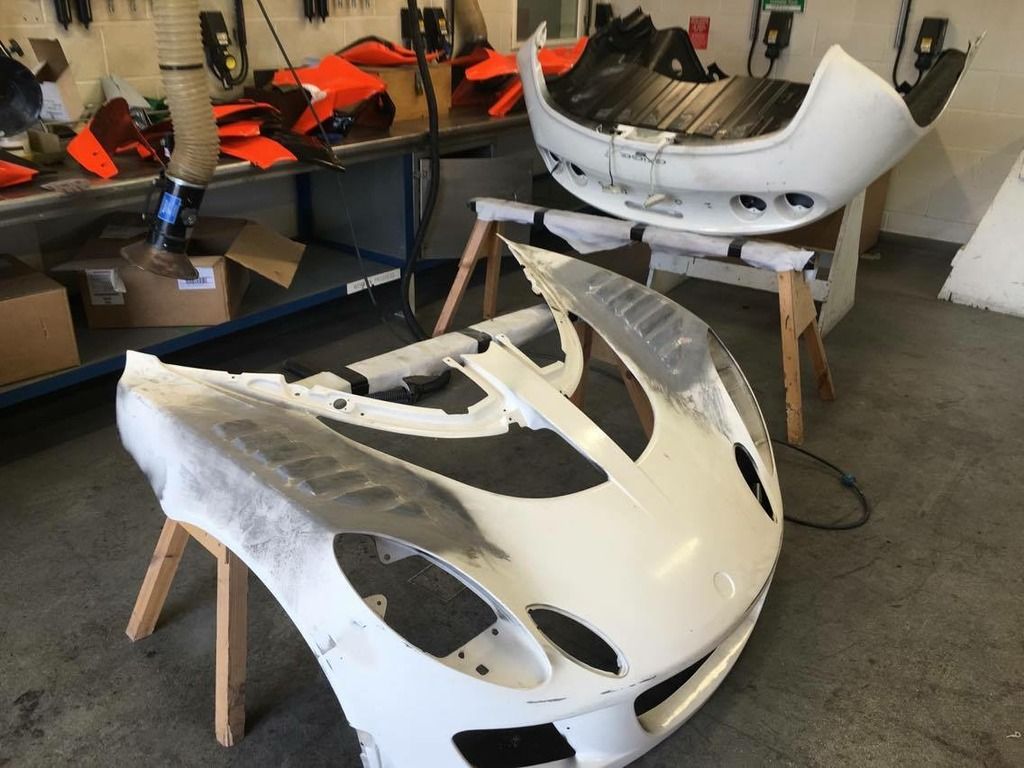
Stripping doors down to bare shell and the removal of the bonded door handles which I hear wasn't an easy job to remove.
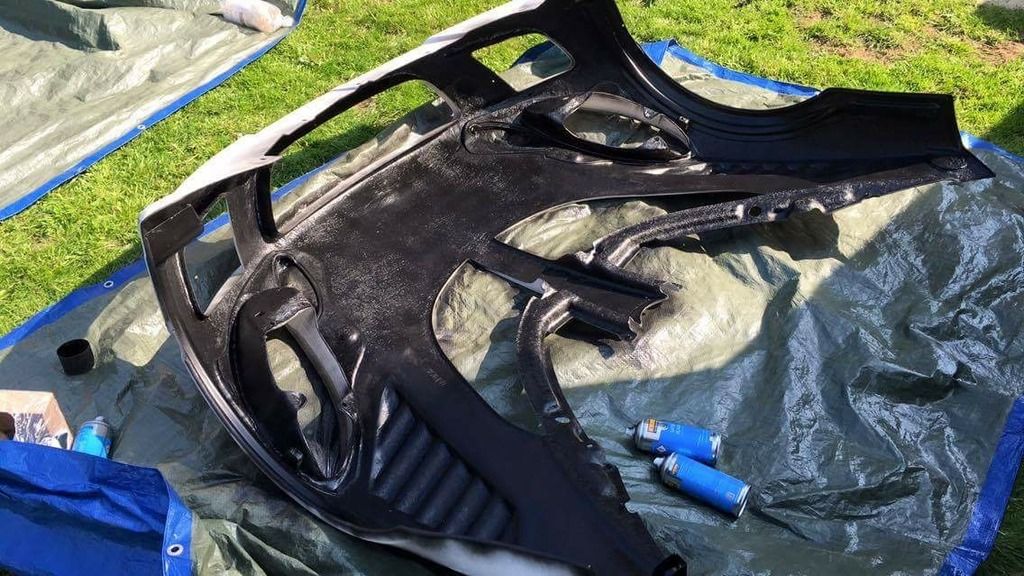
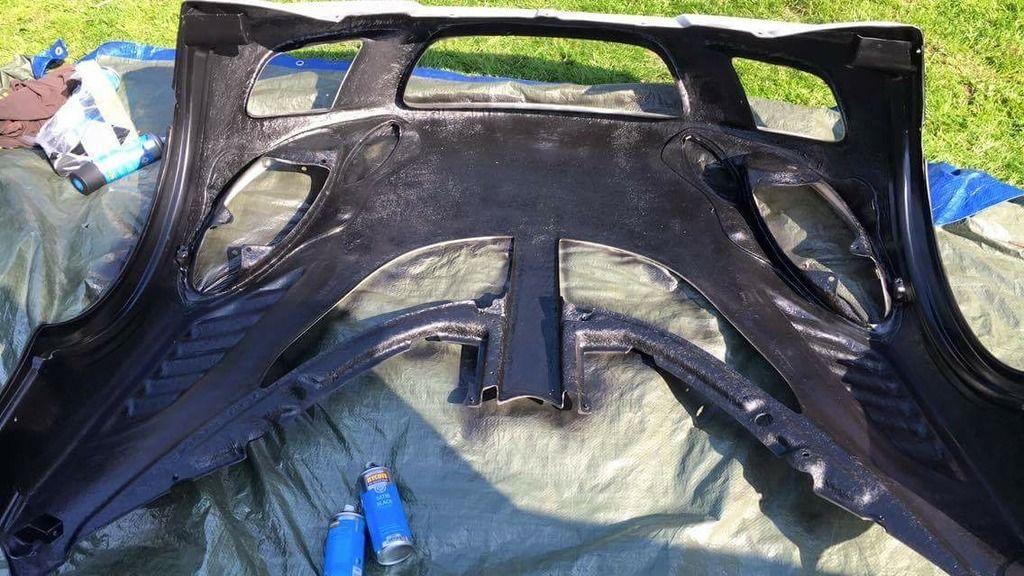
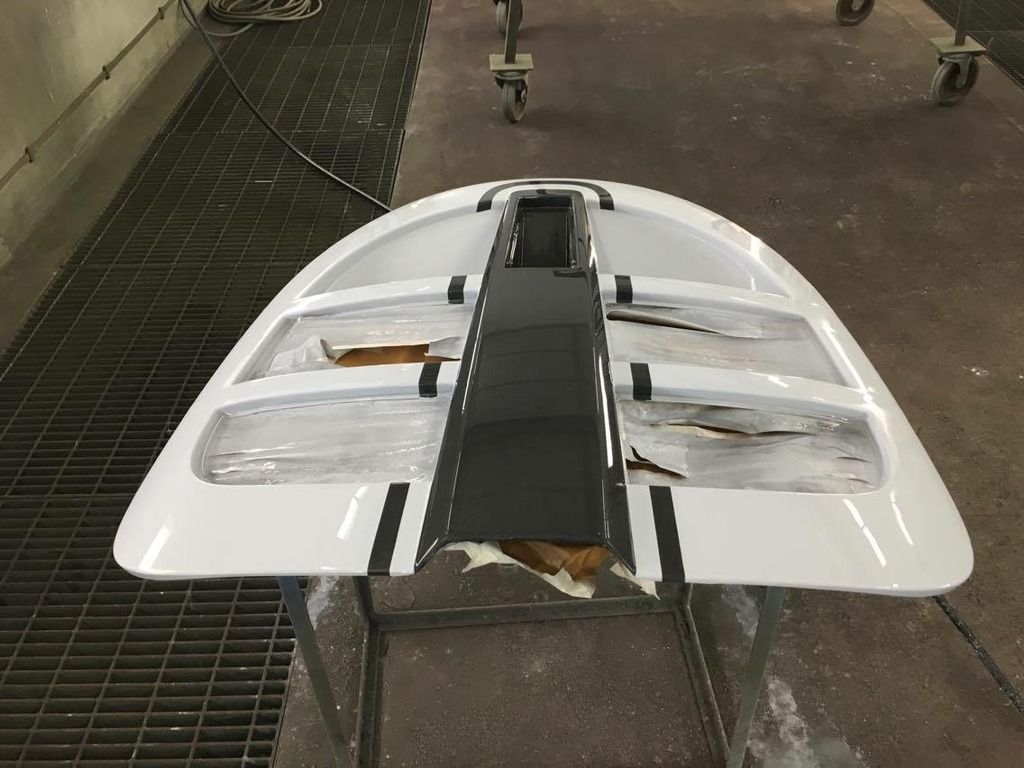
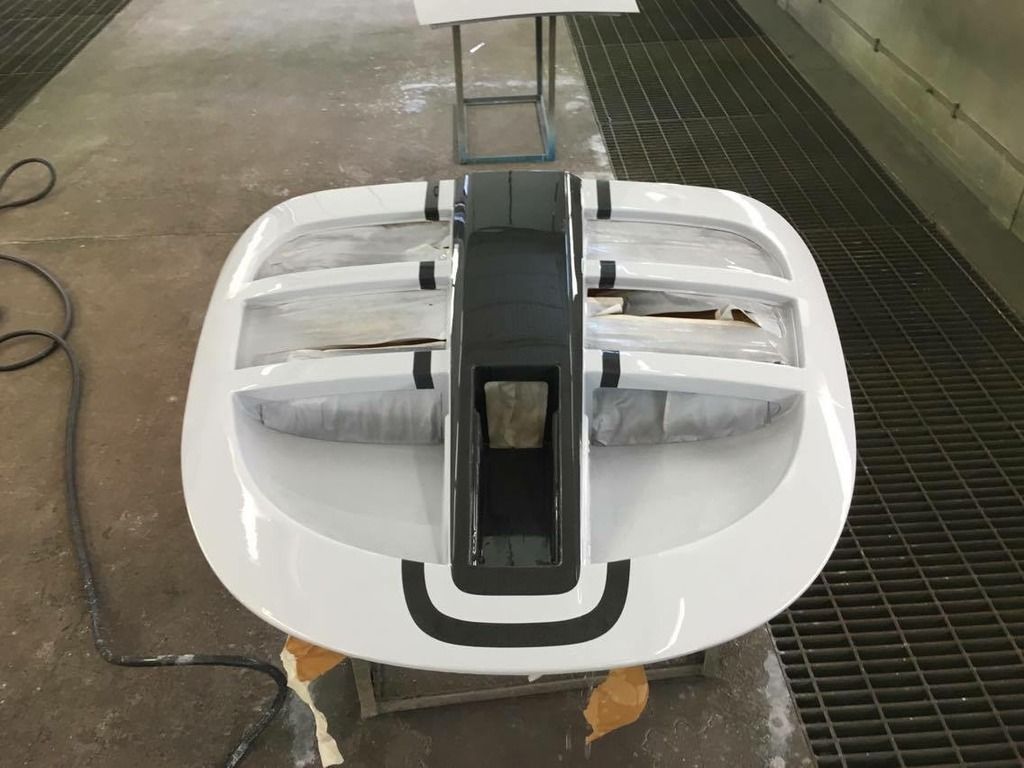
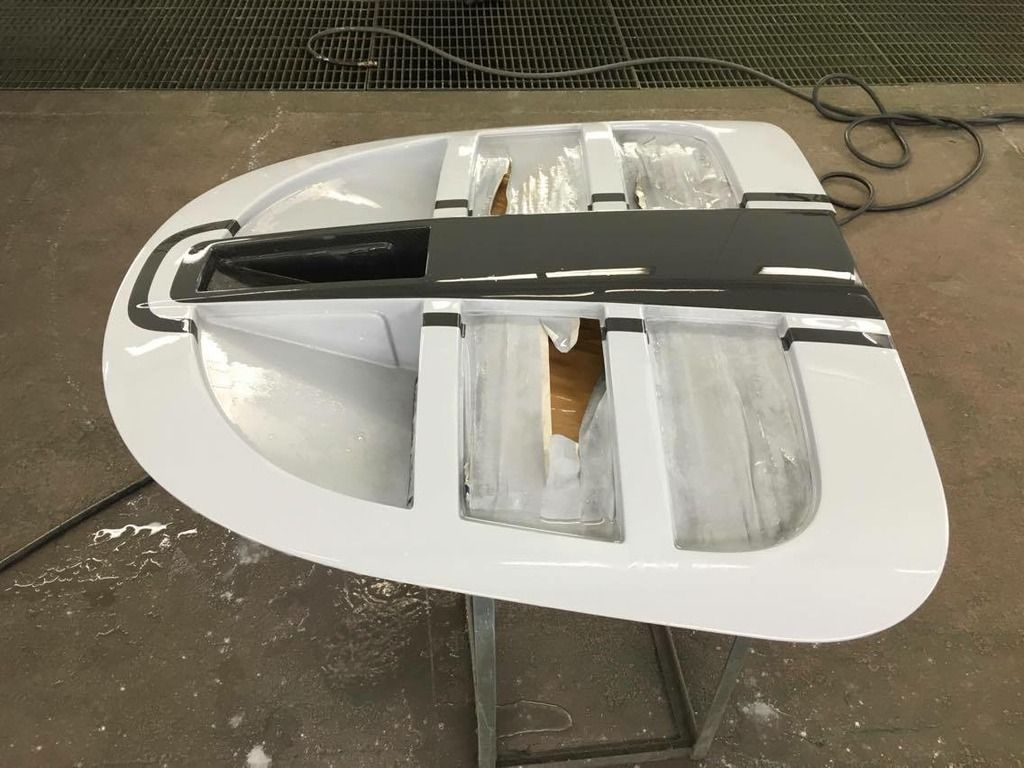
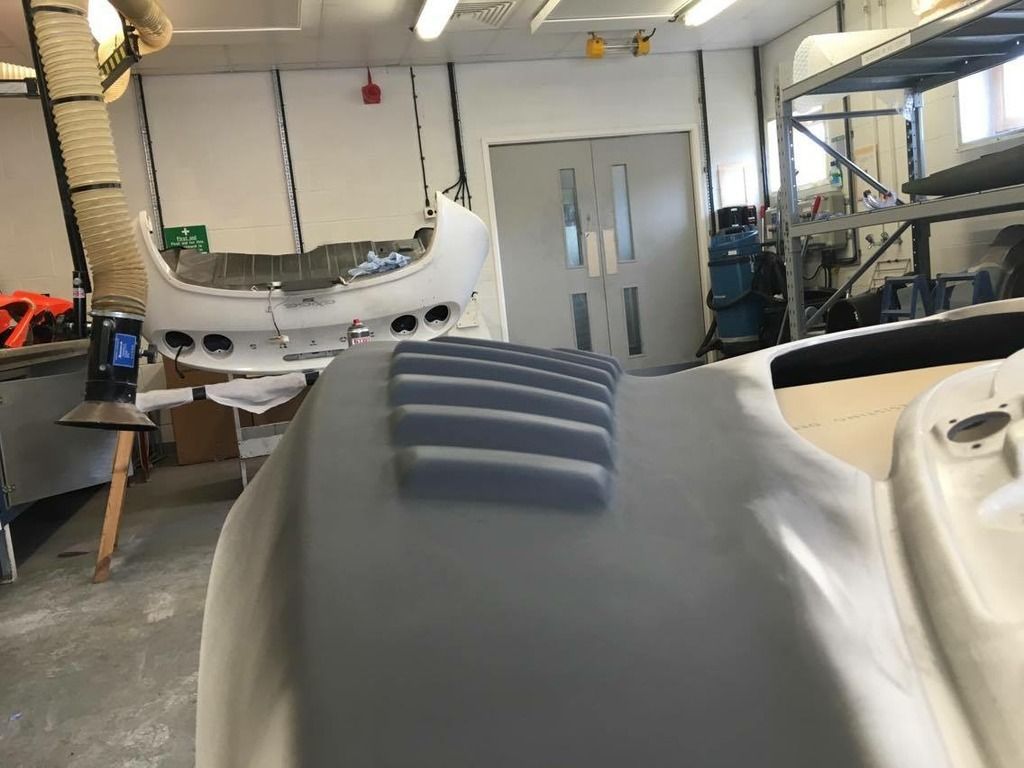
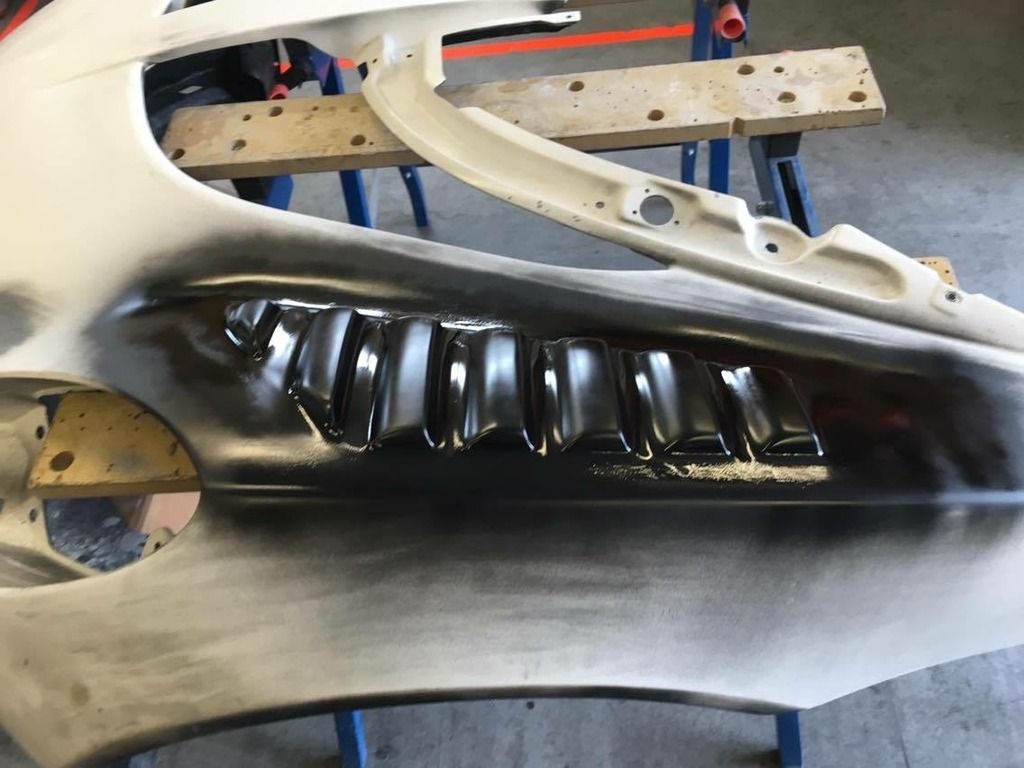
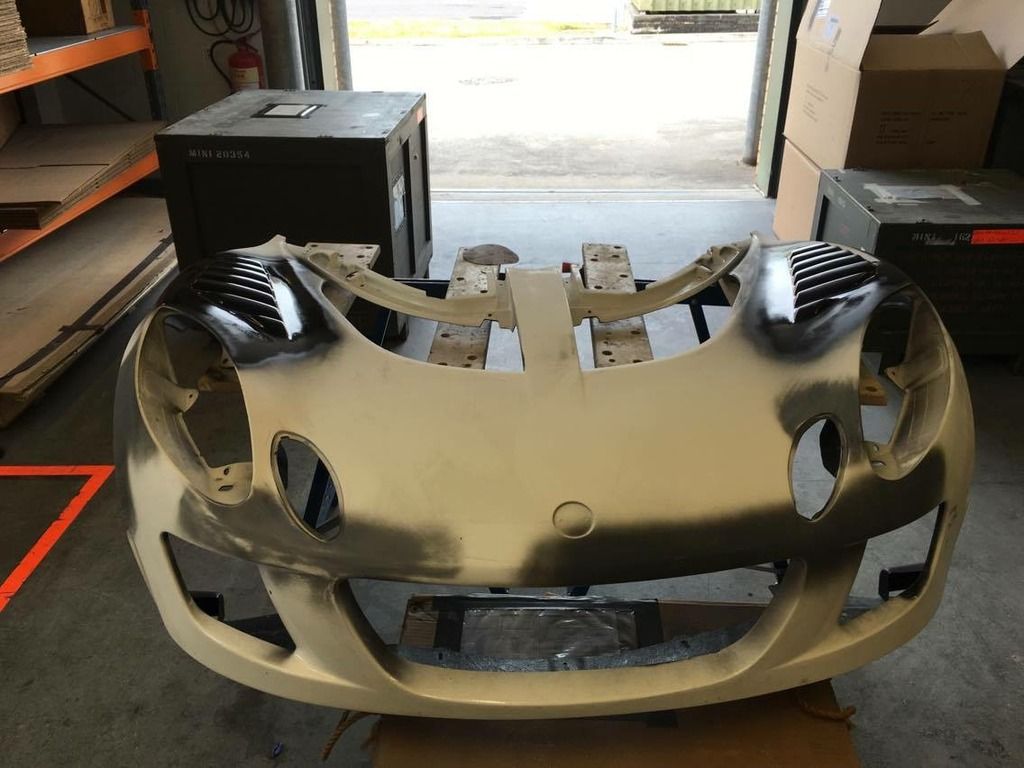
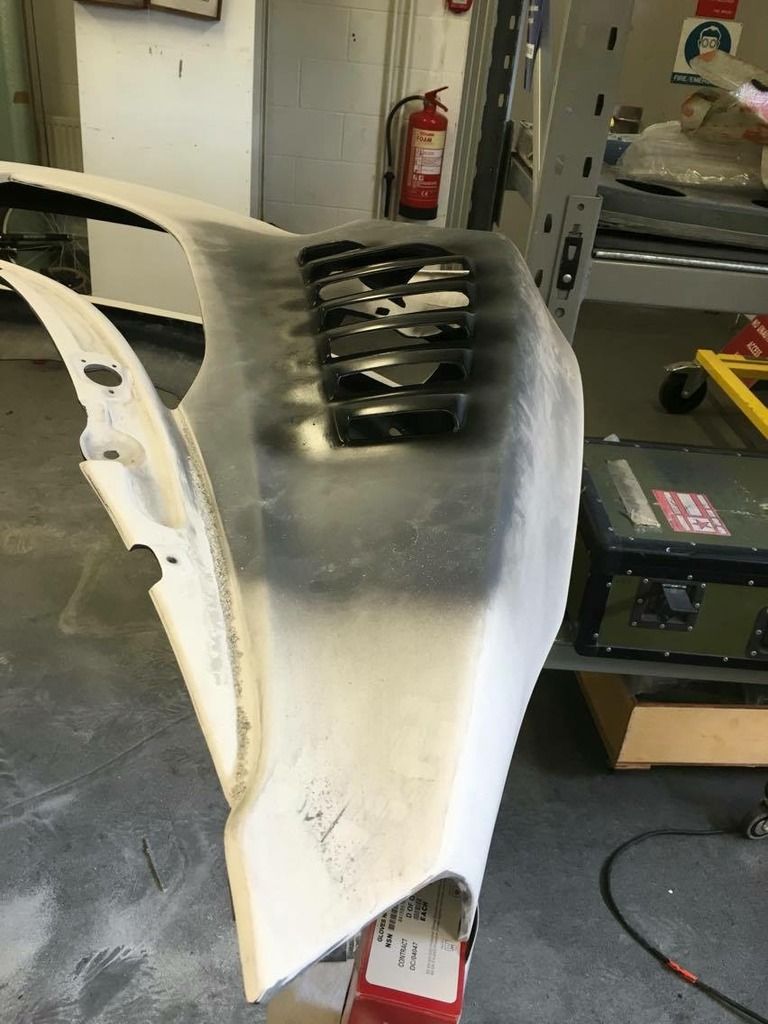
Next job for them both was to prep and smooth the inside of the clams as these are going black. The reason I wanted them black was so when the rear clam was flipped up at shows it looked nice and tidy against the engine and Alastair insisted that everything else must go black as well lol
Front clam first
Front clam louvres smoothed in and primed
The rear needed a few repairs which was sorted and then primed and painted black. Looking really good I must admit.
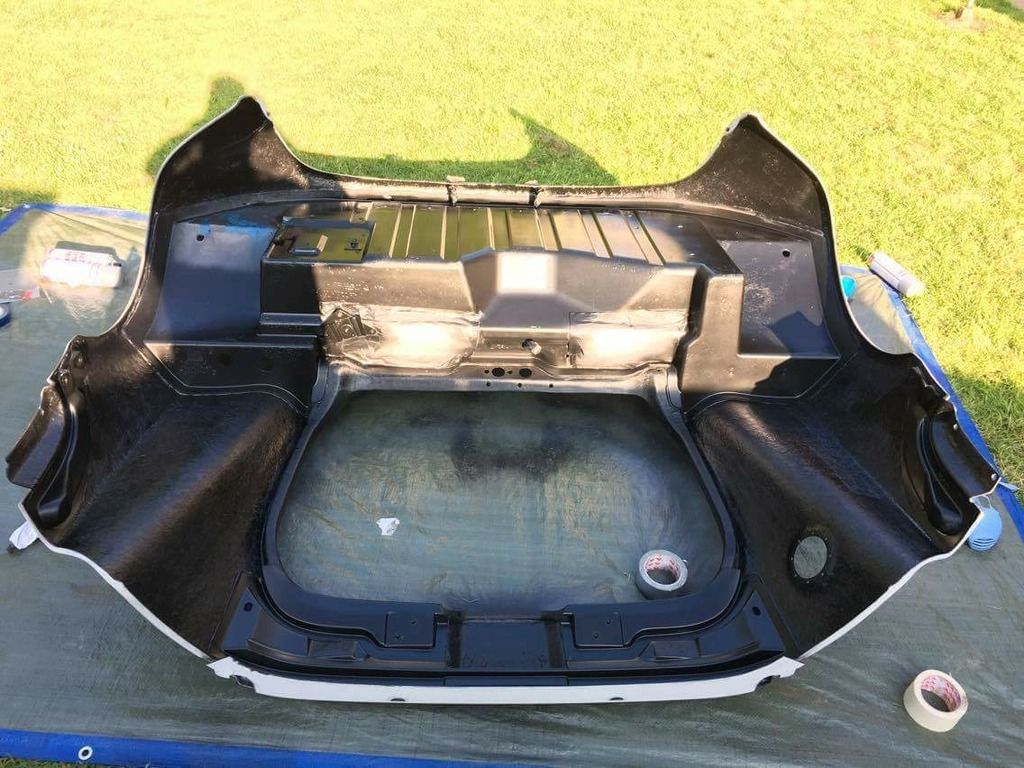


Next job for them both was to prep and smooth the inside of the clams as these are going black. The reason I wanted them black was so when the rear clam was flipped up at shows it looked nice and tidy against the engine and Alastair insisted that everything else must go black as well lol
Front clam first


Front clam louvres smoothed in and primed

The rear needed a few repairs which was sorted and then primed and painted black. Looking really good I must admit.


#687
haggi961
-
-
- 6,003 posts
1cobrav8 is my god
- Gender:Male
- Location:Richmond, N.Yorks
- Interests:Keeping fit and in shape, and pretty much anything to do with an engine.
Posted 27 June 2016 - 08:00 PM
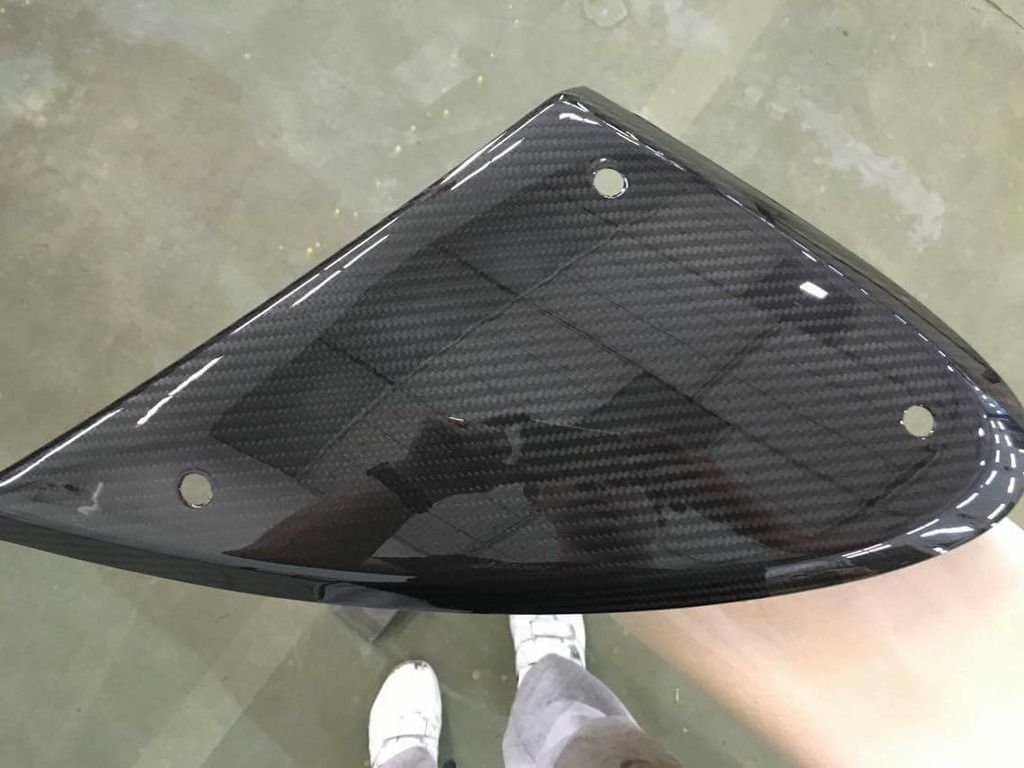
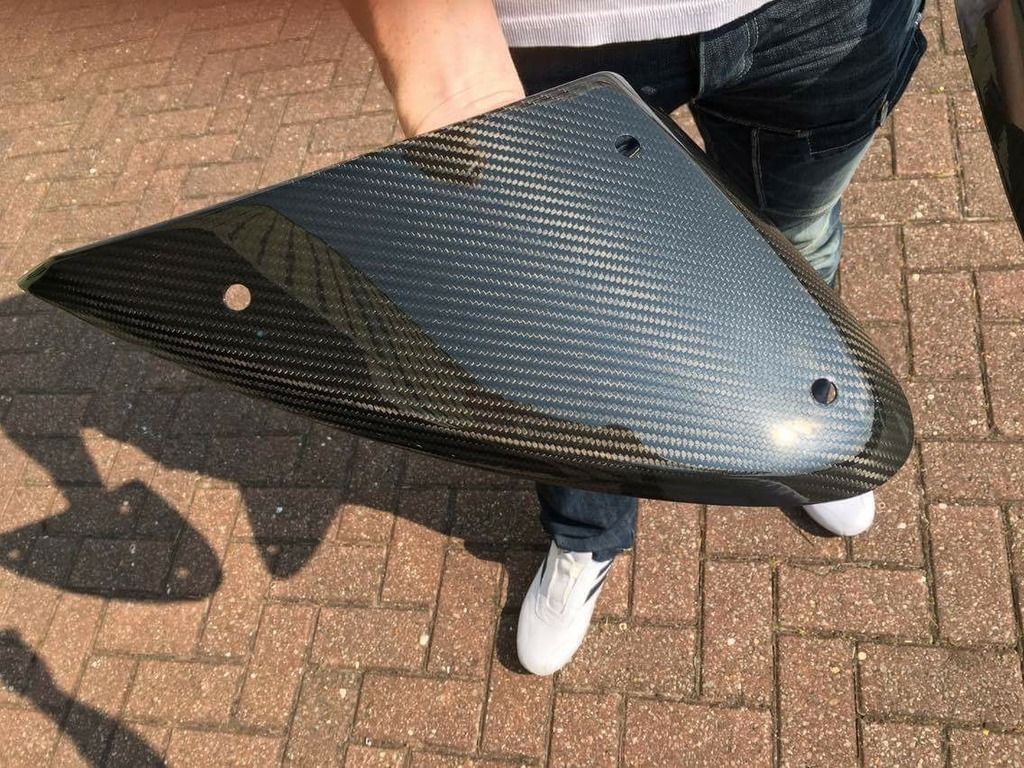
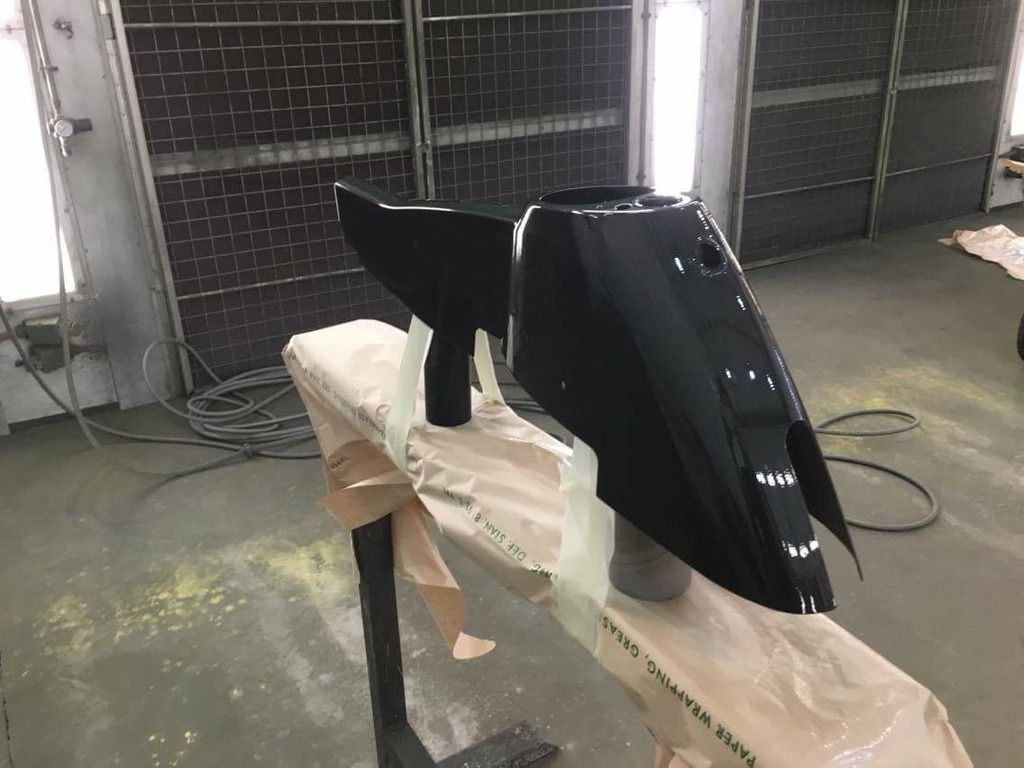
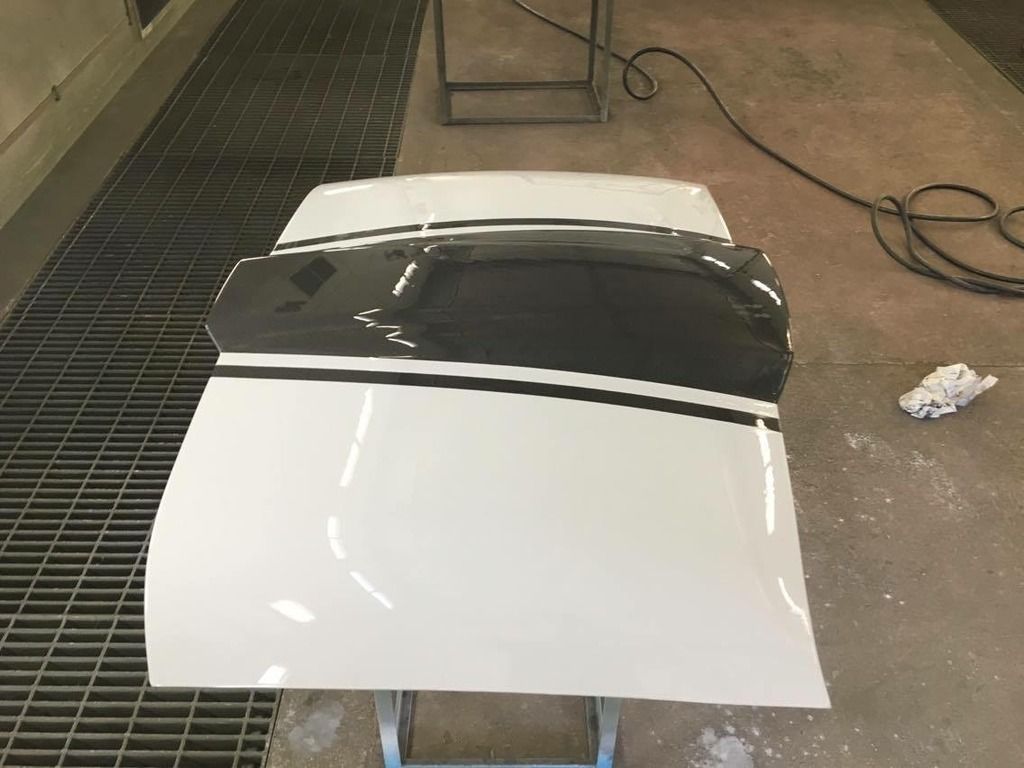
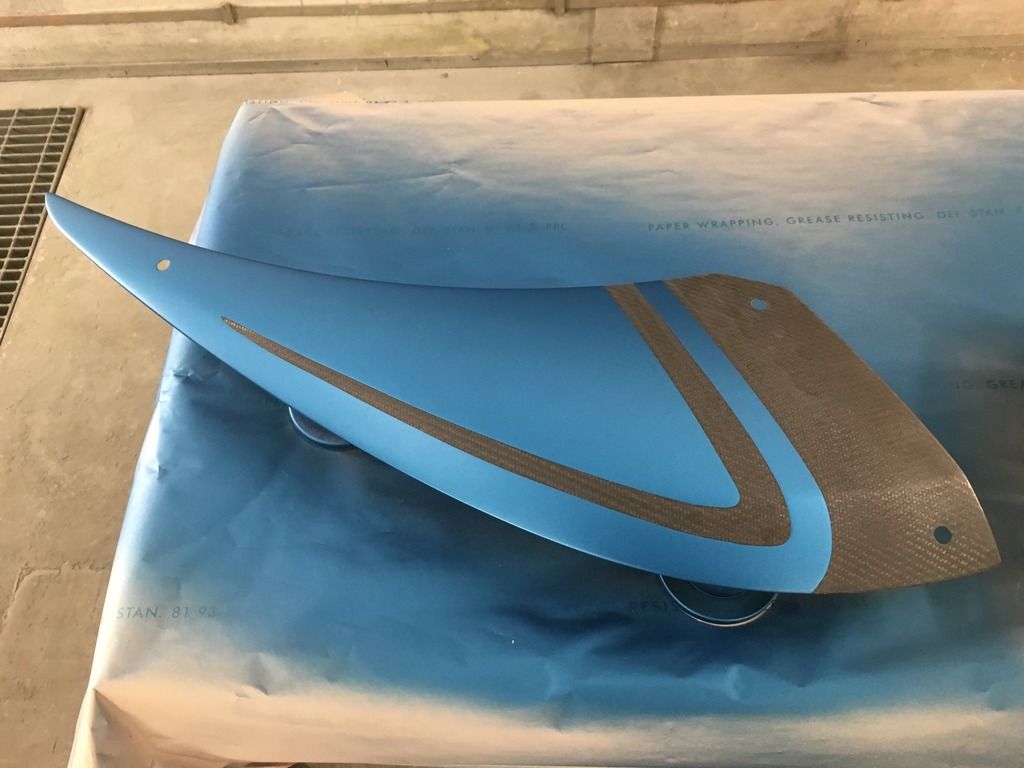
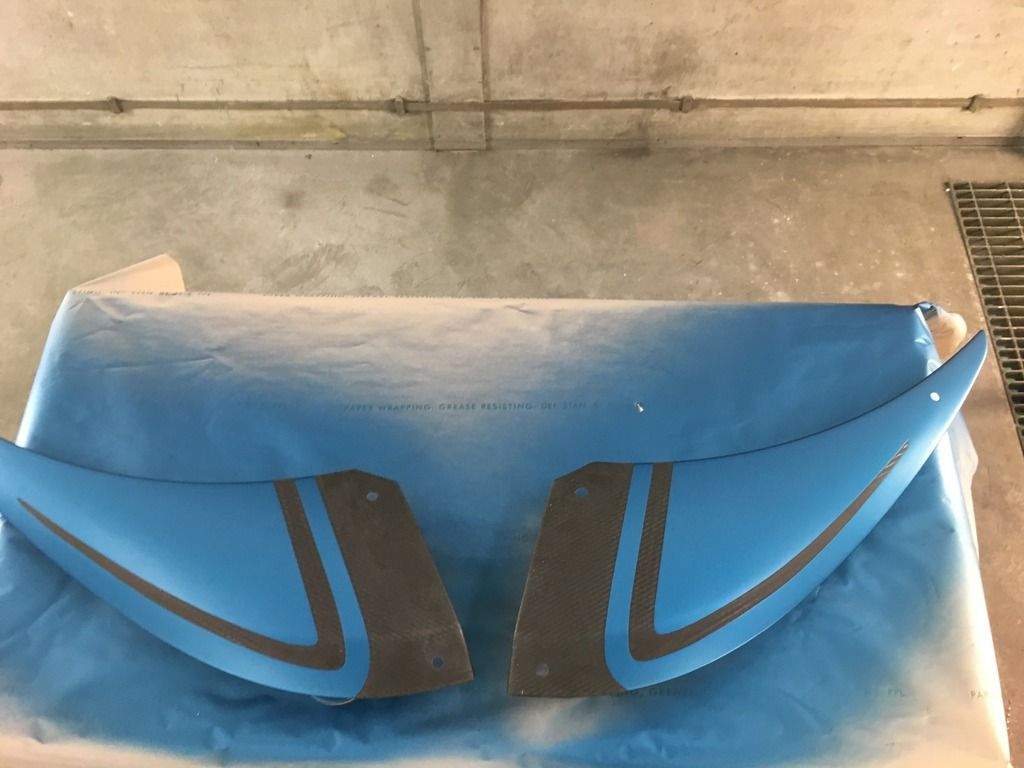
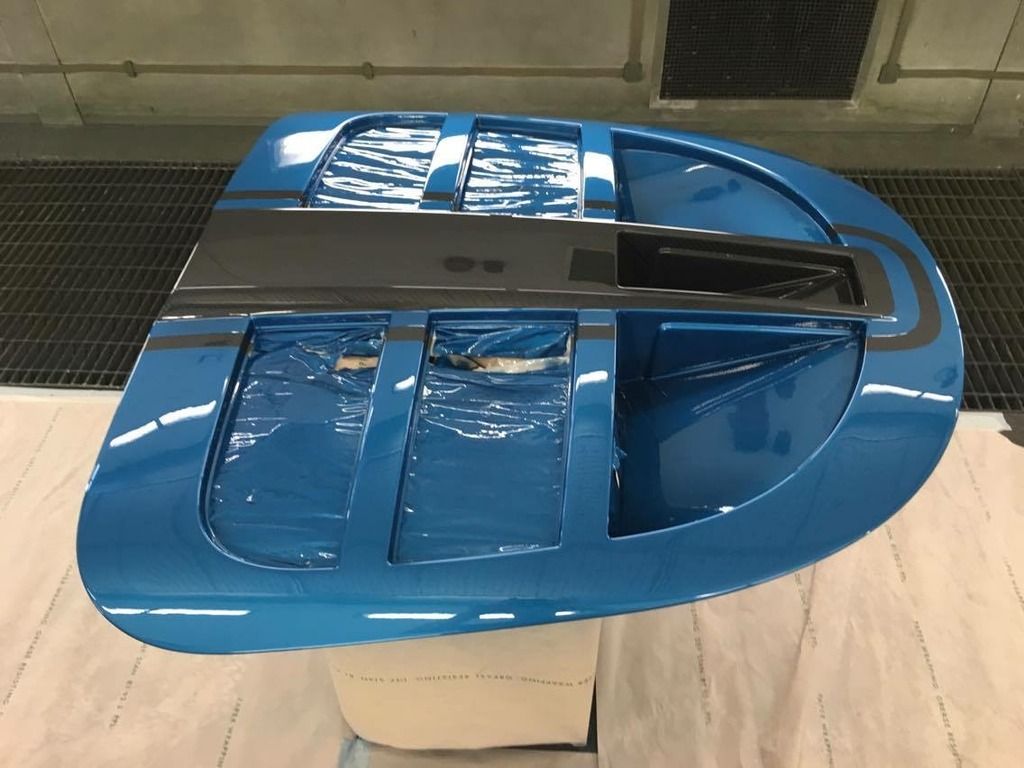
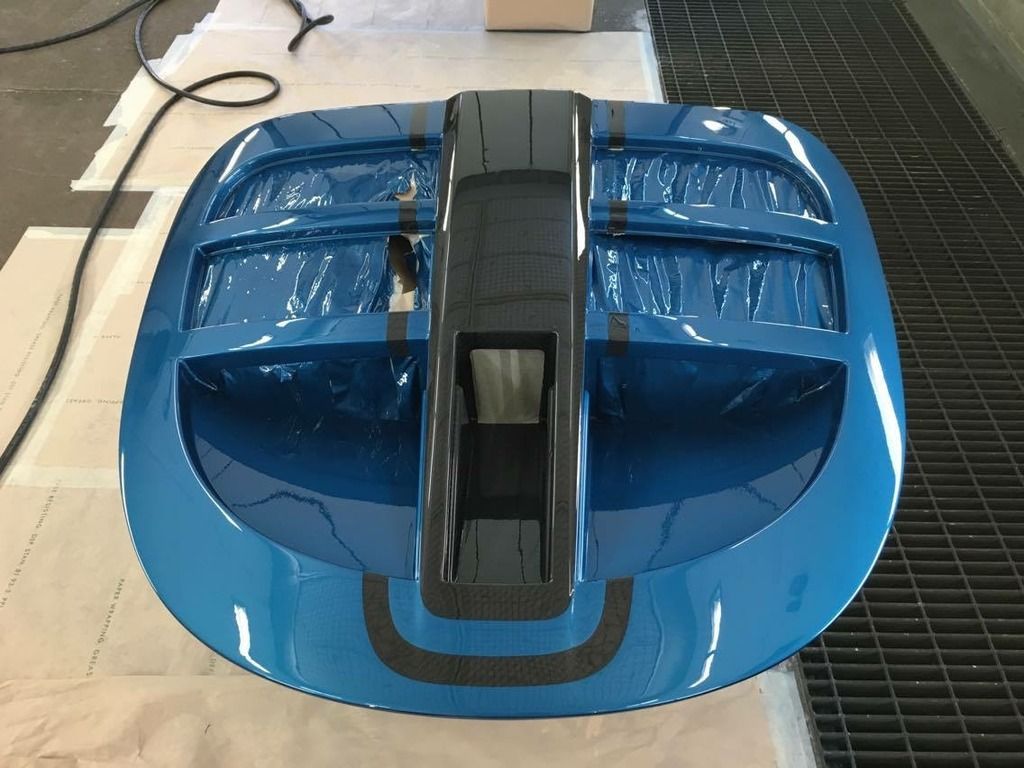
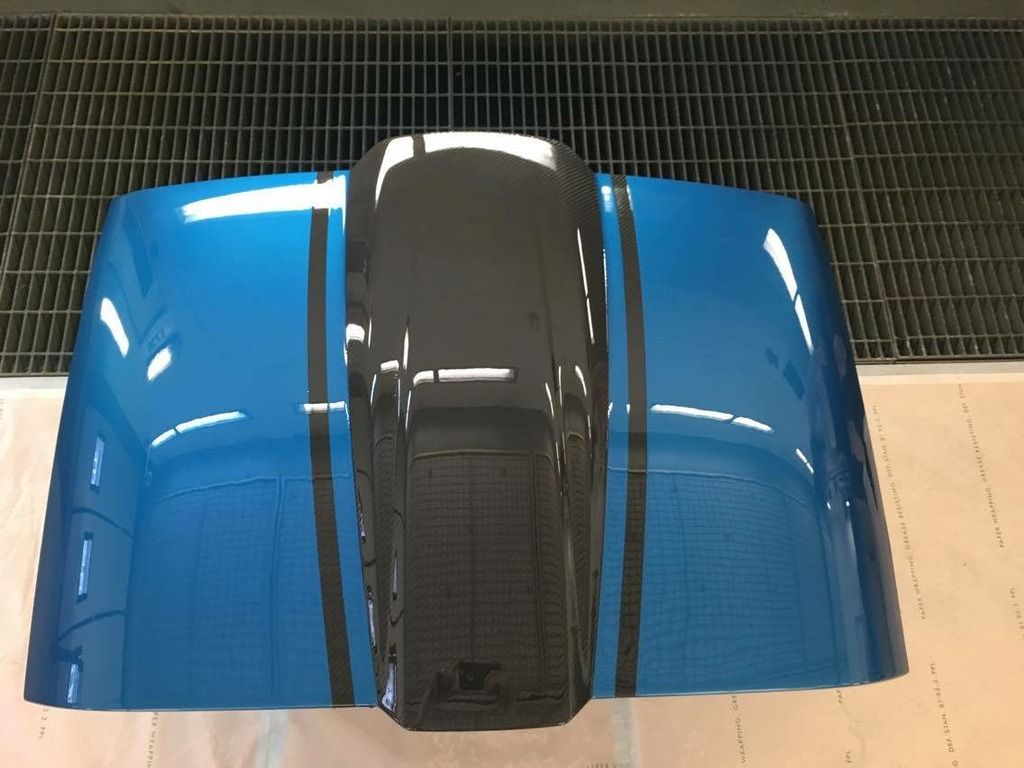
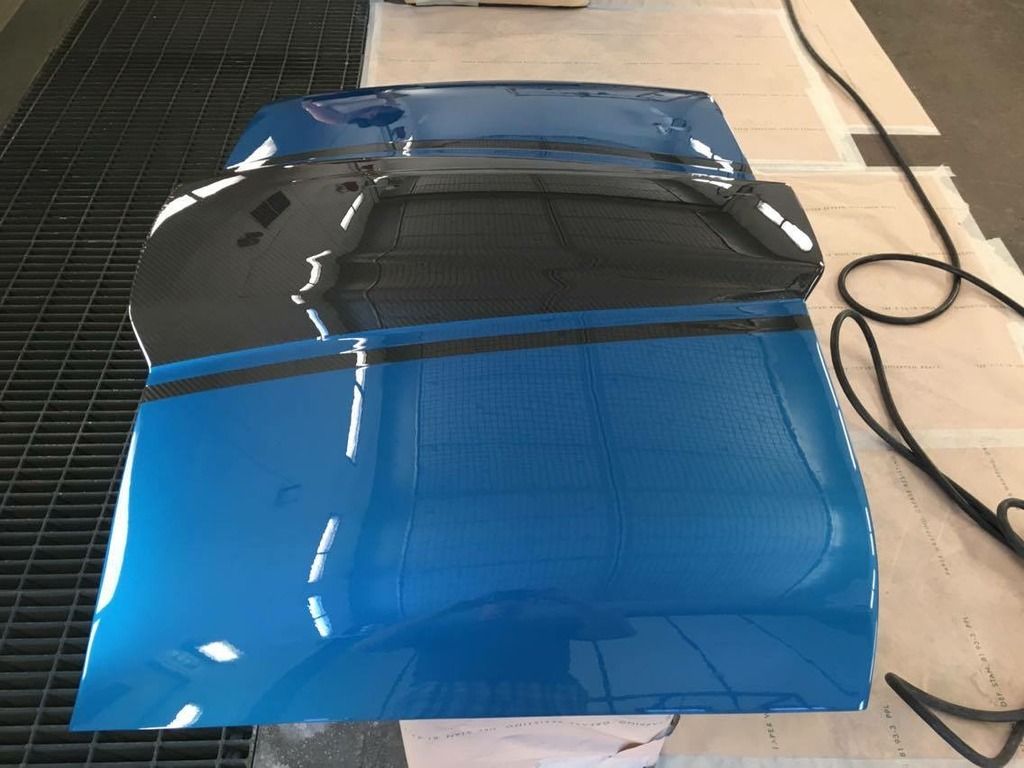
I then changed the project slightly as I was going to get all the bits that's on the cup Exige painted black, but instead I bought a oem carbon fibre roof and engine cover along with lots of other carbon fibre parts. The roof and engine cover have saved me about 12kg in weight so overall a good saving.
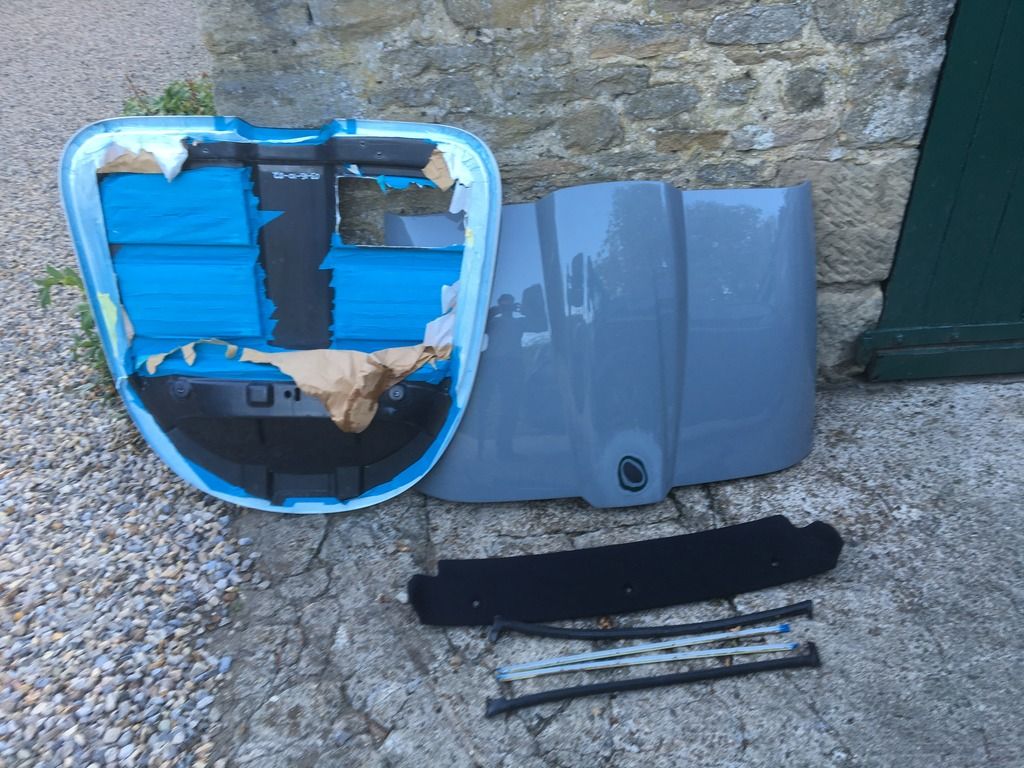
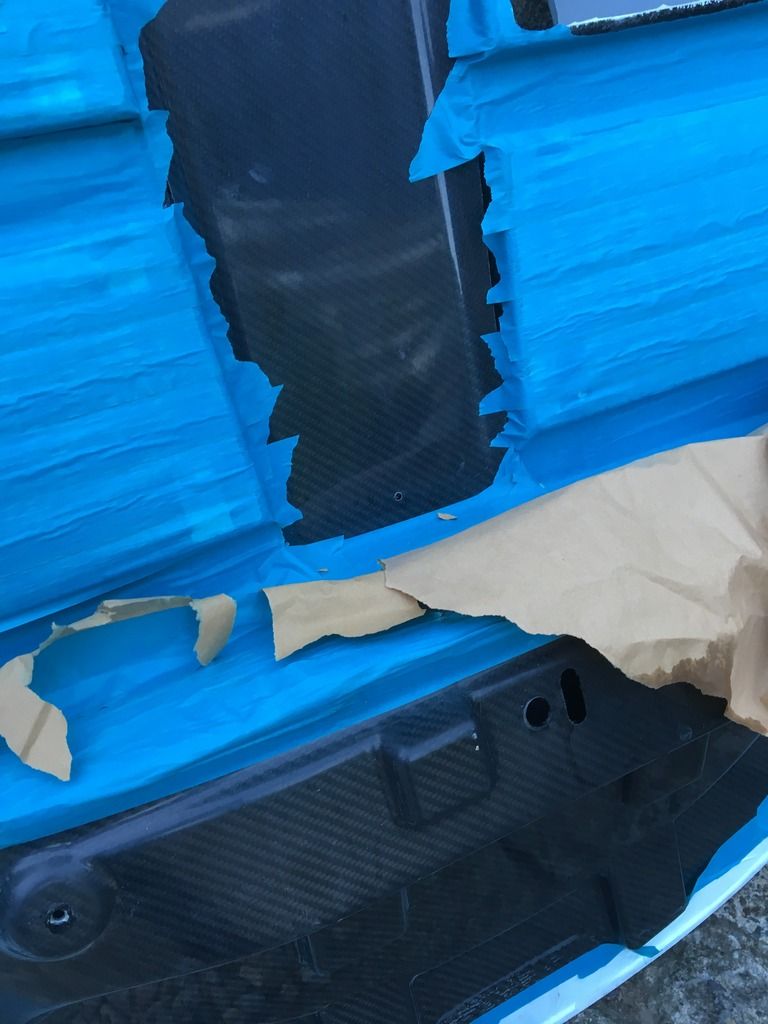
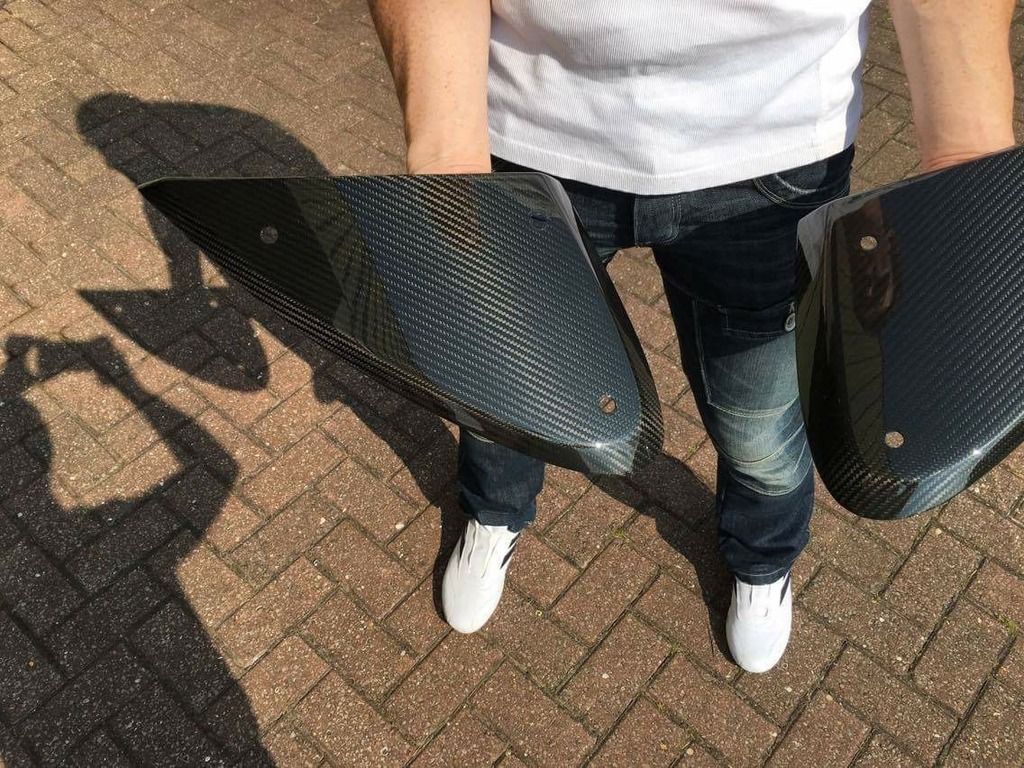
The other little bits are front access panels, side vents, front clam pieces and radiator shroud.
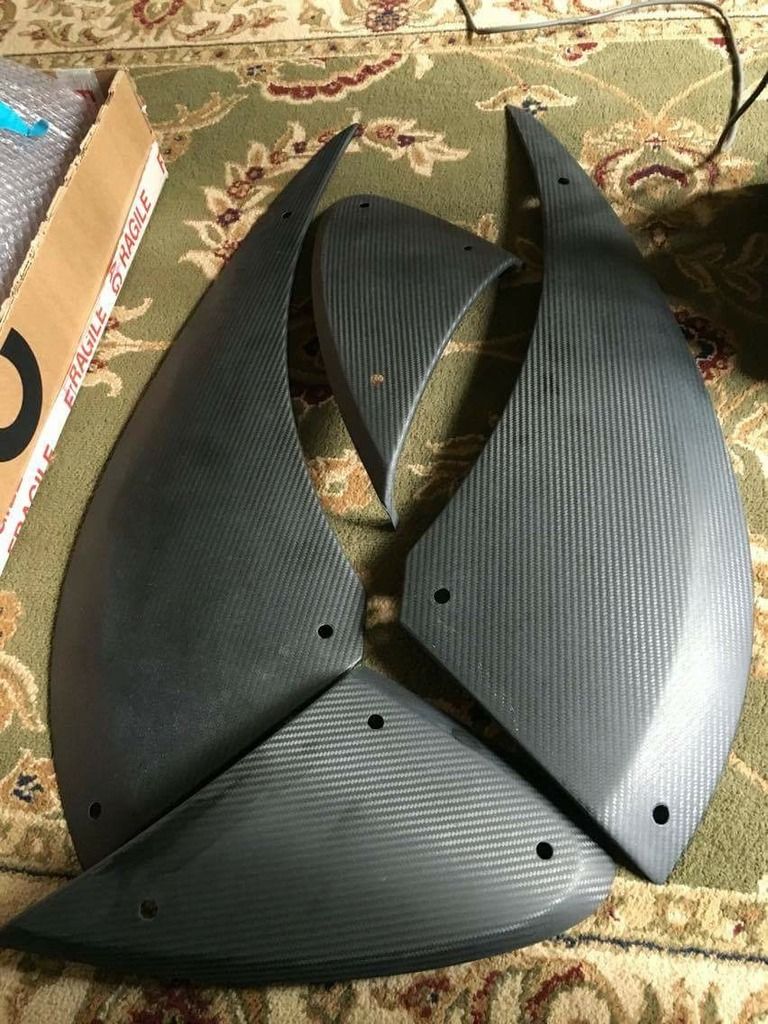
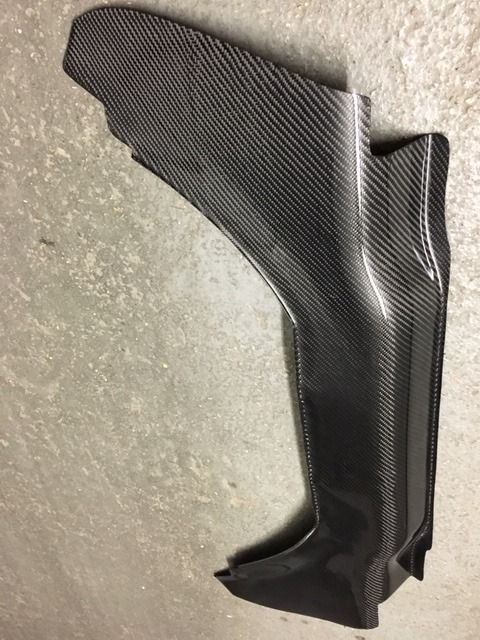
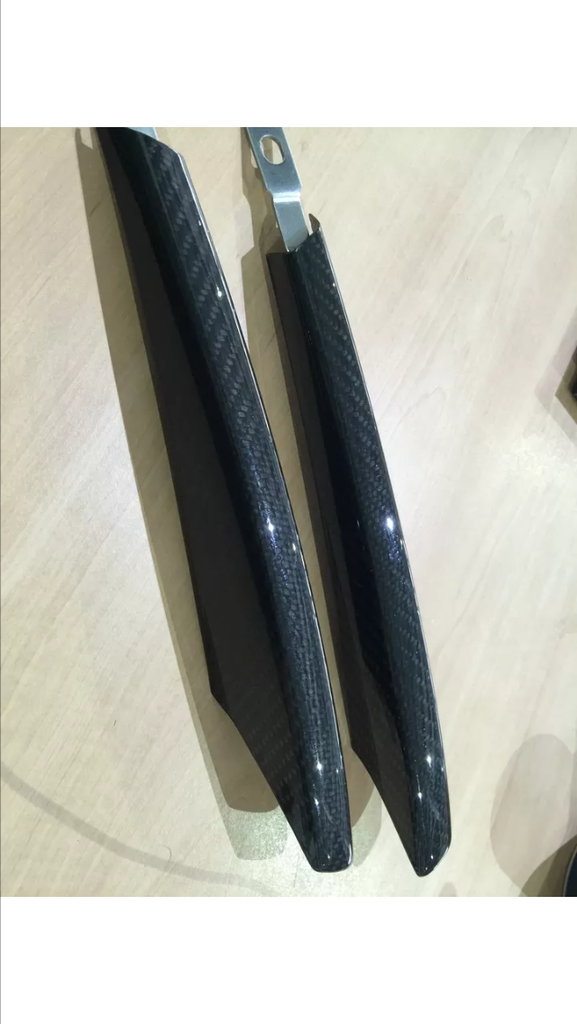


The other little bits are front access panels, side vents, front clam pieces and radiator shroud.


#688
haggi961
-
-
- 6,003 posts
1cobrav8 is my god
- Gender:Male
- Location:Richmond, N.Yorks
- Interests:Keeping fit and in shape, and pretty much anything to do with an engine.
Posted 27 June 2016 - 08:01 PM
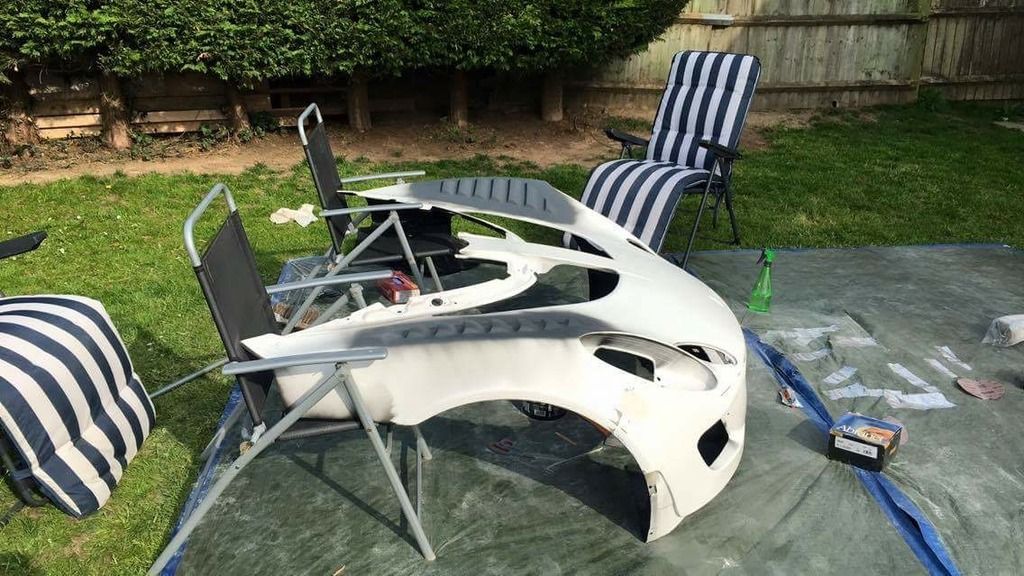
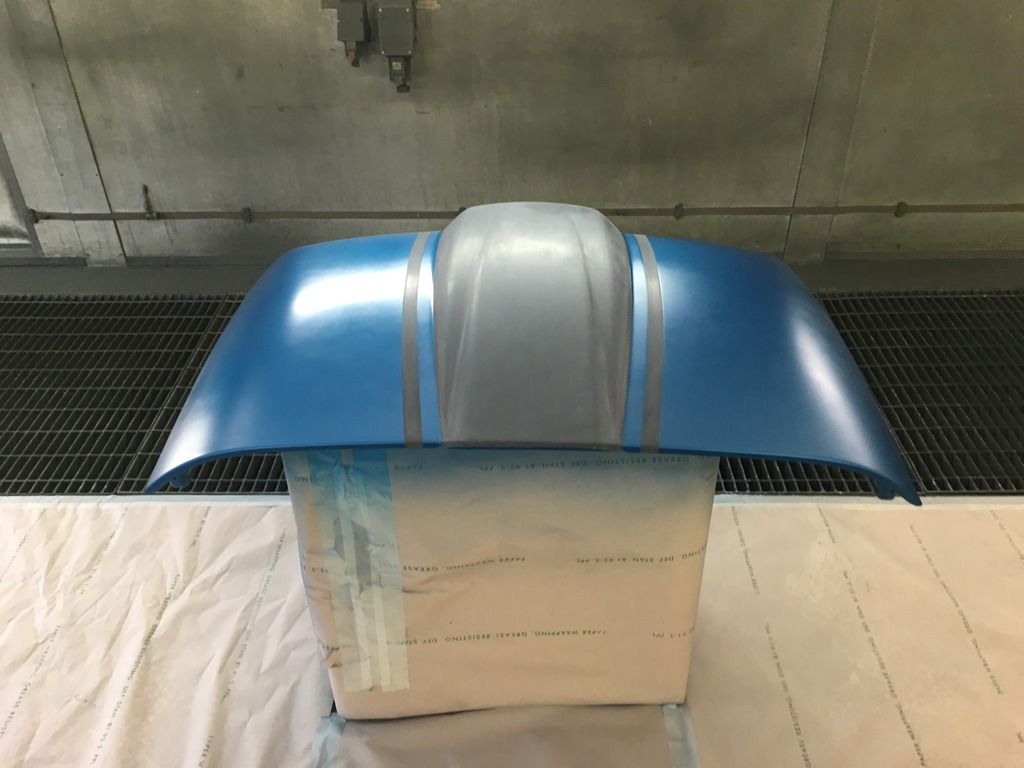
Sanding off the paint on the roof to reveal the carbon fibre which had been covered in layers of paint for some reason. The paint is coming off as the roof is getting done in the cup Exige style.

Next was wheels to be stripped and blasted and some minor repairs as these are getting painted as well.
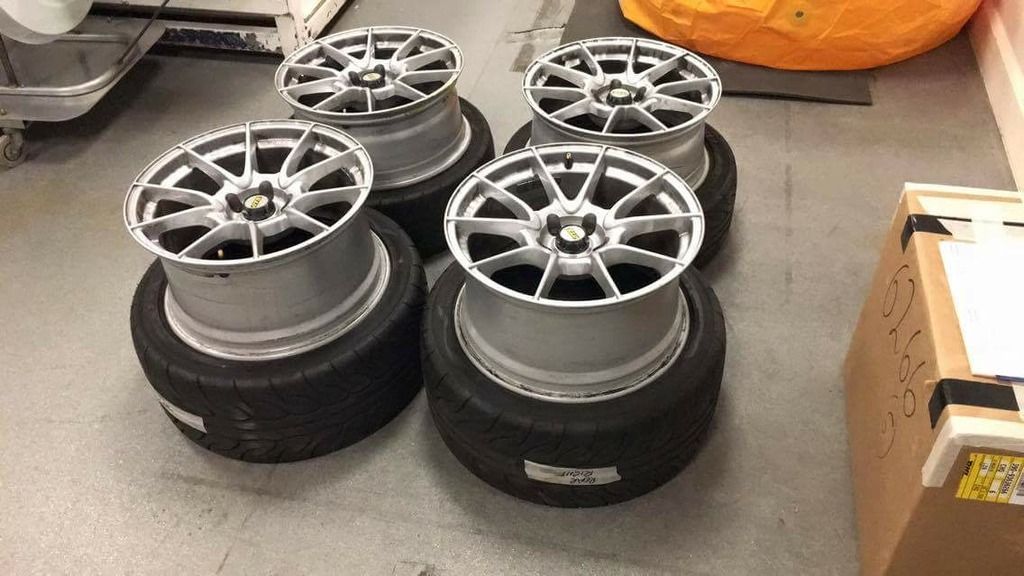
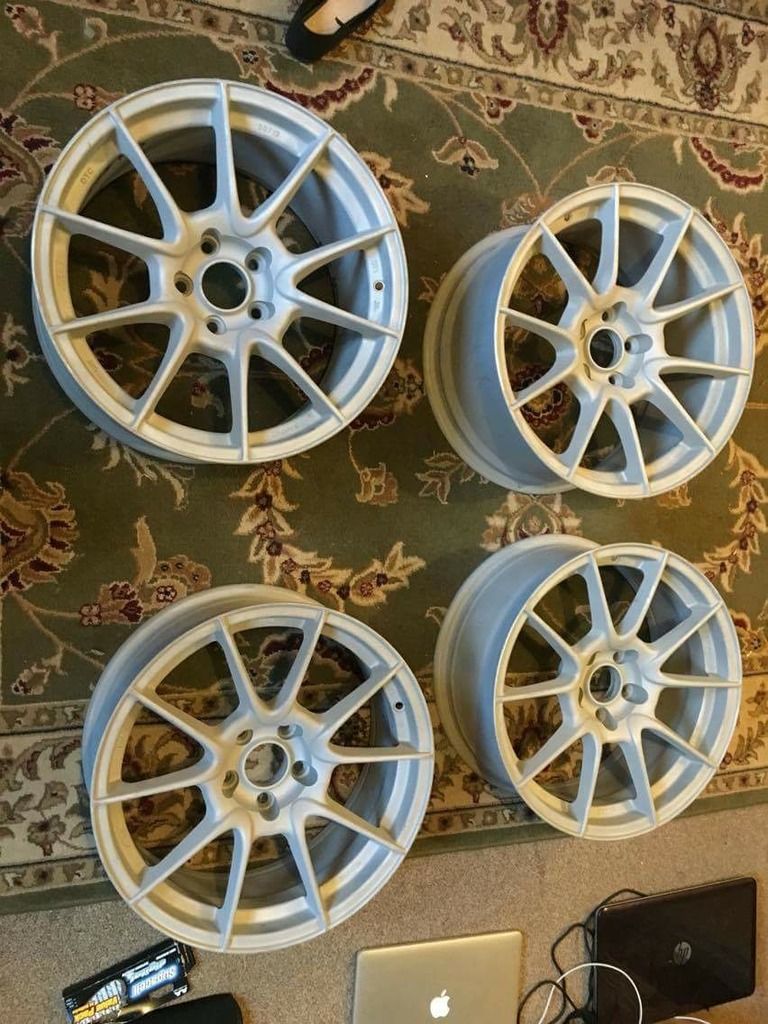
The vxige sitting back on oem wheels, was years ago that it last seen NA wheels.
Little bits and pieces sanded and prepped ready for primer. Ignore the side vents as the plans had changed to the carbon fibre ones.

Next was wheels to be stripped and blasted and some minor repairs as these are getting painted as well.


The vxige sitting back on oem wheels, was years ago that it last seen NA wheels.

Little bits and pieces sanded and prepped ready for primer. Ignore the side vents as the plans had changed to the carbon fibre ones.

#689
haggi961
-
-
- 6,003 posts
1cobrav8 is my god
- Gender:Male
- Location:Richmond, N.Yorks
- Interests:Keeping fit and in shape, and pretty much anything to do with an engine.
Posted 27 June 2016 - 08:02 PM
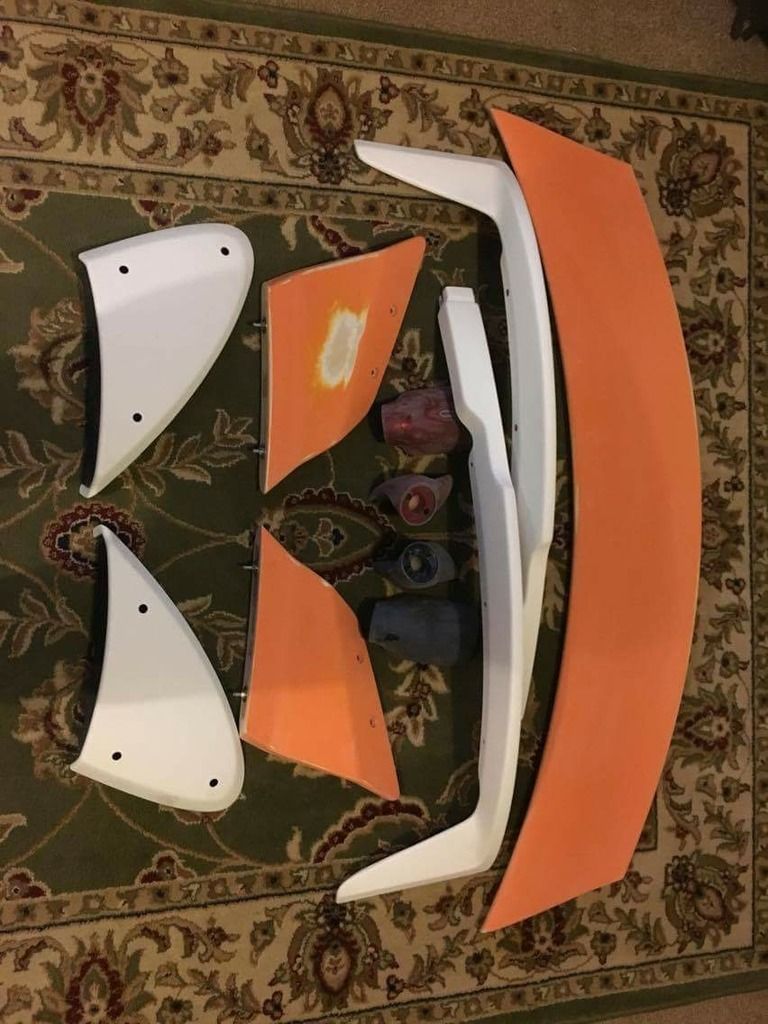
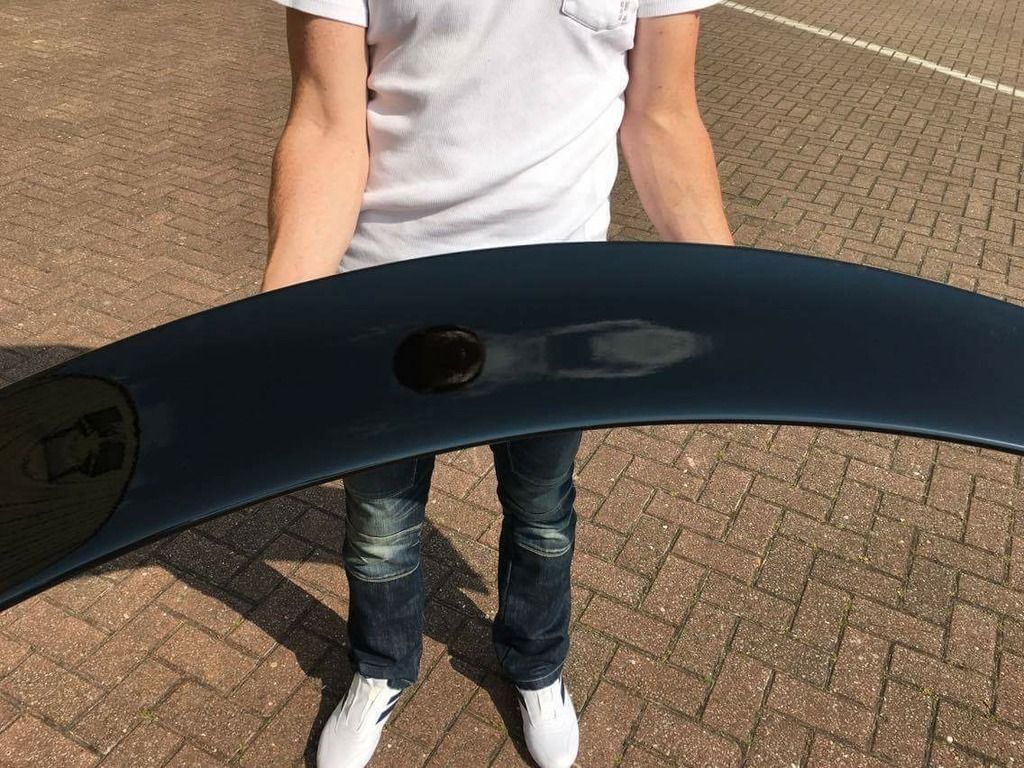
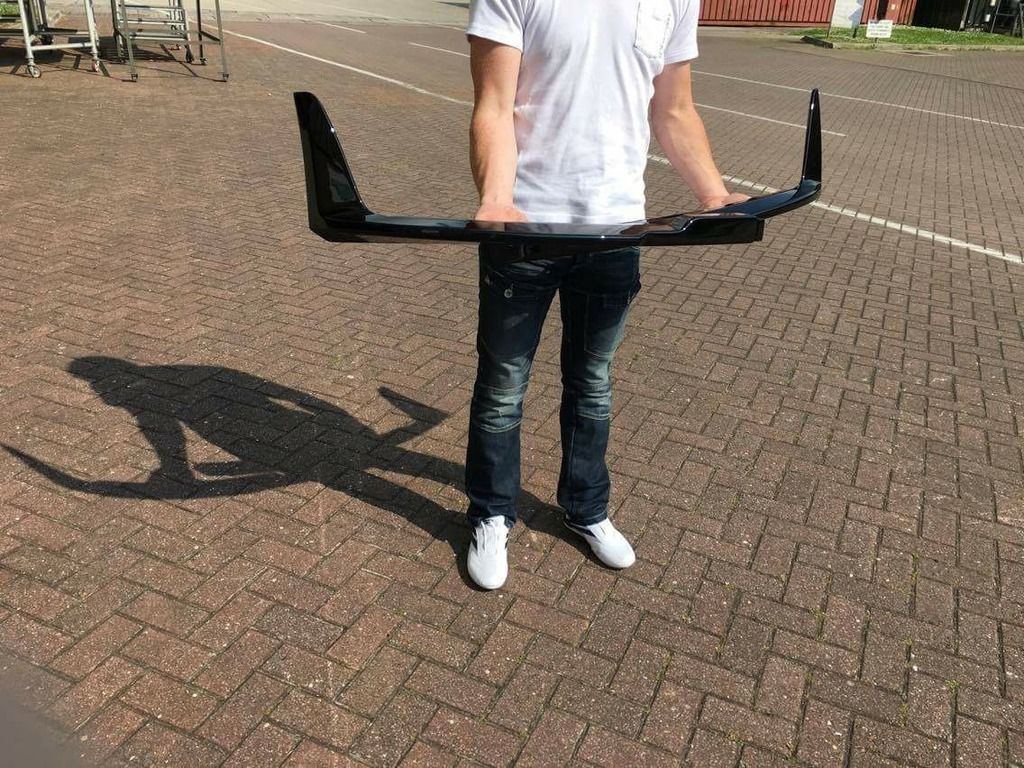
Wheels in primer along with the other little bits and pieces like splitter, spoiler ect
 [/URL
[/URL

Video priming the spoiler

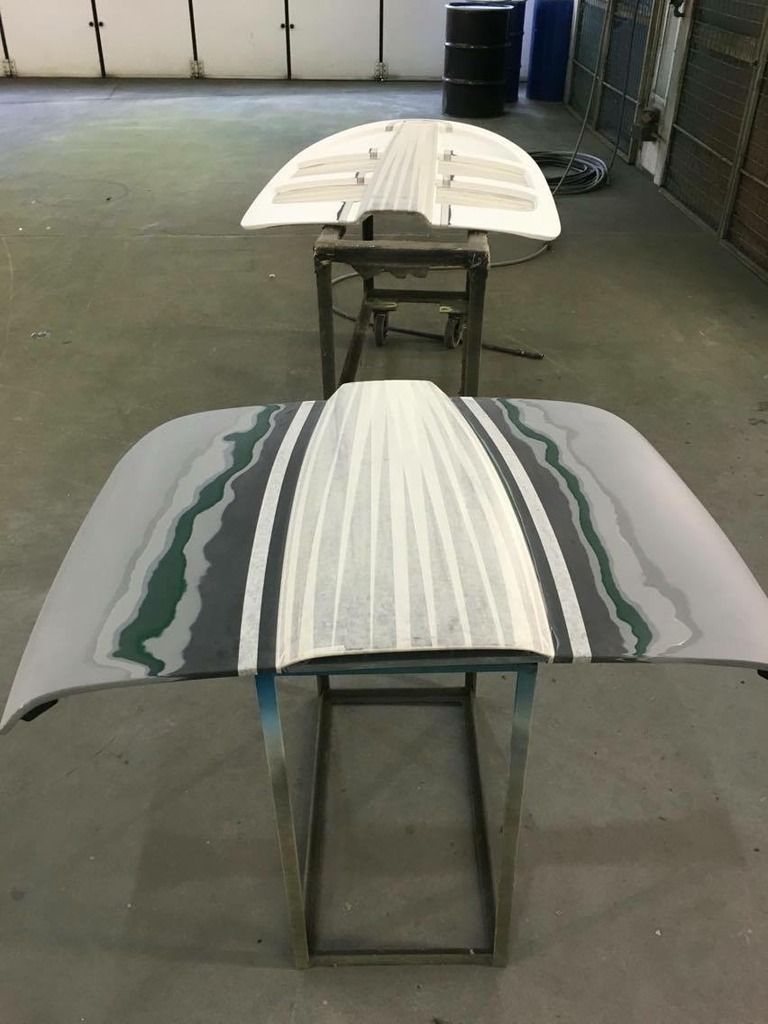
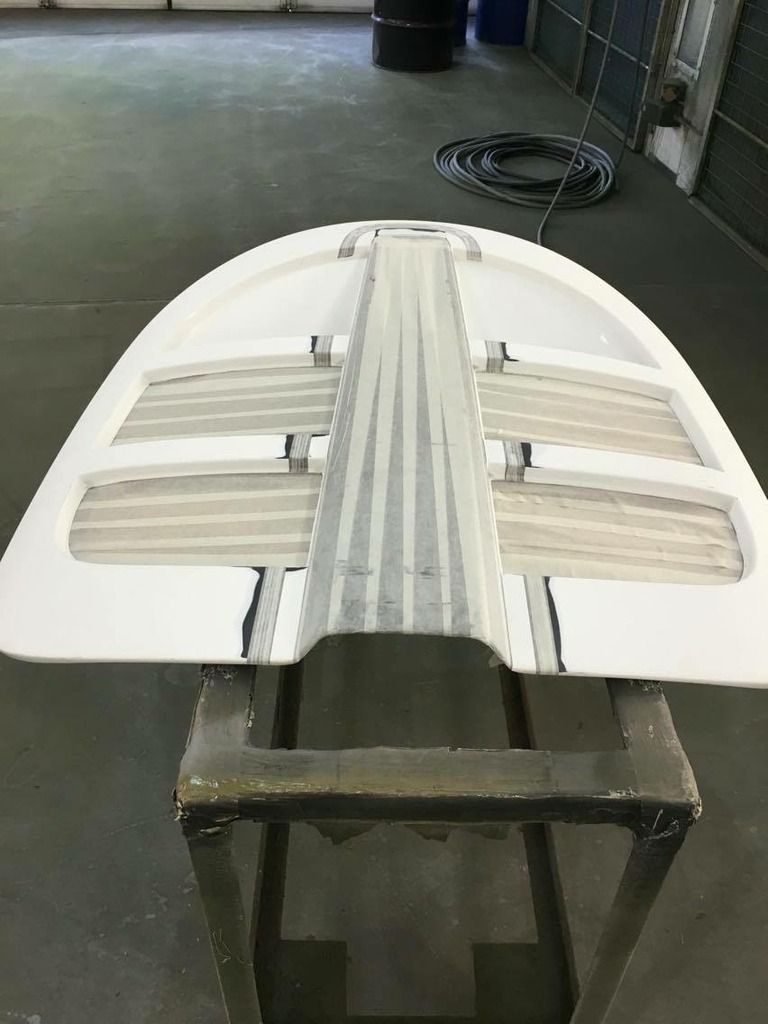
Masking up the front access panels ready to be painted like the cup Exige style. Hours of masking went into this to get it right so thanks again to you both for going that extra mile.
[URL=http://s1174.photobu...qyrgm.jpg.html]


 [/URL
[/URLVideo priming the spoiler
Masking up the front access panels ready to be painted like the cup Exige style. Hours of masking went into this to get it right so thanks again to you both for going that extra mile.
[URL=http://s1174.photobu...qyrgm.jpg.html]
#690
haggi961
-
-
- 6,003 posts
1cobrav8 is my god
- Gender:Male
- Location:Richmond, N.Yorks
- Interests:Keeping fit and in shape, and pretty much anything to do with an engine.
Posted 27 June 2016 - 08:03 PM
Now time for painting the first lot of bits.
Videos of spraying parts


Videos of spraying parts
#691
haggi961
-
-
- 6,003 posts
1cobrav8 is my god
- Gender:Male
- Location:Richmond, N.Yorks
- Interests:Keeping fit and in shape, and pretty much anything to do with an engine.
Posted 27 June 2016 - 08:03 PM
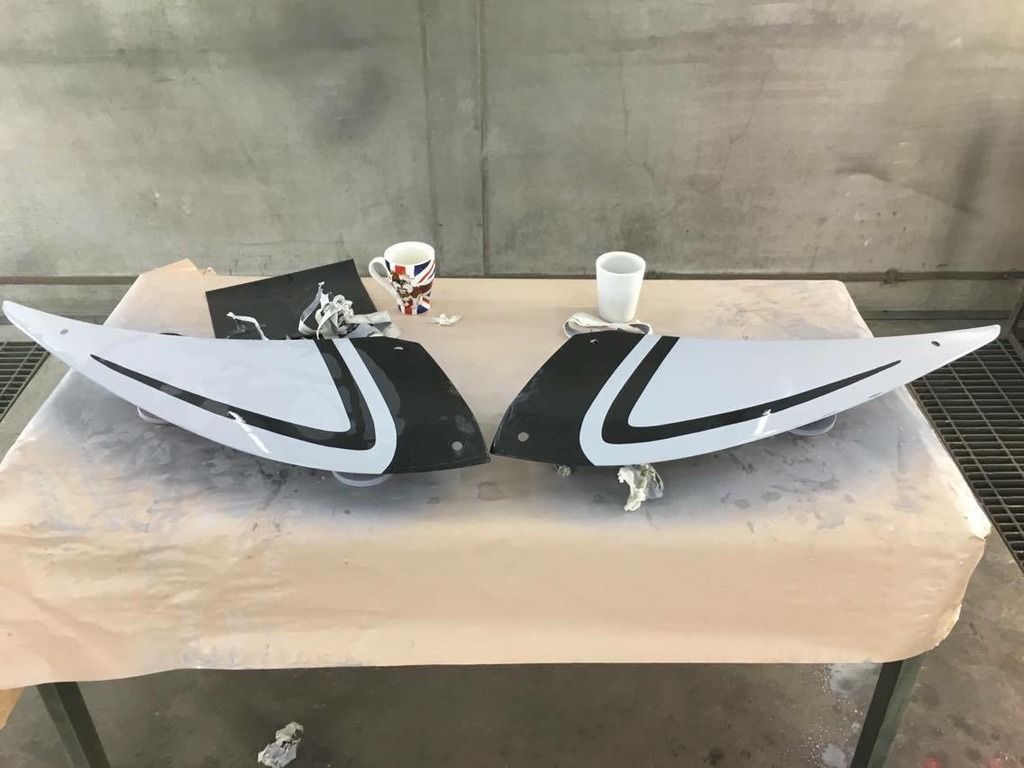
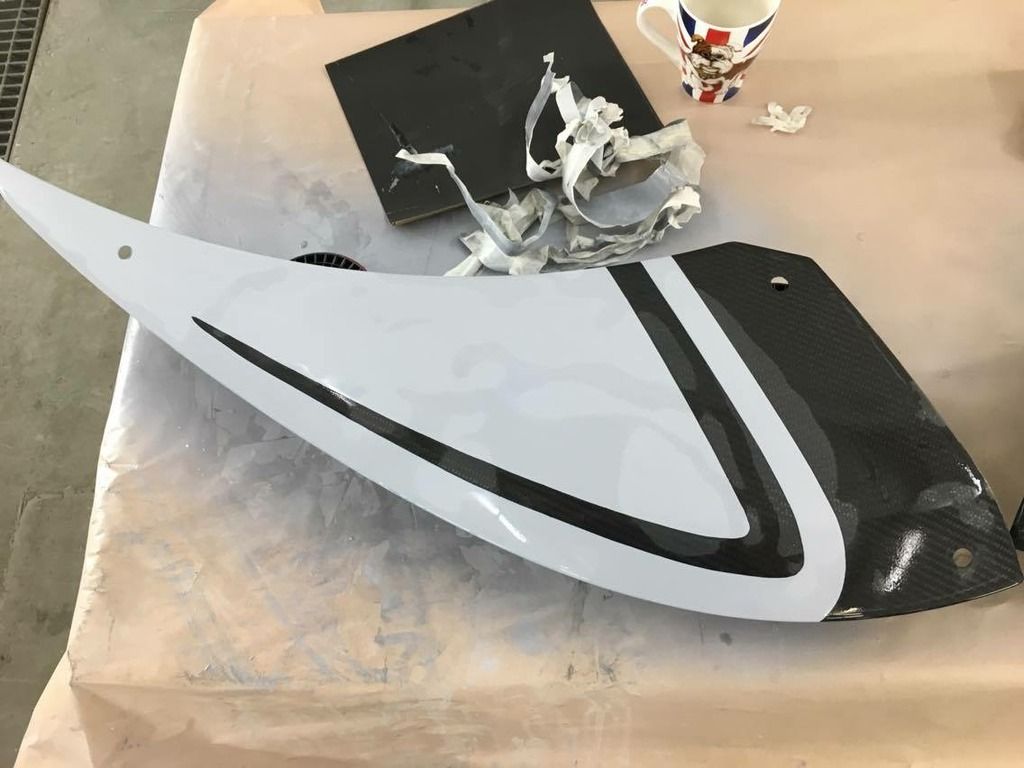
Side vents lacquered
Video of side vents lacquering

Exige center console lacquered
Video of lacquer on the Center console

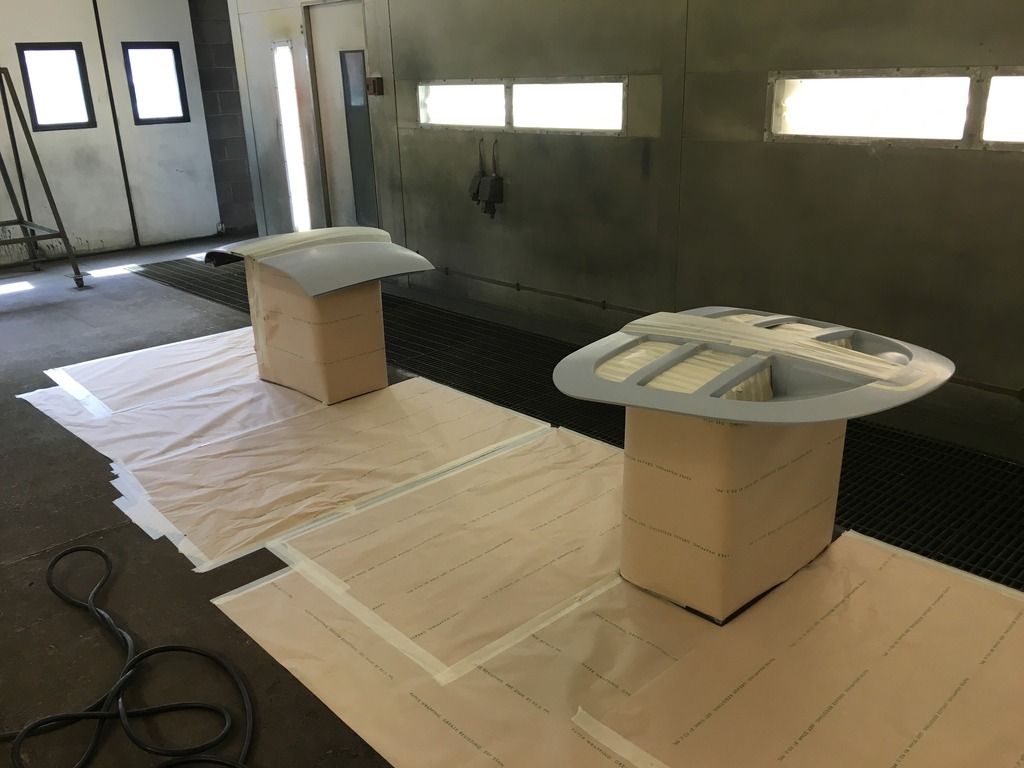
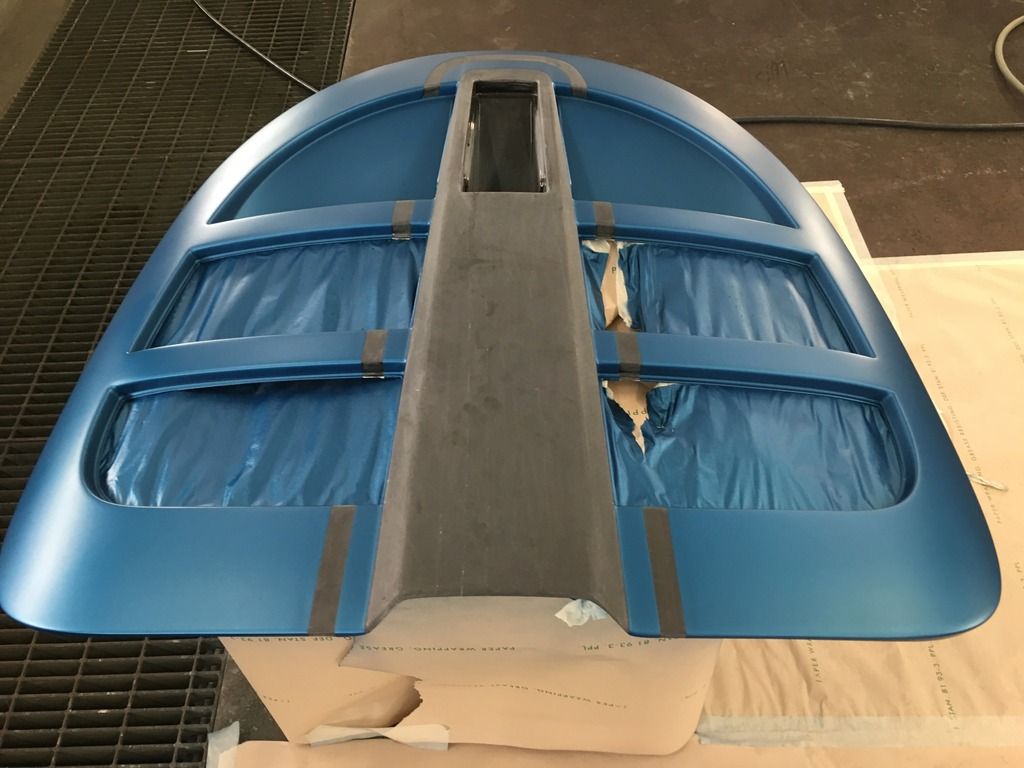
Next was masking the roof and engine cover ready for primer.


Video of side vents lacquering
Exige center console lacquered

Video of lacquer on the Center console
Next was masking the roof and engine cover ready for primer.


#692
haggi961
-
-
- 6,003 posts
1cobrav8 is my god
- Gender:Male
- Location:Richmond, N.Yorks
- Interests:Keeping fit and in shape, and pretty much anything to do with an engine.
Posted 27 June 2016 - 08:05 PM
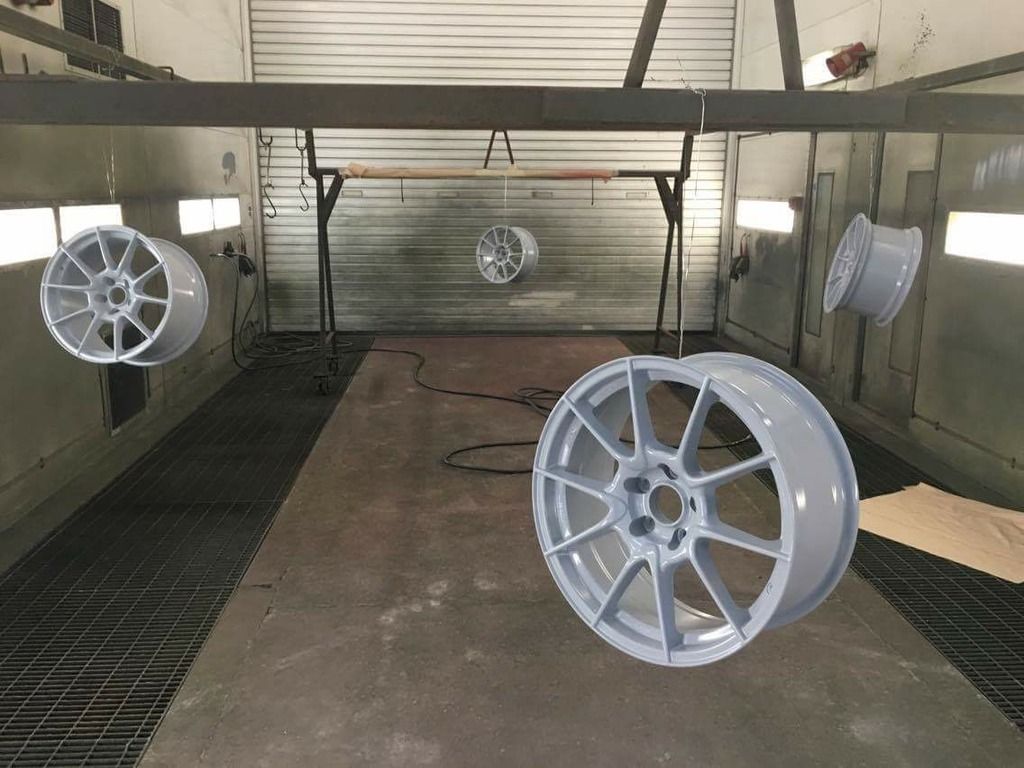
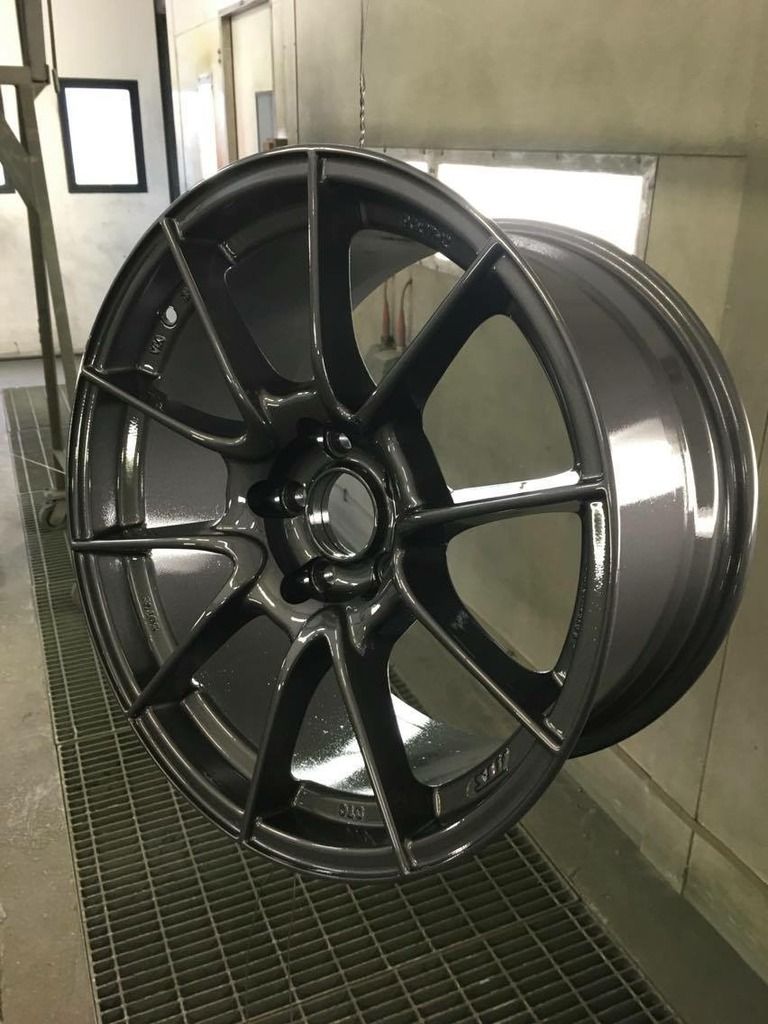
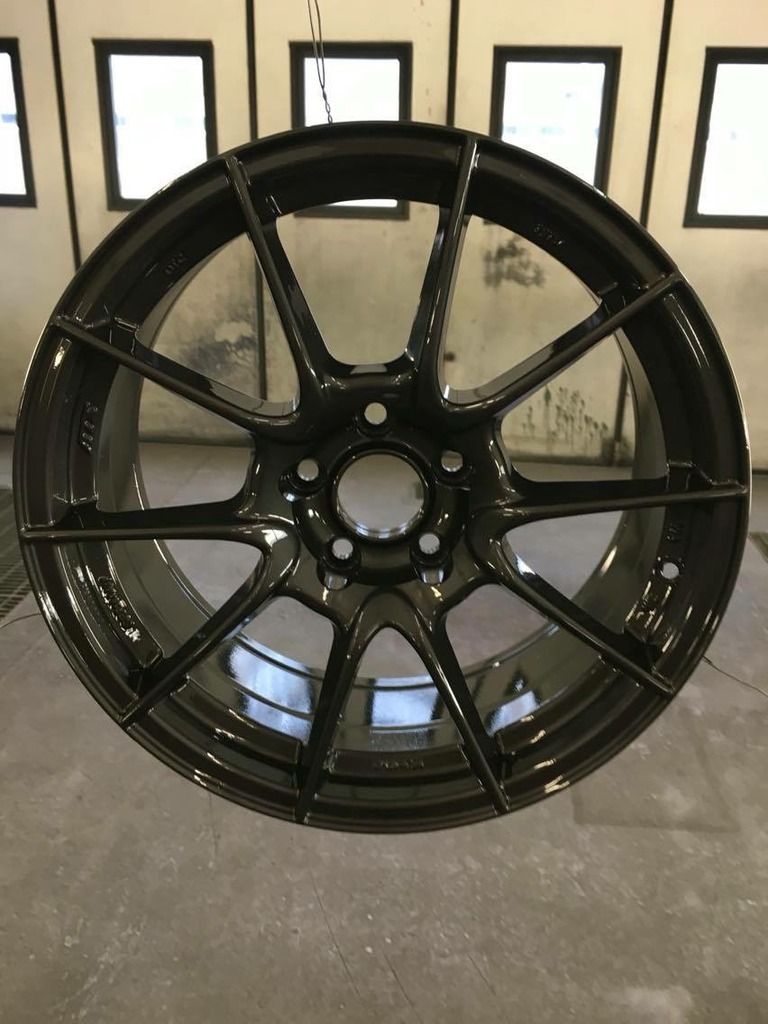
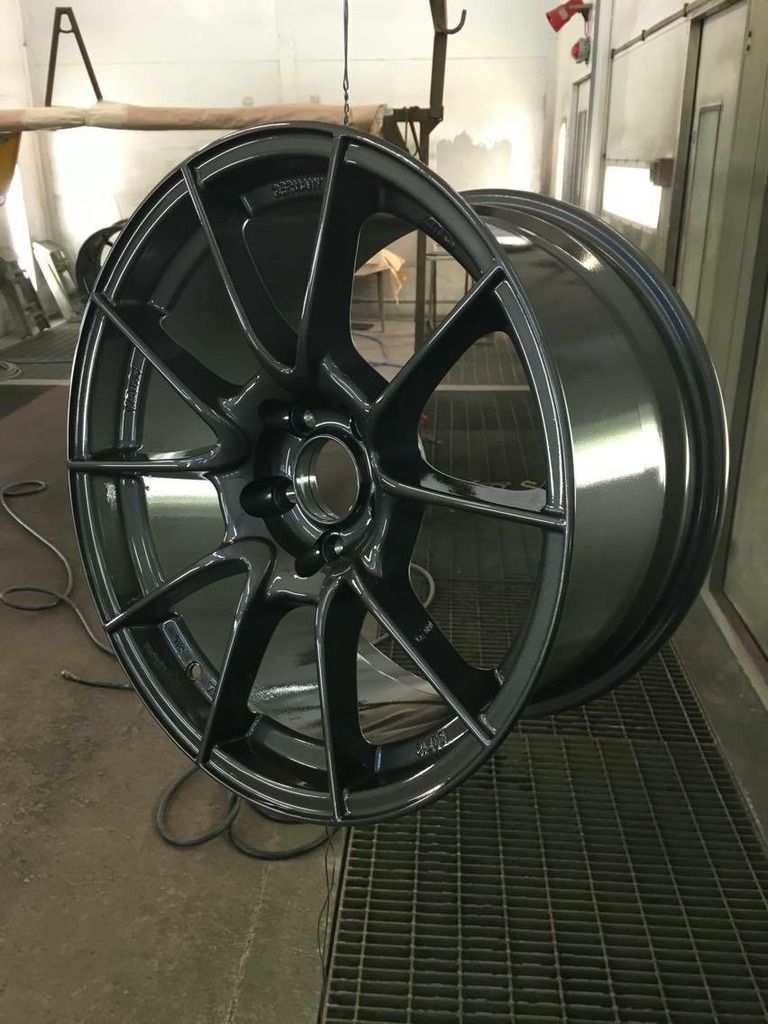
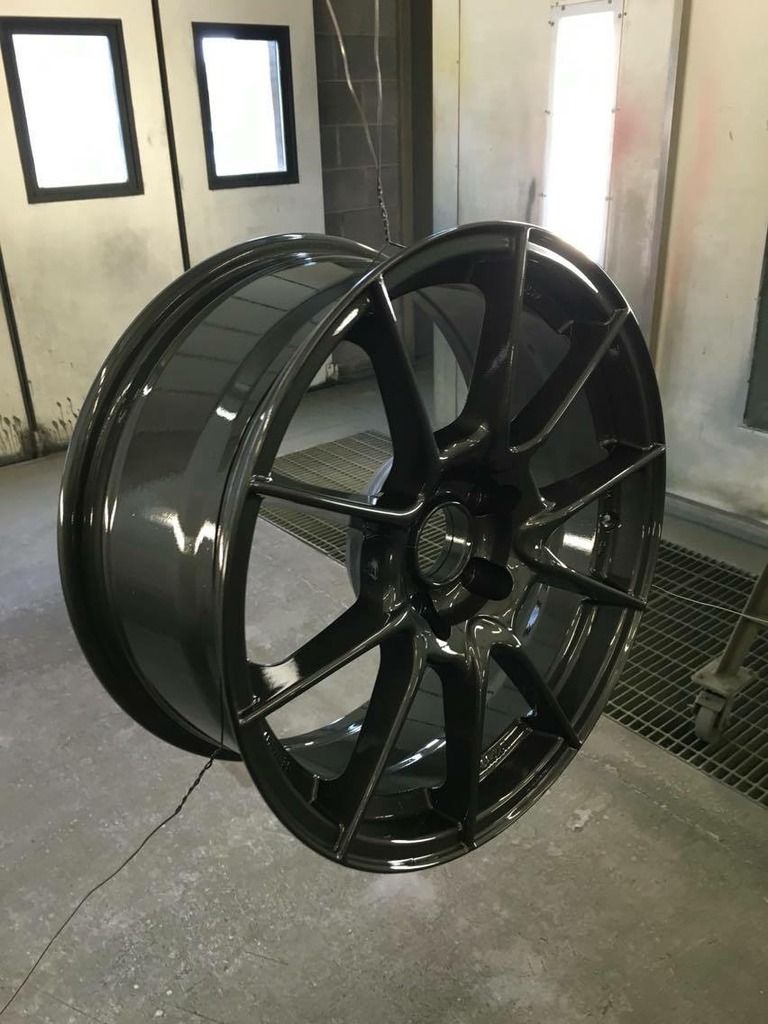
The wheels sprayed in there final colour


#693
haggi961
-
-
- 6,003 posts
1cobrav8 is my god
- Gender:Male
- Location:Richmond, N.Yorks
- Interests:Keeping fit and in shape, and pretty much anything to do with an engine.
Posted 27 June 2016 - 08:05 PM
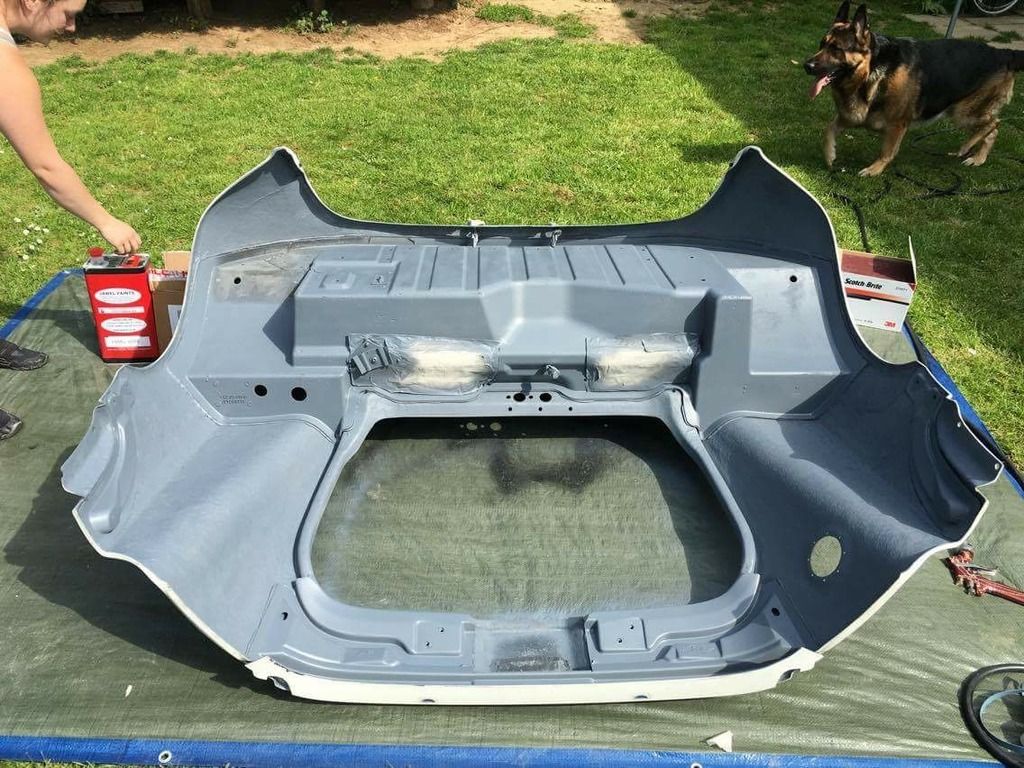
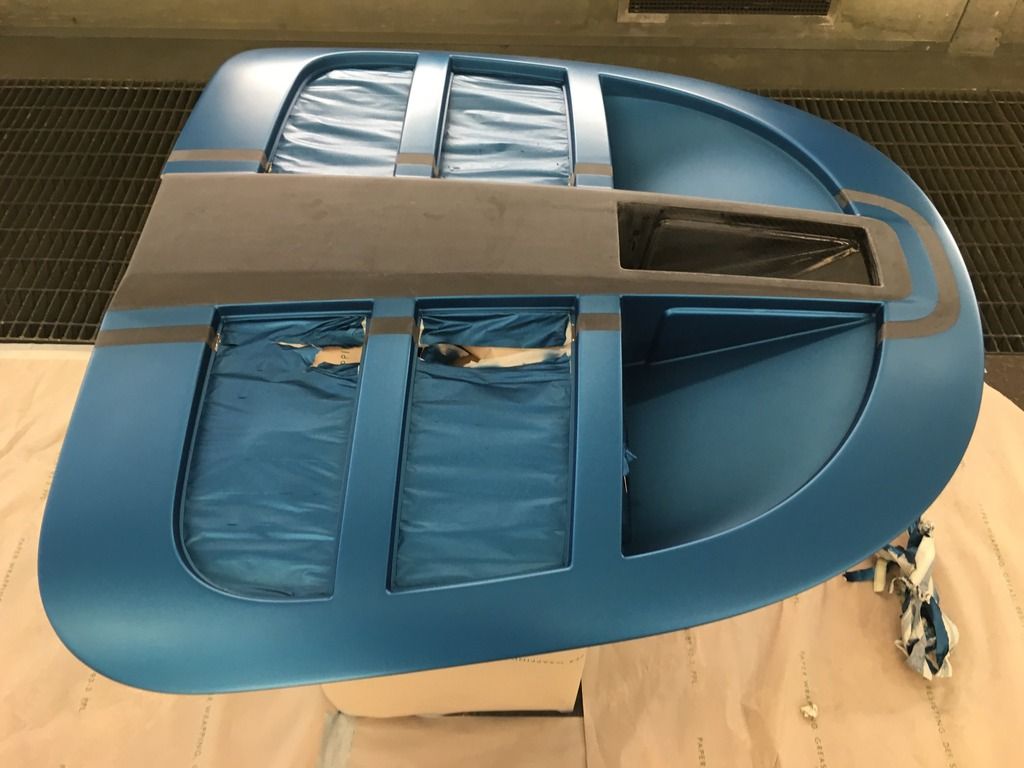
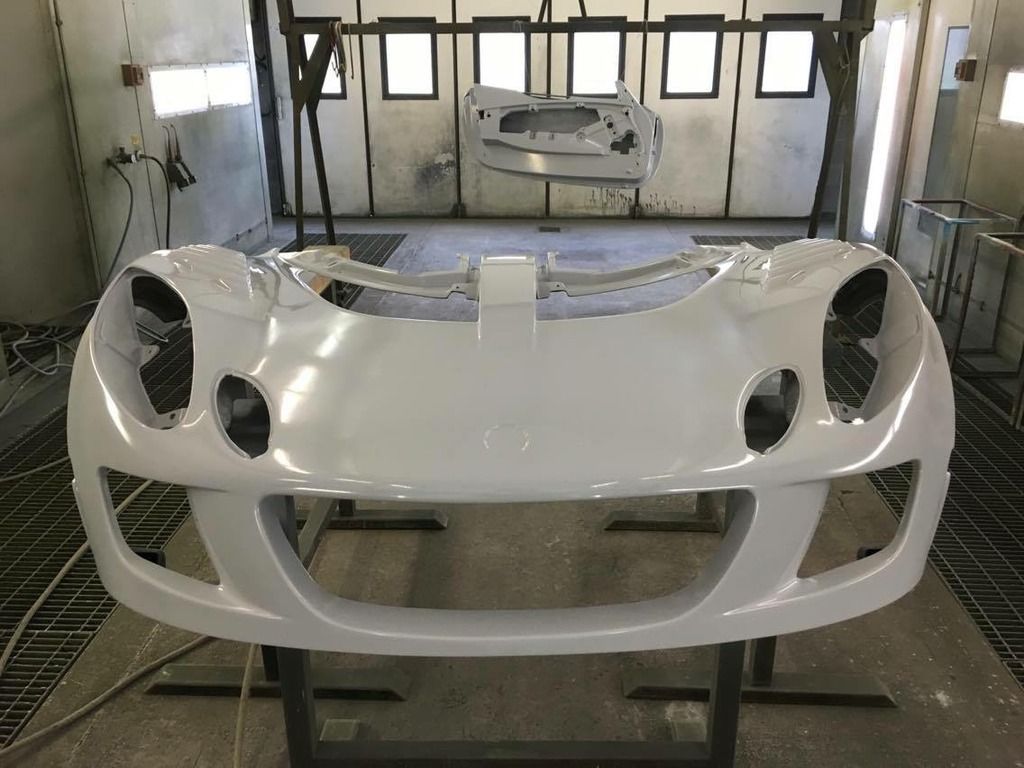
Engine cover, roof, front access panels and other little bits primed. It looks amazing in just primer let alone paint. The shiny look is from being wet sanded not lacquer.


#694
haggi961
-
-
- 6,003 posts
1cobrav8 is my god
- Gender:Male
- Location:Richmond, N.Yorks
- Interests:Keeping fit and in shape, and pretty much anything to do with an engine.
Posted 27 June 2016 - 08:06 PM
Then bits needed re masking for as he wanted to smooth the edge out a bit so there wasn't a ridge in the paint.
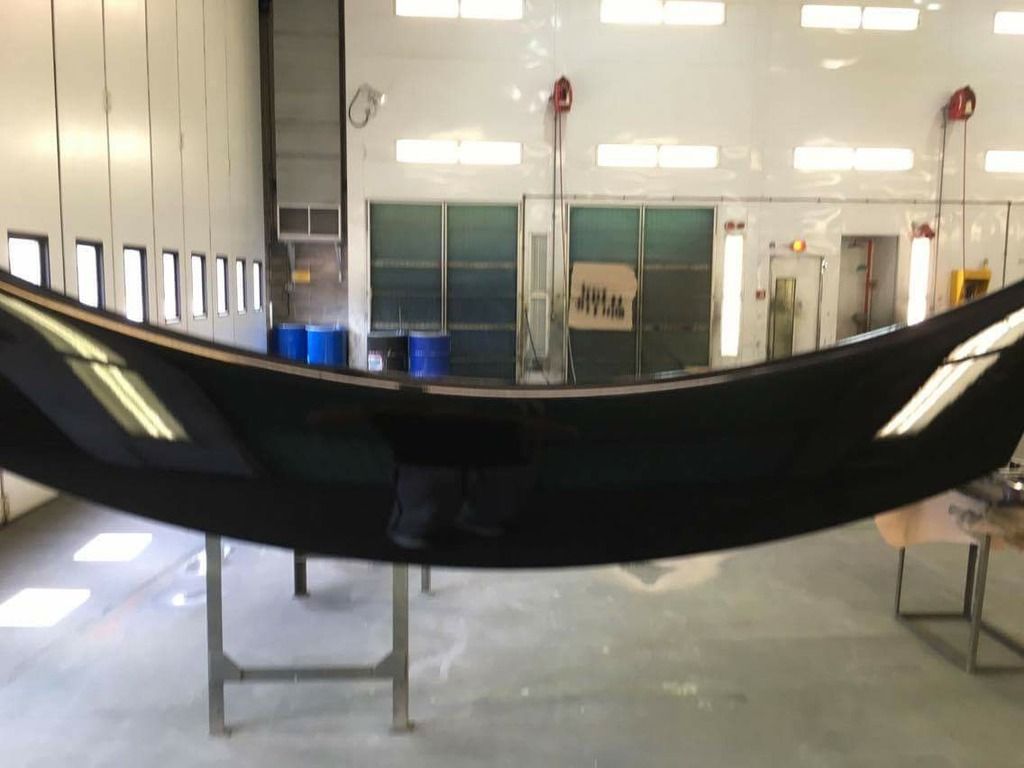
First look of the colour I choose with no lacquer on in a Matt finish.

First look of the colour I choose with no lacquer on in a Matt finish.


#695
haggi961
-
-
- 6,003 posts
1cobrav8 is my god
- Gender:Male
- Location:Richmond, N.Yorks
- Interests:Keeping fit and in shape, and pretty much anything to do with an engine.
Posted 27 June 2016 - 08:07 PM
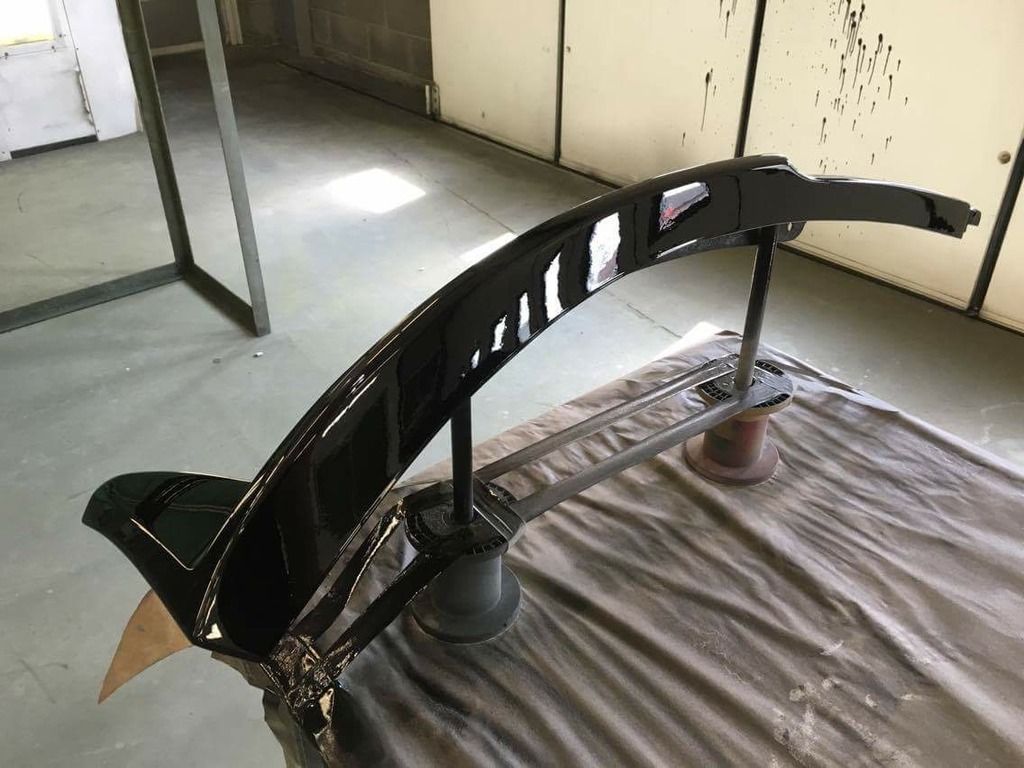
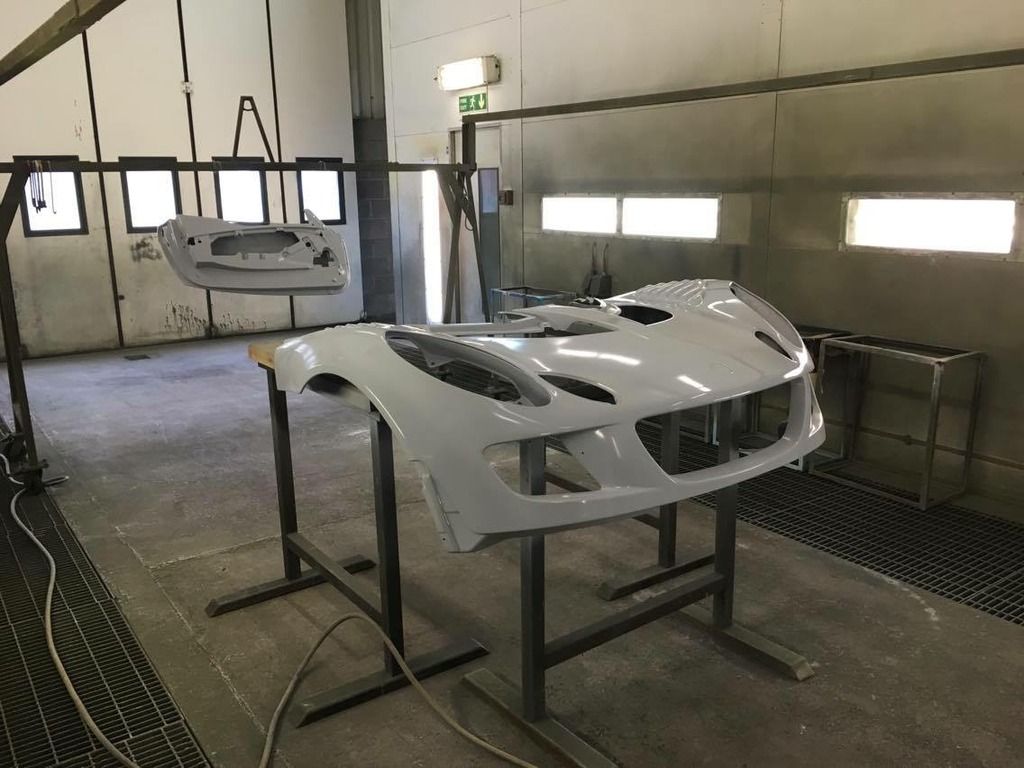
Then all the bits lacquered and they look better then I can ever imagined
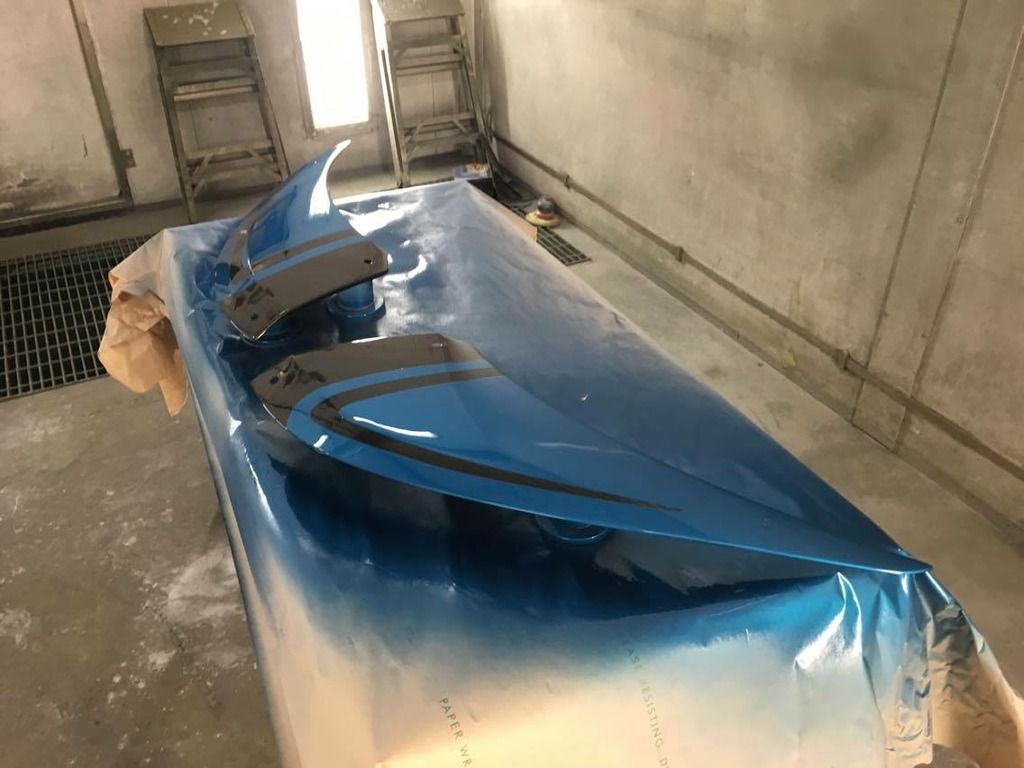

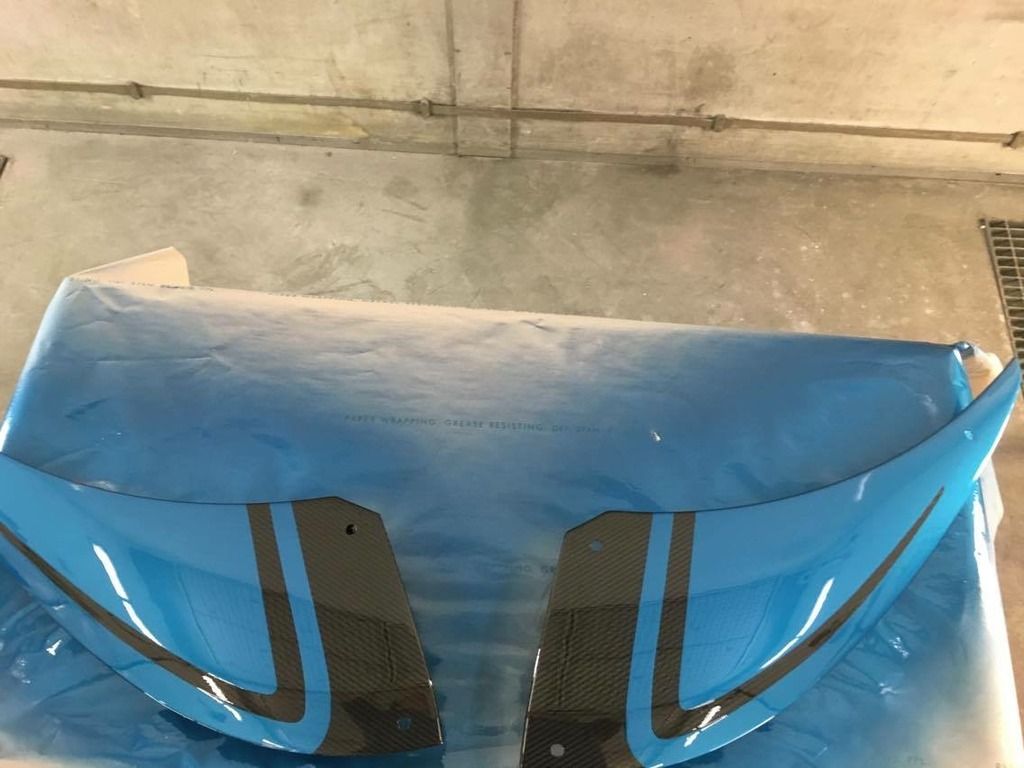
Video to show the parts lacquered


Video to show the parts lacquered
#696
haggi961
-
-
- 6,003 posts
1cobrav8 is my god
- Gender:Male
- Location:Richmond, N.Yorks
- Interests:Keeping fit and in shape, and pretty much anything to do with an engine.
Posted 27 June 2016 - 08:08 PM
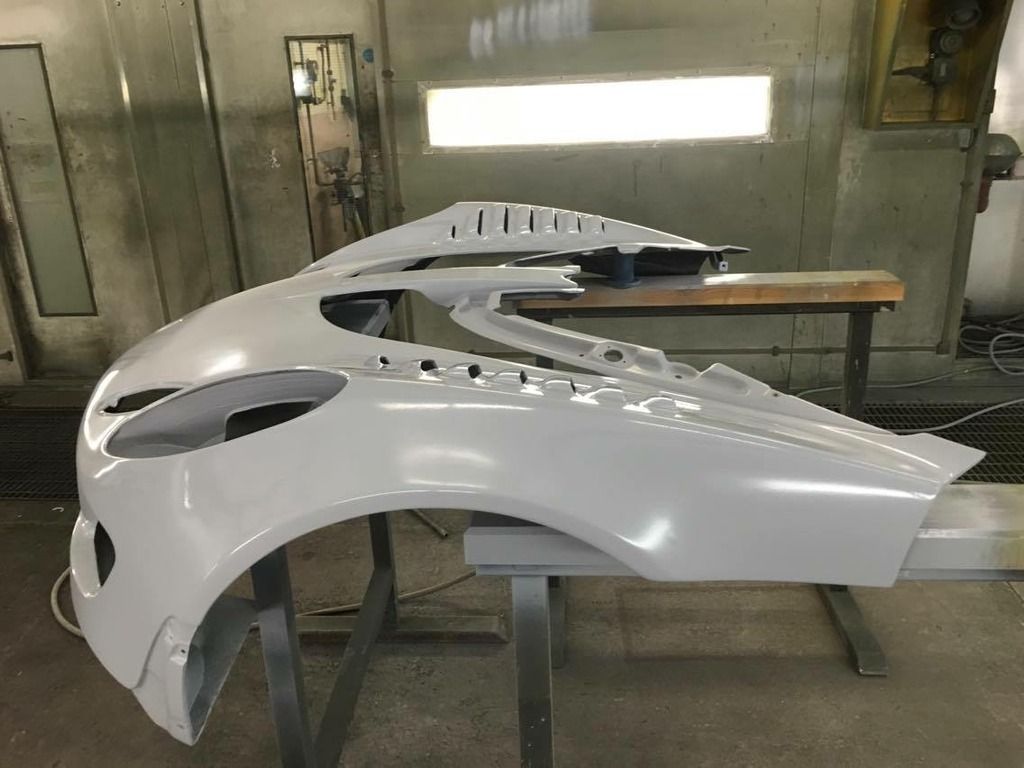
Parts back in the room and they look different again in a different light.

Time for the front and rear clam to have the magic worked on them.
More sanding and filling of the louvres to get a perfect finish


Time for the front and rear clam to have the magic worked on them.

More sanding and filling of the louvres to get a perfect finish


#697
stu8v
-
-
- 745 posts
Super Duper Member
- Location:Grimsby
Posted 27 June 2016 - 08:08 PM
Wow, looking great.
#698
haggi961
-
-
- 6,003 posts
1cobrav8 is my god
- Gender:Male
- Location:Richmond, N.Yorks
- Interests:Keeping fit and in shape, and pretty much anything to do with an engine.
Posted 27 June 2016 - 08:09 PM
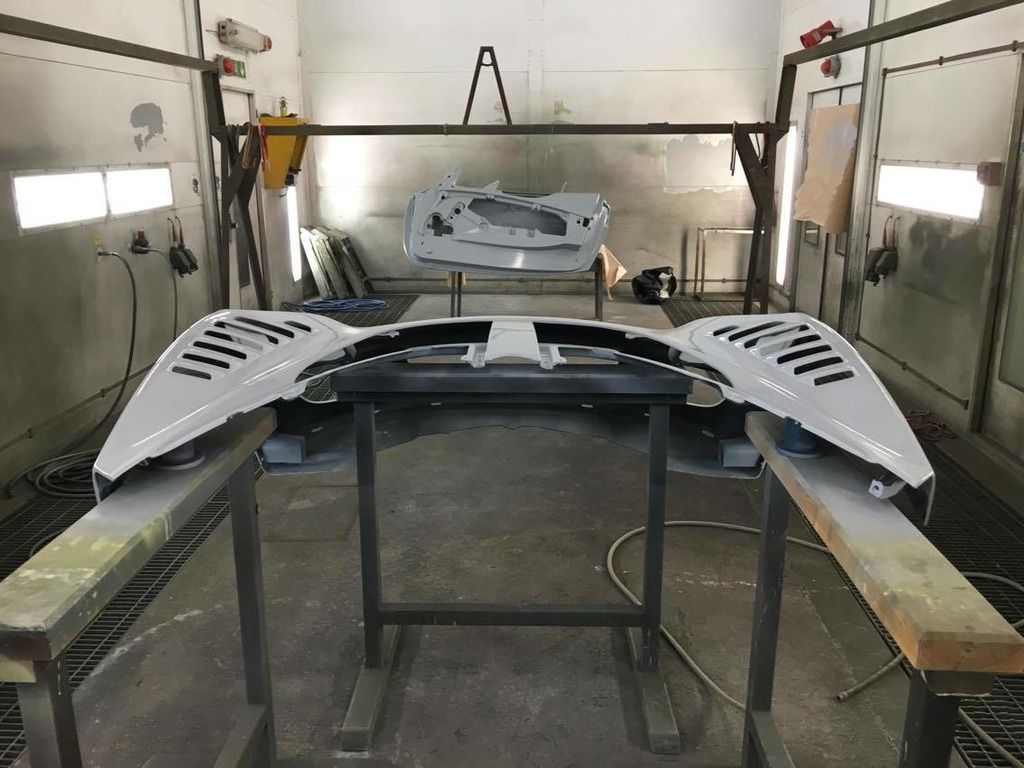
Louvres and clam all smoothed now and the clam looks like they come out of a mould with the louvres


#699
haggi961
-
-
- 6,003 posts
1cobrav8 is my god
- Gender:Male
- Location:Richmond, N.Yorks
- Interests:Keeping fit and in shape, and pretty much anything to do with an engine.
Posted 27 June 2016 - 08:10 PM
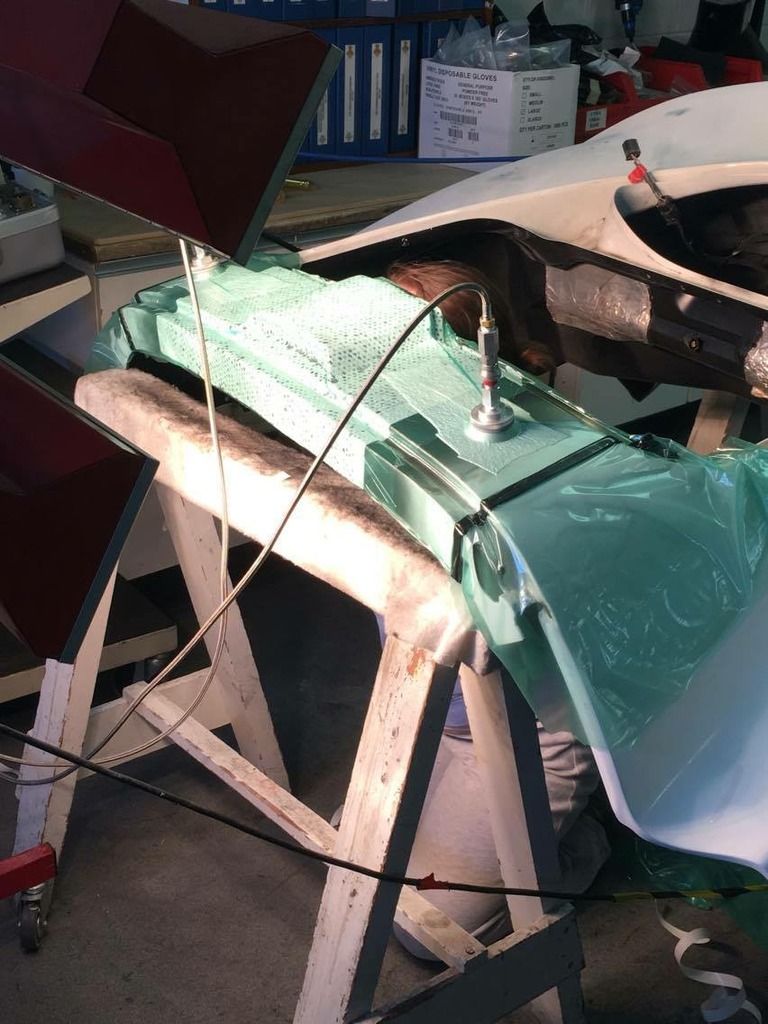
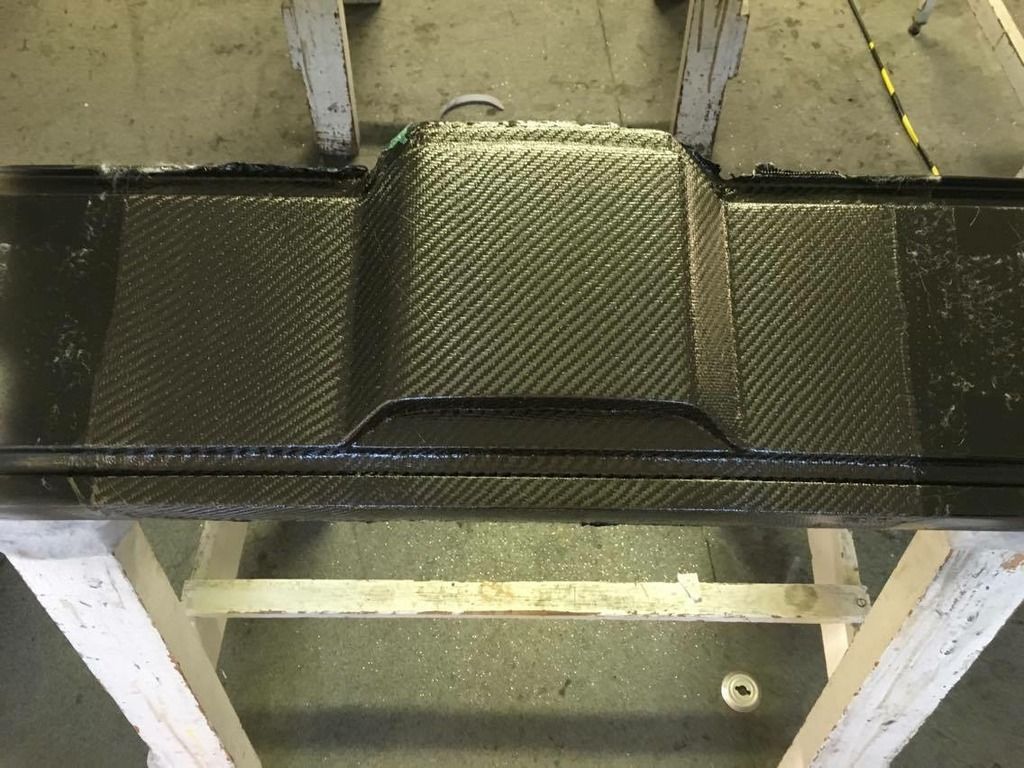
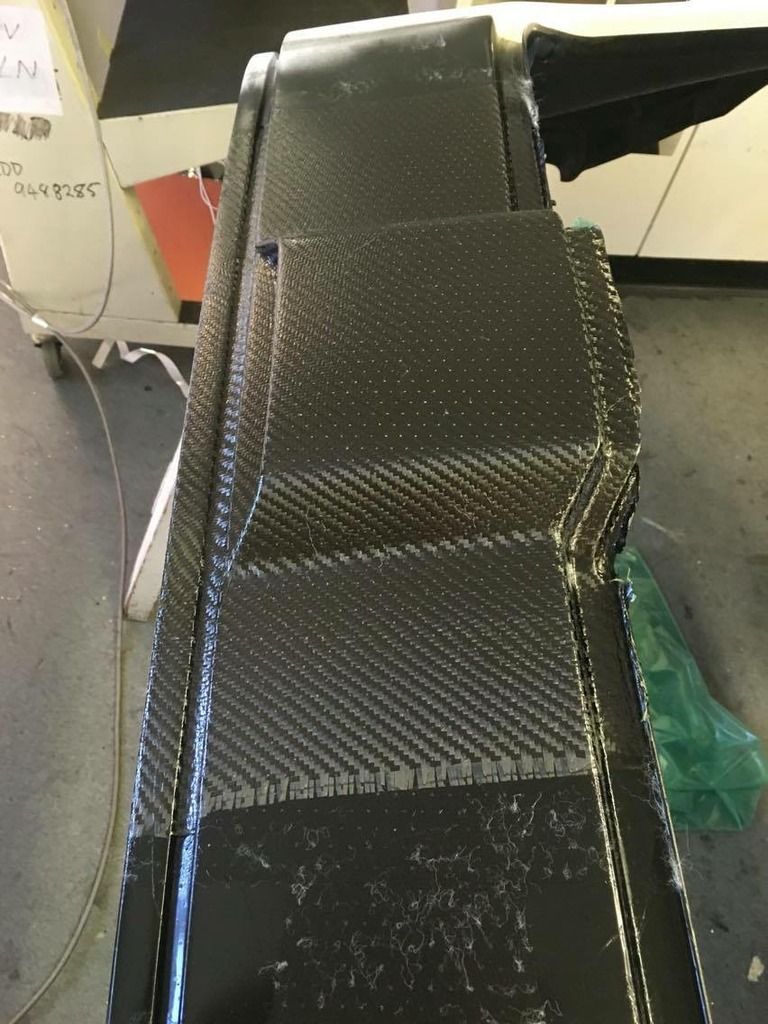
With the cup Exige style I'm going for they had a carbon fibre insert on the top of the clam. Trying to get hold of a clam with this bit on is impossible and I wasn't buying new. So to keep with the design Alastair said he can vaccum a piece of carbon fibre over the clam similar to what lotus did. It came out amazing and once it's got paint and lacquer over you will never know.
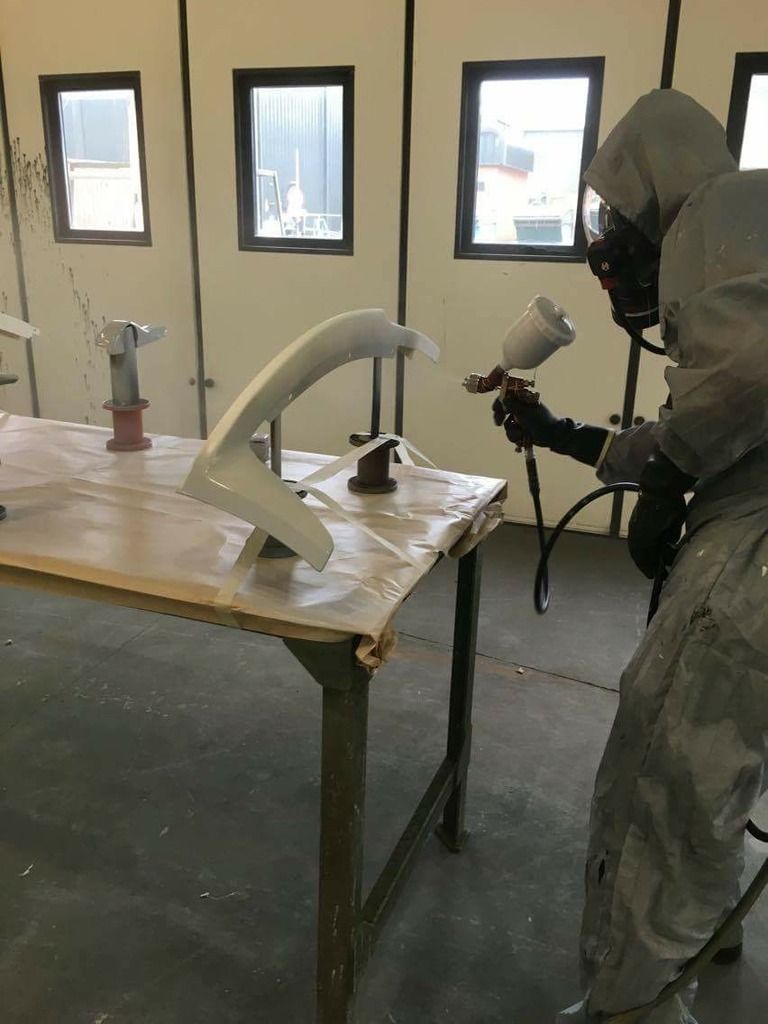
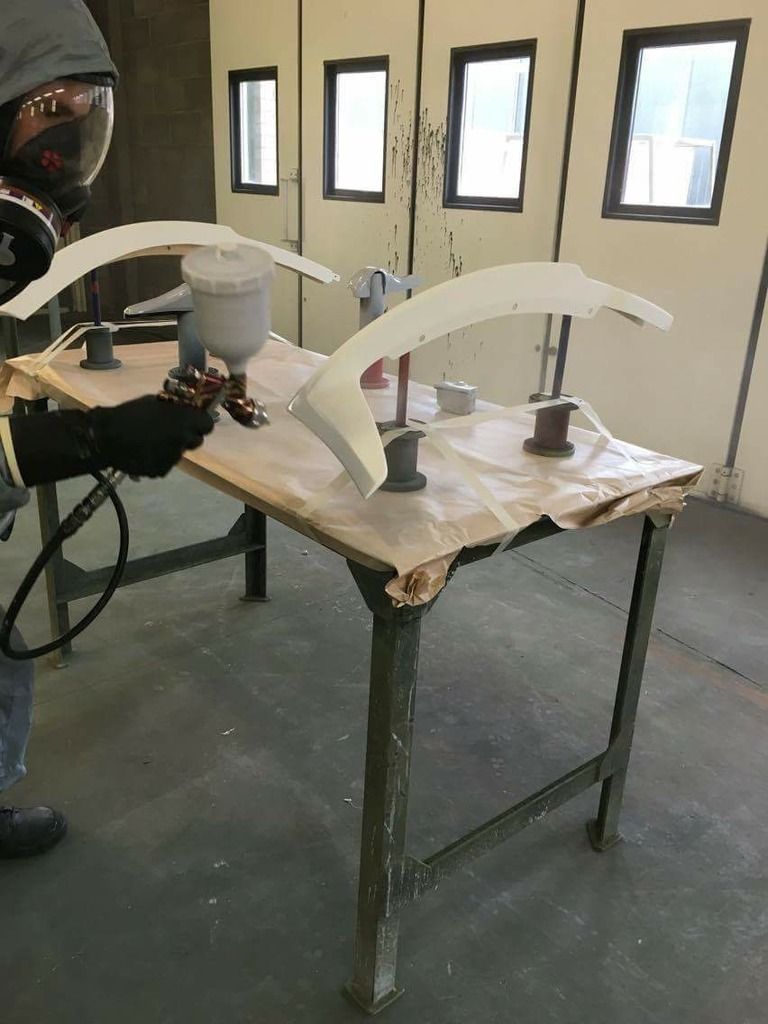
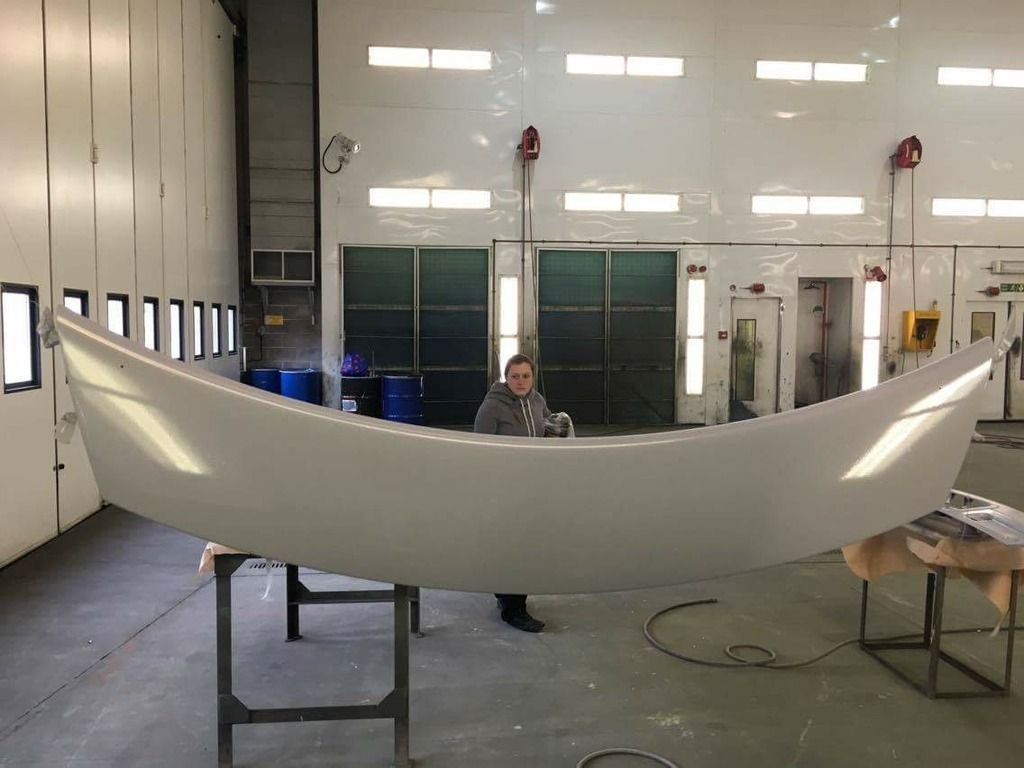
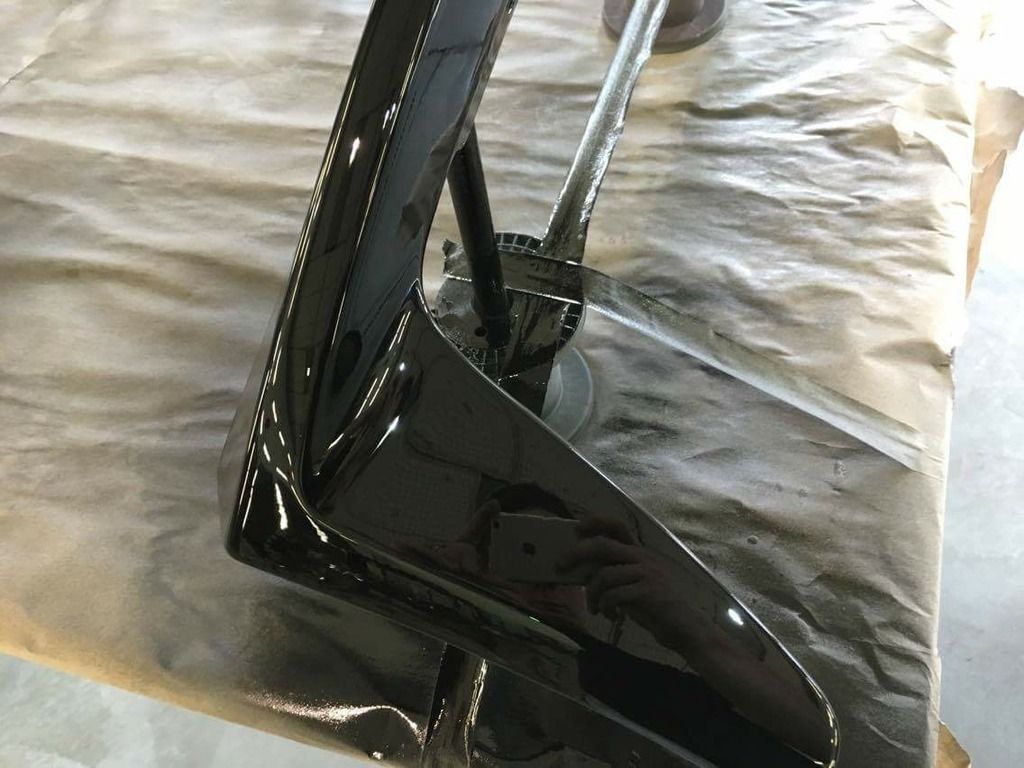
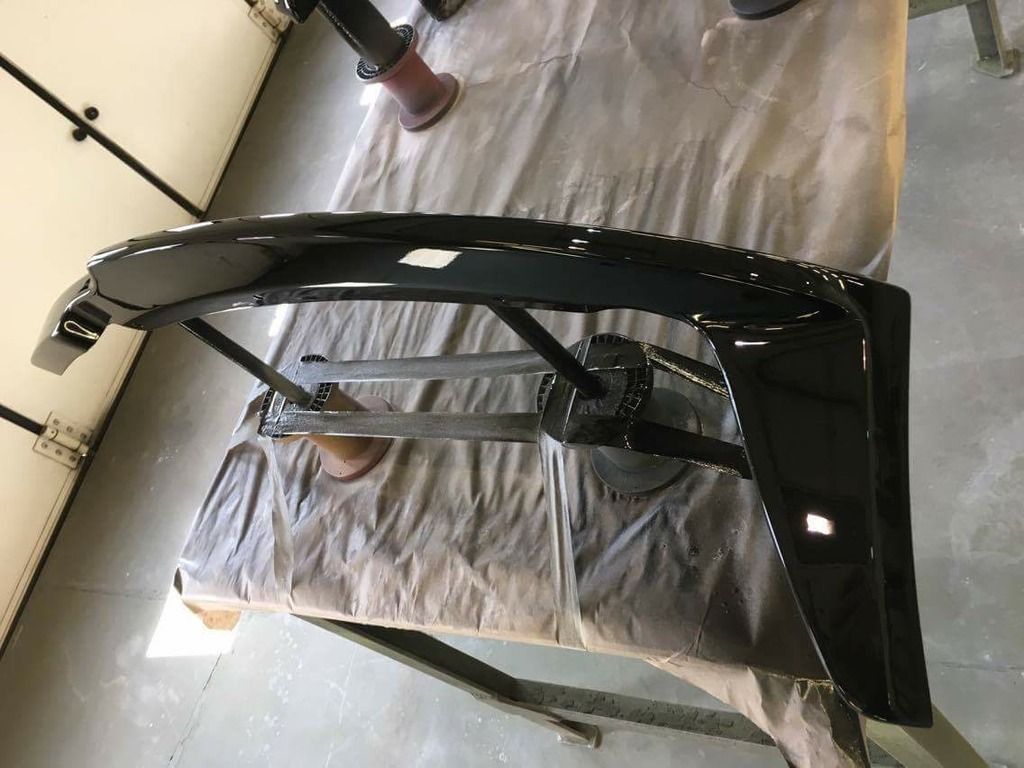
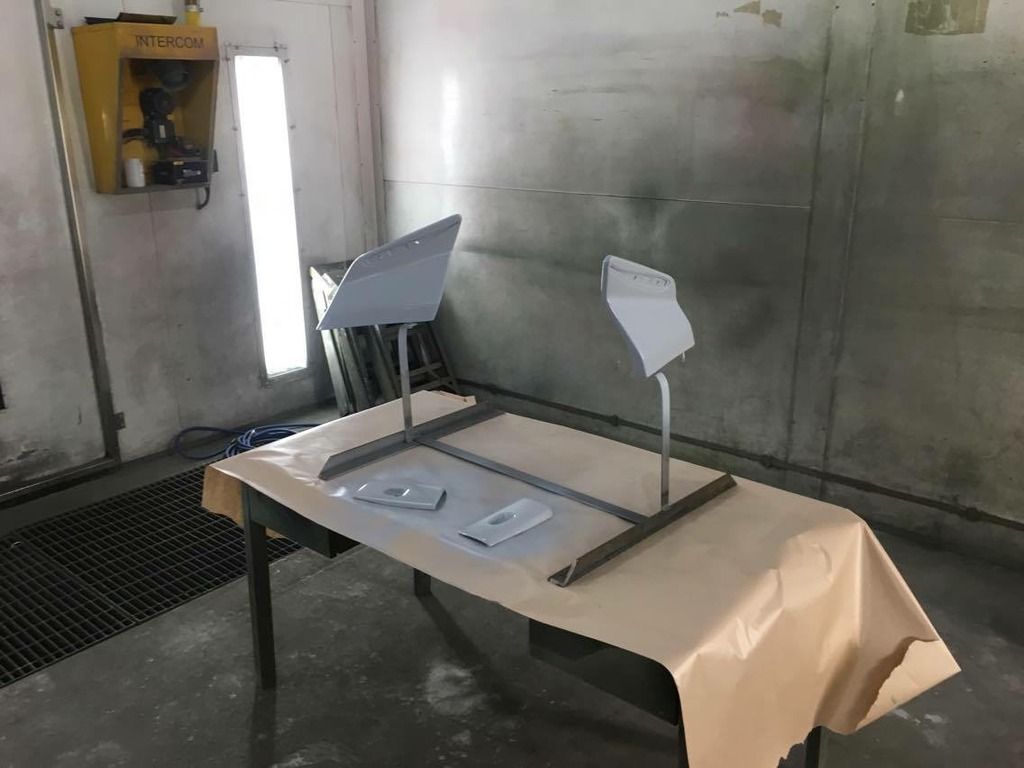
He welded up a frame to hold the spoiler plinths
Louvres cut out


He welded up a frame to hold the spoiler plinths

Louvres cut out


#700
haggi961
-
-
- 6,003 posts
1cobrav8 is my god
- Gender:Male
- Location:Richmond, N.Yorks
- Interests:Keeping fit and in shape, and pretty much anything to do with an engine.
Posted 27 June 2016 - 08:12 PM
Front clam and doors primed


2 user(s) are reading this topic
0 members, 2 guests, 0 anonymous users


![http://s1174.photobu...qyrgm.jpg.html]](http://s1174.photobucket.com/user/haggi96/media/61B64BA8-B381-467F-A1AC-6AC77D97BF97_zpsjjmqyrgm.jpg.html%5D)