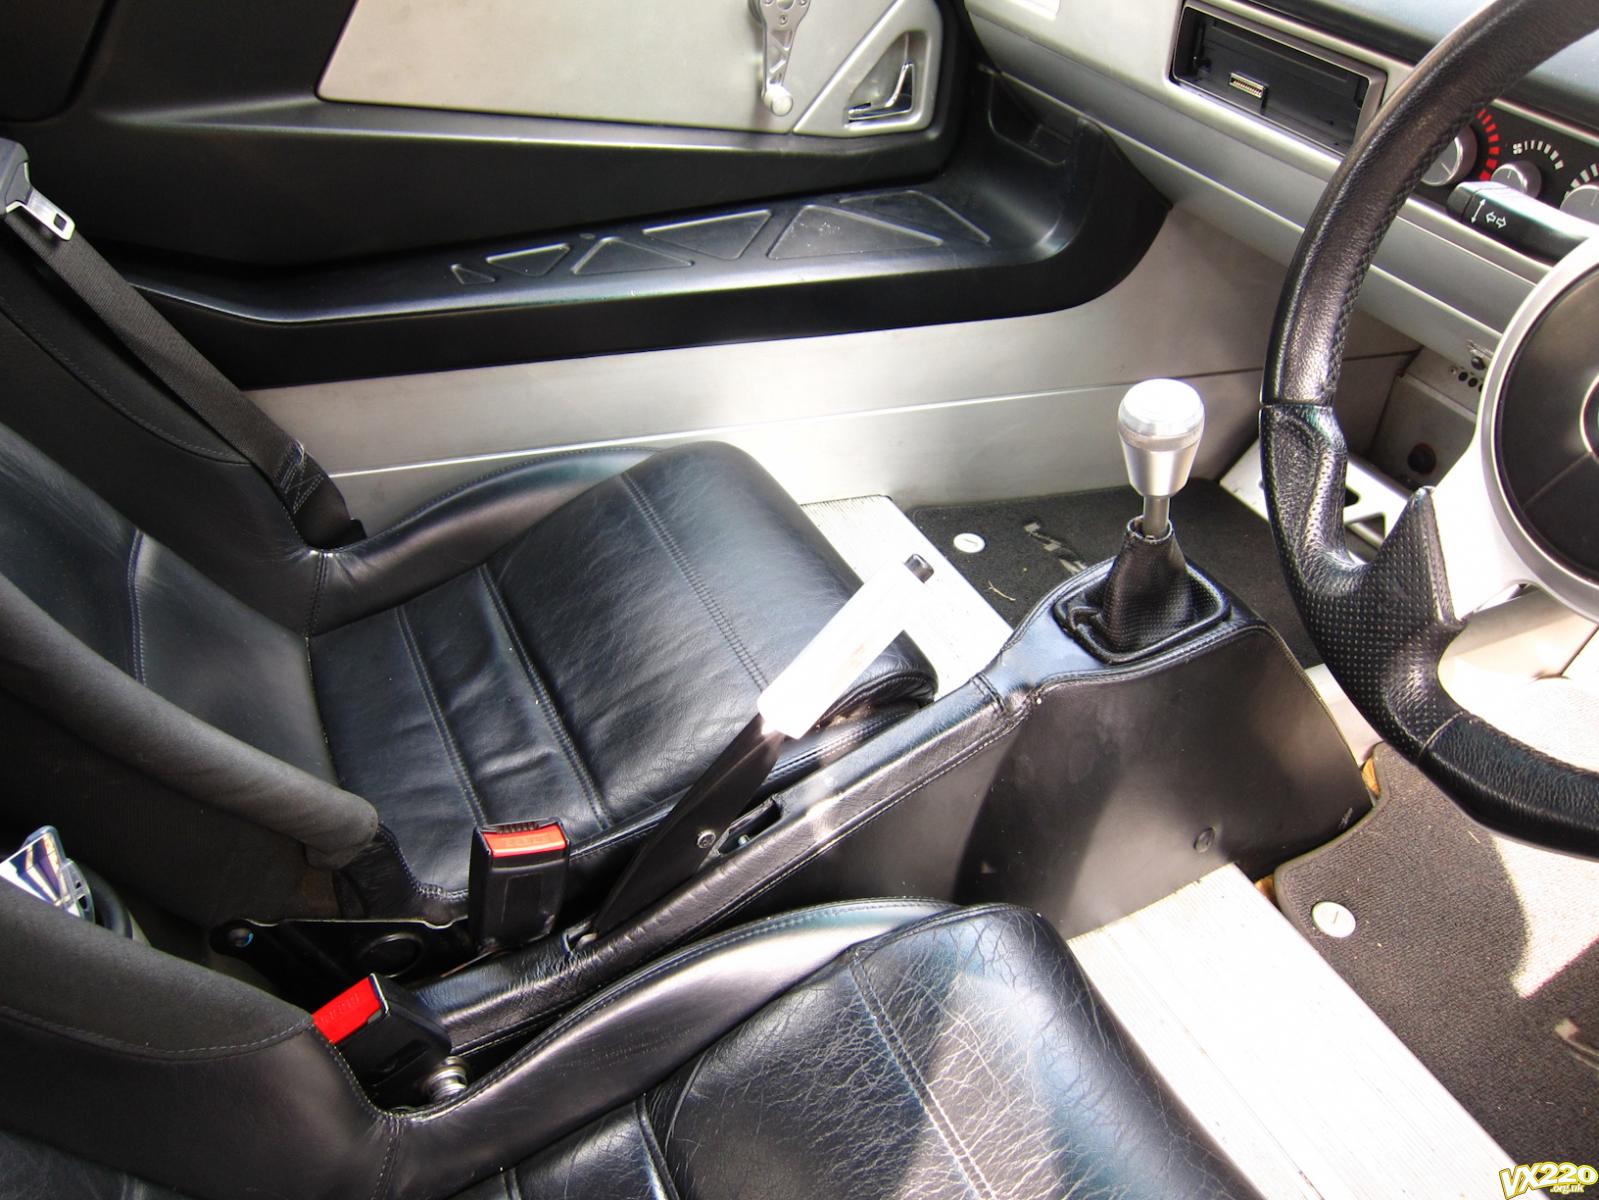
Project 'i Want To Go To Work Today'
#1

Posted 27 February 2011 - 01:23 PM
I bought an all-original '51 plate NA in the middle of February 2011 as my only car. The point of this thread is to document all minor changes made to improve the day to day drivability of the car and act as service documentation for future buyers.
Work already done:
Improved wiper arm - the car came with the original Elise S1 style wiper which had poor contact at the top of the screen. This has been replaced with an uprated part sold at elise-shop. £27.90 for both the arm and blade. There's been a massive improvement over the original and is strongly recommended for any early VX220 driven in the wet.
VW relay - Part code "357-955-531" or typically with a number 99 printed on the top. Approx £11 from ebay. Allows programable interval wiping by lifting the stalk onto interval, bringing it back down after the wipe, then back up and keeping it on interval. The gap between the two wipes is now the interval. Again, really recommended for day to day driving - reduces the number of distractions and a cheap mod. The relay is located at the top of the passenger footwell and can be identified [only two there] by feeling for a click while the wipers are set to interval. A flat bladed screw driver [with keys out of the ignition!] helps to remove it.
OSR light full of water - Typical problem, the clear plastic had separated along the top of the light cluster, allowing water in the gap. The cluster came out [four bolts accessible from the boot] and went in the oven at ~70 C for half an hour to drive the water out. Tiger Seal was applied into the gap and clamped with eight peg-type claps for a few hours. The service history shows vauxhall previously 'fixed' this cluster. Turns out the fix was to drill a small hole in the back of the unit and heat it to drive the water off. This hole will be filled with a black blanking grommet in the future.
Planned work:
HID lights
...other mods with pictures and step by step
#2

Posted 27 February 2011 - 01:52 PM
#3

Posted 27 February 2011 - 02:42 PM
#4

Posted 28 February 2011 - 10:55 PM
#5

Posted 01 March 2011 - 08:06 AM
I have heard that from next year, HID headlights will be tested on the MOT, and will fail if they are not self levelling and equpped with washers
This is apparently true, but it takes approx 5mins per side to change the HID back to normal so this is what I will do once a year for the MOT
#6

Posted 01 March 2011 - 08:34 PM
#7

Posted 02 March 2011 - 08:05 PM
I have heard that from next year, HID headlights will be tested on the MOT, and will fail if they are not self levelling and equpped with washers
I've heard that too. I've gone for 4300k headlights so I don't get pulled, and i'm good until Sept 2012, so i'll worry about it then. Only a 10 minute job to pull them out and put the originals back in.
With that in mind, i've bought replacement 44mm blind grommets which i intend to drill for the HIDs, the originals will stay intact
#8

Posted 02 March 2011 - 08:09 PM
Welcome.
How are you getting on with your purchase? Was this Carl's Silver NA by any chance?
It was indeed!
I'm really enjoying it so far, despite the weather. Keep getting days when im tempted to take the top off, but it's just not warm enough yet!
#9

Posted 02 March 2011 - 08:10 PM
Welcome fezzasus. Did you find the old wiper relay a pain to remove? Mine took me 40 minutes and came out in about 30 pieces! If you use the soft top throughout the winter then I'd recommend getting one of Mangham's soft top liners as they keep the warm in and the noise out.
Mine came out slightly easier, but this was only after a browse of the forums to get the best way of doing it. A flathead screwdriver is the best weapon of choice here!
I've got a hardtop on order for next winter.
#10

Posted 02 March 2011 - 08:27 PM
Information: the DOT rating describes the temperature the fluid will boil at; 4 is 400 C, 5 is 500 C, use DOT 4 or 5.1. DO NOT use DOT 5 as it's a silicon based fluid, not compatible with existing oils and may damage the hoses. DOT 5.1 in contrast is perfectly fine.
The brake fluid was black, so well past it's sell by date - armed with a jack that sinks and a few bricks to solve the aforementioned issue, we set about changing the fluid in the following order: OSR, NSR, OSF, NSF. The clutch system shares the same reservoir but can be done at any point.
As i discovered, the feed for the clutch pedal is at the top of the reservoir and you must ensure is topped up and car is level otherwise you'll end up pulling lots of air into the system.
General Process: Remove alloy for access [no need to do this for the fronts]. attach a 5-6mm diameter 50 cm hose to the caliper and while someone is applying pressure to the brake pedal, use a 11 mm spanner to loosen the bleed valve, get them to continue to apply pressure until the pedal hits the floor, tighten the valve back up and ask them to release. Pump the pedal a couple of times and repeat. Periodically check fluid levels and top up when needed. Stop when the colour of the stuff coming out matches what's going in.
#11

Posted 03 March 2011 - 04:24 PM
As long as the Sun is out it's ok to have the roof off.I'm really enjoying it so far, despite the weather. Keep getting days when im tempted to take the top off, but it's just not warm enough yet!
As for making it a more of a friendly daily drive, I would get the suspension refreshed. When he went out with me in mine just after I got it in July he couldn't believe how 'soft' the suspenion was, don't get me wrong, it's still a bumpy and a back killer, but it might help a little.
Also get some nice sill plates, as I don't beleive he had any, Scottybob sells some nice carbon fiber ones, just check out the group buy room.
I hope you enjoy the car and give it a 'good drive' from time to time, as Carl never seemed to want to go for a drive with me, no idea why, just suppose he didn't want to thrash it a lot.
Got to say,
Just need a big fat exhaust to make it sound nice
#12

Posted 29 April 2011 - 07:54 PM
Lights
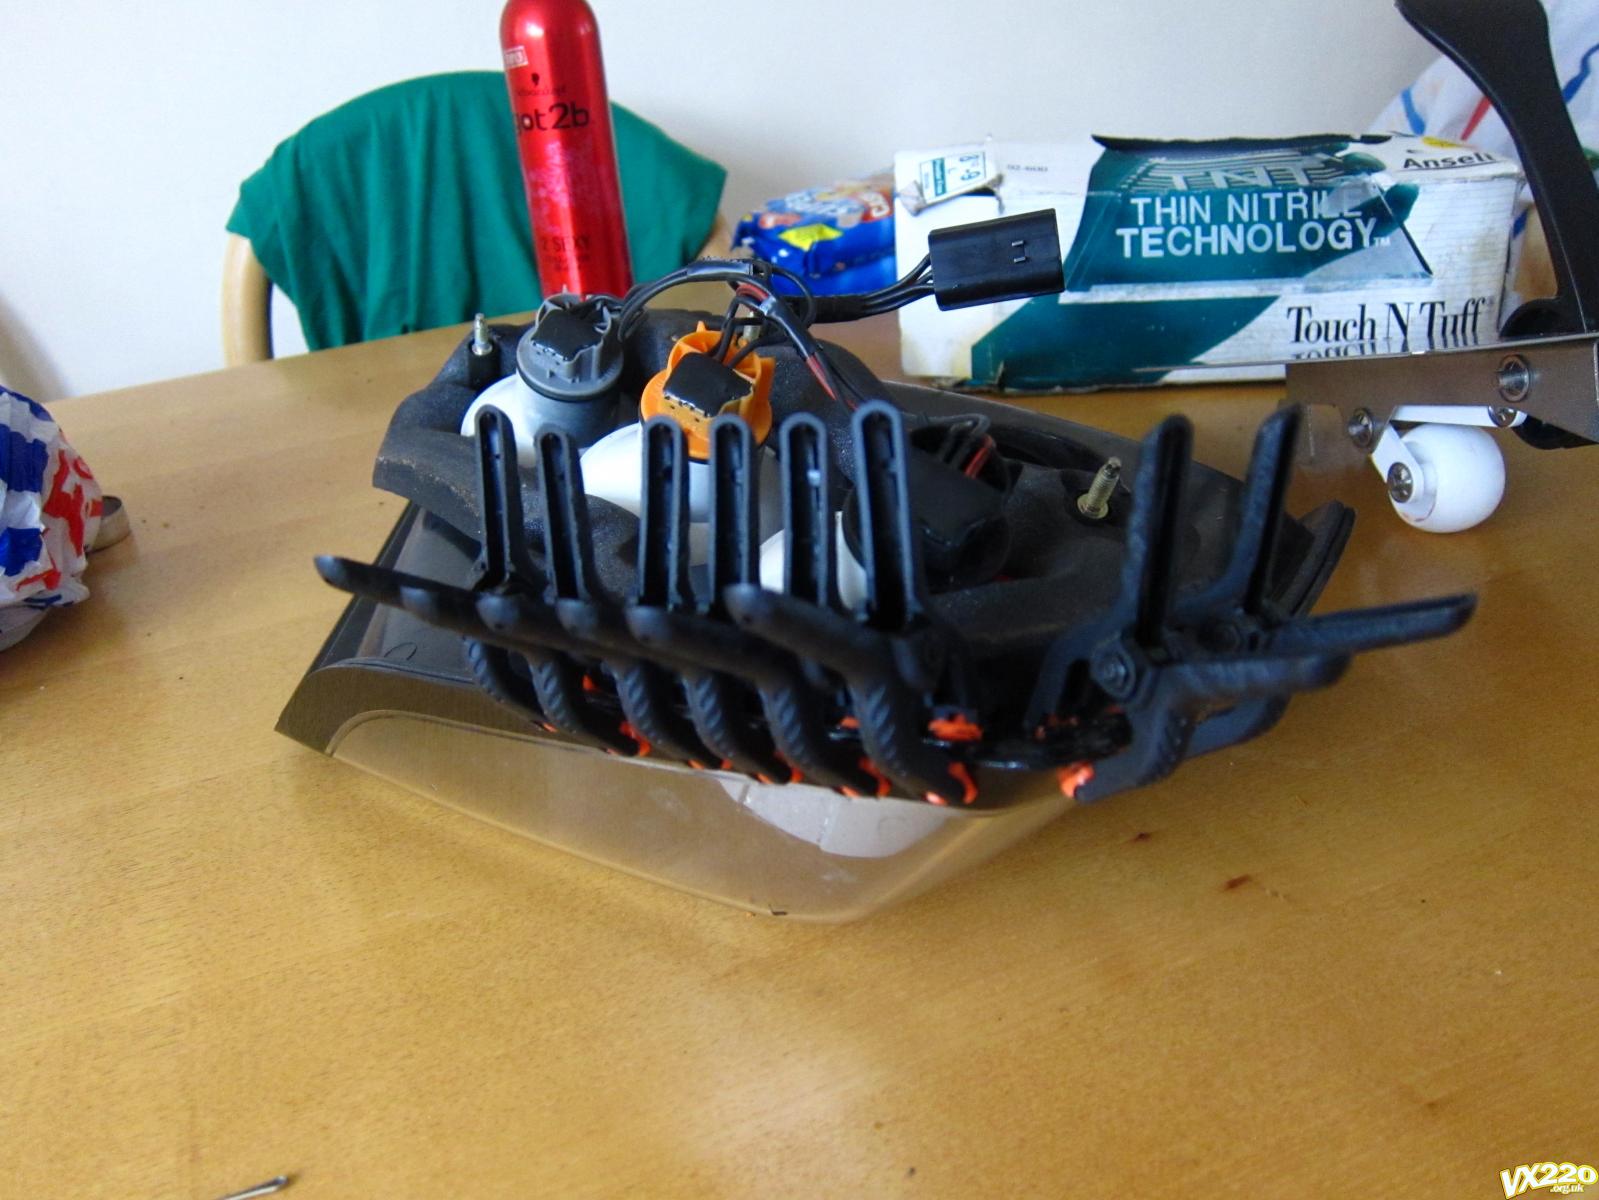
Sealed them up, i didn't want to crack them open fully because it's my only car and I only had a spare hour or so to do it in. Found the gap, filled it with tiger seal, clamped it;
HIDs
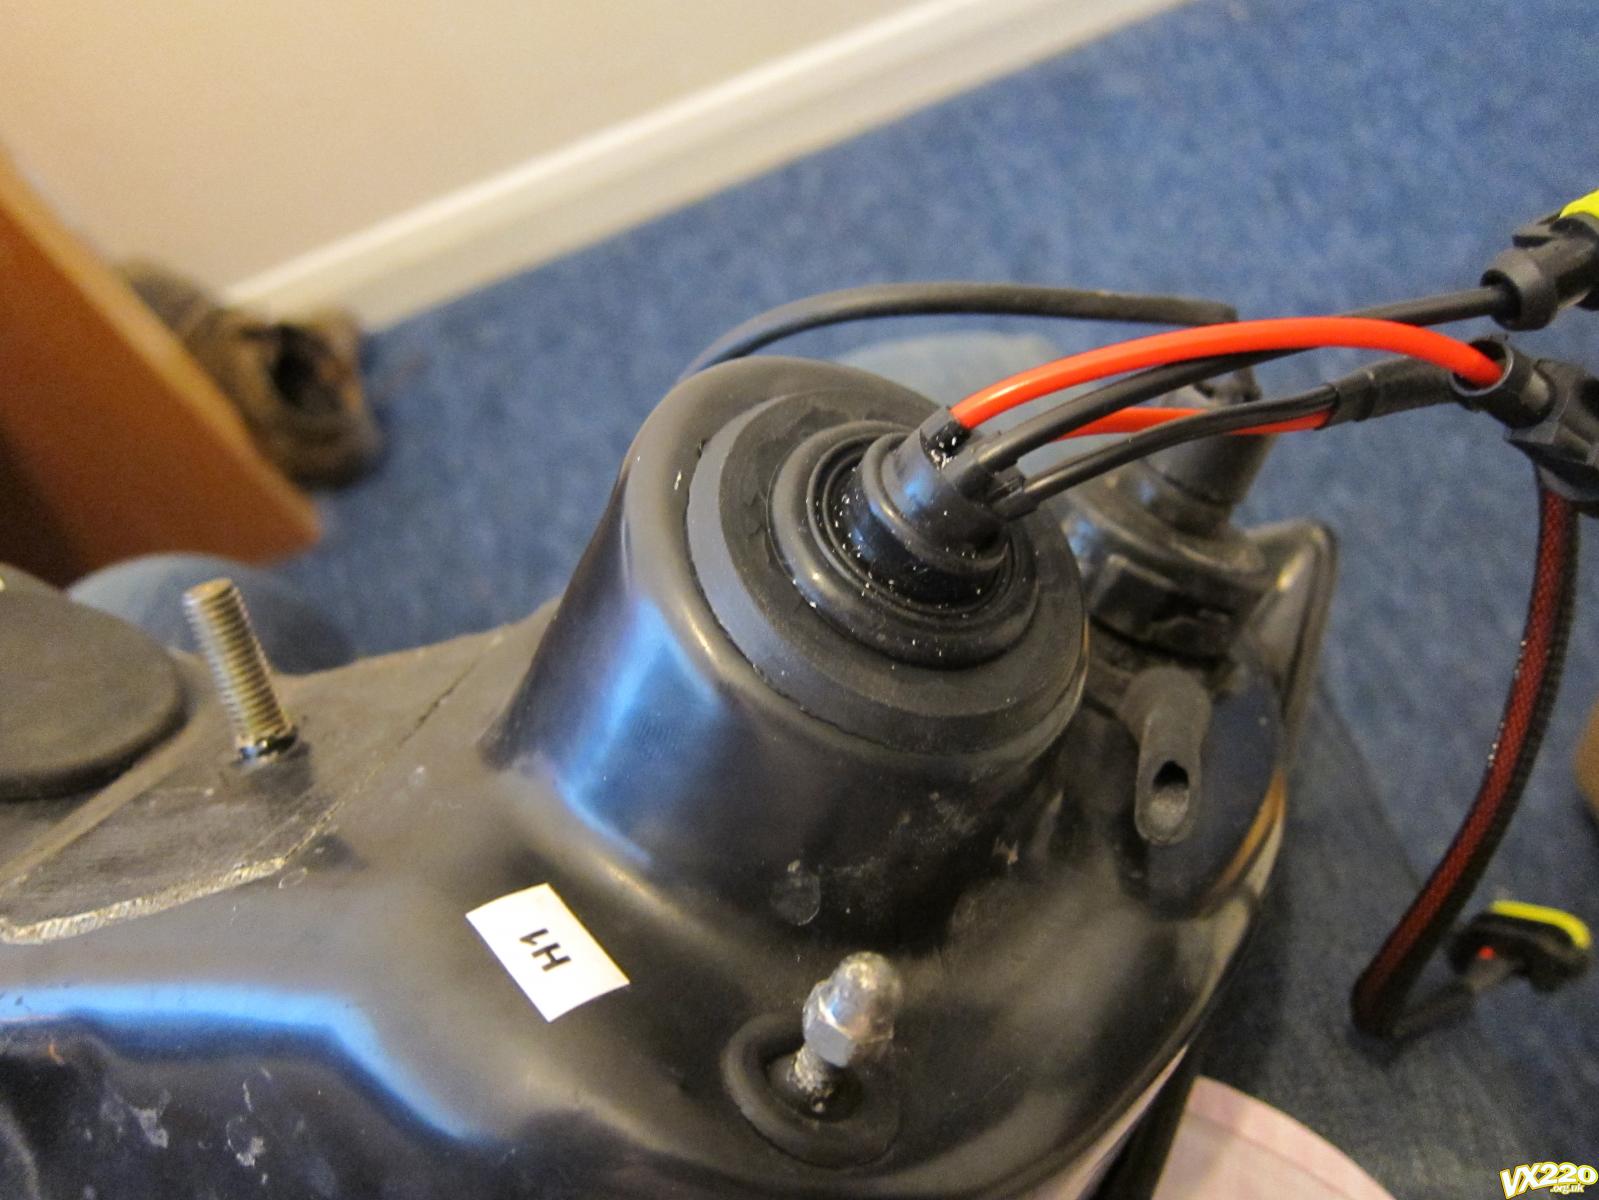
With the new laws coming in December, i wanted the installation to be completely reversible, so sourced different grommets from ebay to drill rather than using the original grommets;
Sidelights
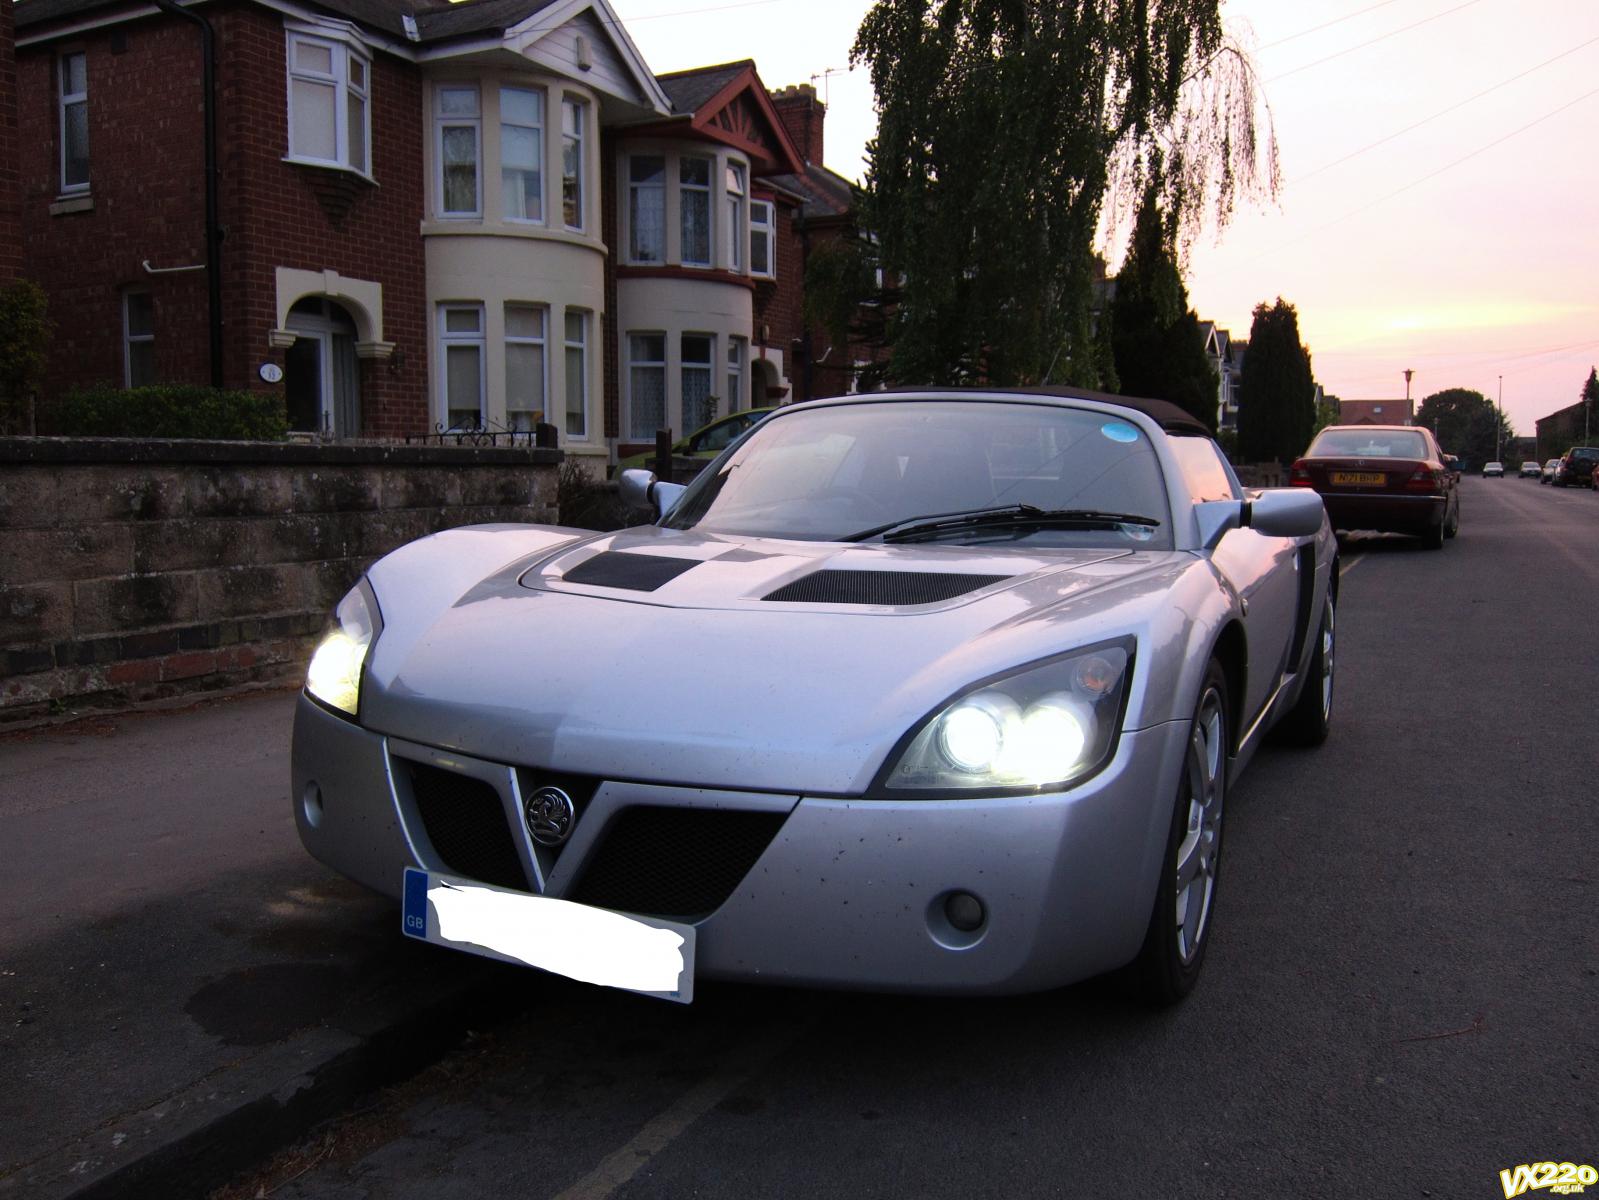
With the new HIDs [4300k] installed, the sidelights no longer matched. I originally sourced a 4 LED bulb described as 'Xenon colour' they were obviously for 6000k HIDs and were far too blue, additionally they didn't fill the sidelight reflector with light. After some trial and error I found the ones pictured. They're a 5 LED SMS type bulb which ensures the light is diffused in all directions. The colour match isn't perfect, but it's the best ive got. I think some warming gel for flash guns may get it dead on.
Future Plans
The radiator hose with the bleed valve has been wrapped with tape, and i'm experiencing slow coolant loss. connecting the two suggests the pipe needs a swap. I'm going to change both pipes and the rad while the clam is off.
#13

Posted 04 May 2011 - 06:23 PM
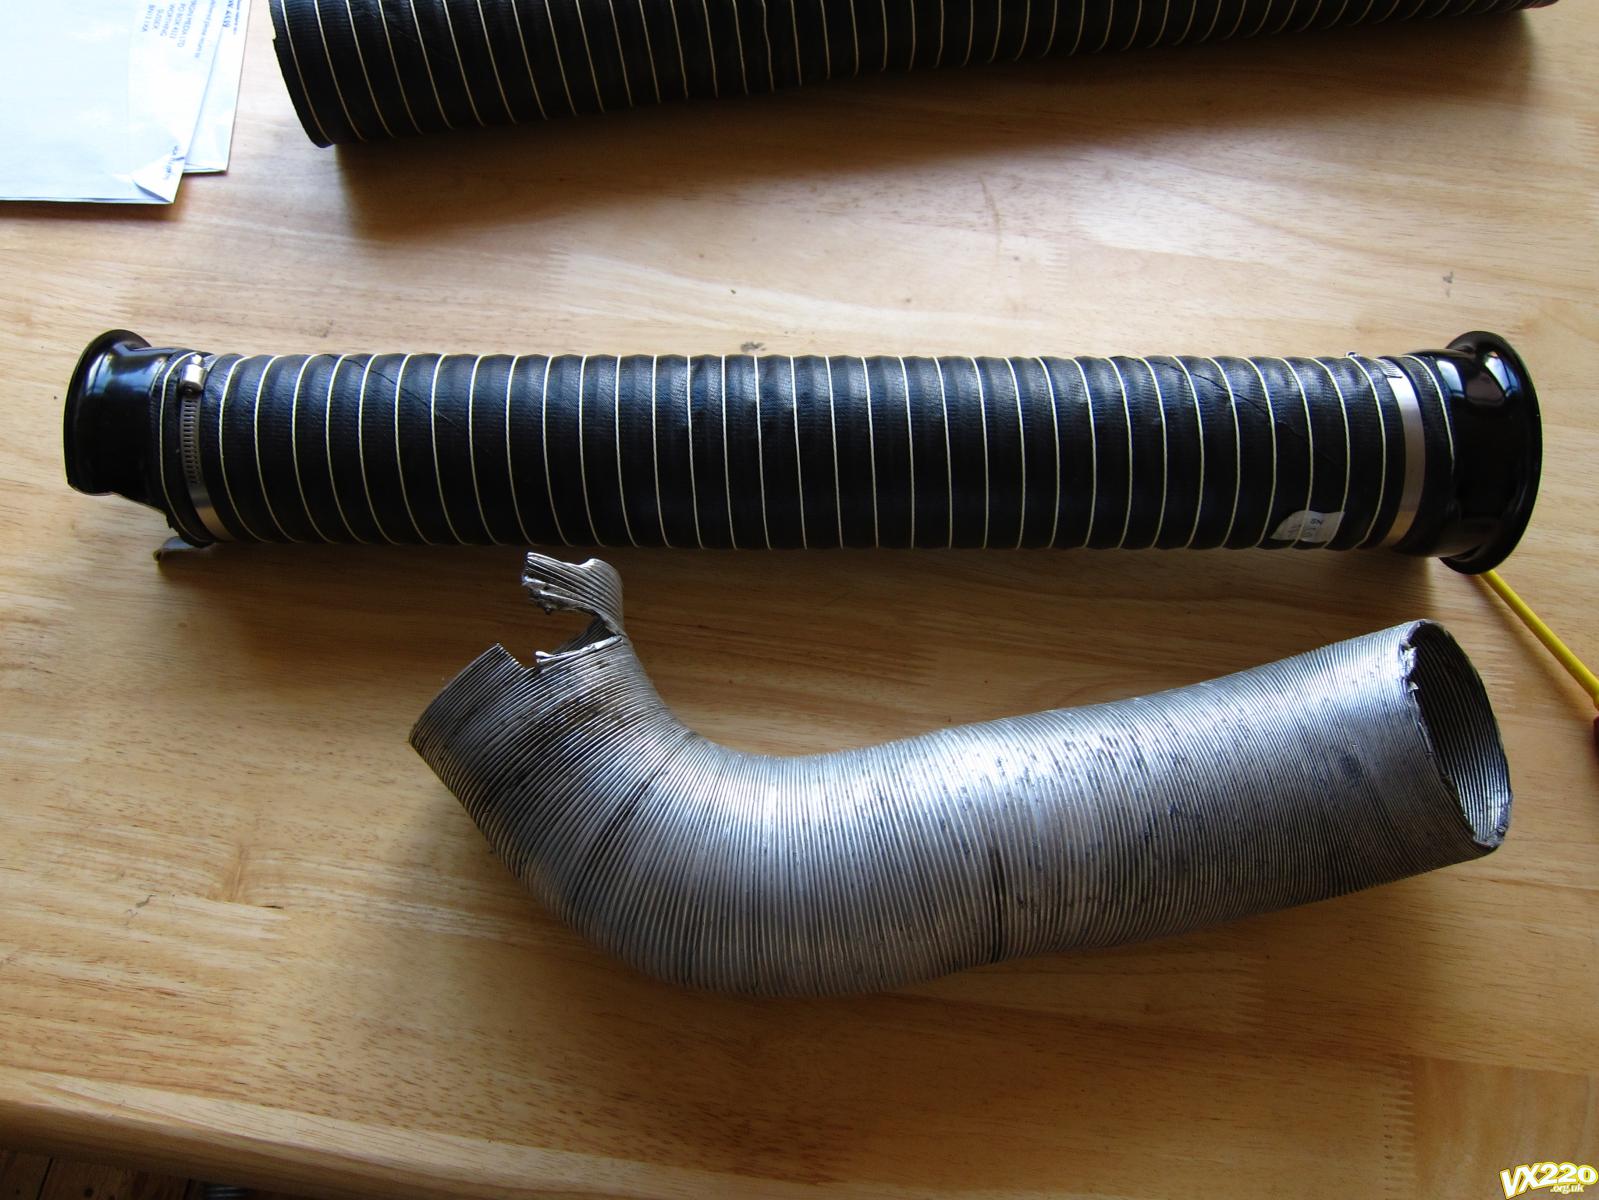
After noticing the original piping wasn't fixed at either end, i went looking for a better fitting alternative. The £50+ samco kit was out of the question, drain pipe heavy and not flexible enough.
I ended up with this; neoprene 76mm hose and two 76mm 'induction trumpets' from ebay.
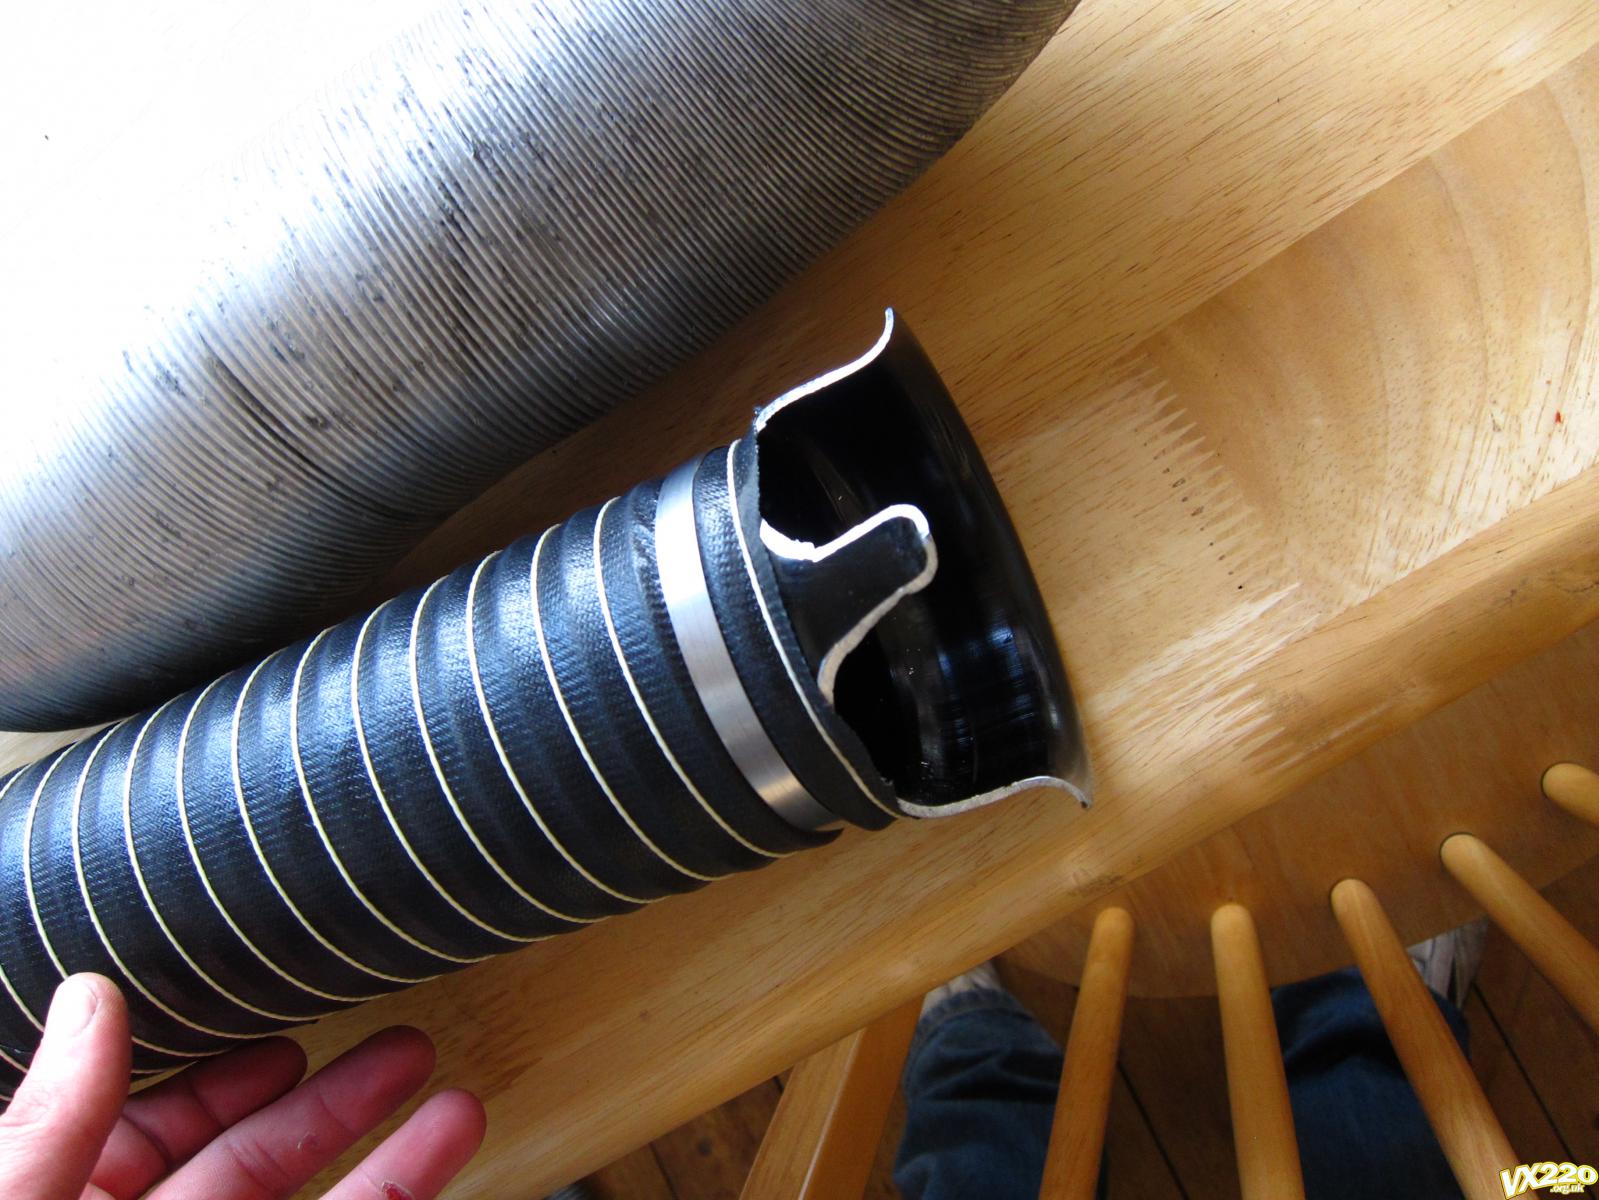
Two cuts, at 90 degrees to each other, had to be made for the trumpet to fix over the heater matrix outlet:
and in place,
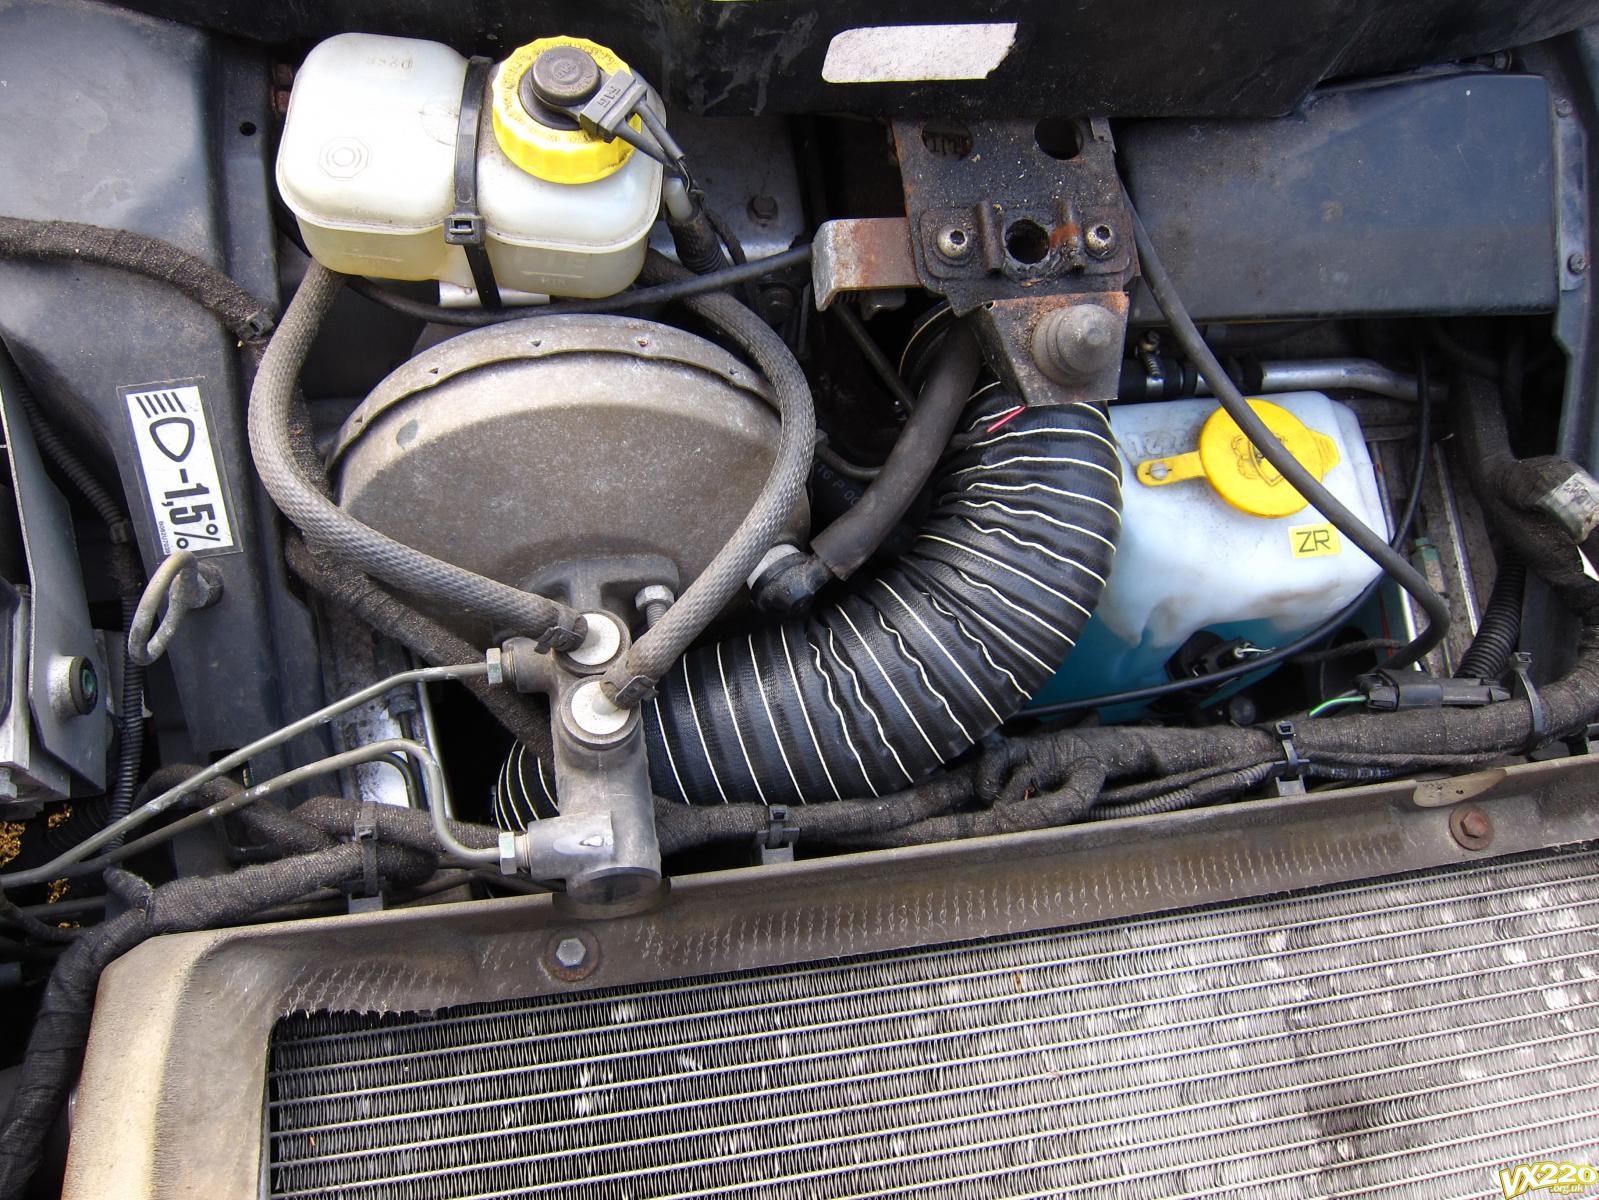
Overall, very pleased with the result. It looks good, and more to the point is a much better fit than the original piping, this should eliminate significant loss of pressure and hopefully lead to better heating.
#14

Posted 04 May 2011 - 08:32 PM
#15

Posted 04 May 2011 - 09:28 PM
Nice work on the heater ducting - expensive? Was it eaasy to fit? I'm guessing if the tube is bendy then you can put our arm down it to attach to the matrix rather than the pain in the arse fixed alu hose...
Cheers
Thanks.
It was pretty cheap - £13.75 per meter from www.t7design.co.uk. Each trumpet was around £4. Probably £25 all in.
The tubing is great quality, really flexible and slight but still feels rugged. I didn't think about putting my arm down it, but the metal collar created by using the trumpets means you've got a secure end to push against, making fitting very easy.
#17

Posted 11 May 2011 - 06:06 PM
#18

Posted 13 May 2011 - 02:26 PM
Nice work on the heater ducting - expensive? Was it eaasy to fit? I'm guessing if the tube is bendy then you can put our arm down it to attach to the matrix rather than the pain in the arse fixed alu hose...
Cheers
Thanks.
It was pretty cheap - £13.75 per meter from www.t7design.co.uk. Each trumpet was around £4. Probably £25 all in.
The tubing is great quality, really flexible and slight but still feels rugged. I didn't think about putting my arm down it, but the metal collar created by using the trumpets means you've got a secure end to push against, making fitting very easy.
Were the trumpets from T7 as well?
Can find them on their website?
#19

Posted 13 May 2011 - 04:18 PM
Were the trumpets from T7 as well?
Can find them on their website?
Nope, the trumpets were from ebay - http://cgi.ebay.co.u...d#ht_3238wt_999
#20

Posted 13 May 2011 - 05:15 PM
2 user(s) are reading this topic
0 members, 2 guests, 0 anonymous users


